Reading time: 5 min read
Processing Sitecore webhook events with Trigger.dev
How to handle long-running background jobs triggered by Sitecore webhooks, with retries, observability, and no timeout issues.
Start typing to search...
How to handle long-running background jobs triggered by Sitecore webhooks, with retries, observability, and no timeout issues.
Sitecore webhooks are a great way to react to content changes. A product gets published, a page is updated — Sitecore fires a webhook and something on the other side handles it.
Most teams connect webhooks to a simple API route on their headless website, likely a Vercel serverless function. This works fine for simple tasks. But when you try to do something heavier — like syncing products to a search index, or running a pipeline that queries a large database — you may start hitting timeout limits or partial failures with limited visibility into what went wrong.
Trigger.dev is a platform for running background jobs from your application. You write a job in TypeScript, trigger it from your webhook handler, and Trigger.dev handles the execution outside your normal request cycle.
Beyond removing timeout constraints, it also provides:
Conditional waiting — the job can check whether an item is actually published, or whether the change is already live on the site, before doing any work. If it is not ready yet, the job can wait and check again — without blocking anything or consuming a running thread
That last point is worth noting. Sitecore fires the webhook at the moment of publish, but your CDN or delivery layer may not reflect that change immediately. You can add a validation step that polls your live site or delivery API until the item is actually available, then proceed.
In this example we use Algolia, but the same approach applies to any third-party index like Elasticsearch or Azure AI Search.
Imagine you have a product catalog in Sitecore. Every time a product is published or unpublished, Sitecore fires a webhook. Your system needs to fetch the full product data and push the update to Algolia to keep search results accurate.
Depending on how your data is structured, fetching the full product may involve multiple queries — related categories, variants, pricing rules. This can take longer than a standard serverless function allows, and if it fails midway there is no built-in way to retry just that product.
The setup lives entirely inside your existing Next.js project. You create a TypeScript file that defines the background job — what it should do, how many times to retry, and what to do on each attempt. This file sits alongside the rest of your application code.
// file: /src/trigger/example.ts
/* eslint-disable @typescript-eslint/no-explicit-any */
import { logger, task, wait } from '@trigger.dev/sdk/v3';
const MAX_PUBLISH_RETRIES = 5;
export const indexItemTask = task({
  id: 'algolia-index-item',
  maxDuration: 300,
  run: async (payload: any, { ctx }) => {
    logger.log('Indexing item received', { payload, ctx });
    let retries = 0;
    while (itemNotPublished(payload) && retries < MAX_PUBLISH_RETRIES) {
      retries++;
      logger.warn(`Item not published yet, retrying in 5s... (${retries}/${MAX_PUBLISH_RETRIES})`, {
        itemId: payload.id,
      });
      await wait.for({ seconds: 5 });
    }
    if (retries === MAX_PUBLISH_RETRIES) {
      logger.error('Item never published after max retries, aborting.', { itemId: payload.id });
      return {
        message: 'Indexing aborted: item never became published',
        itemId: payload.id,
      };
    }
    const algoliaRecord = buildAlgoliaRecord(payload);
    logger.log('Algolia record prepared', { algoliaRecord });
    await indexInAlgolia(algoliaRecord);
    logger.log('Item successfully indexed', { itemId: payload.id });
    return {
      message: 'Item indexed successfully',
      itemId: payload.id,
      indexedAt: new Date().toISOString(),
    };
  },
});
When you deploy the project, Trigger.dev picks up those job definitions automatically. Your project is effectively deployed to two places at once: Vercel runs your API routes as usual, and Trigger.dev runs your background jobs. Both are fed from the same codebase and the same deployment.
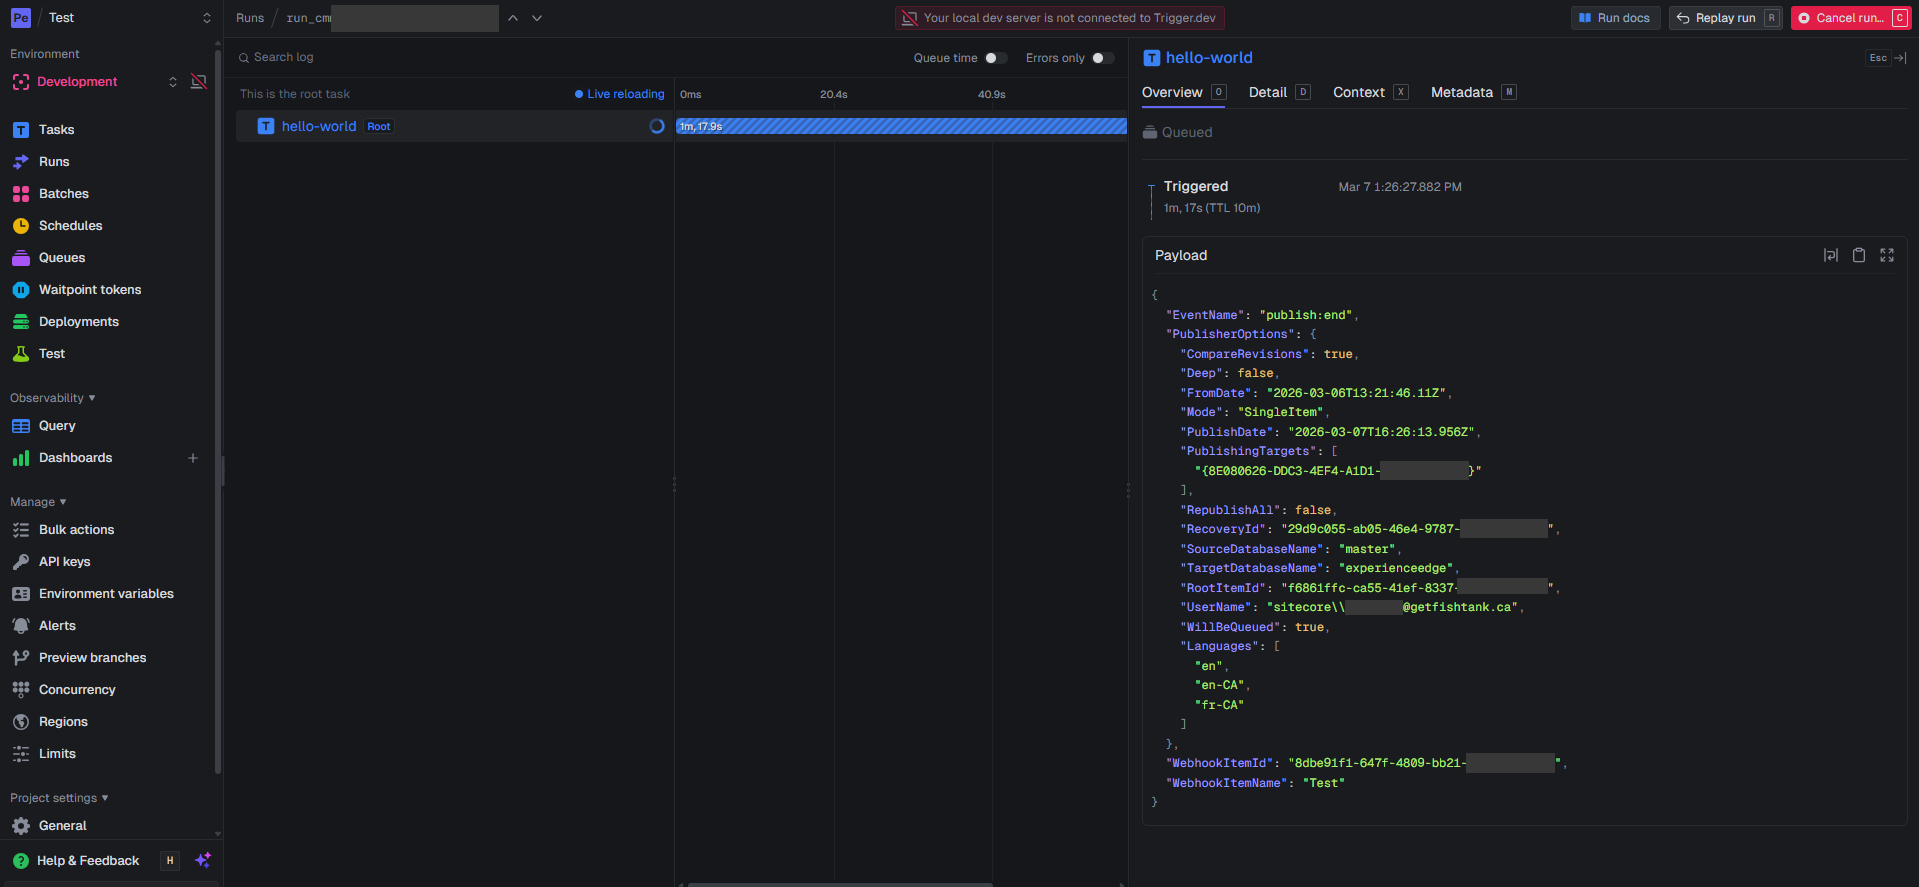
Your Sitecore webhook points to an API route in your Next.js project, same as before. That route receives the webhook payload, triggers the background job with the relevant data, and immediately returns a 200 to Sitecore. The job then runs on Trigger.dev's infrastructure — waiting for the item to go live, fetching the full product data, and pushing the update to Algolia.
// file: /api/webhook-handler.ts
import type { indexItemTask } from '../../../src/trigger/example';
import { tasks } from '@trigger.dev/sdk';
import type { NextApiRequest, NextApiResponse } from 'next';
export default async function handler(req: NextApiRequest, res: NextApiResponse) {
  if (req.method !== 'POST') {
    return res.status(405).json({ error: 'Method not allowed' });
  }
  const authHeader = req.headers['authorization'];
  const expectedToken = process.env.WEBHOOK_SECRET;
  if (expectedToken && authHeader !== `Bearer ${expectedToken}`) {
    return res.status(401).json({ error: 'Unauthorized' });
  }
  const payload = req.body;
  // Trigger the Algolia indexing task asynchronously
  const handle = await tasks.trigger<typeof indexItemTask>('algolia-index-item', payload);
  return res.status(200).json({
    ok: true,
    runId: handle.id,
    message: `Indexing task queued for item ${payload.id}`,
  });
}
Here is the flow:
Sitecore Webhook → Next.js API Route → Trigger.dev Job → Validate Item is Live → Fetch Product Data → Index
The job handles both publish and unpublish events. If the item was unpublished, it gets removed from the index. If it was published, the full product data is fetched and saved.
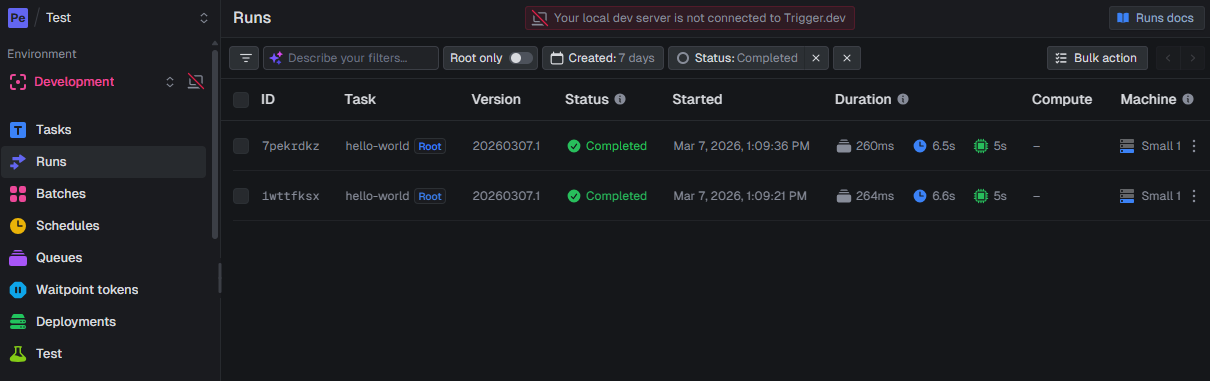
Once set up, every job execution is tracked. You can see:
Adding Trigger.dev to an existing Next.js project is mostly installing their SDK and connecting your project to their cloud or self-hosted instance. Their CLI runs alongside your dev server during local development, so you can trigger and test jobs without deploying anything first.
For Sitecore, your webhook configuration does not change. You point it at your existing endpoint, your endpoint calls Trigger.dev, and the processing happens outside the request cycle.