Reading time: 11 min read
Sitecore Content Hub DAM Asset Creation Guide
For the DAM Creator Role
Start typing to search...
For the DAM Creator Role
Assets that have metadata that are properly tagged and labelled substantially increase how fast a user can locate a specific asset. Gone are the days of endlessly scrolling through a huge folder looking for an image from an event from a year ago that’s unfortunately called something like ‘IMG_000345.png’.
With Sitecore Content Hub DAM, users can use custom search facets to quickly look for a specific asset or even better, a type or style of an asset like a ‘ski chairlift’. Users save time locating what they are looking for when assets have good metadata.
Proper metadata lets the DAM categorize and identify what the asset is. If it’s an image, what is that image of? What colours does it have? Who’s in that image? Who created that image? For documents, the same thing, what information is in there, what’s it about, who wrote it, and what purpose does it serve?
When assets have context, they can be more easily identified and let marketers make more informed selections.
Again, when assets have proper data and information attached to them, they are more useful. Rather than an image or document sitting somewhere in a folder on a drive called ‘Untitled (4)’. Users can keyword search for assets that are relevant to what they are searching for.
Let's get started on how to add, edit, and submit assets in Sitecore Content Hub DAM!
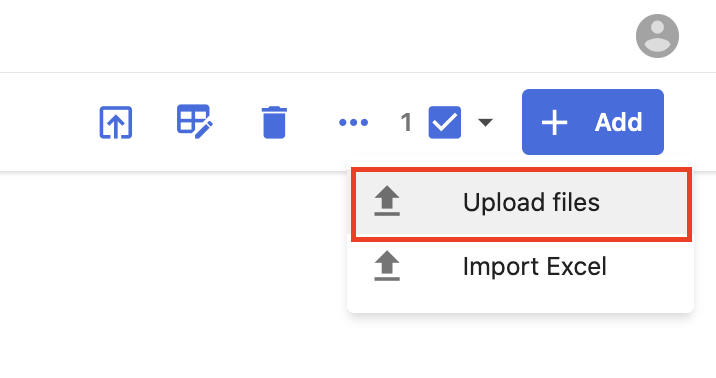
This is the easiest method to import. Simply drag and drop the files, hit ‘Upload’ and wait for the assets to render on the Create page.
This is a standard import method where you can select file(s) from your computer. You can select one or multiple files at a time. Add to your initial selection by clicking ‘+Add more’ once you’ve added at least one asset to import. You can also drag and drop into this modal. Click ‘Upload’ once all files are added and wait for the assets to render on the Create page.
Paste one or more URLs to files. Note: links to file storage platforms (like Google Drive, Dropbox, etc.) are not supported by Content Hub at this time. Click ‘Upload’ once all links are added and wait for the assets to render on the Create page.
Once your assets have been rendered on the Create page, you’ll want to add schema to your assets to tag them with relevant data for future use. This helps with search results and overall asset management.
As a DAM Creator, you have the ability to upload and edit your own assets. Your workflow probably goes a little something like this:
Depending on how your Content Hub is configured, there’s probably at least one required field on your asset schema. You’ll need to make sure that those fields are filled out before submitting for approval.
You’ll see that the required fields are indicated with an asterisk(*) and must be filled out before submitting the asset for approval.
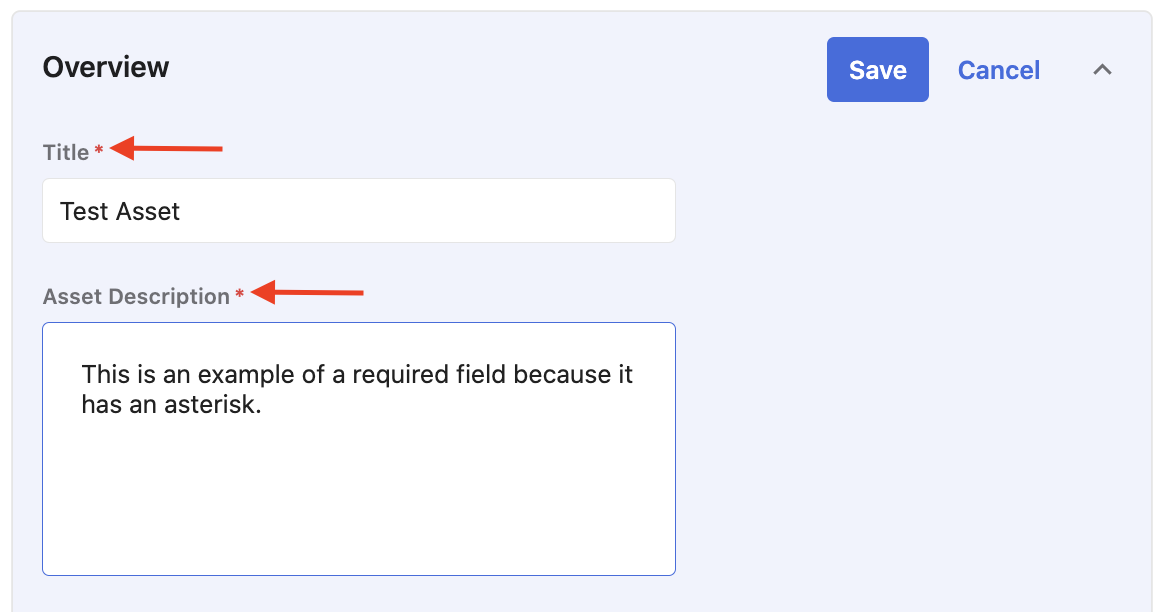
If a required field on an asset is left blank, Content Hub will automatically reject the submission for approval and show an error message in the bottom right corner indicating that a field is not satisfied on the ‘Asset Details’ page (aka the individual asset page).
You can either navigate to the asset’s ‘Asset Detail’ page or use the ‘Mass Edit Table’ to make updates on multiple assets at once and on the same page.
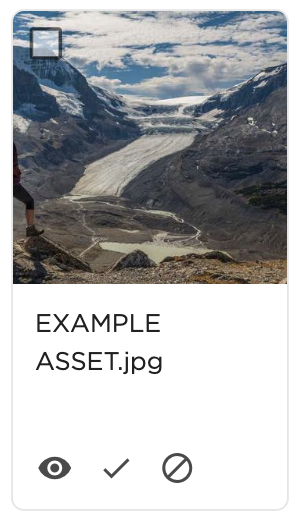
To edit the schema fields on a single asset, click on an asset on the ‘Create’ page. This will take you to the ‘Asset Details’ page where you can add data from the lists, checkboxes, open text fields, and tags available to you in your configured schema. To edit, click the <strong">pencil icon of a section.</strong">
Once all fields are filled out in a section, press ‘Save’. Note: You can’t jump from one section to the other without saving. You’ll be prompted with an error message to save before continuing.
You can navigate to the ‘Mass Edit Table’ on the ‘Create’ page, and also on the ‘Assets’ page (once assets are approved).

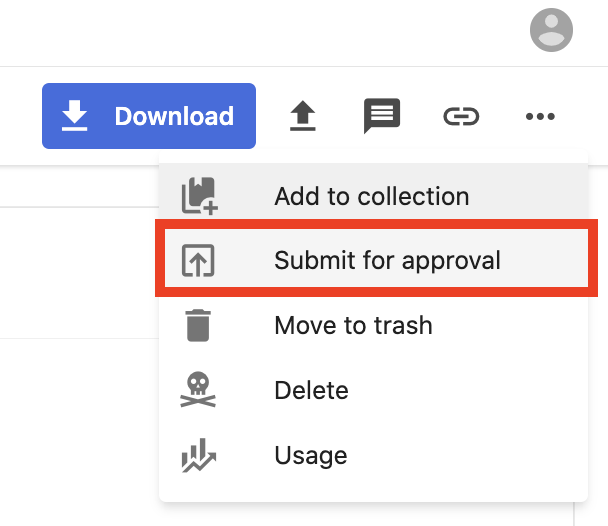

DAM Approvers will navigate to the ‘Review’ page to review all assets that have been submitted by DAM Creators.
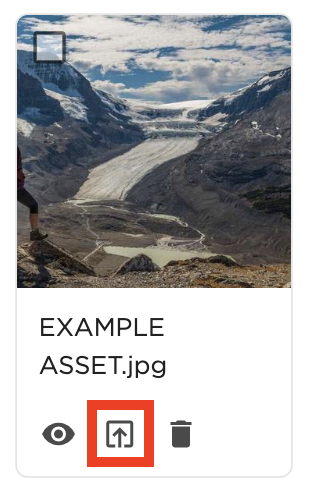
DAM Approvers can view, approve, or reject the asset with the icons at the bottom of the asset. They can also select single, multiple, or all assets and batch approve/reject them. The ‘Edit in table’ is also available on the ‘Review’ page.
Once assets are approved, DAM Readers and DAM Creators can view, use, and download the assets on the ‘Assets’ page.
Collections allow users to share group assets with other users when they need to work collaboratively on a collection of assets. Users can leave comments and feedback within a collection as well.
After creating a collection, users can add assets from the repository. It should be noted that adding an asset to a collection doesn’t create a duplicate asset. It’s a reference to the main asset that lives in ‘Assets’. This means that any changes that are made to that asset are carried over in every collection the asset is in, so be mindful!
| Field Name | Description | Value | Mandatory |
|---|---|---|---|
| Name | Name of the collection | String value (Open text) | Yes |
| Collection type | Type of the collection | Campaign, Product, or Event | Yes |
| Description | Brief description of the collection | String value (Open text) | No |
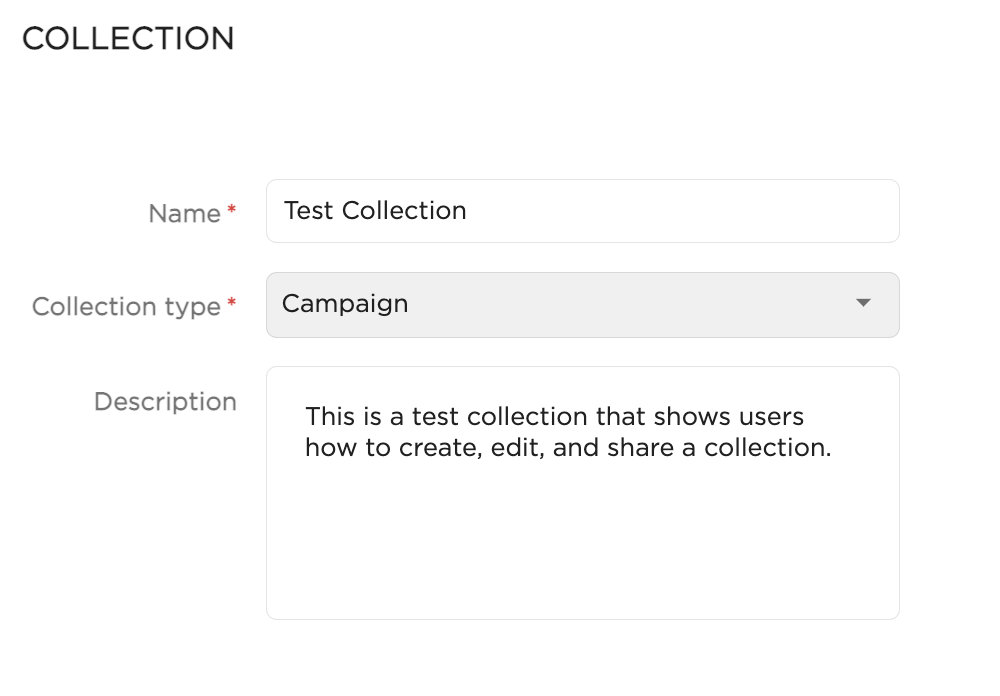
On the ‘Details’ tab of a collection detail page, you can edit the collection name, type and description, and view the cover image.
Do one of the following:
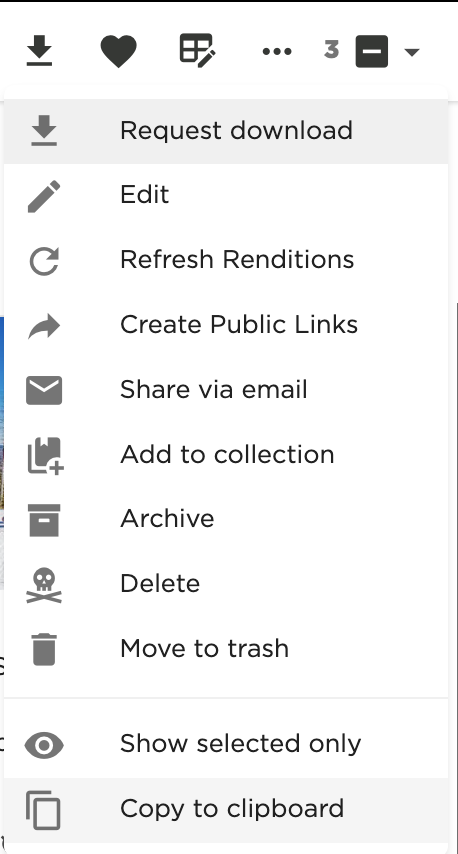
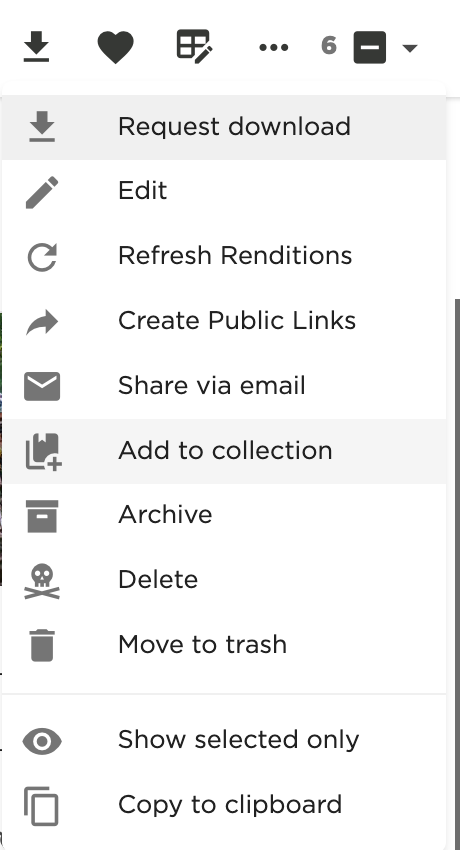
Add Multiple Assets: Select the assets you want using the tick boxes on each asset, then click the three dots (…) in the top right corner and select Add to collection’.
On the Collection modal window, do one of the following:
You can add other Content Hub users to certain collections to collaborate using comments and contribute other assets.
Important: If you add assets to a collection and the user doesn’t have permission rights to view those assets in the DAM, the assets are not shared with that user.
You can create a public link for a collection where non-Content Hub users can access assets for download only. This is great for sharing with external vendors for quick access to final versions and renditions.
Important: If you add restricted assets to a collection and make it public, the restricted assets are not shared.
Now you know the importance of asset management, how metadata is applied to assets, how to add assets to Content Hub, how to mass edit, and how to create a collection to organize assets further. Following this guide will set your DAM up for success and benefit your DAM users.
If you have any questions about Content Hub DAM, reach out at [email protected].
