Reading time: 5 min read
Create a Simple Subscription Form in Sitecore Send
Your quick guide to creating a basic form in Sitecore Send (Moosend).
Start typing to search...
Your quick guide to creating a basic form in Sitecore Send (Moosend).
Sitecore Send (Moosend) is a powerful SaaS-based marketing automation and campaign management platform designed to help you create and manage highly personalized, data-driven campaigns. With Sitecore Send, you can easily segment and target your audience, design personalized emails, track the performance of your campaigns, and gain valuable insights into the performance of your campaigns.
For the most part, not much. Sitecore acquired Moosend in 2021, and for the most part, Sitecore Send is often used synonymously with Moosend. The platform is branded as a Sitecore product for enterprise users, but internally, we use the basic Moosend branded version (and I am living for the little cow logo 🐮).
Forms are an invaluable marketing tool, providing an efficient and convenient way to collect user information, register for events, and subscribe to mailing lists.
To create a basic form in Sitecore Send, follow these steps:
Hover over the Growth Tools tab in the top navigation bar and select Subscription Forms.

Click the New button at the top right from the Growth Tools page and select Subscription Form.

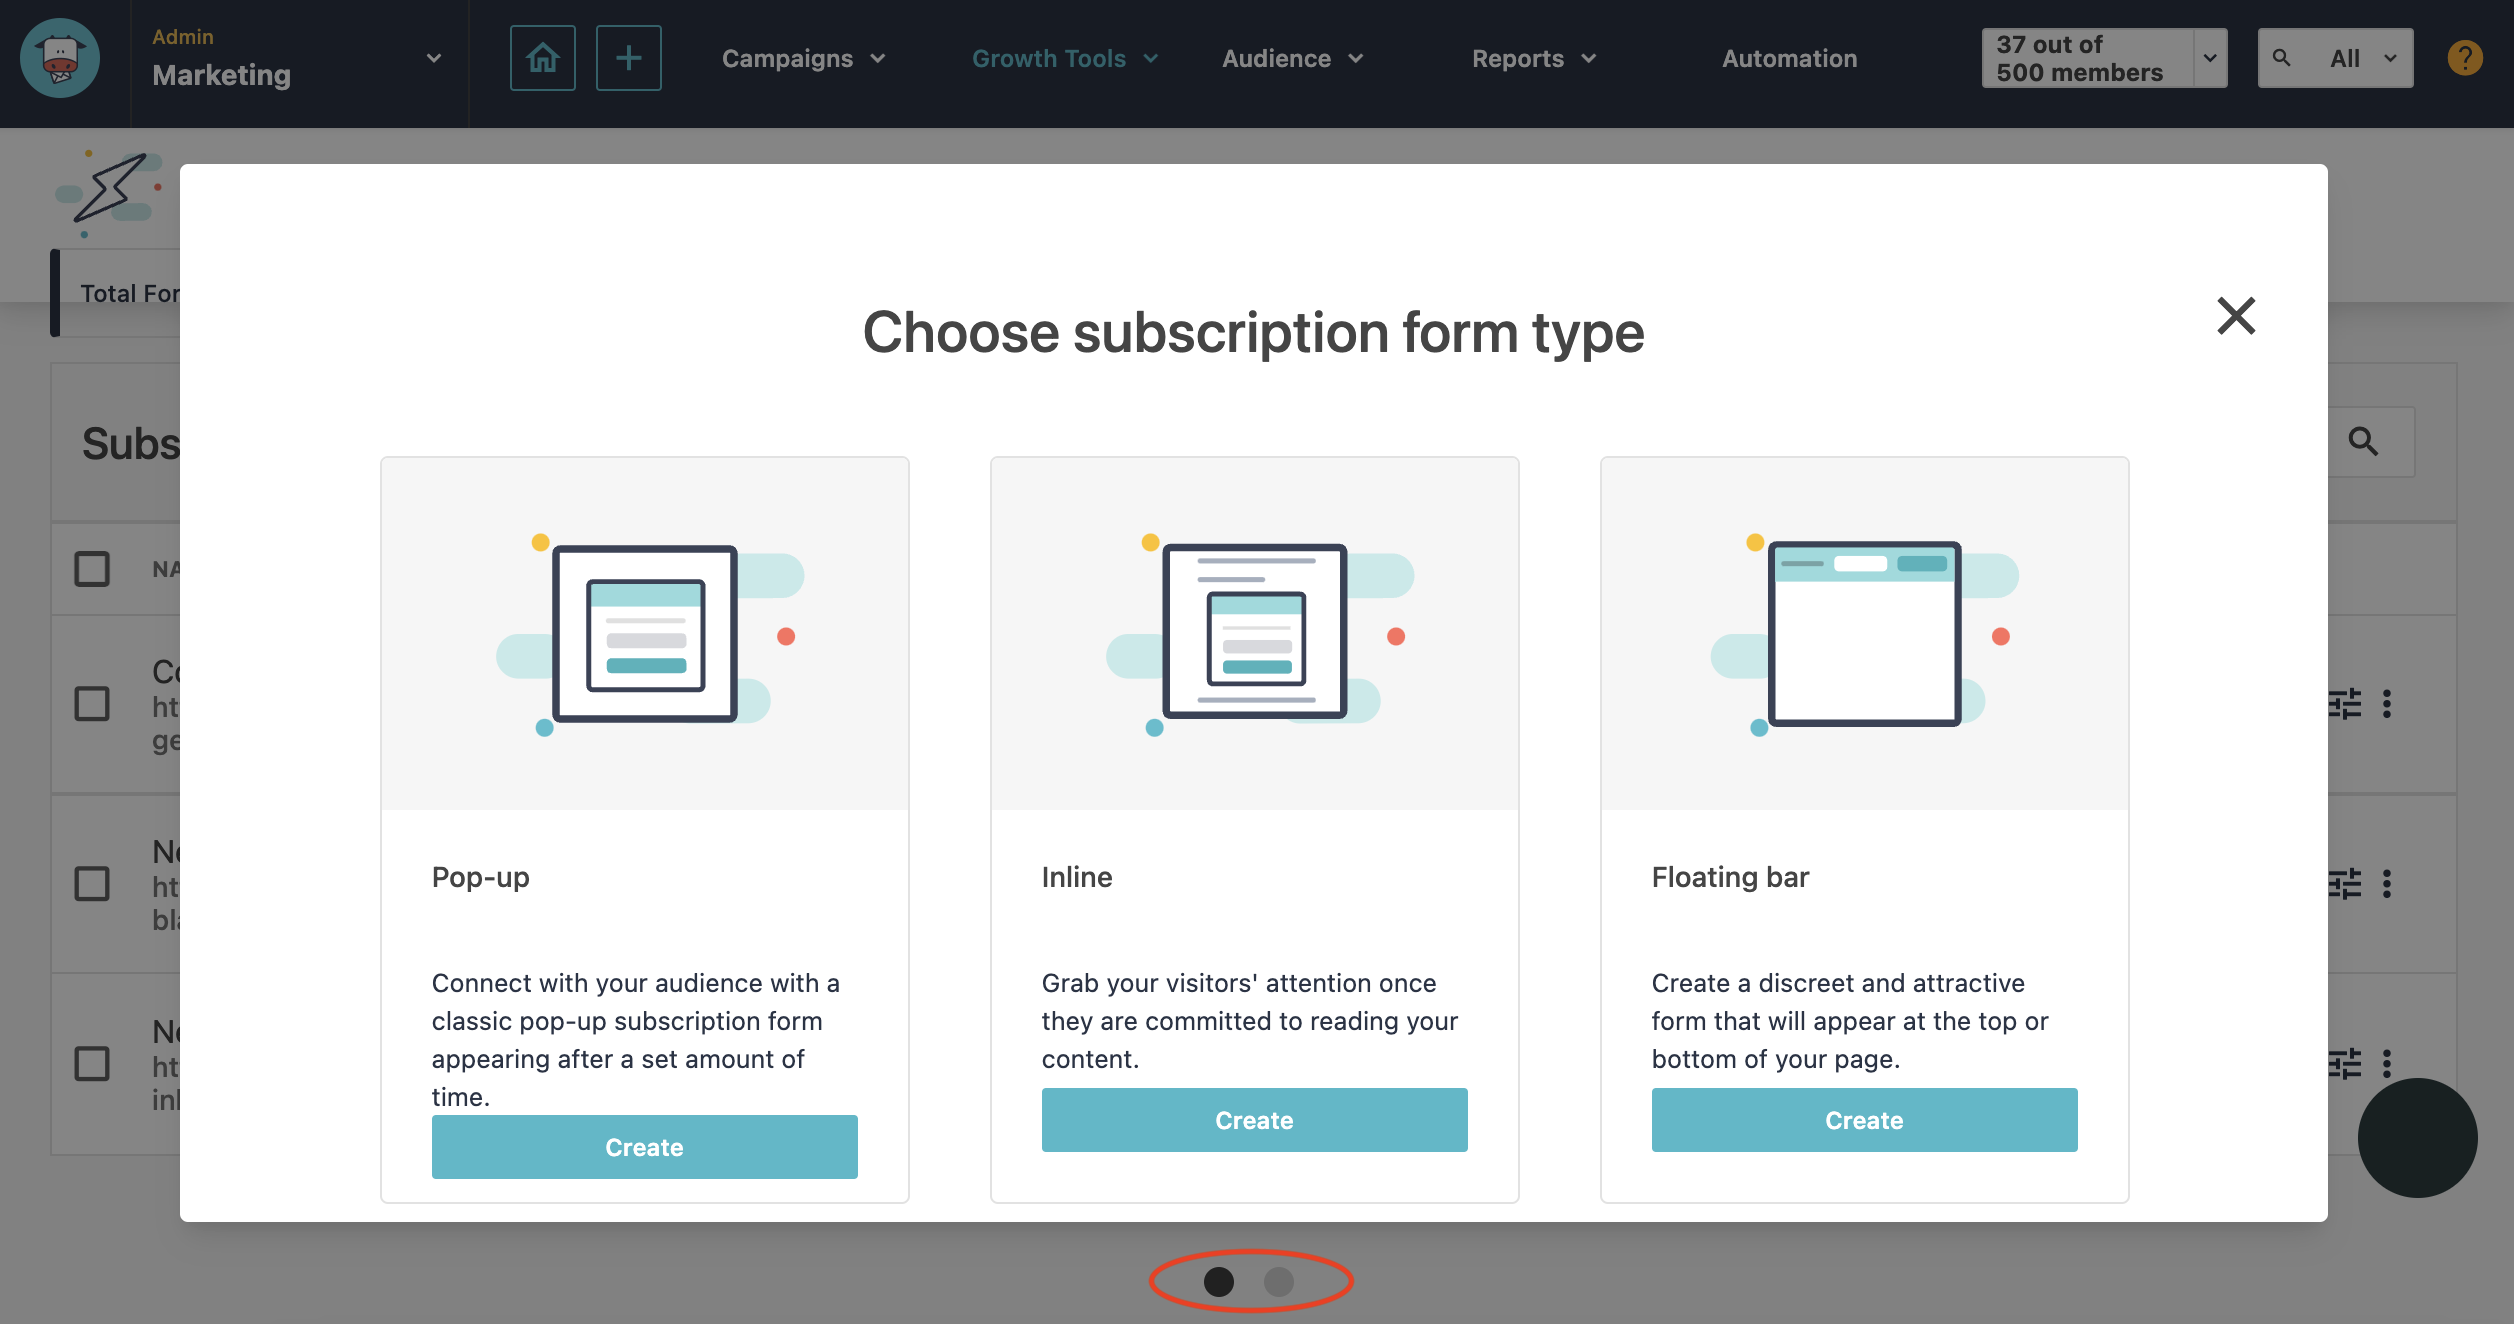
Next, choose the subscription form type from the pop-up. Use the circle buttons at the bottom of the pop-up to view the next page. There are six different types of subscription forms to choose from in Sitecore Send:
Name your subscription form. This isn’t public, so don’t worry about using this label to keep your forms organized. Click Next.
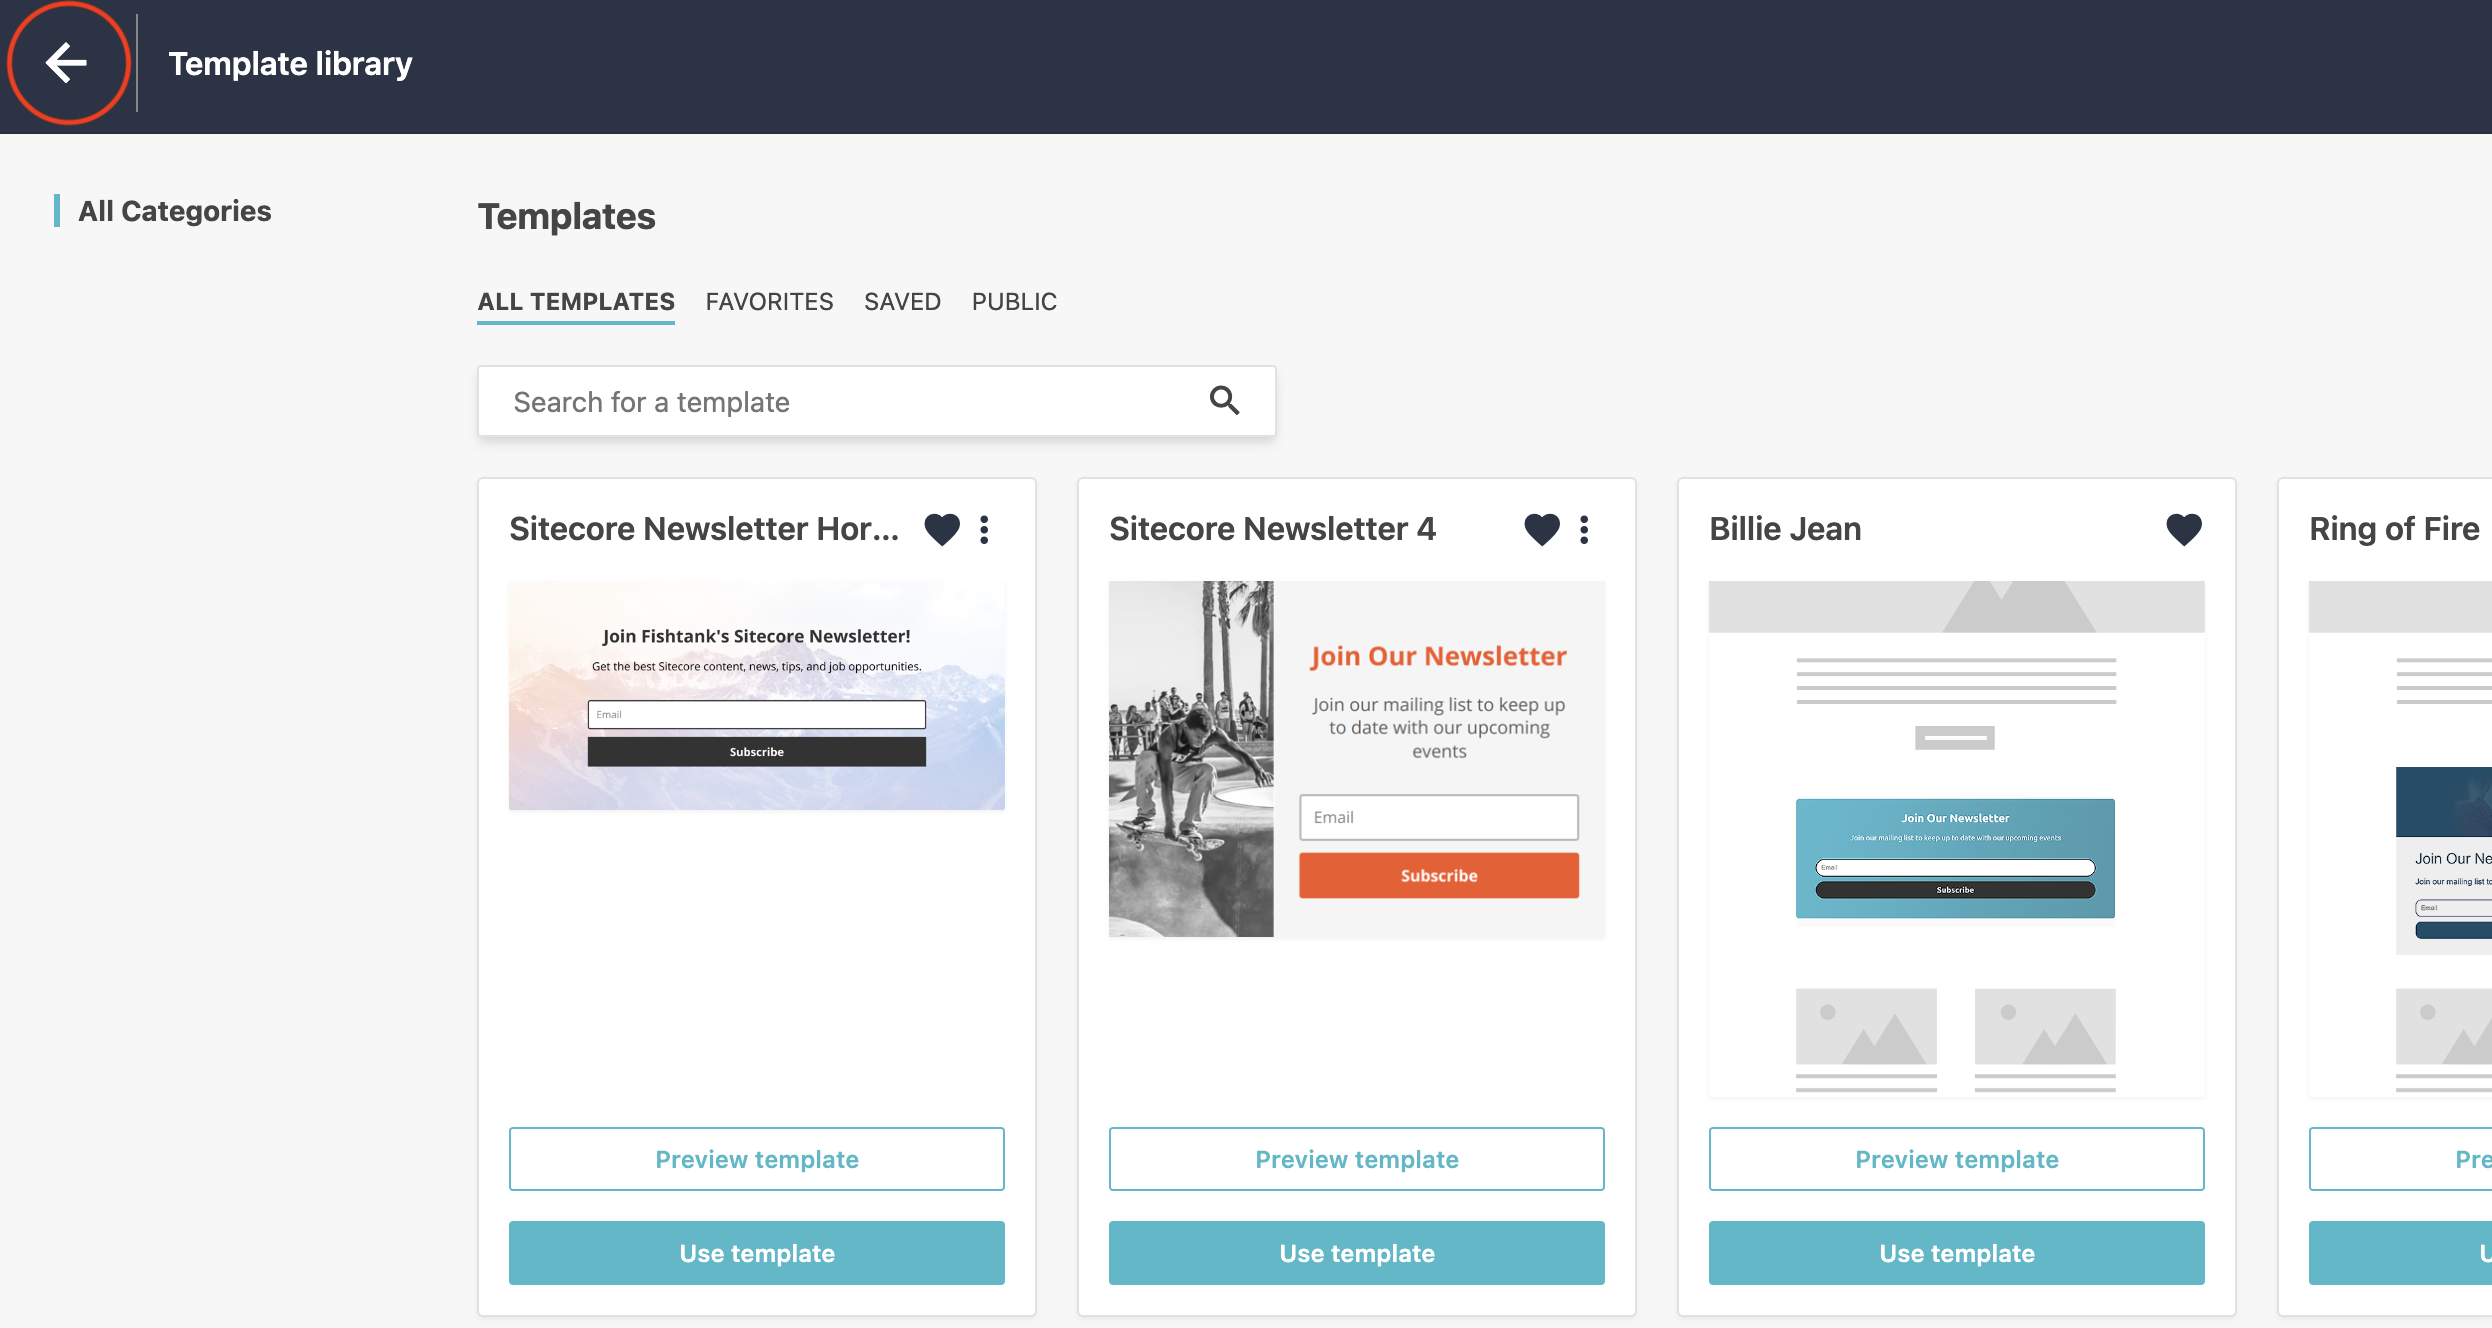
Time to design your subscription form in Sitecore Send! Scroll to the bottom of the page and click on the Start designing button to use Form Designer. Select a template from the Template Library to work off of, or click on the arrow at the top left to design from a blank(ish) canvas.
I find the design editor less intuitive than other email marketing platforms (like Mailchimp), so I suggest building off a template to save some time (and possibly aggravation).
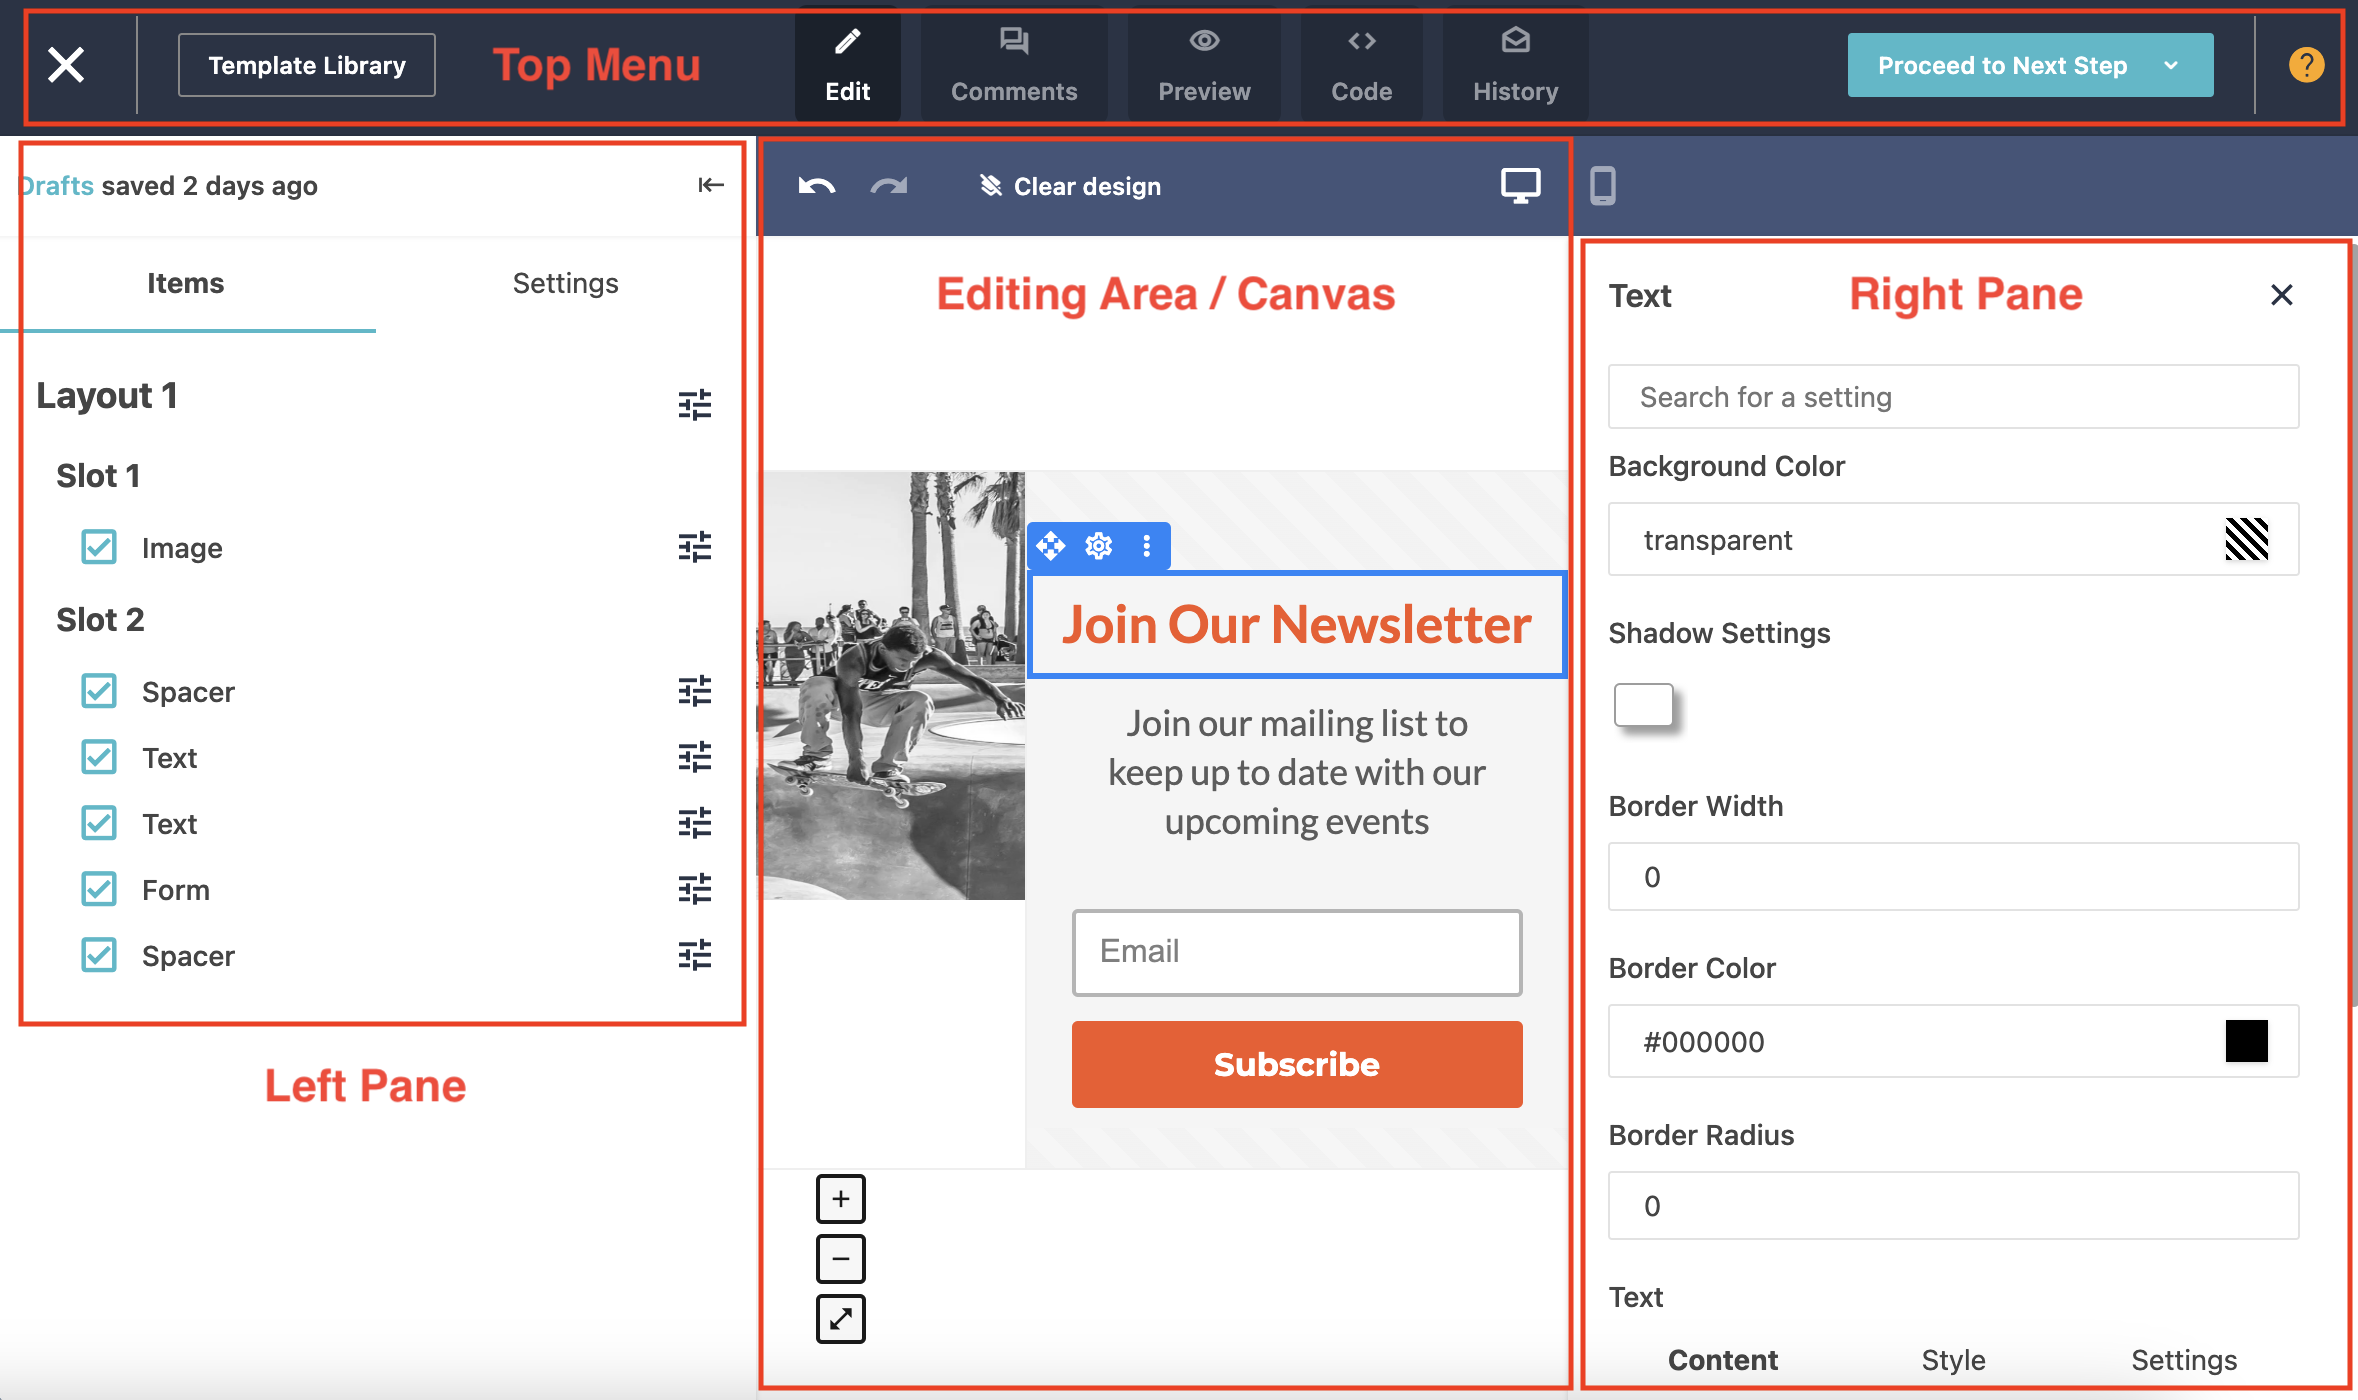
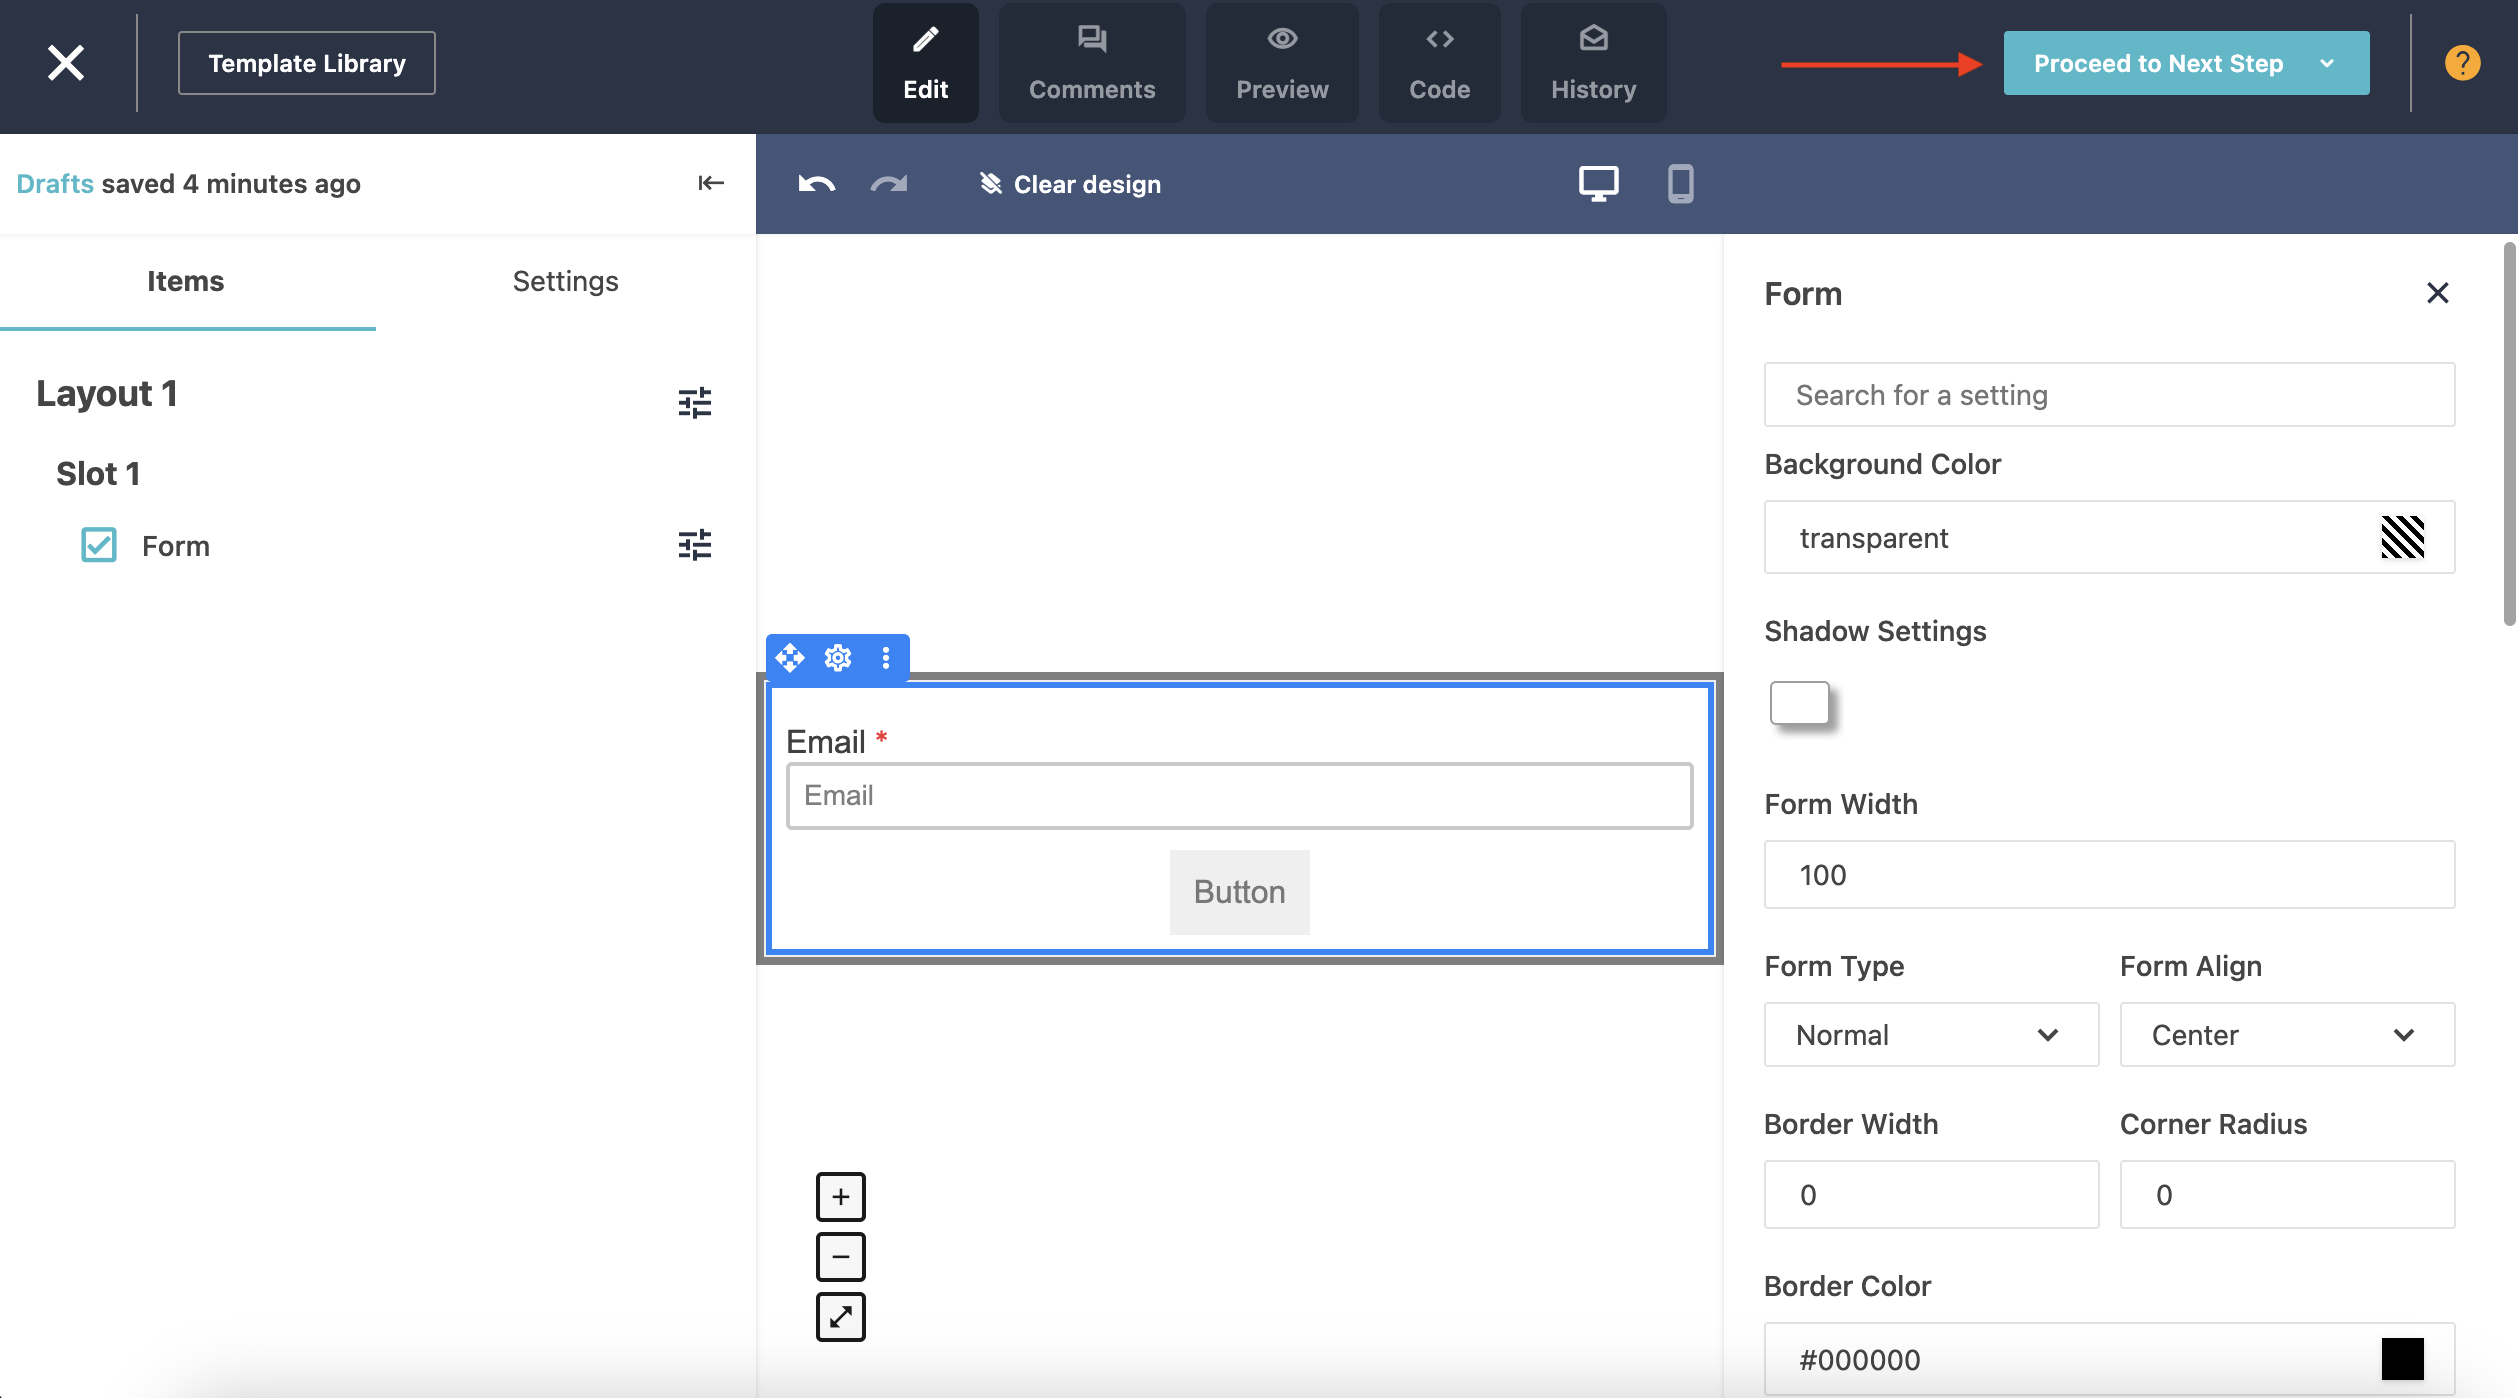
Add or edit the layout and items of your subscription form based on your preferences. The Form Designer is made up of four main sections:
Right pane: contains setting used to customize items or the layout.
Select Proceed to Next Step from the top menu when you've finished designing. Note that this action (clicking the Proceed to Next Step button) formally saves your design. Your subscription forms are always autosaved, but the program is autosaving your draft, not the final form (this is only truly relevant if you’re editing a published form). You can also hover over the Proceed to Next Step button to save your form as a template.
Visibility settings vary based on the type of subscription form you’re using. For example, if you’re working on a pop-up form, you will need to set the time that needs to have passed before a returning or first-time visitor sees your form.
The image below shows the visibility settings of an inline form. In this instance, the snippet must be copied and pasted into the component where you want it to be displayed.
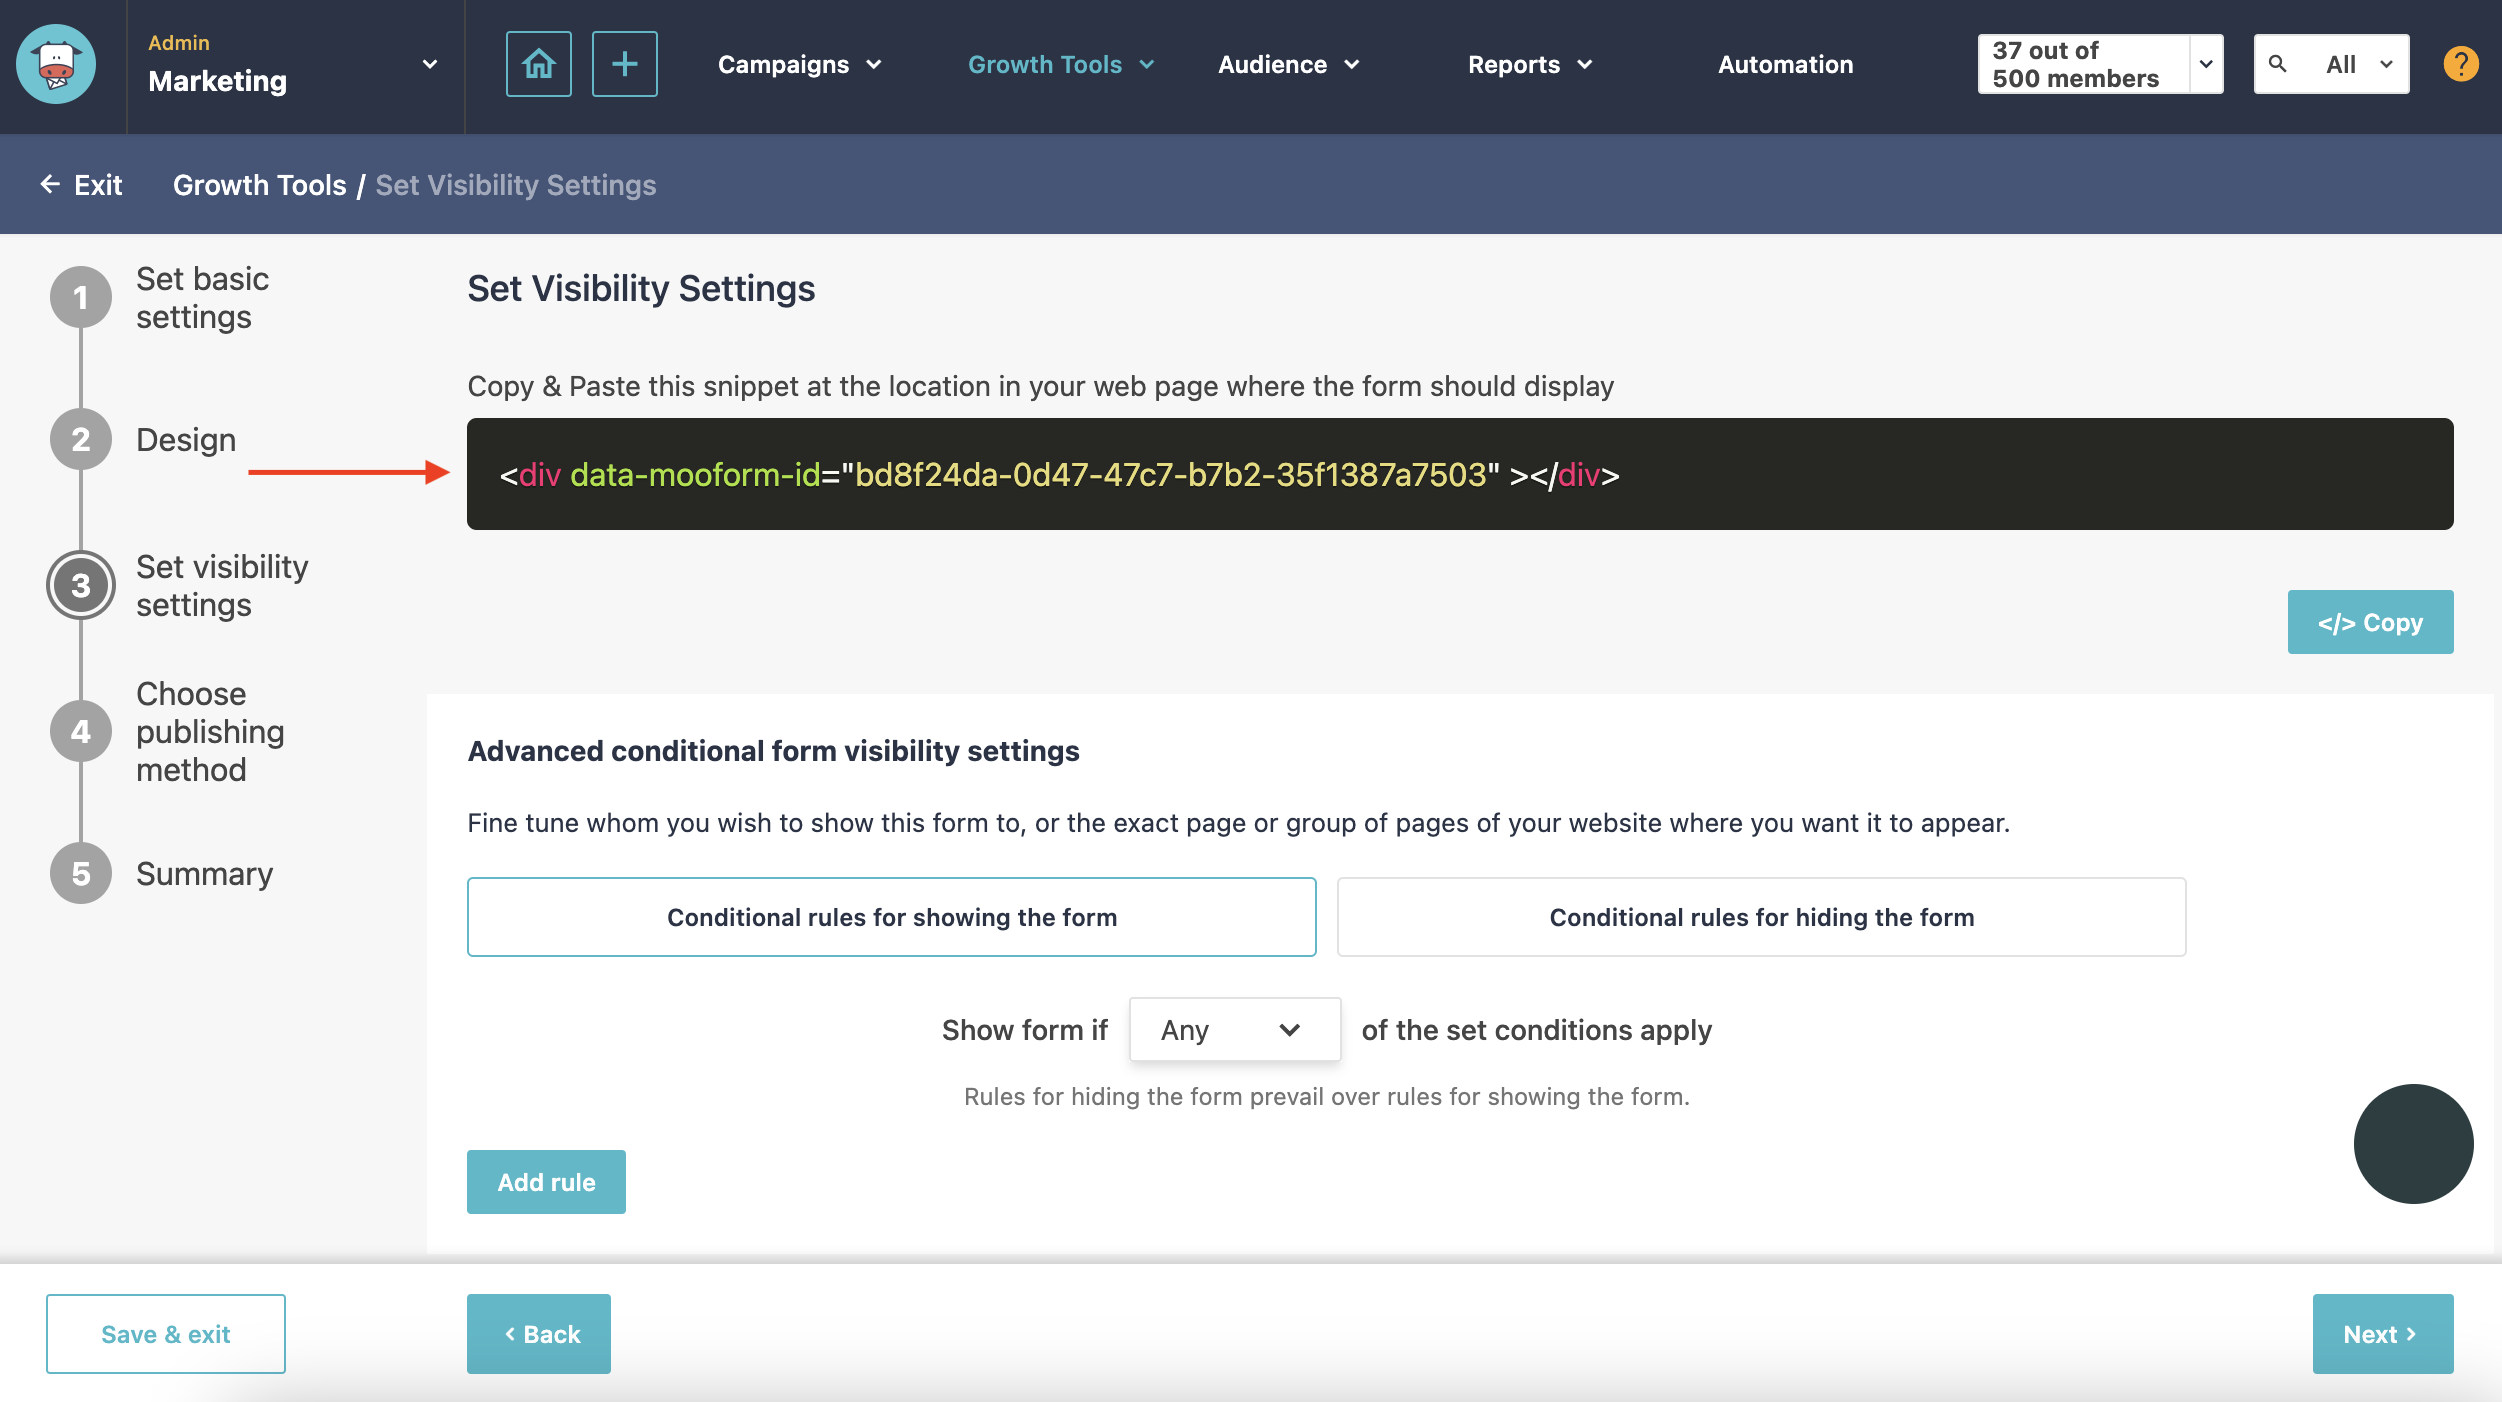
If you’d like, you can set conditional rules for displaying or hiding your form to maximize its effectiveness. You can create rules based on the following:
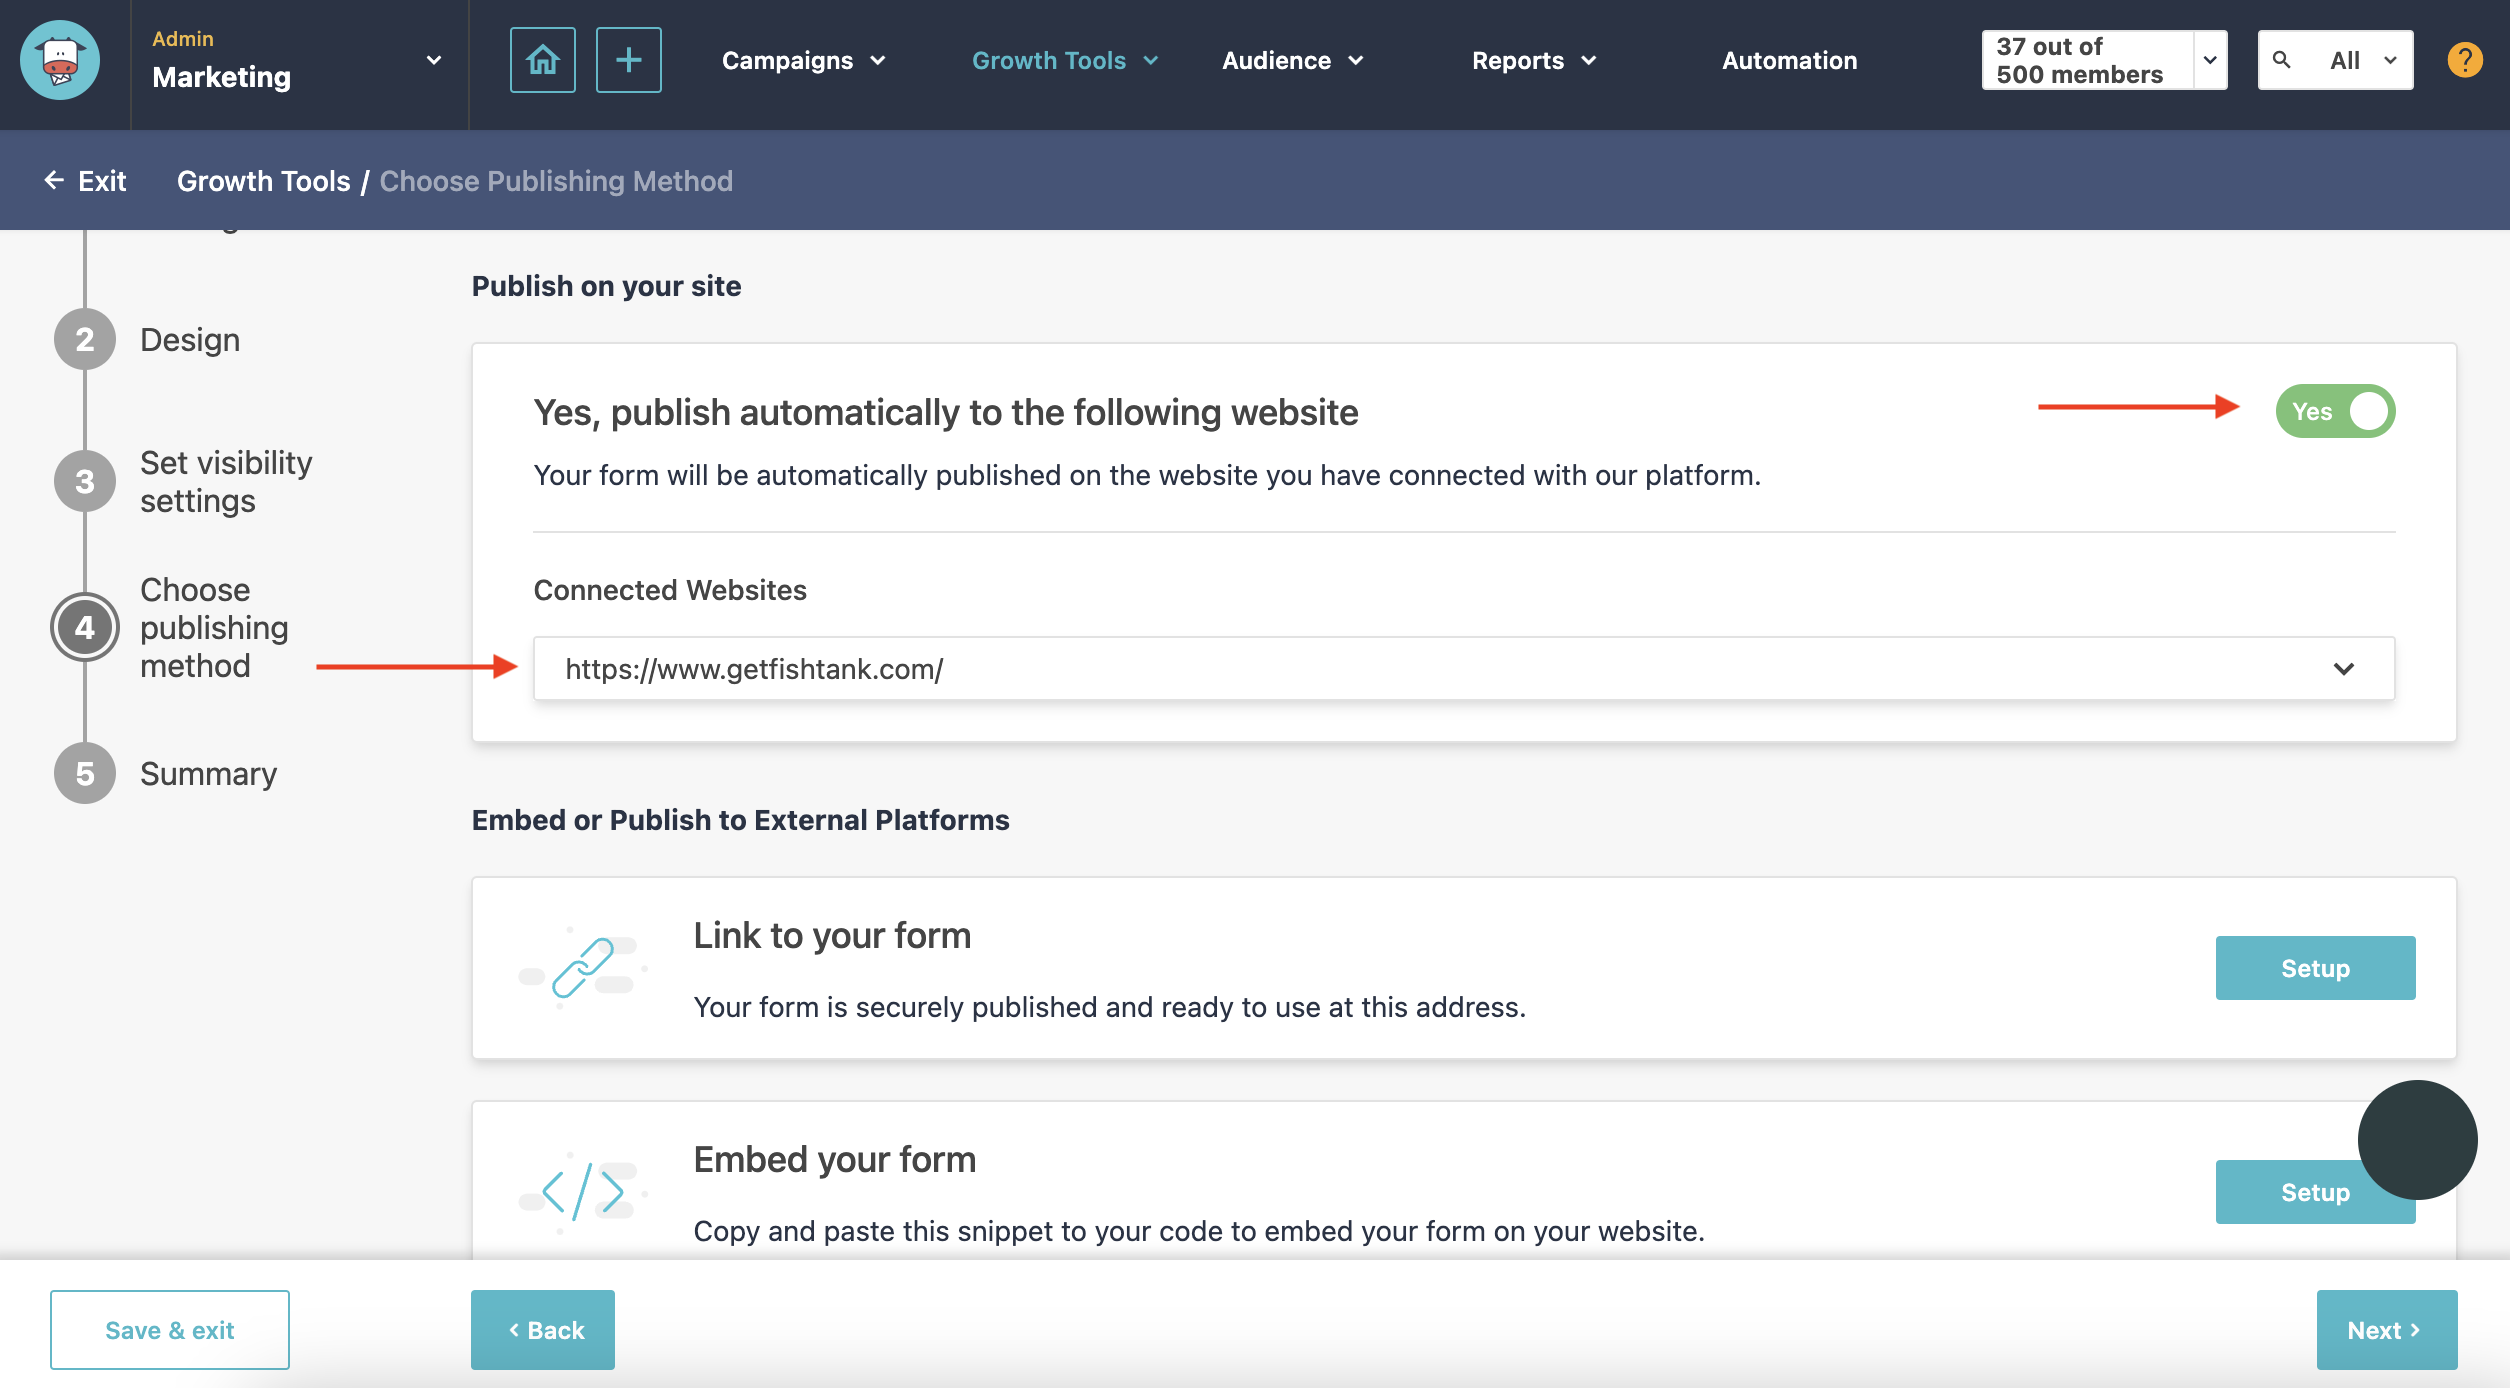
Your subscription form can be automatically published on your website or on an active landing page in Sitecore Send. To do so, toggle the switch to Yes under the Publish on your site heading. (Note: your website must be connected to your account and verified.)
You also have the option to either embed or link your form to external platforms if needed.
Before pressing Publish, review your form’s design, visibility, and publishing settings. Any missing information is marked with a red X (instead of green checkmarks).
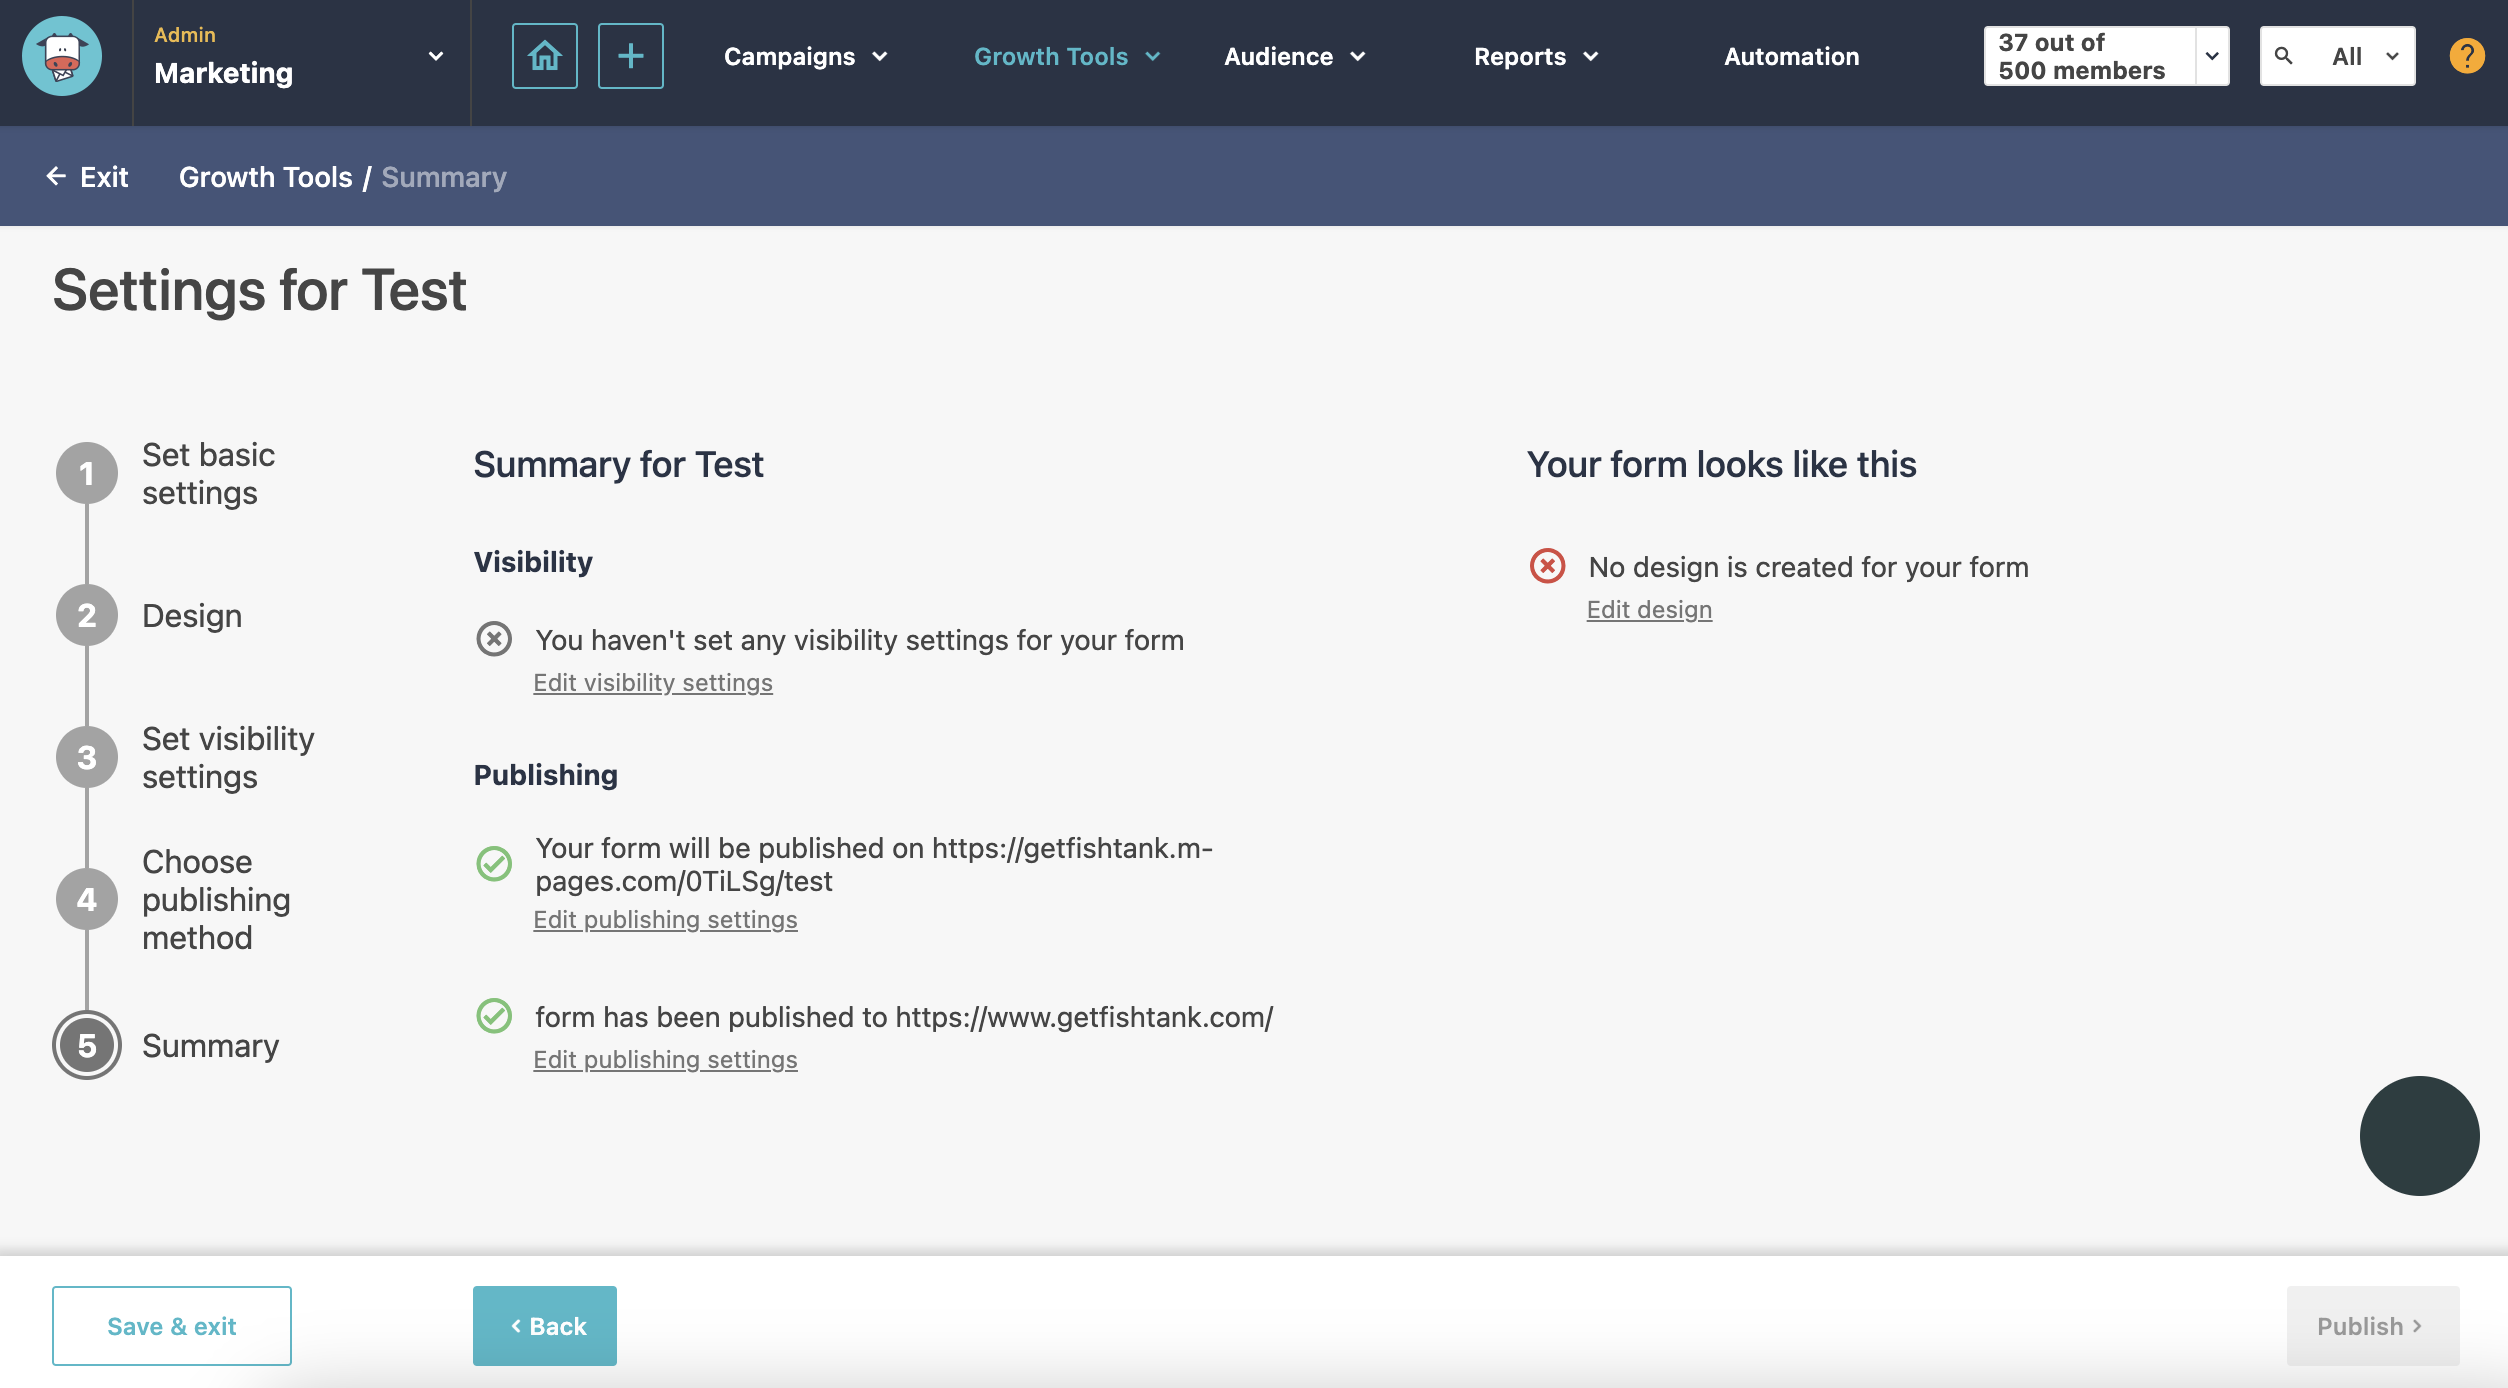
Congrats on creating your first form!
For a complete walk-through:
