Reading time: 4 min read
Creating Custom Sitecore Ribbon Buttons with PowerShell Extensions (SPE)
A step-by-step guide for developers to extend the Sitecore Content Editor ribbon using Sitecore PowerShell Extensions.
Start typing to search...
When building admin tools in Sitecore, customizing the Content Editor ribbon can significantly improve authoring efficiency. Traditionally, modifying ribbon items required manual editing in the Core database. But with the Sitecore PowerShell Extensions (SPE), we can create and manage these custom buttons entirely via script.
In this blog post, we'll walk through how to create a custom ribbon section and a button that executes a PowerShell script. We'll also look into how SPE handles this behind the scenes, reducing manual effort and improving maintainability.
Before SPE, customizing the Content Editor ribbon involved:
/sitecore/content/Applications/Content Editor/Ribbons/ChunksWith PowerShell Extensions, we eliminate this manual process. Instead, we:
In Sitecore master database:
/sitecore/system/Modules/PowerShell/Script Library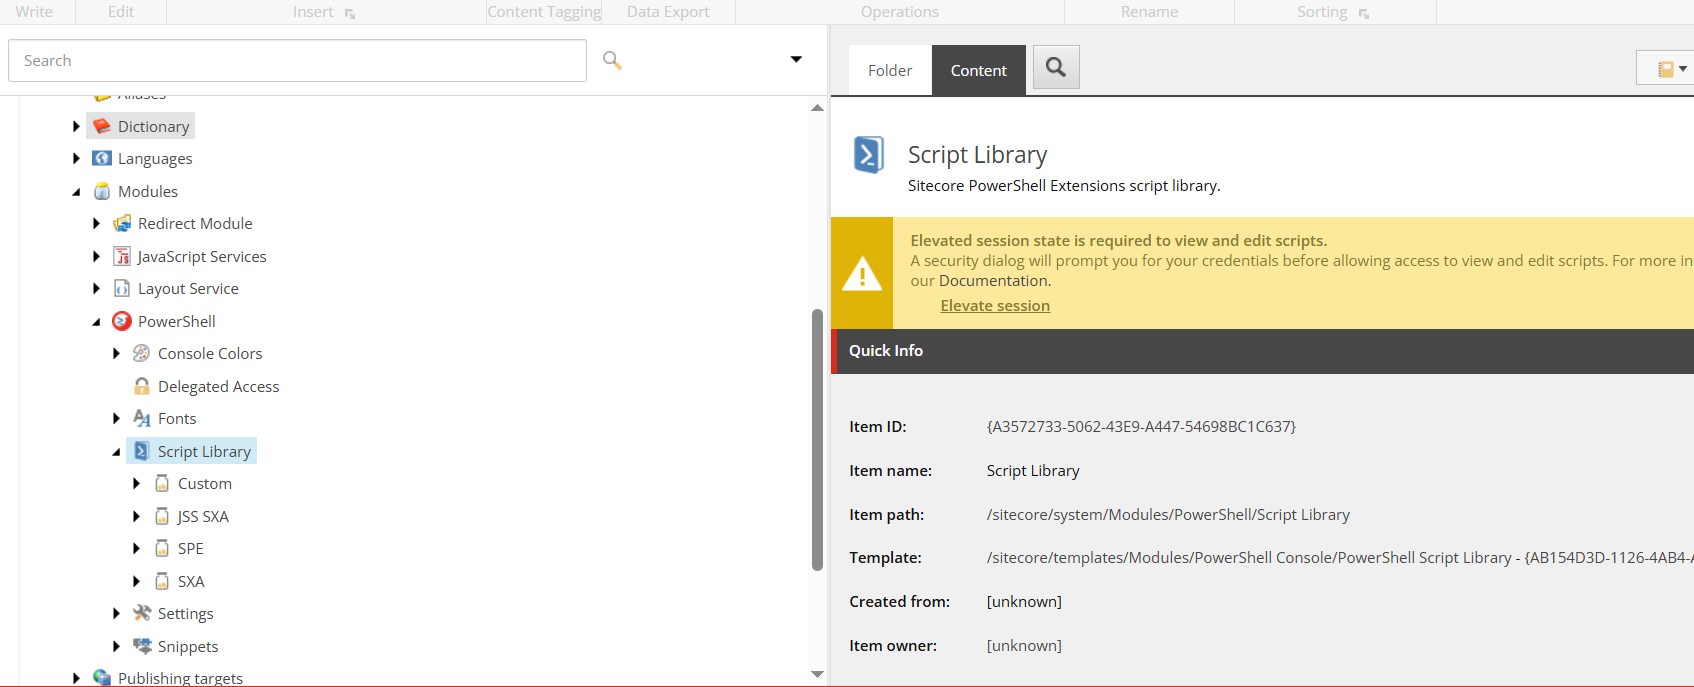
Create a new Script Module:
Custom
Custom Export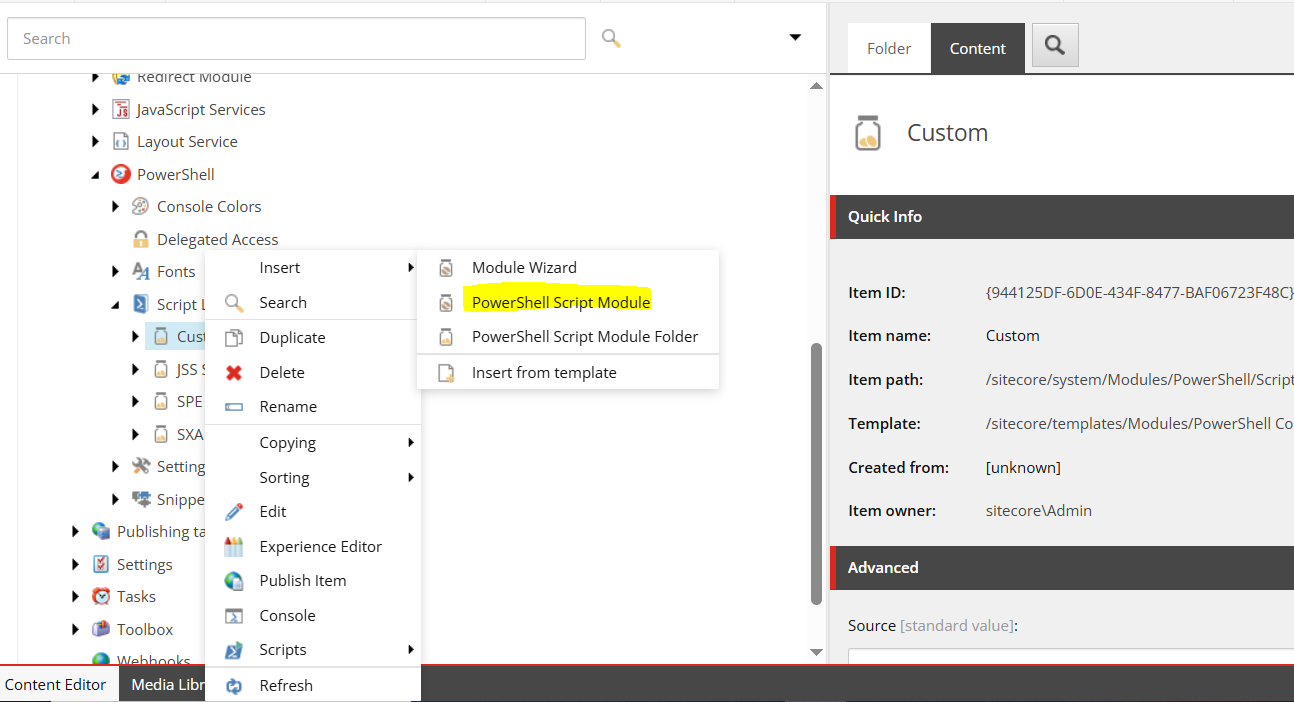
Right-click the module:
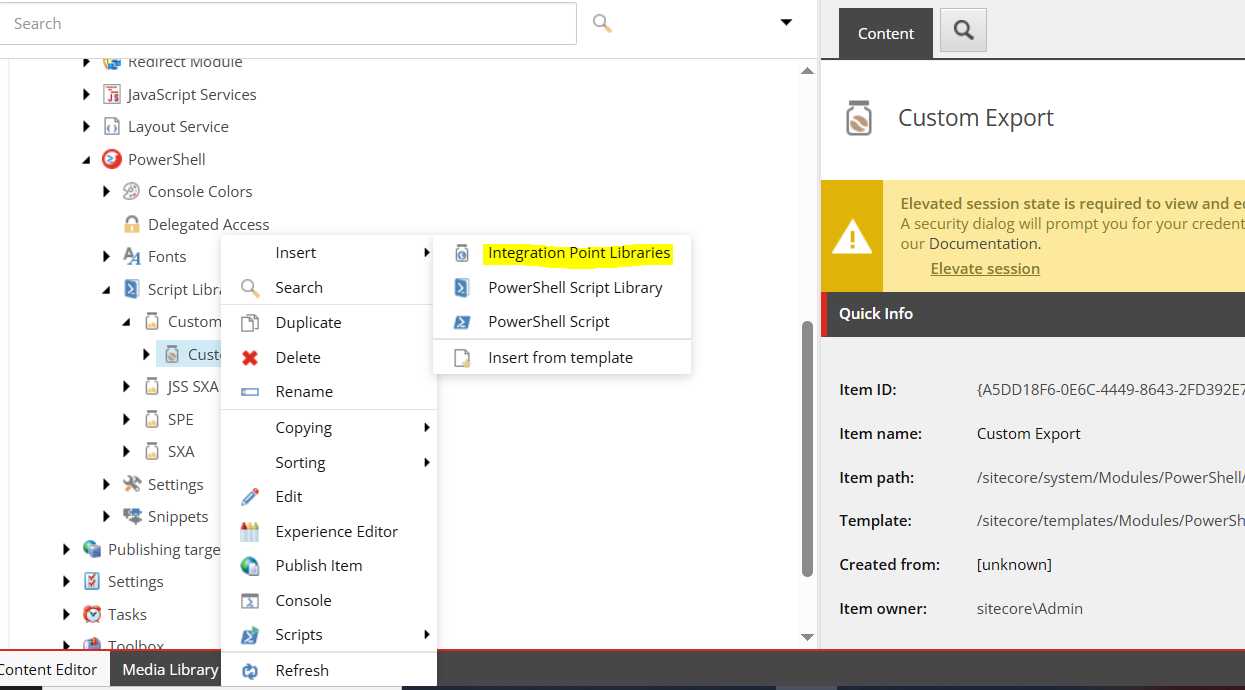
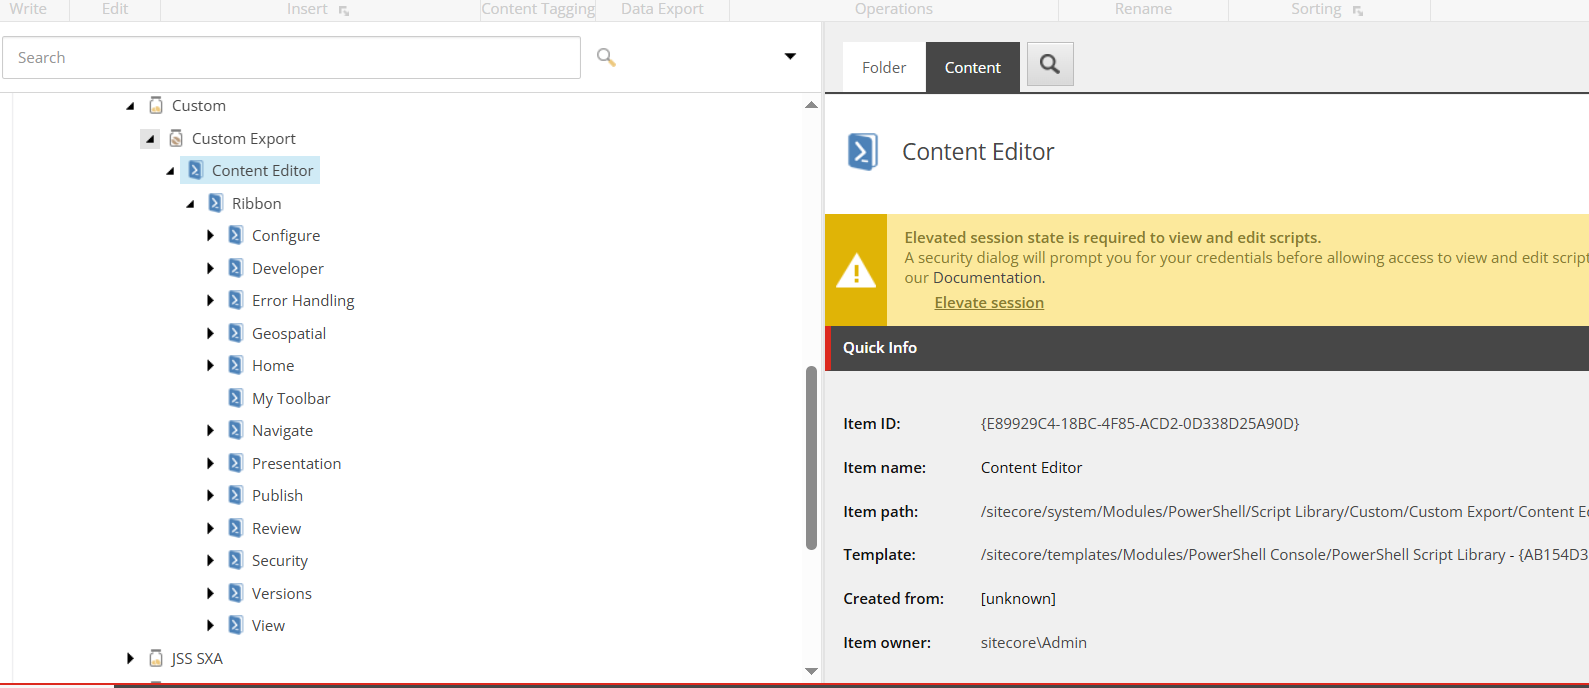
This will scaffold a structure like:
Custom
└── Custom Export
    └── Integration Points
    └── Content Editor
        └── Ribbon
            └── View
            └── Home
            └── Navigate
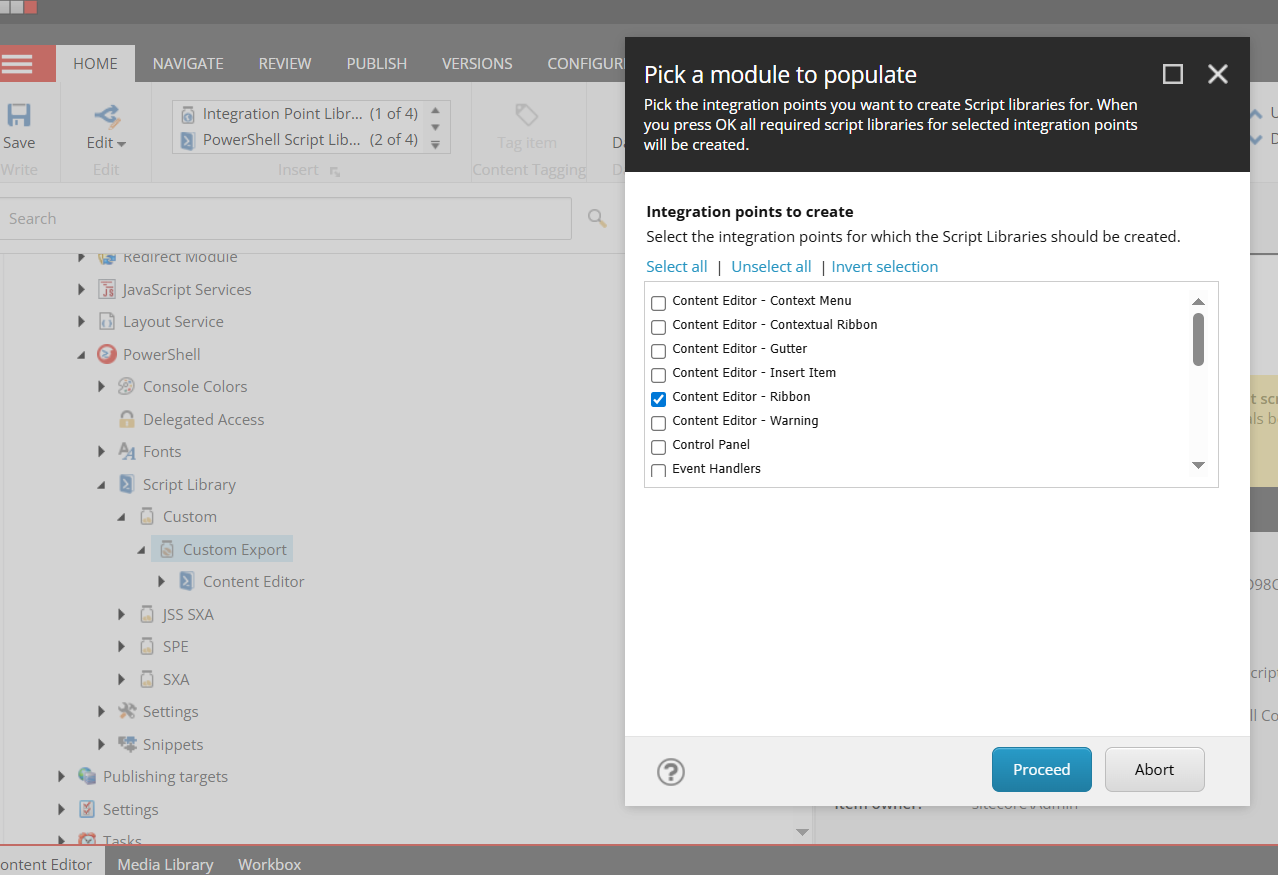
You’ll now see all existing ribbon tabs like Home, Navigate, Review, and View under the Ribbon item.
Under Ribbon > Home, do the following:
Home → Insert → PowerShell Script Library (e.g., Data Export)Data Export, Insert → PowerShell Script (e.g., Data Export)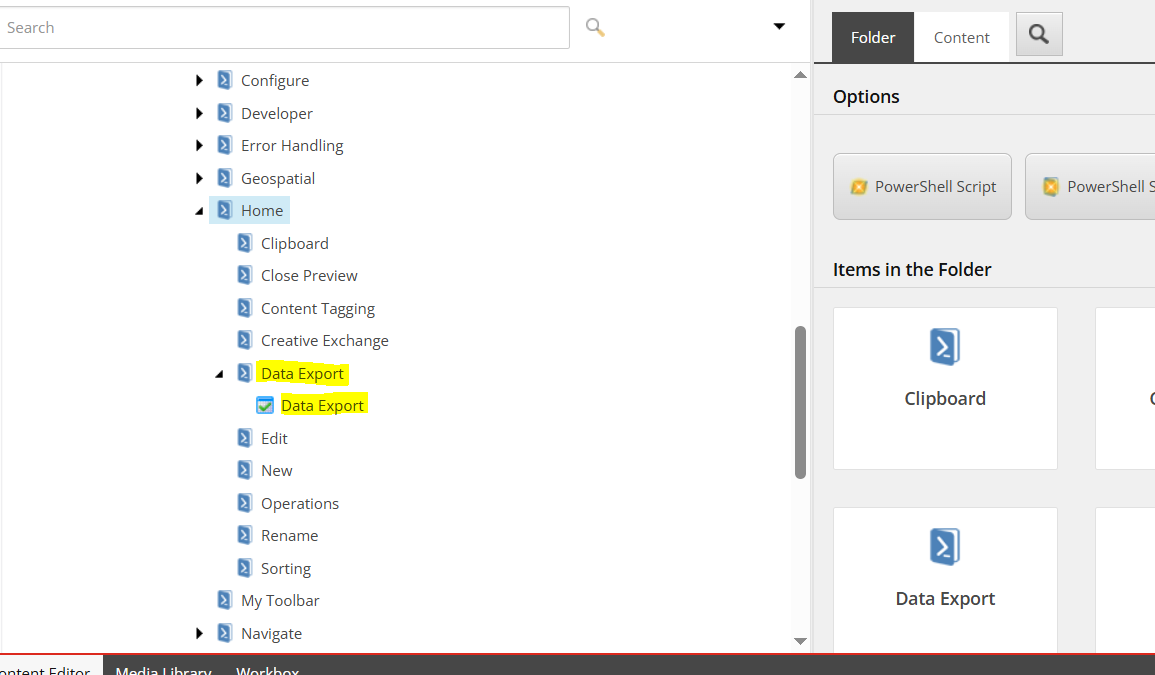
Configure your script item:
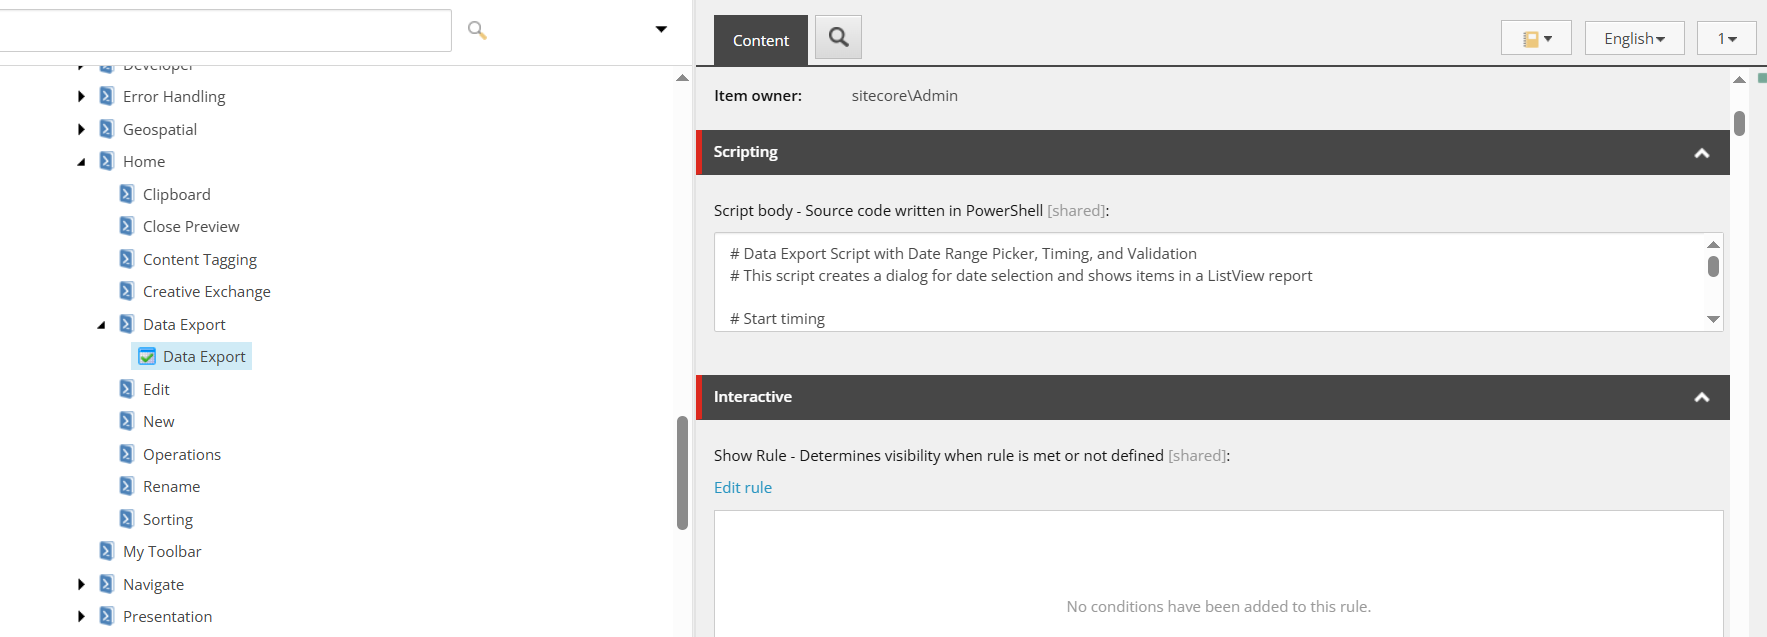
In my case, I have created a button for a data export of items within a date range. You may have any script functionality embedded with the new button
Once scripts are added:
Custom Export root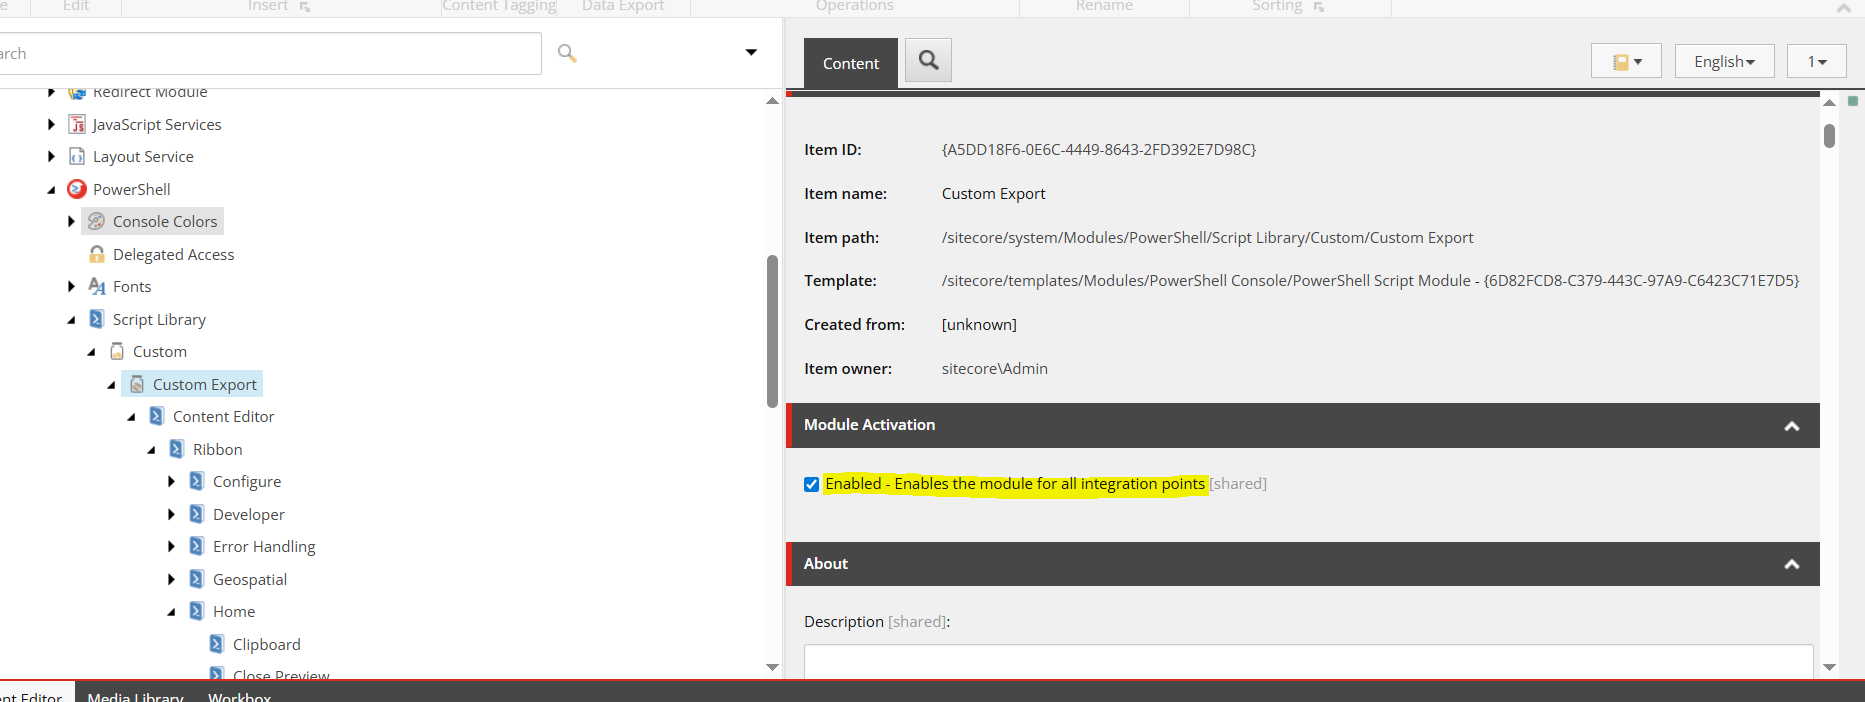
Open PowerShell ISE (Start Menu → Development Tools → PowerShell ISE)
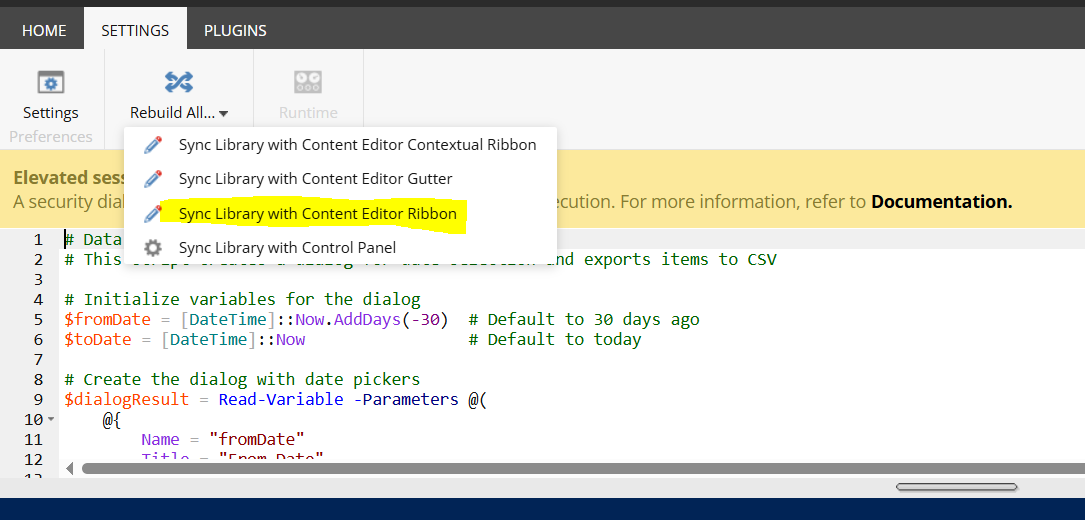
This will:
Go back to Content Editor → Home tab → Confirm your button is visible.

When serializing the PowerShell-generated items, it's a good idea to remove any unnecessary ribbon items and keep only the relevant ones such as the Home ribbon item shown in the image below. Also, don’t forget to serialize any related items from the core database that may have been automatically created during this process. This ensures a clean and consistent deployment across environments.

Customizing the Sitecore Content Editor ribbon with PowerShell Extensions (SPE) is one of the easiest and most effective ways to streamline admin workflows—without having to dig into the Core database manually. With script modules and integration points, developers can quickly build tools that boost author efficiency, reduce the risk of errors, and are much easier to maintain over time. Whether you're creating export utilities, batch actions, or quick diagnostics, SPE gives you a clean, scriptable way to bring those tools directly into the authoring experience. And it doesn’t stop at ribbon buttons—SPE unlocks a lot more power under the hood, letting you extend Sitecore in ways that were once tedious or time-consuming. Happy Sitecoring!!!