Enhanced Security for Sitecore Content Hub: Leveraging SAML Authentication
From configuring your app in Azure AD to enabling external authentication in Content Hub
Start typing to search...
Sitecore Content Hub is an all-encompassing platform that is ideal for optimizing processes across an organization's entire content lifecycle when it comes to managing digital assets and content. By leveraging Security Assertion Markup Language (SAML) authentication to integrate Sitecore Content Hub with Azure Active Directory (AD), security is improved and user access is made easier. With the help of this connection, managing user access is made easy and safe while utilizing Azure AD's strong features as a reliable identity provider.

In the digital era, where security breaches and cyber threats are increasingly common, safeguarding access to critical business applications like Sitecore Content Hub is paramount. Traditional username and password authentication mechanisms, while familiar, pose several security and operational challenges. They are susceptible to phishing attacks, require significant management effort in terms of password policies, and often lead to poor user experiences due to password fatigue.
SAML removes the requirement for customers to input a password directly on the service provider's website, it lowers the danger of phishing attacks and password theft. Because authentication takes place via Azure AD and only a token is sent to Sitecore Content Hub, the opportunities for an “attack” is significantly reduced.
Administrators can effectively manage who has access to Sitecore Content Hub, implement multi-factor authentication (MFA), and apply conditional access controls from a single interface by using Azure AD as the central point for managing user identities and access.
Users don't have to remember and enter several sets of credentials to access Sitecore Content Hub seamlessly. Because users may easily move between projects, this not only boosts productivity but also improves user satisfaction.
By utilizing SAML authentication, Sitecore Content Hub users may create individual accounts, reset their passwords, and manage their accounts with much less effort, freeing up important IT resources.
By guaranteeing that access to Sitecore Content Hub is securely regulated and auditable, integrating SAML with Azure AD can assist organizations in meeting compliance requirements. For auditing and compliance needs, Azure AD offers comprehensive logs and reports.
Managing access through conventional methods gets more and more difficult as organizations expand. Because SAML authentication scales smoothly, adding new users and applications is simple and doesn't require major infrastructure modifications.
Before we can even get to seeing up and configuring SAML SSO within Content Hub, we need to perform several actions from within Azure Active Directory (AD). They are:
From within your Azure Portal, proceed to the App Registration > New Registration. Give it a meaningful name.
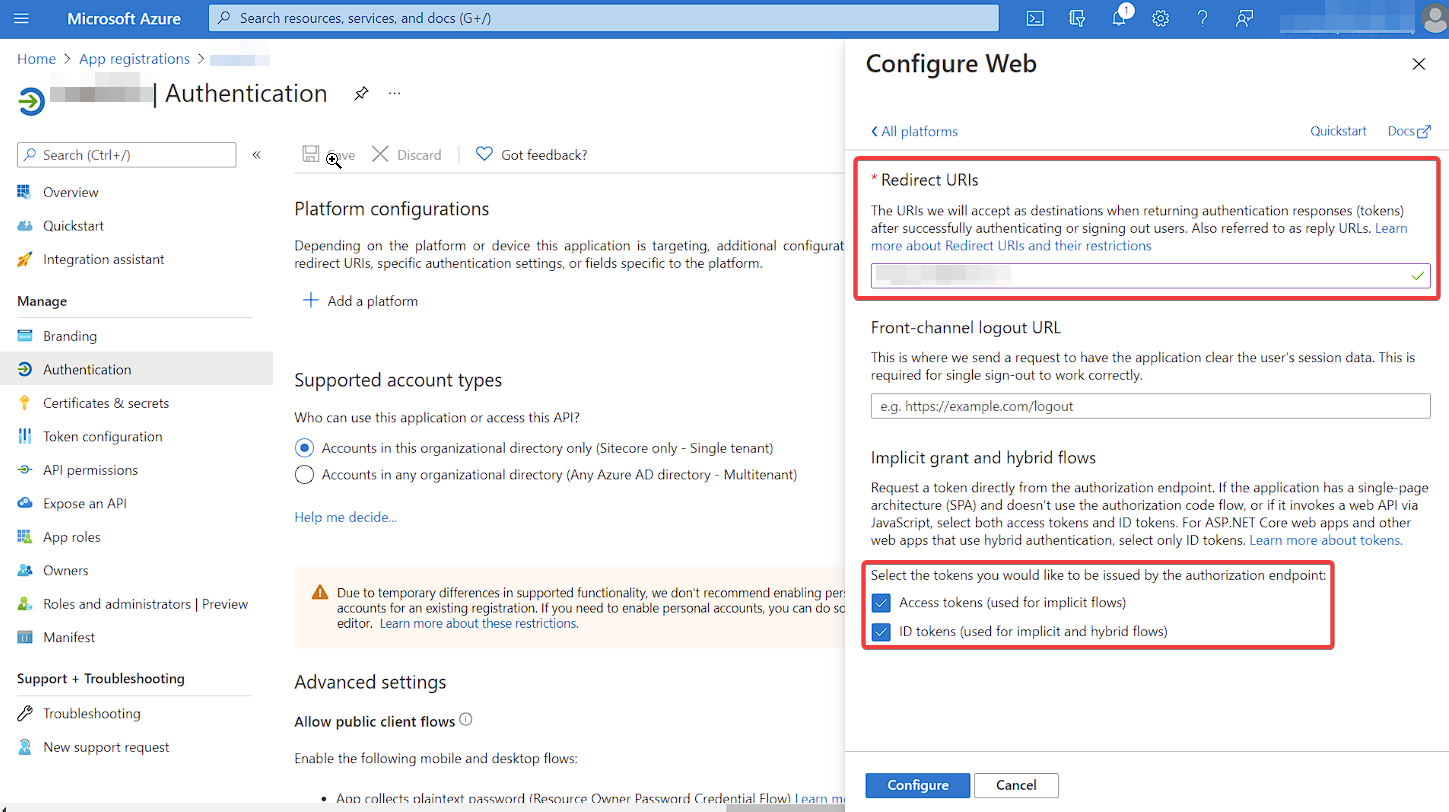
Within your new App, you’ll want to proceed to Manage > Authentication > Platform configurations > Add a platform.
This is where you will enter your Content Hub portal URL inside the Redirect URIs field. Your Content
Hub portal URL looks something like this:
https://abc-q-001.sitecorecontenthub.cloud/en-US/
In the Implicit grant and hybrid flows section, click both:
Access tokens (used for implicit flows)ID tokens (used for implicit and hybrid flows)
Again, inside the Manage section, proceed to Token configuration > Add group claim.
Within the Edit groups claim field find and check Security groups. You will find this under
Access, ID and SAML tokens.
Open up those options and confirm you have selected the Group ID option.
Then click add.
Proceed to the Token configuration > Add optional claim. There you need to select SAML under
the Token type. And then under Claim check the email box and click
Add.
And lastly within Add optional claim, don’t forget to check off
Turn on the Microsoft Graph email permission.
Lastly, again under Manage, this time select Expose an API. And click Add a scope.
At this point the Application ID URI is generated.

After you’ve copied it somewhere safe, click Save and continue and then on the Add a scope
box, click Cancel.
You’ve already got your Application ID URI but you will also require the
Federation metadata document and the EntityID. Both of these you’re going to obtain from the
Overview > Endpoints tab.
You will require the following to setup SAM in Content Hub so let’s ensure you have everything you need.
Application ID URI Federation metadata documentEntityIDIf you have everything, then let’s head on in to Content Hub. You will require admin privileges to perform the following steps.
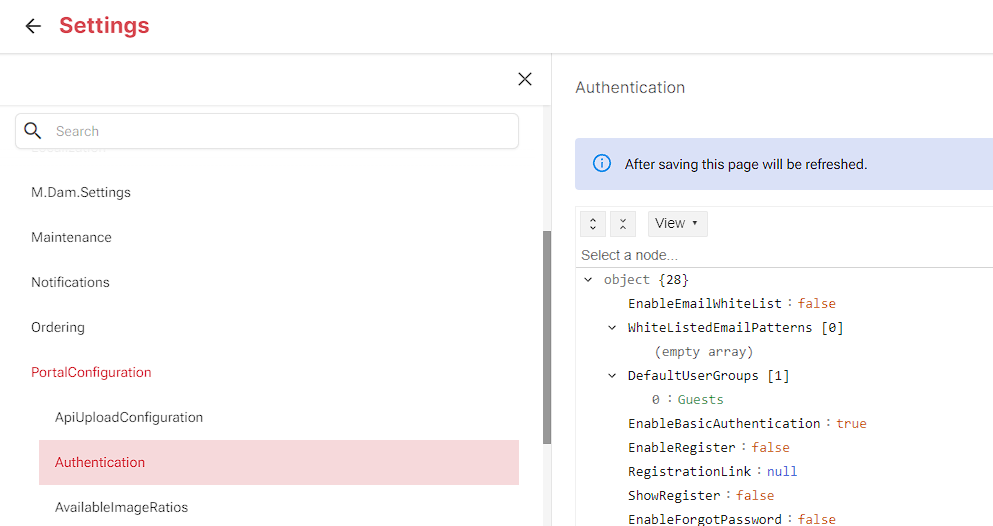
Once you’ve logged in, proceed to to Manage > Settings.
There, on the left hand side, locate Portal Configuration followed by Authentication.

In the drop-down menu where it says View switch it to be Text.
Scroll down to ExternalAuthenticationProviders.
Inside the "saml" array you will want to add the following.
{
  "metadata_location": "<Federation metadata document value>",
  "sp_entity_id": "<Application ID URI value>",
  "idp_entity_id": "<EntityID>",
  "provider_name": "<Give it a provider name, no spaces, eg. SitecoreContentHub>",
  "messages": {
    "signIn": "<This is the Button Text people will click.>"
  },
  "authentication_mode": "Passive",
  "module_path": "AuthServices",
  "is_enabled": true
}
Lastly, navigate up to EnableExternalAuthentication and ensure it’s set to true.
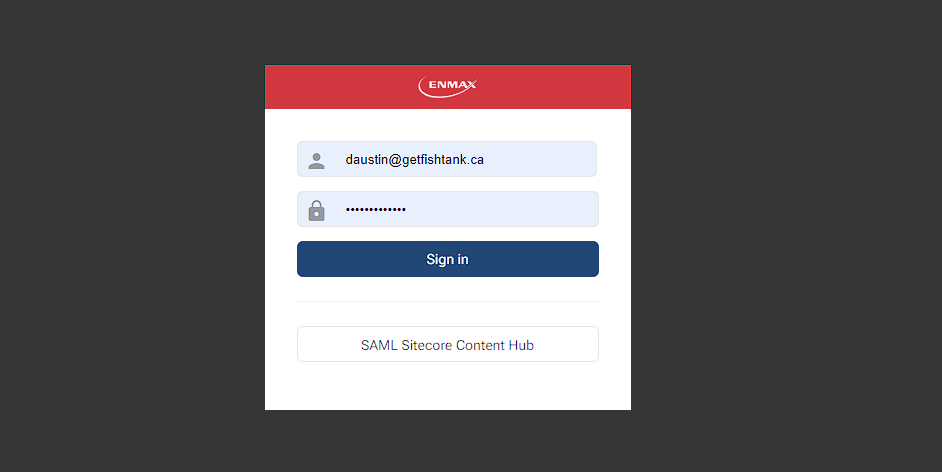
At this stage you can log out and on the login screen you should see the following.

Congrats! You have successfully setup SAML for Sitecore Content Hub!
In the fast-paced world of digital asset management, securing and streamlining user access without compromising on efficiency is paramount. Integrating SAML authentication with Azure Active Directory to safeguard the Sitecore Content Hub offers a robust solution to these challenges. This approach not only enhances security by mitigating the risks associated with traditional authentication methods but also improves user experience through single sign-on capabilities, reduces administrative overhead, and ensures compliance with auditing requirements. As organizations continue to grow and evolve, the scalability of SAML authentication becomes a critical asset, enabling seamless management of user access and identity. By following the steps outlined for setting up SAML within Azure AD and configuring it in Sitecore Content Hub, businesses can achieve a secure, efficient, and compliant content management ecosystem. This strategic integration empowers organizations to leverage their digital assets fully while maintaining a secure and user-friendly environment.