Reading time: 4 min read
How to Update Page Branches in SitecoreAI with Page Builder
When you can't use Experience Editor, you can still maintain them in Page Builder
Start typing to search...
If you've updated to Content SDK from Sitecore JSS, then you are well versed with the fact that Experience Editor is no longer available to you. While this is a considerable blessing for some as it moves us closer to using the power of Page Builder. While the functionality isn't entirely there yet, more features are certainly on their way. In this example, we're assuming we have a site setup, we have Page Designs and appropriate components ready to go that would fill the requirements as to what needs to go on a particular page. 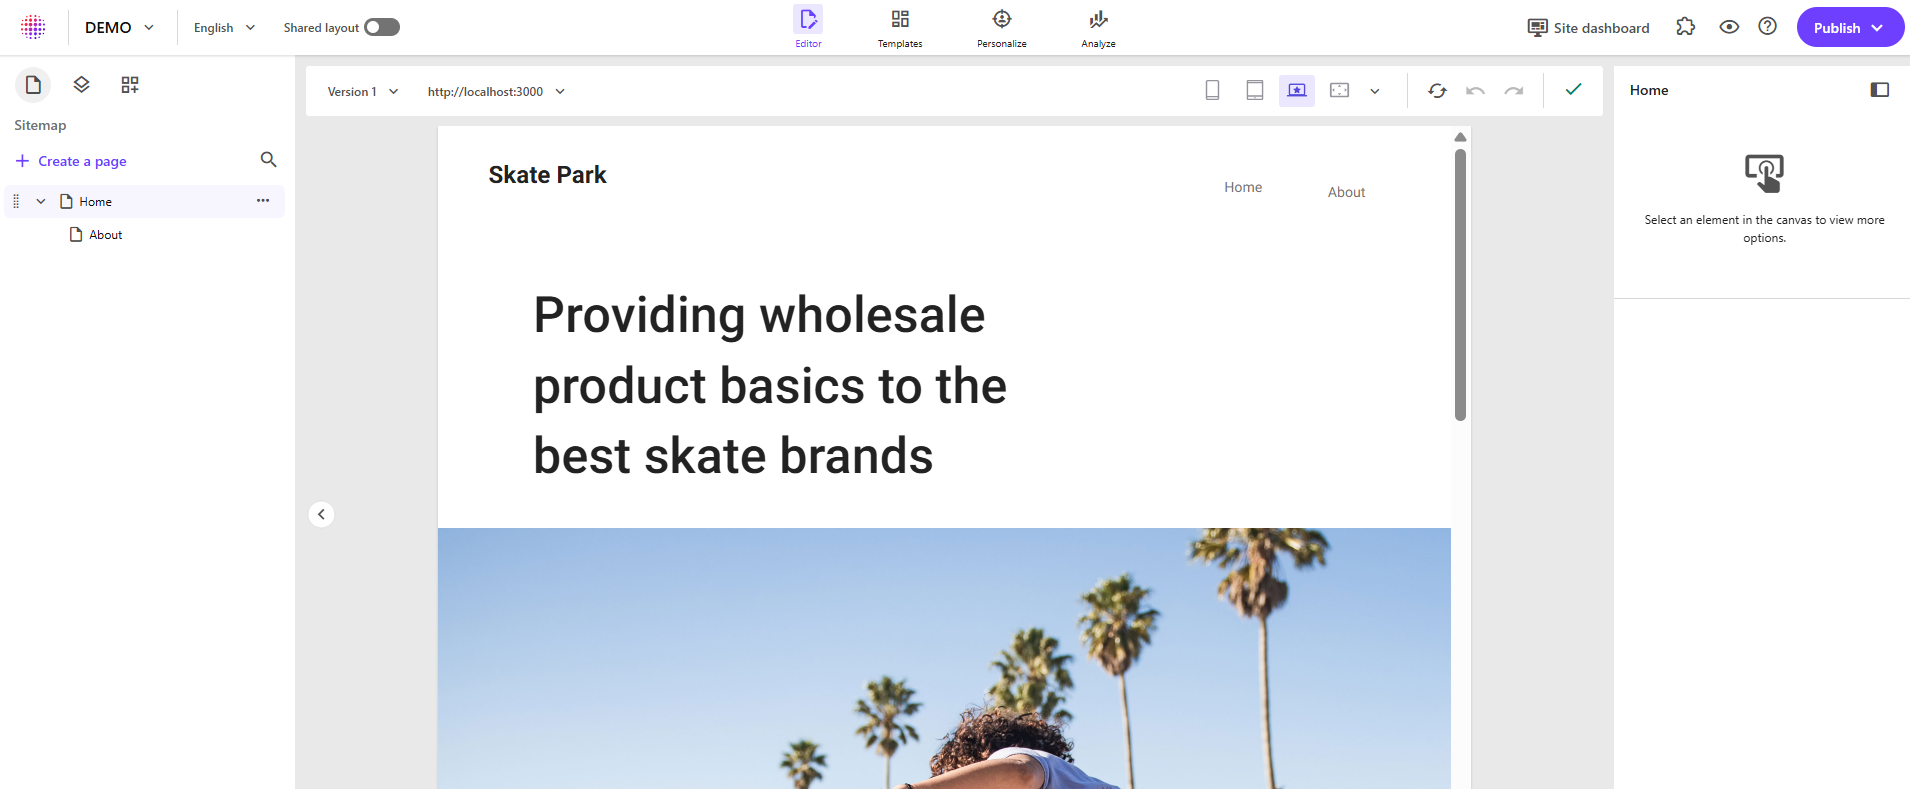 So what are the ways to update a Page Branch item using Page Builder? But first, what is a Page Branch?
Page Branches are a template used by authors or developers to create new pages with pre-configured components and datasources yet still allow for a fully authorable layout. Think of it as doing a portion of the work early for an author to allow them to hit the ground running faster. They're different from designs in that they use what's already configured for a page design. With Page Branches, you can add even RichText components to the main placeholder yet still allow the other to adjust that main placeholder's components or even remove pre-configured components from the page (if they needed something different).
First thing first, we need a Page Branch item for which to work with. Head on into Content Editor, and local Page Branches under Presentation. Once there, right click on Page Branches, click Insert and then select Page Branch. 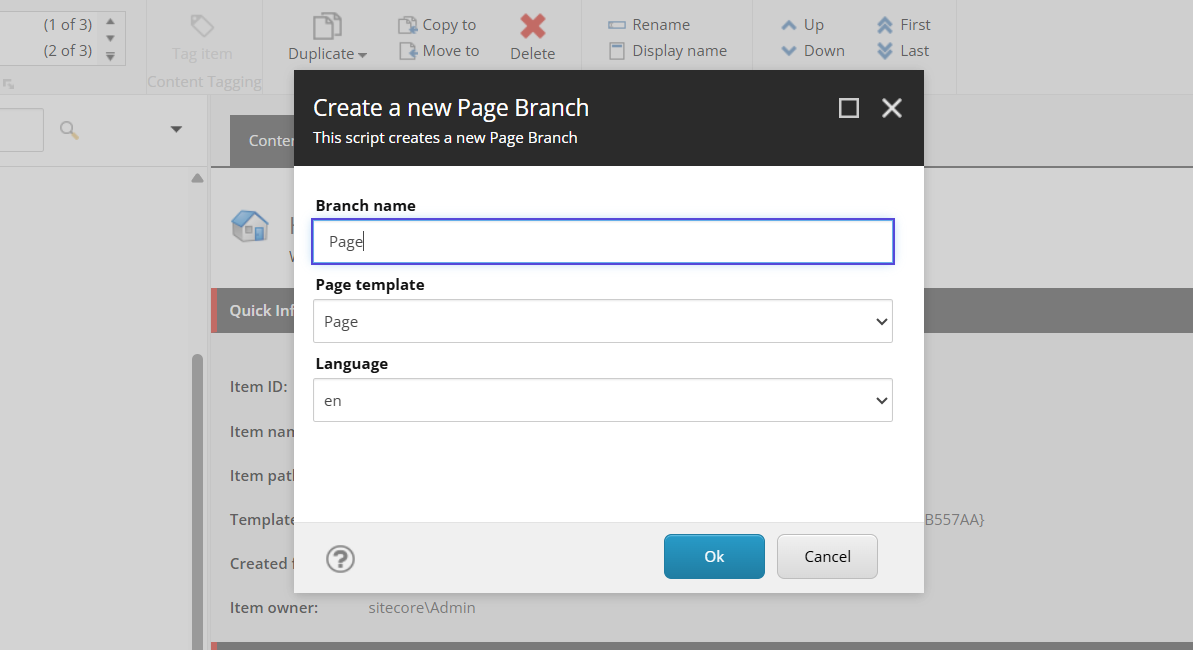 Enter in the appropriate information. In this example, we only have a single page template, so we're just calling it
 Page. After which, you may have to refresh the Page Branches item, and you'll see your page branch with the appropriate $name item underneath. 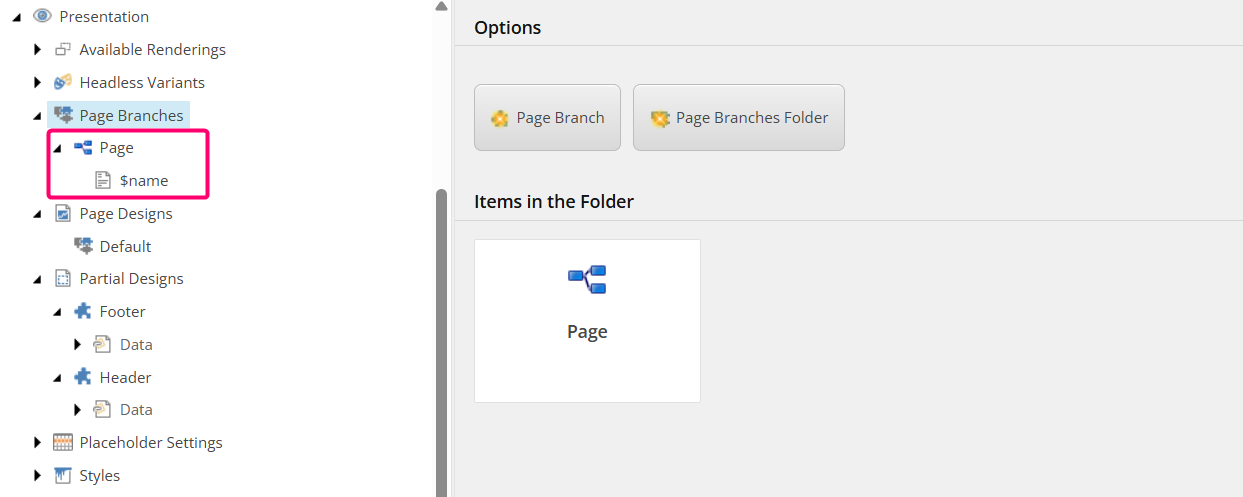
Selecting the $name item, we can obtain the item GUID, shown below. Copy that value, excluding the { and }. 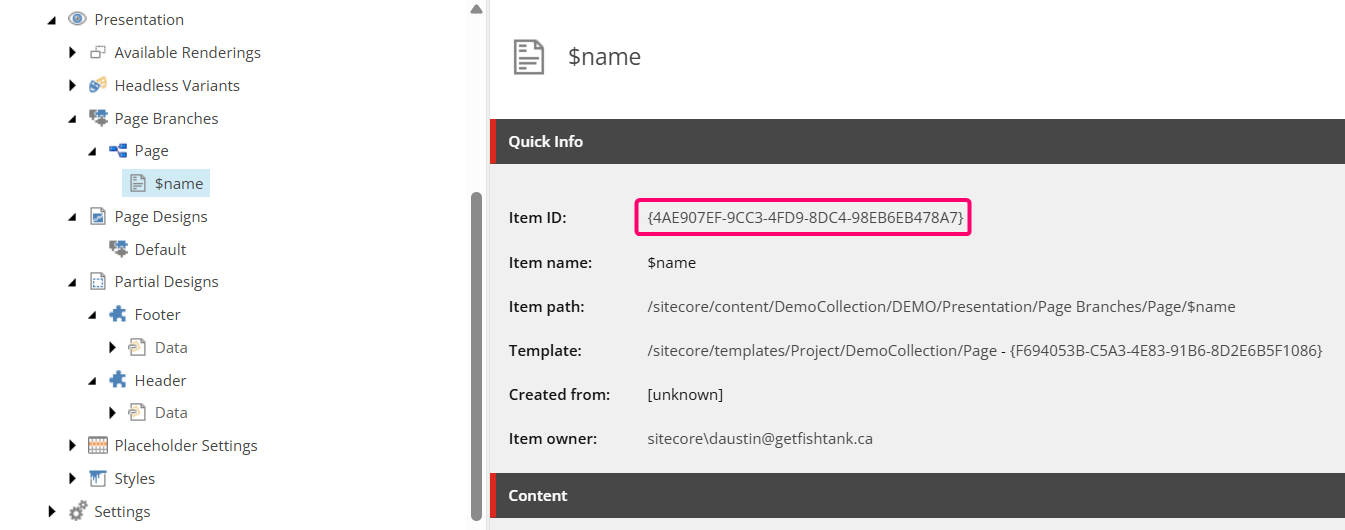 If you now head on into Page Builder, you'll be able to see the URL of the item you're on. In our case, we're on the Home item and our URL looks like so.
https://pages.sitecorecloud.io/editor?tenantName=xxxxxxxxxxxxxxxxxx&organization=org_xxxxxxxxxx&sc_itemid=9fcecc0d-ab31-42a0-9026-66a952849d26&sc_lang=en&sc_site=DEMO&sc_version=1You're looking for the sc_itemid value in the URL. We're going to replace that value, with the GUID of the $name item above. Update the URL, hit Enter and then Page Builder will refresh. It may take a moment and in some cases you may need to Refresh the page. In some older versions, you may encounter an error in Page Builder telling you that there is no content tree available, you can safely ignore that. In updated versions of Content SDK, you will see $name appear on the left. 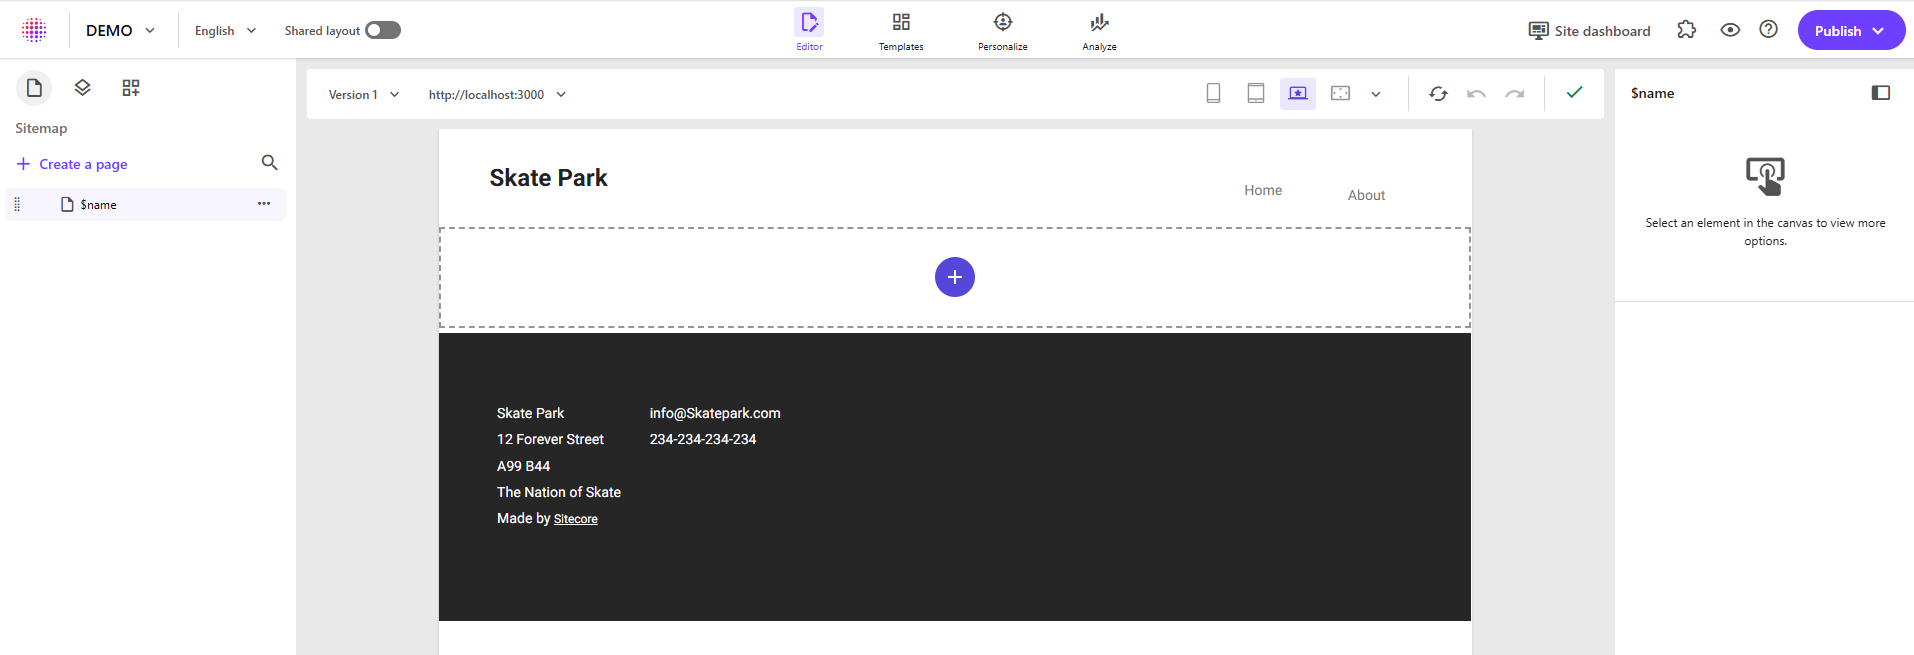 With this in place, you are now free to update your Page Branch item accordingly with the necessary components and datasources.
If you're not comfortable with the above, the other option still involves Page Builder, but relies a bit more advanced knowledge on Content Editor. So first thing we're going to do is go into Page Builder and create a new test page.
Here I've created a regular page called Page Branch page that I will use to setup how I want it to look. 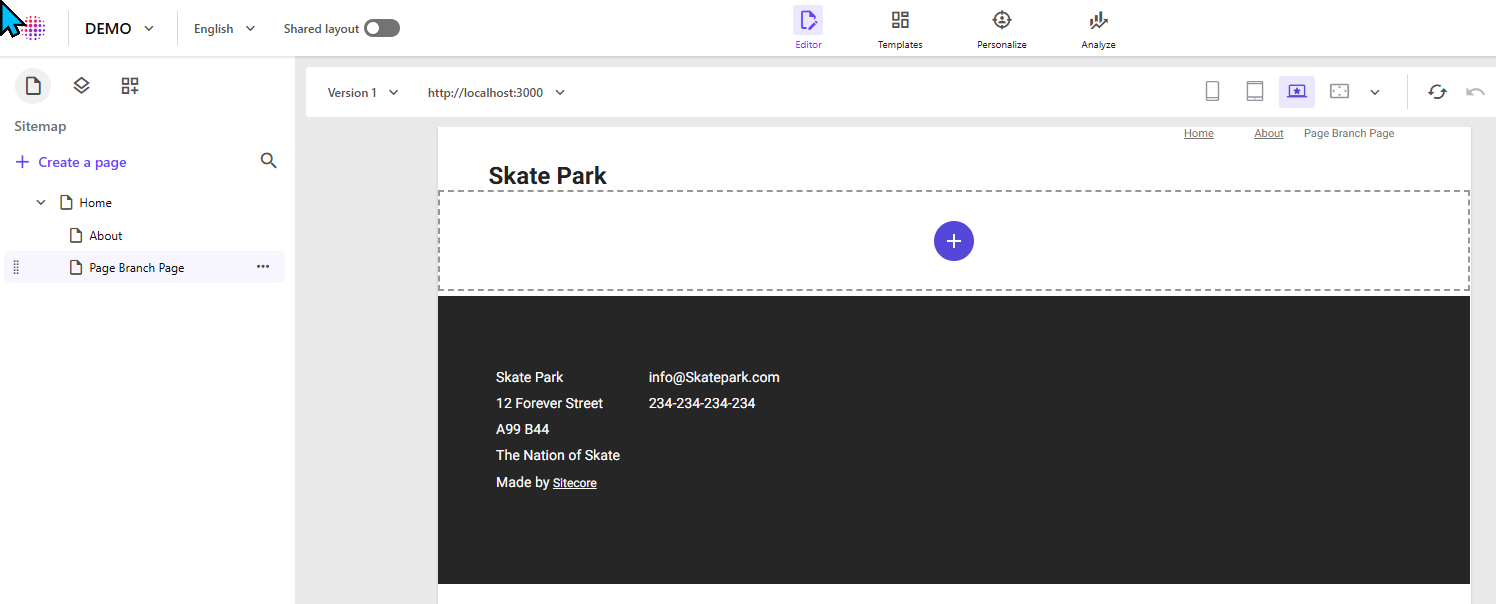 Now you'll notice that it's currently in
 Final layout so depending on what you're wanting to setup you will have to do some adjustments. If you're wanting all versions, all languages having the same components, then you'll want to switch to Shared. If you want a specific language to have something and another language something else, then you'll want to use Final. It's important to know what you are wanting though as this trips up so many people.
Once you're finished you're going to head back into Content Editor.
Back in Content Editor, you're going to want to enable Standard Fields and Raw fields in the View tab so you can see all the appropriate fields and their raw values. Then under Layout, select and copy the Renderings and Final Renderings raw values and paste them into the same field of the $name page branch item. 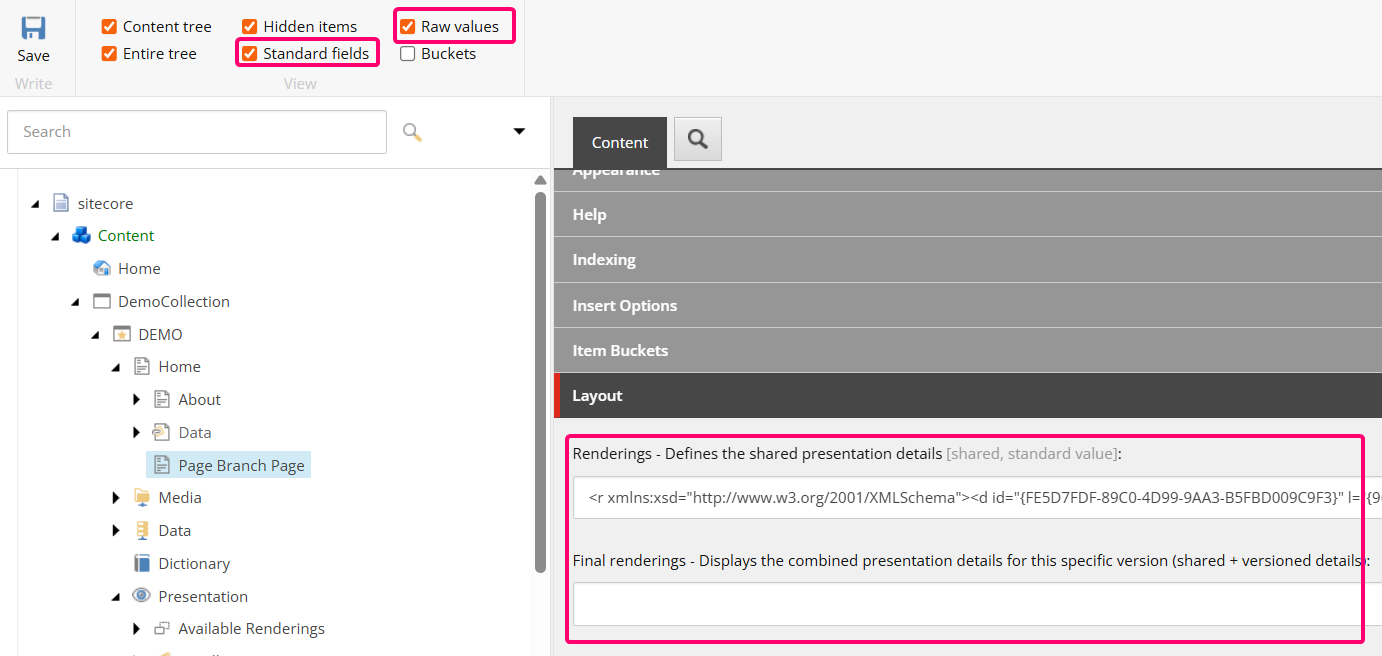 Saving these updates will effectively allow your Page Branch item to act just like a regular item.
It honestly doesn't matter which option above you prefer. Both work just fine. I think as time goes on, more and more functionality will come to Page Builder and thus it will become the standard and recommended approach. Certainly once Content Editor is retired.