Reading time: 10 min read
How to Create and Manage CDP Guests with the REST API in Next.js
Learn how to create, update, and manage CDP guests in Next.js using Sitecore's official REST API.
Start typing to search...
Learn how to create, update, and manage CDP guests in Next.js using Sitecore's official REST API.
Sitecore offers a wide range of products designed to help businesses streamline their digital ecosystem. For marketers and business analysts, collecting and analyzing customer data is essential for refining web strategies, and Sitecore Customer Data Platform (CDP) makes this process seamless.
The foundation of data analysis begins with data collection. There are multiple ways to capture customer information, from structured data sources to user-submitted inputs via forms. The most valuable data is often the information that users willingly provide—such as details from user profiles, newsletter sign-ups, and other interactions. While there are many methods for gathering customer data, our focus is on enriching user profiles by tagging relevant information. In this article, we’ll explore how to manage this data using Sitecore CDP’s Guest REST API and integrate it into customer-facing forms.
The first step is to know what information we would want to be captured. We can start off with something simple. Let’s collect basic information to create an actual profile and let’s add in one important detail we can utilize to help provide a personalized experience on our site. The basic information we would want to collect are the following:
For segmenting customers into different user groups these might be some inputs you might want to consider.
We'll focus on the Next.js serverless function (API route) that handles the form submission, rather than the specifics of creating the form itself in Next.js.
This API route will be designed to accept POST requests. We expect the incoming request body to contain data with the following keys: firstName, lastName, email, and areaOfInterest. All these data are strings, a pretty simple set of data to pass into a serverless function.
Here’s the initial code structure for the handler function. It includes a crucial check to ensure only POST requests are processed, returning a 405 Method Not Allowed error for any other HTTP method:
import type { NextApiRequest, NextApiResponse } from 'next';

export default async function handler(req: NextApiRequest, res: NextApiResponse<ResponseData>) {
  if (req.method === 'POST') {
    try {
      const { firstName, lastName, email, areaOfInterest }: RequestBody = req.body;

  ............

  } else {
    res.setHeader('Allow', ['POST']);
    res.status(405).end(`Method ${req.method} Not Allowed`);
  }
}
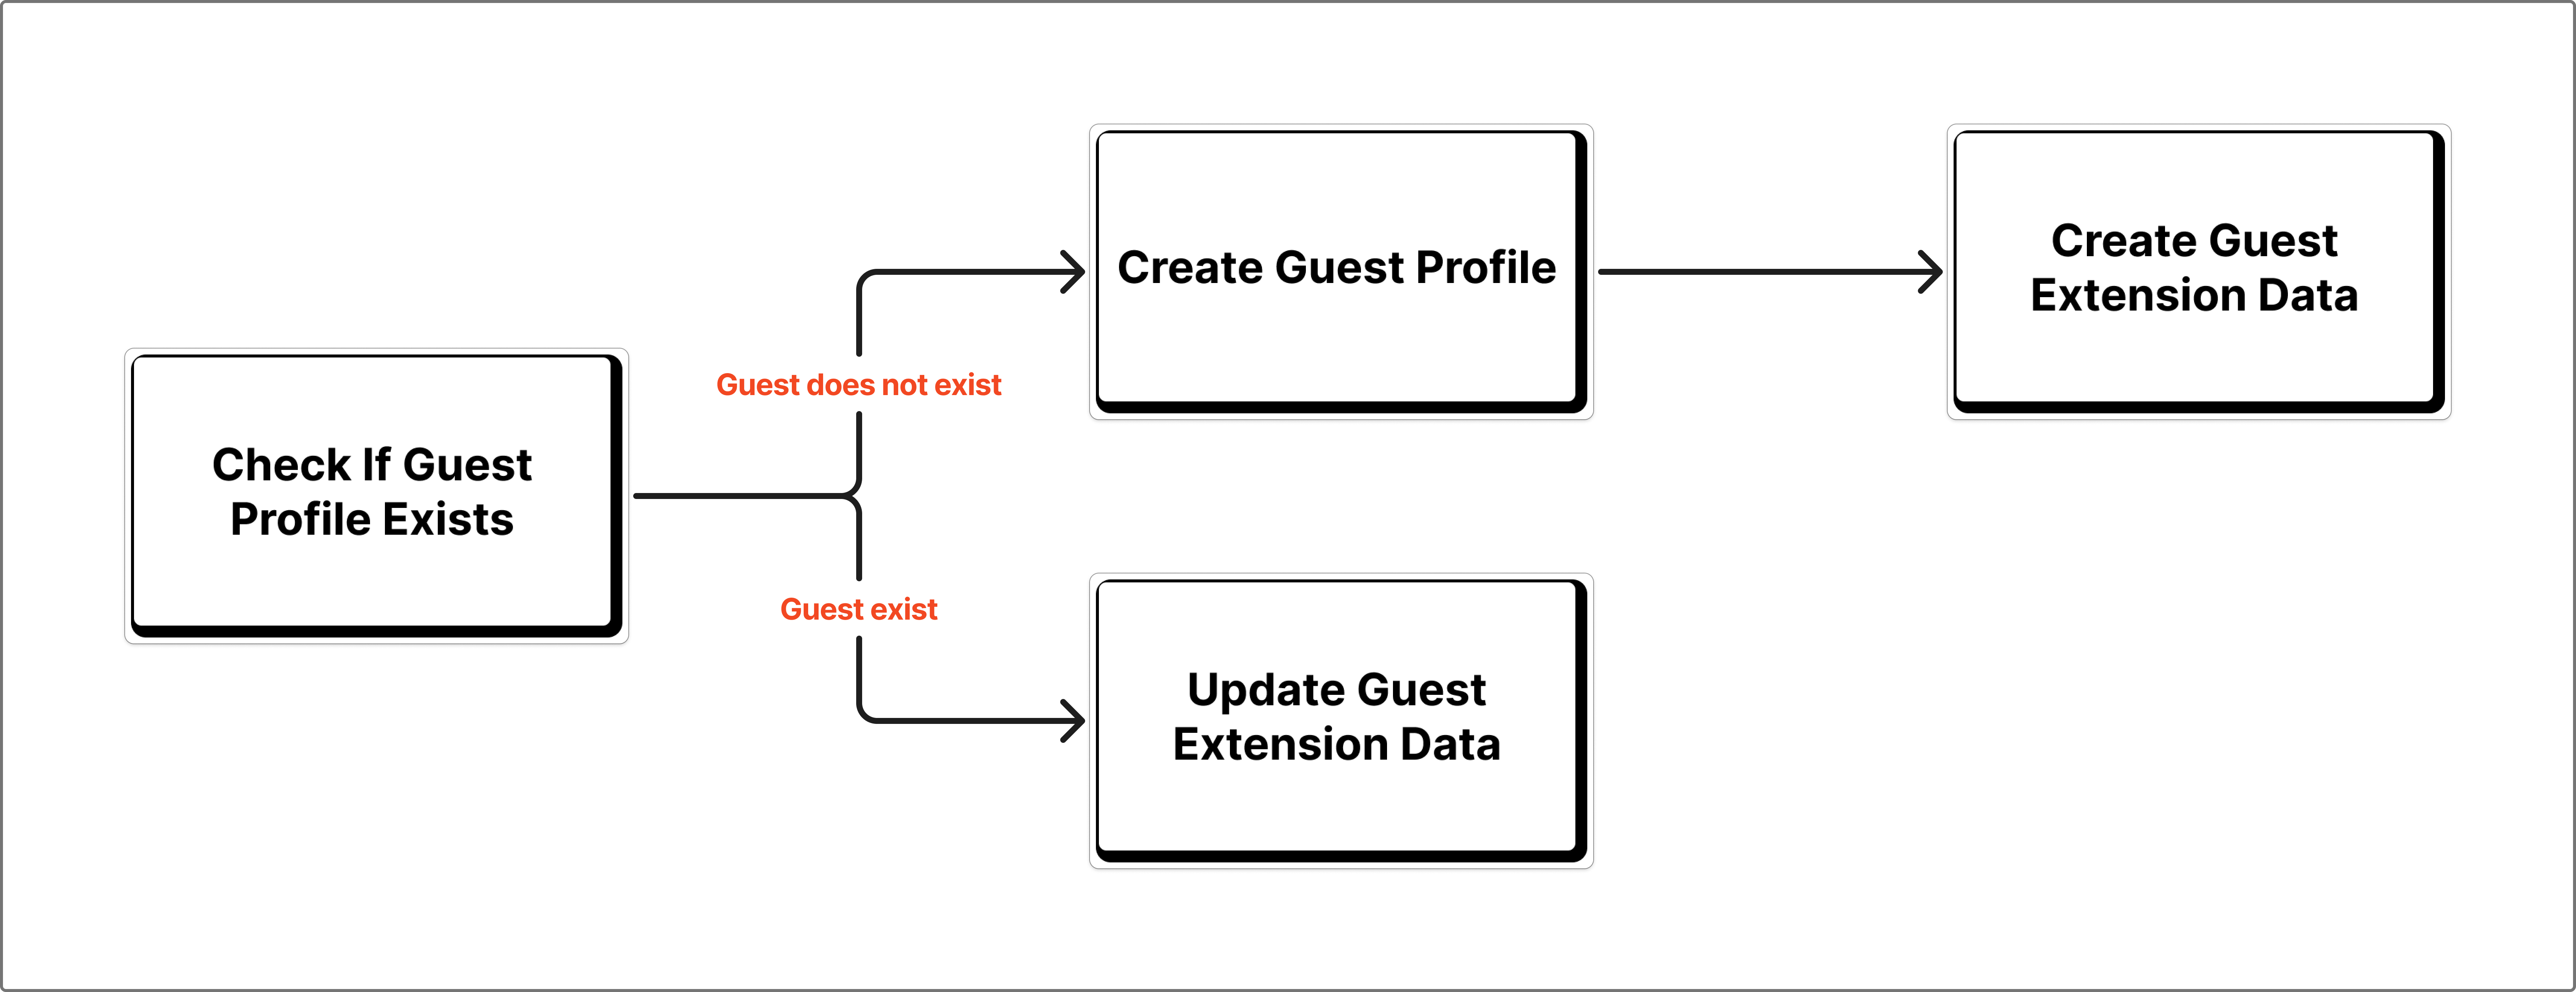
For the rest of the serverless function, I have a diagram below that will help understand how the code should be structured.
To interact with the Sitecore CDP REST APIs, you will need to authenticate your requests. This typically involves using a Client Key and an API Token. Here’s how to locate them:
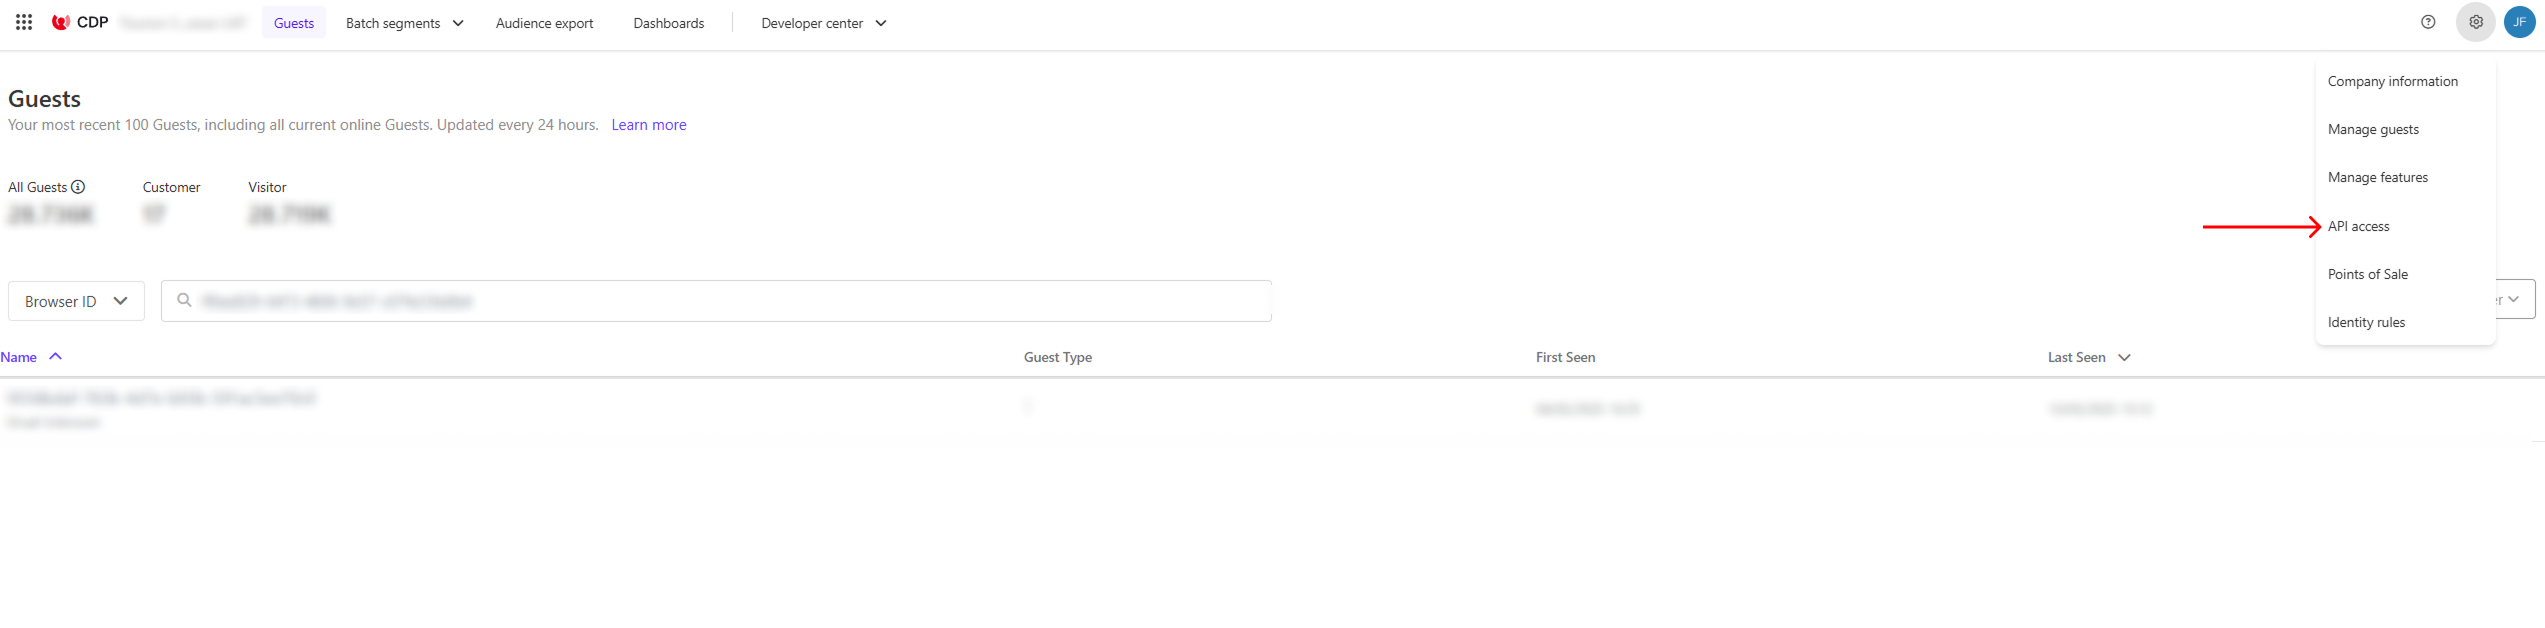
On the API access page, you will find your Client Key and API Token, similar to the screenshot below.
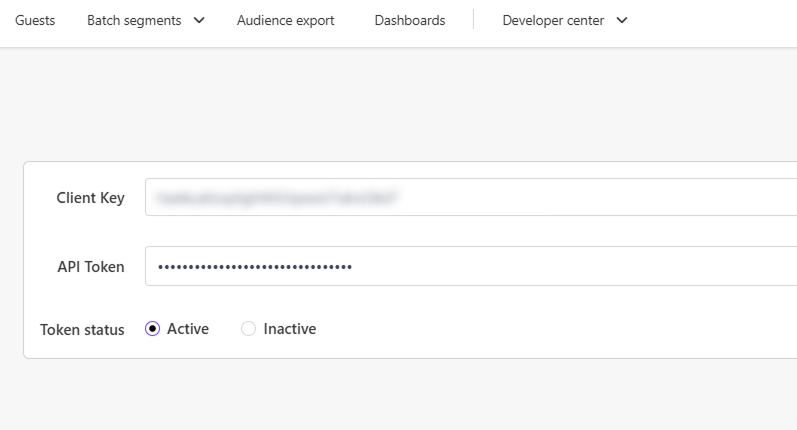
It is highly recommended to store these sensitive credentials securely as environment variables rather than hardcoding them. We will use these environment variables in our serverless function examples.
For the upcoming code samples, we will assume these credentials have been set as environment variables named CLIENT_KEY and API_TOKEN.
Now that we have the necessary credentials, let’s walk through how to use them within a serverless function. The credentials variable is reused across multiple endpoints and acts as a common Authorization Header when interacting with Sitecore CDP API endpoints.
const username = process.env.CLIENT_KEY
const password = process.env.API_TOKEN

// This will be added in the Authorization Header
const credentials = btoa(`${username}:${password}`);
Once this is set, your handler function should follow a clean and modular structure. Below is a simple example:
type CDPGuestResponse = {
  items: {
    ref: string;
  }[];
};

export default async function handler(req: NextApiRequest, res: NextApiResponse<ResponseData>) {
  if (req.method === 'POST') {
    try {
      // Data passed and will be collected in CDP
      const { firstName, lastName, email, areaOfInterest }: RequestBody = req.body;
      // Information we have added from CDP for Authentication
      const username = process.env.CLIENT_KEY
      const password = process.env.API_TOKEN

      // This will be added in the Authorization Header
      const credentials = btoa(`${username}:${password}`);

      let firstResponseData: CDPResponse | null = null;
      let guestRef: string | undefined;

      // Check if Guest already exists
      const existingGuest = await checkGuestExists(credentials, email);

      if (existingGuest.items.length === 0) {
        // Create Guest if they don't exist
        firstResponseData = await createGuest(credentials, firstName, lastName, email);
        guestRef = firstResponseData?.ref;
        // Add extension data
        await addGuestInterest(credentials, guestRef, areaOfInterest);
      } else {
        // If Guest exists, update extension data
        guestRef = existingGuest.items[0].ref;
        await updateGuestInterest(credentials, guestRef, areaOfInterest);
      }

      res.status(200).json({
        message: 'Successfully created guest in CDP',
      });
    } catch (error) {
      console.error('CDP API Error:', error);
      res.status(500).json({
        error: 'Internal server error',
        message: error instanceof Error ? error.message : 'Unknown error occurred',
      });
    }
  } else {
    res.setHeader('Allow', ['POST']);
    res.status(405).end(`Method ${req.method} Not Allowed`);
  }
}
The code doesn’t contain everything, I’ve divided some of the parts into separate function to help keep everything readable and organized. This structure also aligns with the ideal workflow for integrating Sitecore CDP. Note that Sitecore CDP doesn’t enforce strict uniqueness on identifiers, incorrectly implementing guest data may create multiple records instead of maintaining existing ones.
Refer to the official Sitecore CDP API documentation to tailor additional functions.
The first key function checks whether a guest already exists in Sitecore CDP.
GET request to the https://api-engage-us.sitecorecloud.io/v2.1/guestsBelow is the sample code for checkGuestExists. With this we can proceed with knowing whether we create a new guest data or modify the existing one.
const checkGuestExists = async (credentials: string, email: string): Promise<CDPGuestResponse> => {
  const query = new URLSearchParams({
    'identifiers.provider': 'email',
    'identifiers.id': email,
    'expand': 'true',
  }).toString();

  const formattedGuestAPIUrl = `https://api-engage-us.sitecorecloud.io/v2.1/guests?${query}`;
  const response = await fetch(formattedGuestAPIUrl, {
    method: 'GET',
    headers: {
      'Content-Type': 'application/json',
      Authorization: `Basic ${credentials}`,
    },
  });

  if (!response.ok) {
    const errorData = await response.json();
    throw new Error(errorData.message || 'Error creating guest');
  }

  return response.json();
};
If the guest does not exist, use the createGuest and addGuestInterest functions.
if (existingGuest.items.length === 0) {
     // Create Guest if they don't exist
     firstResponseData = await createGuest(credentials, firstName, lastName, email);
     guestRef = firstResponseData?.ref;

     // Add extension data
     await addGuestInterest(credentials, guestRef, areaOfInterest);
}
From the code above, let’s start with what createGuest function looks like. This function should satisfy the criteria below.
POST request to the Sitecore CDP guests endpoint.guestType, channel, and type.Below is the sample code we have to satisfy the endpoint’s requirements and what we’ll be using for addGuestInterest function.
const createGuest = async (
  credentials: string,
  firstName: string,
  lastName: string,
  email: string
): Promise<CDPResponse> => {
  const response = await fetch("https://api-engage-us.sitecorecloud.io/v2.1/guests", {
    method: 'POST',
    headers: {
      'Content-Type': 'application/json',
      Authorization: `Basic ${credentials}`,
    },
    body: JSON.stringify({
      guestType: 'customer',
      channel: 'WEB',
      type: 'IDENTITY',
      identifiers: [
        {
          provider: 'email',
          id: email,
        },
      ],
      firstName,
      lastName,
    }),
  });

  if (!response.ok) {
    const errorData = await response.json();
    throw new Error(errorData.message || 'Error creating guest');
  }

  return response.json();
};
After creating a guest, you can attach additional metadata such as the user’s area of interest.
const addGuestInterest = async (credentials: string, guestRef: string, areaOfInterest: string) => {
  const { extensionAPIUrl } = getEnvironmentVariables();
  const formattedGuestRef = extensionAPIUrl.replace('{guestRef}', guestRef);
  const response = await fetch(formattedGuestRef, {
    method: 'POST',
    headers: {
      'Content-Type': 'application/json',
      Authorization: `Basic ${credentials}`,
    },
    body: JSON.stringify({
      name: 'ext',
      areaOfInterest,
    }),
  });

  if (!response.ok) {
    const errorData = await response.json();
    throw new Error(`Error updating guest interests: ${JSON.stringify(errorData)}`);
  }
};
There you have it, we have entered a new guest and have added some extension data for that guest. I’ll walk you through the next step of updating an Extension Data when the guest already is in the system.
If the guest already exists, update the extension data instead of creating a new entry.
if (existingGuest.items.length === 0) {
    ...
} else {
    // If Guest exists, update extension data
    guestRef = existingGuest.items[0].ref;
    await updateGuestInterest(credentials, guestRef, areaOfInterest);
}
The function will look similar to when we created a new Guest Extension data.
const updateGuestInterests = async (
  credentials: string,
  guestRef: string,
  areaOfInterest: string
) => {
  const { extensionAPIUrl } = getEnvironmentVariables();
  const formattedGuestRef = extensionAPIUrl.replace('{guestRef}', guestRef) + '/ext';
  const response = await fetch(formattedGuestRef, {
    method: 'PUT',
    headers: {
      'Content-Type': 'application/json',
      Authorization: `Basic ${credentials}`,
    },
    body: JSON.stringify({
      areaOfInterest,
    }),
  });

  if (!response.ok) {
    const errorData = await response.json();
    throw new Error(`Error updating guest interests: ${JSON.stringify(errorData)}`);
  }
};
Once your API integration is complete, you can verify guest records directly in the Sitecore CDP Platform.
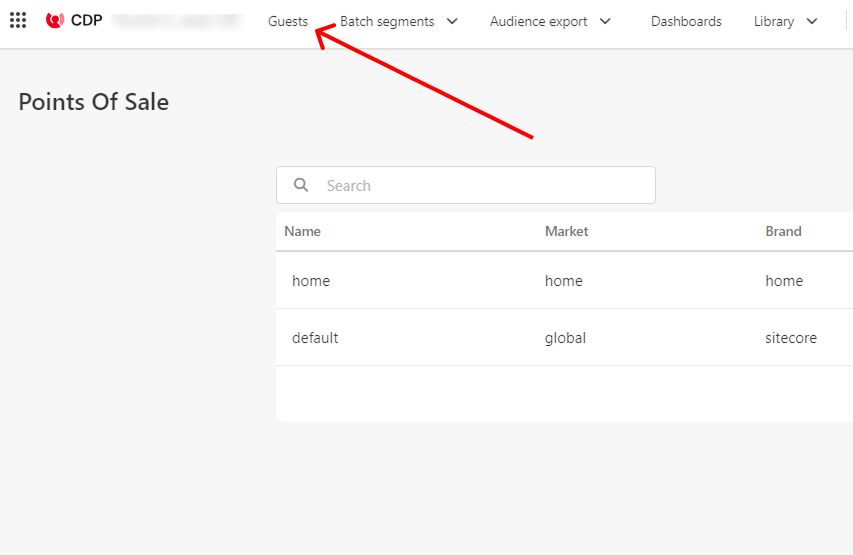
To find your entry more easily:
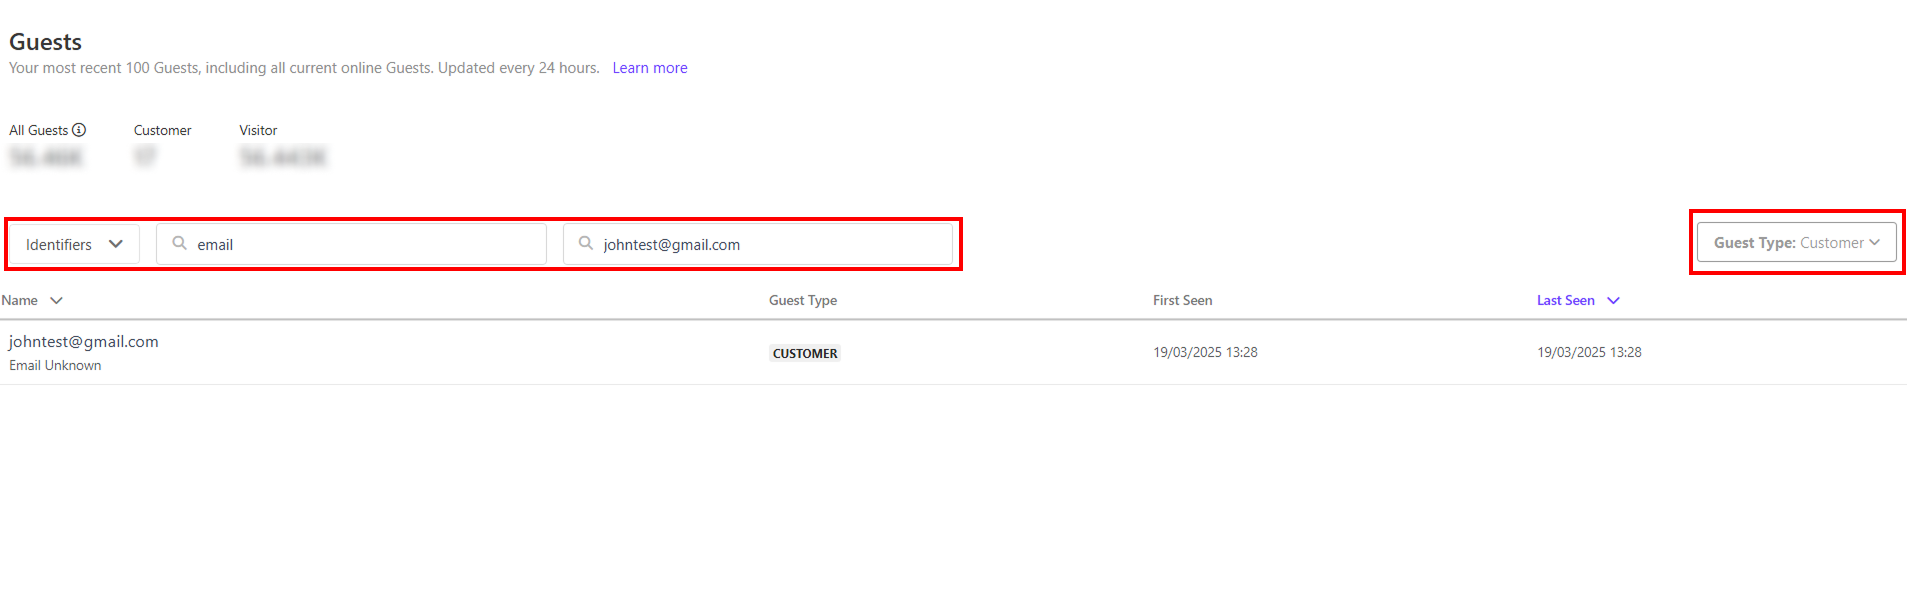
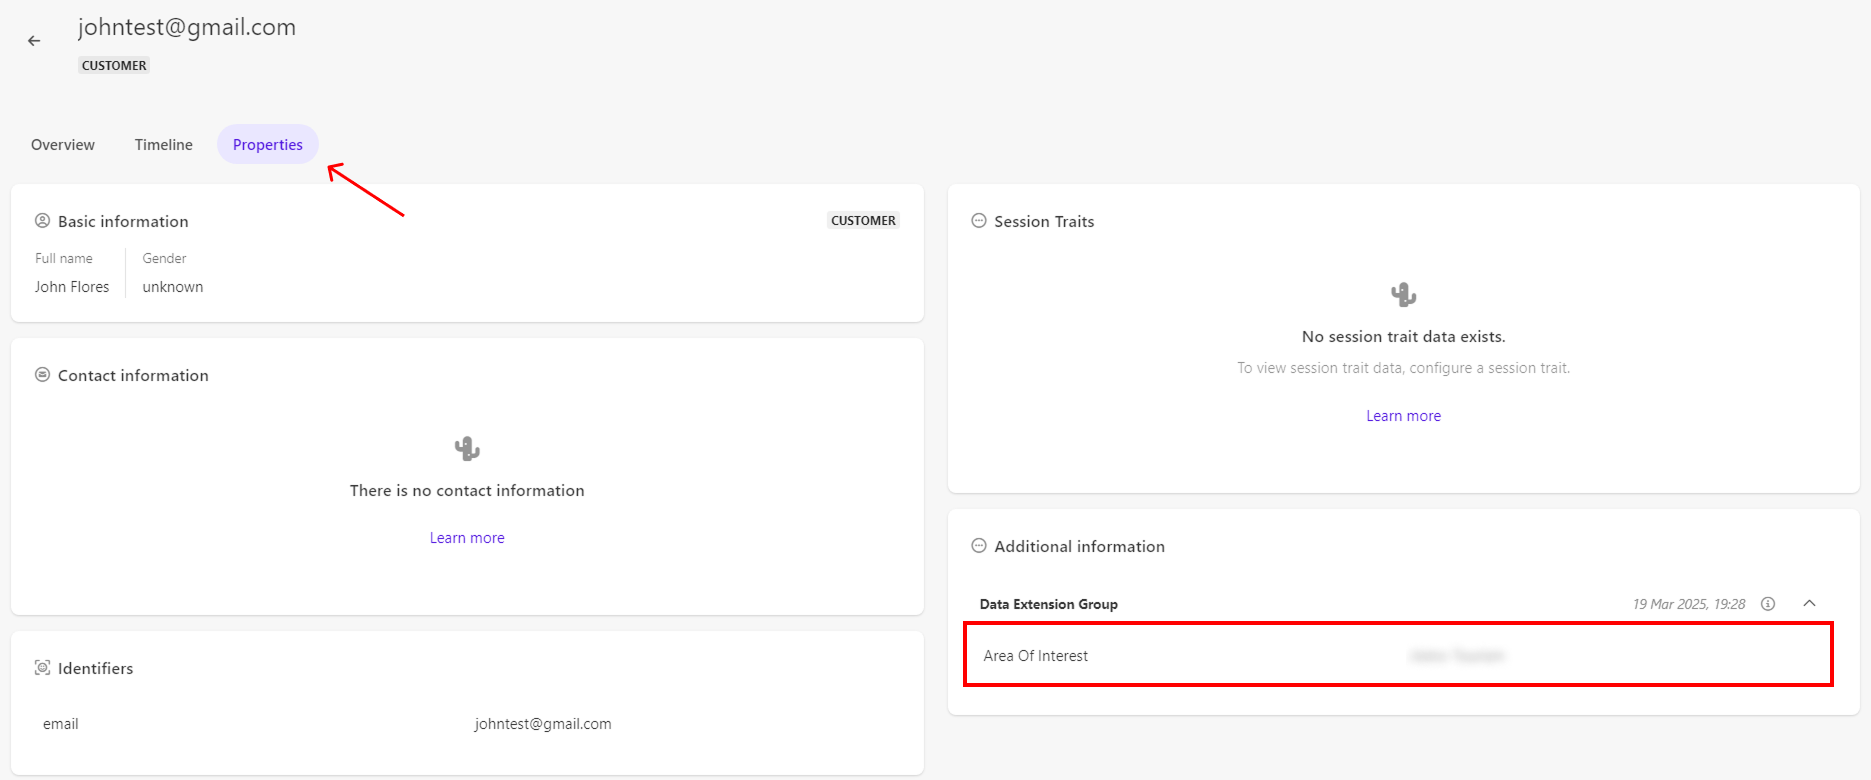
If the guest was created successfully, the entry should appear with a recent timestamp. Next, we can open the data and view the additional information we pushed.
Click on the row and you’ll navigate to that Guest’s data. Click on the Properties tab and you’ll find the Area of Interest data inside the Additional Information block.
 Unlocking More of Sitecore CDP
As traffic grows, so does the value of the data you collect. Sitecore CDP is a powerful platform for personalizing experiences and capturing meaningful guest insights. Migrating and dropping your old analytics isn’t always the goal, you can easily complement different analytic data and help make your readings more accurate.
Stay tuned for more Sitecore CDP blogs coming your way, I’ll continue to work and discover ways on working with Sitecore CDP and I am eager to share this knowledge with everyone.

