Reading time: 8 min read
Sitecore XP 10 Forms Custom Form Element with Multiple Fields
Here’s a comprehensive walkthrough on how to create a custom form element with multiple fields.
Start typing to search...
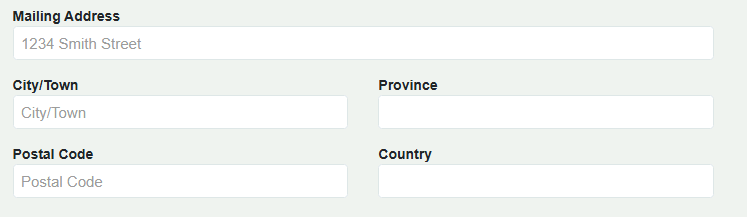
In this blog, we will be making a custom address form element as an example. It will contain fields for address, city/town, province/state, postal code, and country.
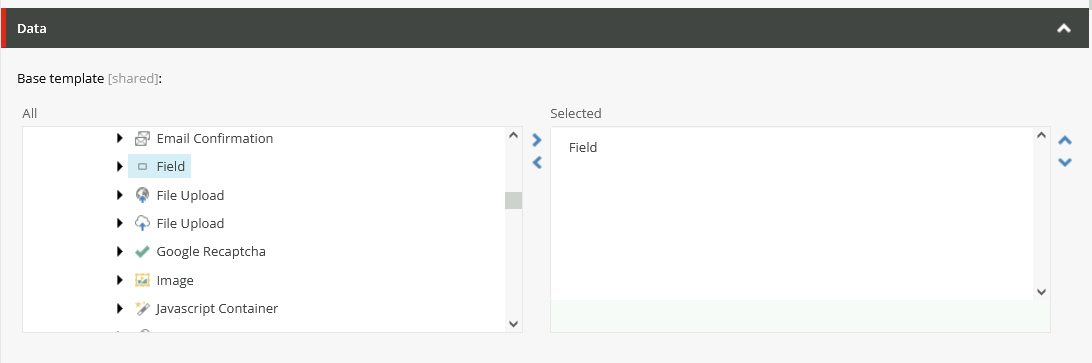
/sitecore/templates/System/Forms/Fields and insert a new template named Address Complete.After it’s created, switch over to the Content tab. There should be a Data section with a Base template field. Add Templates/System/Forms/Fields/Field.
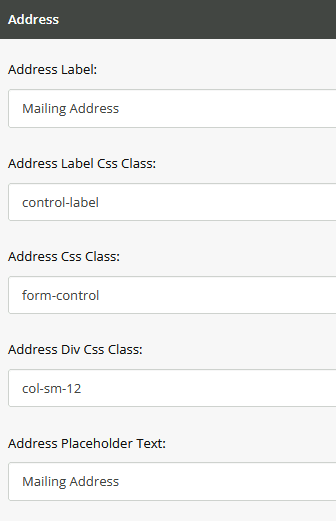
Go back to the Builder tab and add a Section named Address. Add the following fields with the Type Single-Line Text.
Add a Section named City and the following fields. The Field Name is the important field, but we will get to that later.
City Label, City Label Css Class, City Css Class, City Div Css Class, City Placeholder Text, City Field Name
Add a section named Province
Province Label, Province Label Css Class, Province Css Class, Province Div Css Class, Province Field Name
Add a section named Postal Code
Postal Code Label, Postal Code Label Css Class, Postal Code Css Class, Postal Code Div Css Class, Postal Code Placeholder Text, Postal Code Field Name
And finally, a section named
Country Label, Country Label Css Class, Country Css Class, Country Div Css Class, Country Field Name
Now to go the Builder Options ribbon at the top and add Standard values. Without standard values, you will not be able to add the element inside form builder. You can fill out the Standard values however you want. I did something simple like this:
Now it’s time to go into the code. In Visual Studio, create a new class named AddressCompleteViewModel.cs . Here’s what mine looks like with just the Address fields included to save space. Please read the comments for more details.
using Sitecore;
using Sitecore.Data.Items;
using Sitecore.ExperienceForms.Mvc.Models.Fields;
using System;

namespace MyProject.Feature.Sitecore.Forms.Fields
{
    [Serializable]
    public class AddressCompleteViewModel : StringInputViewModel
    {
        public string ErrorMessage { get; set; }

        //Address fields. Copy the name of the fields in the Address Complete template, but remove the spaces; it increases readability
        public string AddressLabelCssClass { get; set; }
        public string AddressCssClass { get; set; }
        public string AddressDivCssClass { get; set; }
        public string AddressPlaceholderText { get; set; }

        // add the rest of the fields here

        // Create an override for InitItemProperties
        protected override void InitItemProperties(Item item)
        {
            // on form load
            base.InitItemProperties(item);

            // Initialize the address fields. They will be the Standard values at first
            AddressLabel = StringUtil.GetString(item.Fields["Address Label"]);
            AddressLabelCssClass = StringUtil.GetString(item.Fields["Address Label Css Class"]);
            AddressCssClass = StringUtil.GetString(item.Fields["Address Css Class"]);
            AddressDivCssClass = StringUtil.GetString(item.Fields["Address Div Css Class"]);
            AddressPlaceholderText = StringUtil.GetString(item.Fields["Address Placeholder Text"]);

            // add the rest of the fields here
        }

                // override UpdateItemFields
        protected override void UpdateItemFields(Item item)
        {
            // upon save
            base.UpdateItemFields(item);

            // Save updated fields
            item.Fields["Address Label"]?.SetValue(AddressLabel , true);
            item.Fields["Address Label Css Class"]?.SetValue(AddressLabelCssClass, true);
            item.Fields["Address Css Class"]?.SetValue(AddressCssClass, true);
            item.Fields["Address Div Css Class"]?.SetValue(AddressDivCssClass, true);
            item.Fields["Address Placeholder Text"]?.SetValue(AddressPlaceholderText, true);

                        // add the rest of the fields here
                    }

    }
}
Next, let’s create a view file to go with our new class. I’ve named it AddressComplete.cshtml. The default location for Sitecore Forms views are stored inside website/Views/Formbuilder/FieldTemplates. I stored mine inside website/Views/Formbuilder/Custom.
 @using Sitecore.ExperienceForms.Mvc.Html
@model MyProject.Feature.Sitecore.Forms.Fields.AddressCompleteViewModel

<div class="@Model.CssClass">
    <div class="@Model.AddressDivCssClass">
        <label for="@Html.IdFor(m => Model.Value)" class="@Model.AddressLabelCssClass">@Model.AddressLabel</label>
        <input id="@Html.IdFor(m => Model.Value)" name="@Html.NameFor(m => Model.Value)" class="@Model.AddressCssClass" type="text" value="@Model.Value" placeholder="@Model.PlaceholderText" data-sc-field-name="@Model.Name" />
    </div>
    <div class="@Model.CityDivCssClass">
        <label class="@Model.CityLabelCssClass">@Model.CityLabel</label>
        <input id="@Html.IdFor(m => Model.CityValue)" name="@Html.NameFor(m => Model.CityValue)" value="@Model.CityValue" type="text" class="@Model.CityCssClass" placeholder="@Model.CityPlaceholderText" data-sc-field-name="@Model.CityFieldName" />
    </div>
    <div class="@Model.ProvinceDivCssClass">
        <label class="@Model.ProvinceLabelCssClass">@Model.ProvinceLabel</label>
        <input id="@Html.IdFor(m => Model.ProvinceValue)" name="@Html.NameFor(m => Model.ProvinceValue)" value="@Model.ProvinceValue" type="text" class="@Model.ProvinceCssClass" data-sc-tracking="@Model.IsTrackingEnabled" data-sc-field-name="@Model.ProvinceFieldName" />
    </div>
    <div class="@Model.PostalCodeDivCssClass">
        <label class="@Model.PostalCodeLabelCssClass">@Model.PostalCodeLabel</label>
        <input id="@Html.IdFor(m => Model.PostalCodeValue)" name="@Html.NameFor(m => Model.PostalCodeValue)" value="@Model.PostalCodeValue" type="text" class="@Model.PostalCodeCssClass" placeholder="@Model.PostalCodePlaceholderText" data-sc-tracking="@Model.IsTrackingEnabled" data-sc-field-name="@Model.PostalCodeFieldName" />
    </div>
    <div class="@Model.CountryDivCssClass">
        <label class="@Model.CountryLabelCssClass">@Model.CountryLabel</label>
        <input id="@Html.IdFor(m => Model.CountryValue)" name="@Html.NameFor(m => Model.CountryValue)" value="@Model.CountryValue" type="text" class="@Model.CountryCssClass" data-sc-tracking="@Model.IsTrackingEnabled" data-sc-field-name="@Model.CountryFieldName" />
    </div>
</div>
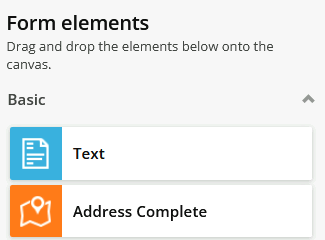
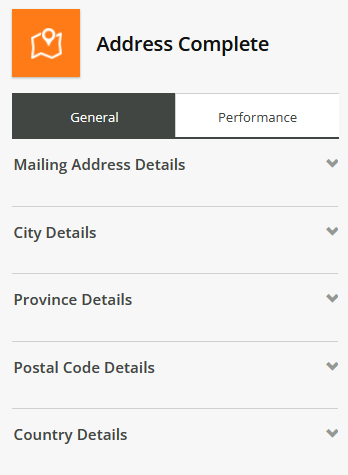
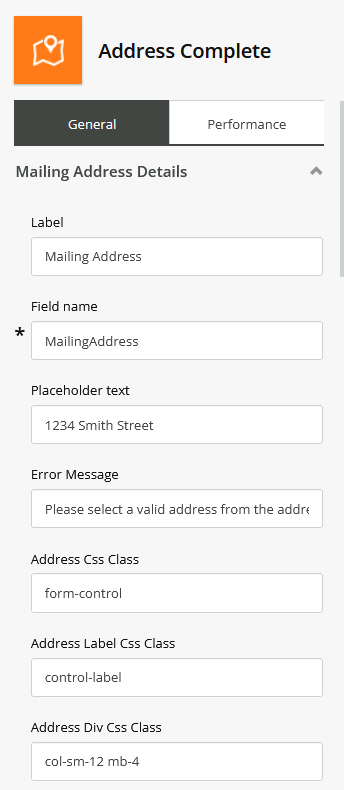
Our next goal is to create a drag and droppable element inside the Sitecore Forms Builder, as well as have editable fields. Here’s a few pictures of our end goal.
Navigate to /sitecore/client/Applications/FormsBuilder/Components/Layouts/PropertyGridForm/PageSettings/Settings . If you’re looking for it manually, FormsBuilder is actually labeled Forms.
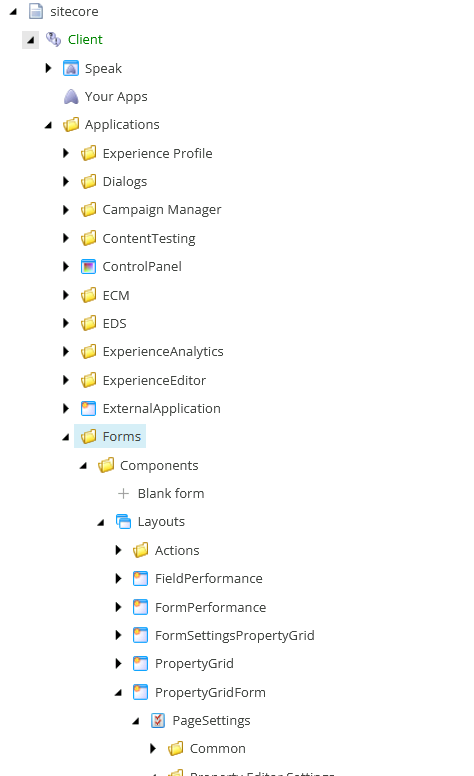
Right click on the folder, and hit Insert from Template, using /sitecore/client/Business Component Library/version 2/Layouts/Renderings/Forms/Form/Form Parameters. Name it AddressComplete, and make sure IsVisible is checked.
Right click on the new AddressComplete item and Insert from template again, this time using /sitecore/client/Applications/FormsBuilder/Common/Templates/FormSection. Add five FormSection items, naming them:
There are two fields for our new items, ConfigurationItem, and ControlDefinitions. They must all be unique. Any duplicates will have the FormsBuilder spinning and a vague error message appearing in the console.
/sitecore/client/Applications/FormsBuilder/Components/Layouts/PropertyGridForm/PageSettings/Common/Sections. Right-click and add a new folder from the template /sitecore/templates/Common/Folder named AddressComplete./sitecore/client/Business Component Library/version 2/Layouts/Renderings/Containers/Expander/Expander Parameter. As you’ve probably already guessed, name them:
sitecore/client/Applications/FormsBuilder/Components/Layouts/PropertyGridForm/PageSettings/Common/Sections/AddressComplete/AddressExpander.Create ControlDefinitions for each FormSection
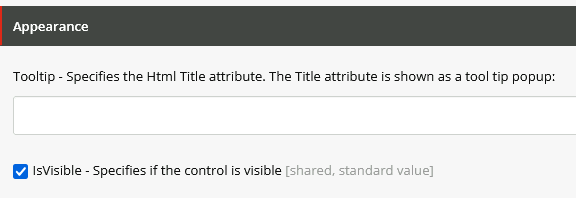
/sitecore/client/Business Component Library/version 2/Layouts/Renderings/Forms/Form/Templates/FormTextBox Parameters.Here are the Appearance settings for the items.
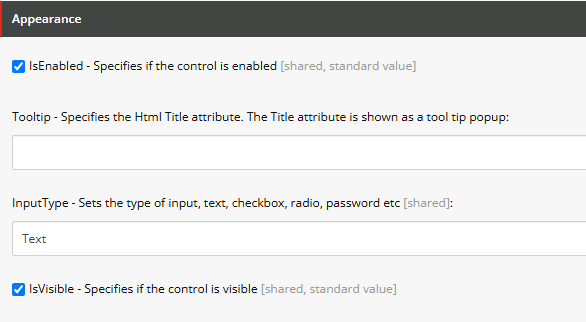
Scroll down to the Form section and fill it out like so. In the BindingConfiguration, use the same name as the template name, but in camelCase, eg. Address Div Css Class → addressDivCssClass.

Do this for Address, City, Province, PostalCode, and Country. You should end up with a tree looking like this:
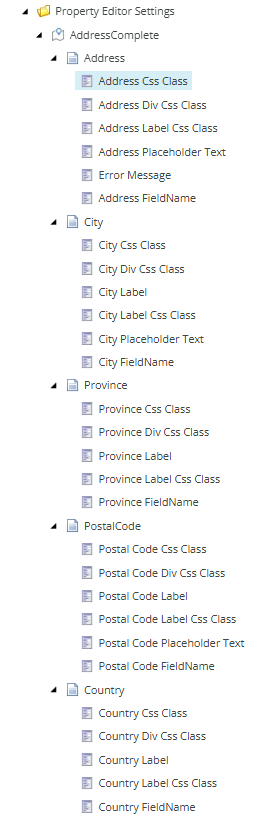
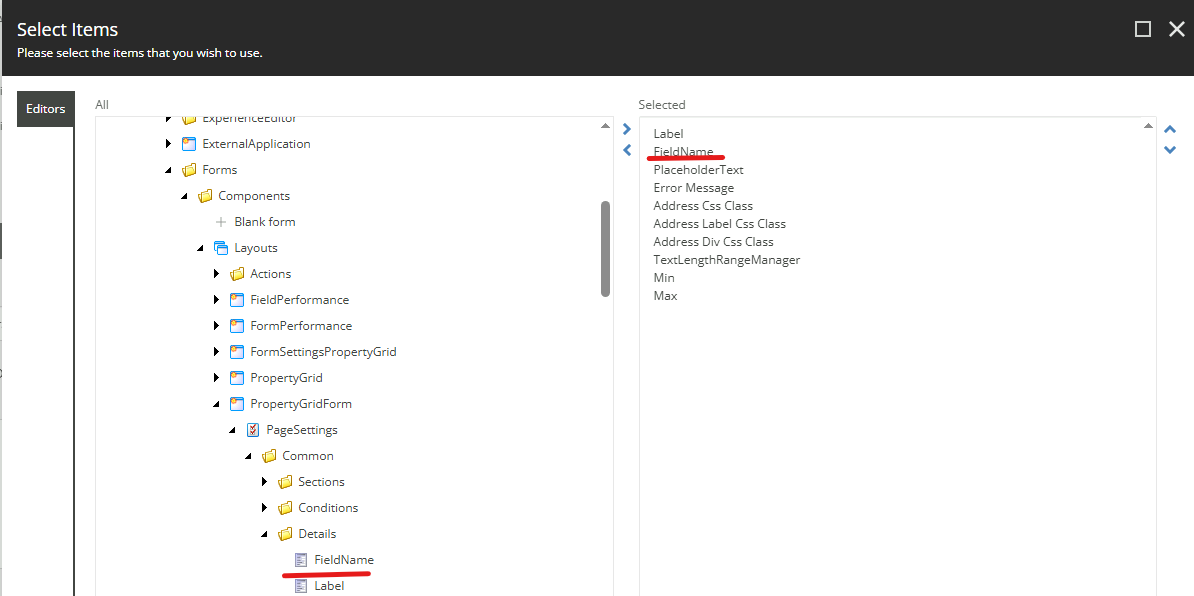
Edit the ControlDefinitions for each FormSection. Let’s do Address as it will be a little different.
We will actually be using the default Sitecore FieldName for Address, which ensures we can have multiple Address Complete elements on the form (as long as the FieldName is unique). You can find FieldName under sitecore/client/formsbuilder/components/layouts/PropertyGridForm/PageSettings/Common/Details/FieldName.
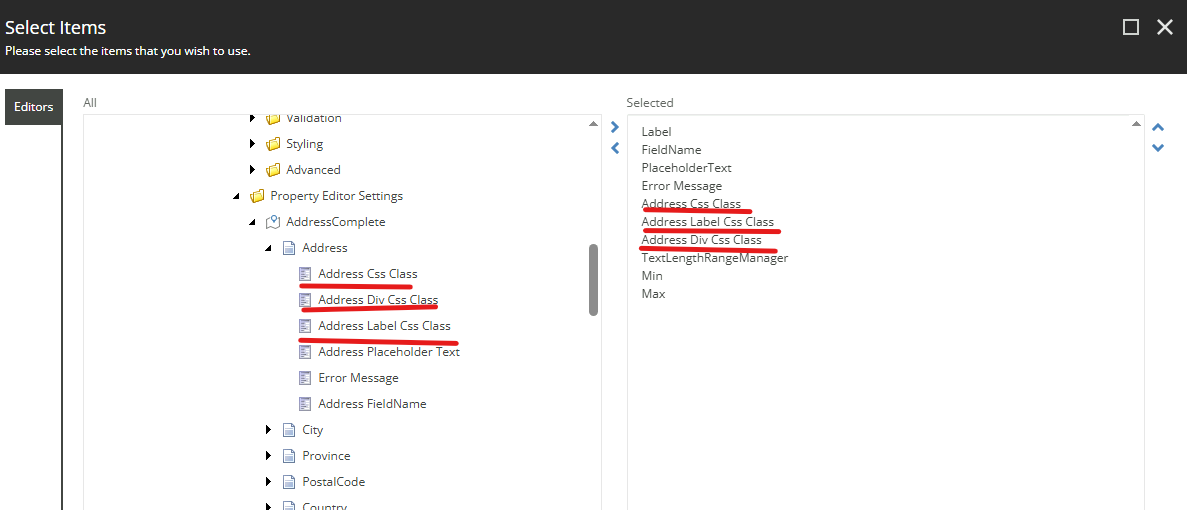
I used Sitecore’s default label, but you can use the custom Address Label field we created.
The rest of the items can be found under the FormSection we just created. Ignore the extra items I’ve added for testing.
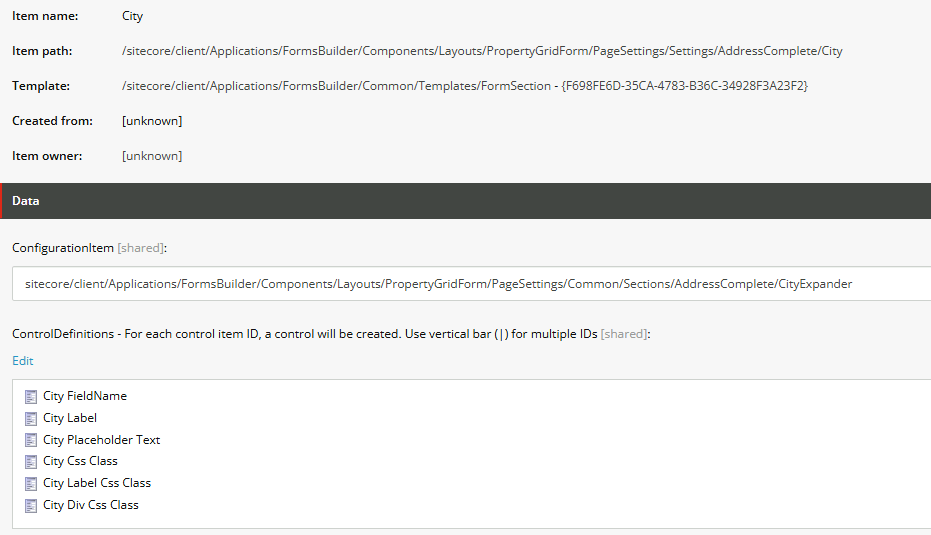
Now do this for Country, City, Province, and PostalCode as well. For example, City should end up looking like this:
/sitecore/system/Settings/Forms/Field Types/Basic./sitecore/templates/System/Forms/Field Type.
MyProject.Feature.Sitecore.Forms.Fields.AddressCompleteViewModel, MyProject.Feature.Sitecore.Property Editor Settings/AddressComplete.Fields/Address Complete.OfficeWhite/32x32/map_location2.png because it looks like a map. This will be the icon for the Address Complete element in the Forms Builder.And that is it! Open up the Forms Builder and you should see the Address Complete element under Form elements.
Drag and drop it into your new form, and start editing. Here’s what mine looks like:

Here’s a few of my CSS classes. I used Bootstrap
And here’s what it looks like after I’ve published it:
Thank you for reading my walkthrough. I hope it helped!