Reading time: 6 min read
Sitecore XM Cloud: Creating a FEaaS Component
Learn how to create your first XM Cloud FEaaS component, also known as a no-code component.
Start typing to search...
Front-End as a Service (FEaaS) components, or no-code components, are built using XM Cloud’s user interface. It allows non-technical content authors to create reusable components to design web pages. This blog post will teach you how to create one.
This tutorial is on Sitecore JSS version 22.1.3. While FEaaS was added to JSS as early as 21.0.6, I would upgrade to at least version 22 just to make sure there are no issues.
To check if you have FEaaS installed, check your package.json file and look for @sitecore-feaas/clientside. I currently have 0.5.17 installed.
Go to your Layout.tsx. You should have the following imports somewhere. If not, add them!
...
import Scripts from 'src/Scripts';
...
return (
    <>
        <Scripts />
    ...
);
Now check Scripts.tsx to make sure it’s importing FEAASScripts. If this file doesn’t exist, add it under your src folder.
...
import FEAASScripts from 'components/FEAASScripts';
...
const Scripts = (): JSX.Element => {
  return (
    <>
      ...
      <FEAASScripts />
        ...
    </>
  );
};
Lastly, let’s make sure we have this file. If not, copy the following file into src/components.
import Image from 'next/image';
import * as FEAAS from '@sitecore-feaas/clientside/react';
import nextConfig from 'next.config';
// Element implementations for Sitecore Component Builder can be overriden here

const FEAASScripts = (): JSX.Element => {
  // we cannot use nextjs's logic for remotePatterns matching without extra dependencies
  // so we use a limited approach for now - which will be replaced once nextjs allows to fall back to unoptimized OOB
  const convertToRegex = (pattern: string) => {
    return pattern.replace('.', '\\.').replace(/\*/g, '.*');
  };

  const shouldOptimize = (src: string) => {
    if (src.startsWith('http')) {
      const url = new URL(src);
      const domains: string[] = nextConfig().images?.domains || [];
      const remotePatterns = nextConfig().images?.remotePatterns || [];
      return (
        domains.some((domain) => url.hostname === domain) ||
        remotePatterns.some(
          (pattern) =>
            pattern.protocol === url.protocol.slice(0, -1) &&
            new RegExp('^' + convertToRegex(pattern.hostname) + '$').test(url.hostname)
        )
      );
    }
    return true;
  };

  // Register next Image to be used in Component Builder.
  // Nextjs image implementation will be used when img is rendered in component from Component Builder
  FEAAS.setElementImplementation('img', (attributes: Record<string, string>) => {
    // eslint-disable-next-line @typescript-eslint/no-unused-vars
    const { children, src, alt, ...imgAttributes } = attributes;
    return (
      <Image
        height={1920}
        width={1200}
        unoptimized={!shouldOptimize(src)}
        src={src}
        alt={alt}
        {...imgAttributes}
      />
    );
  });

  return <></>;
};

export default FEAASScripts;
Open your Sitecore Content Editor and go to your site. Open up the Presentation/Available Renderings folder. You should see one labeled FEaaS.
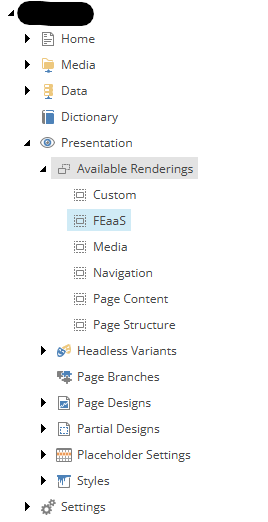
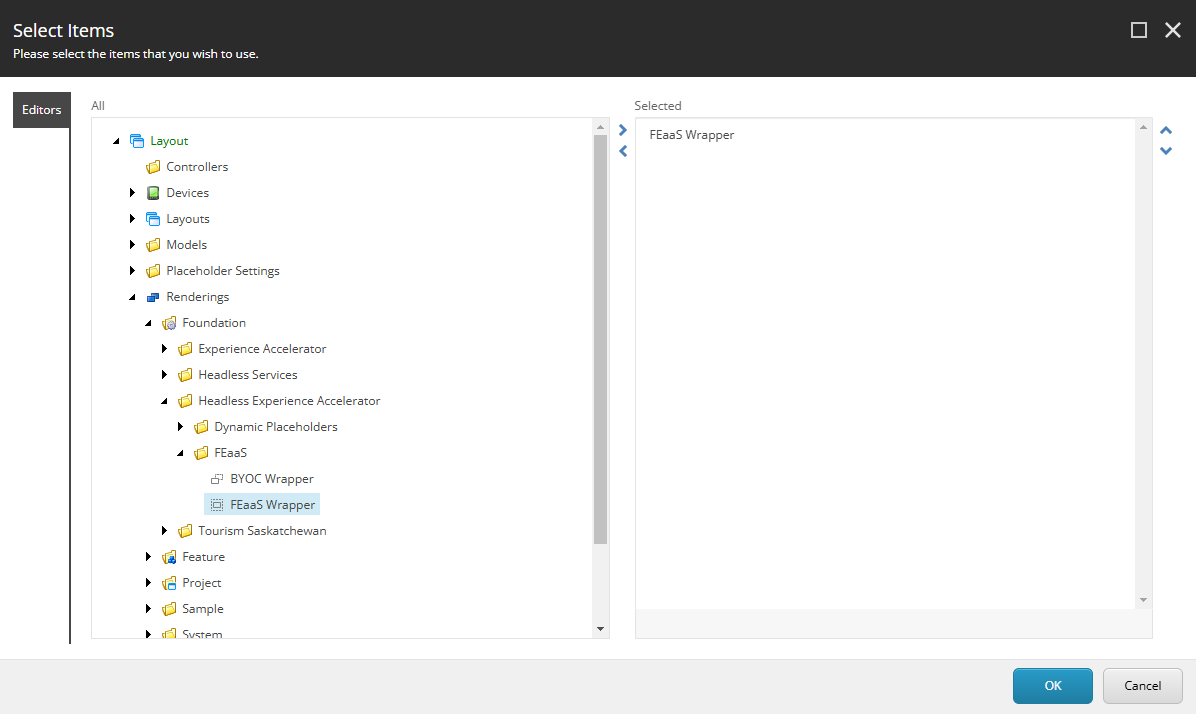
If not, add one, and add the FEaaS Wrapper rendering to the Renderings field.
It can be found inLayout/Renderings/Foundation/Headless Experience Accelerator/FEaas.
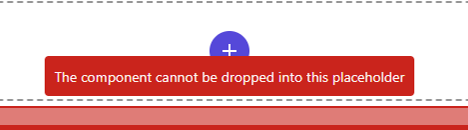
If you don’t do this step, you will see this error when trying to add your FEaaS component later on: The component cannot be dropped into this placeholder.
Open the Sitecore Cloud Portal (https://portal.sitecorecloud.io/) and do the following:
Go to your desired XM Cloud environment. Here, I’m going to staging.
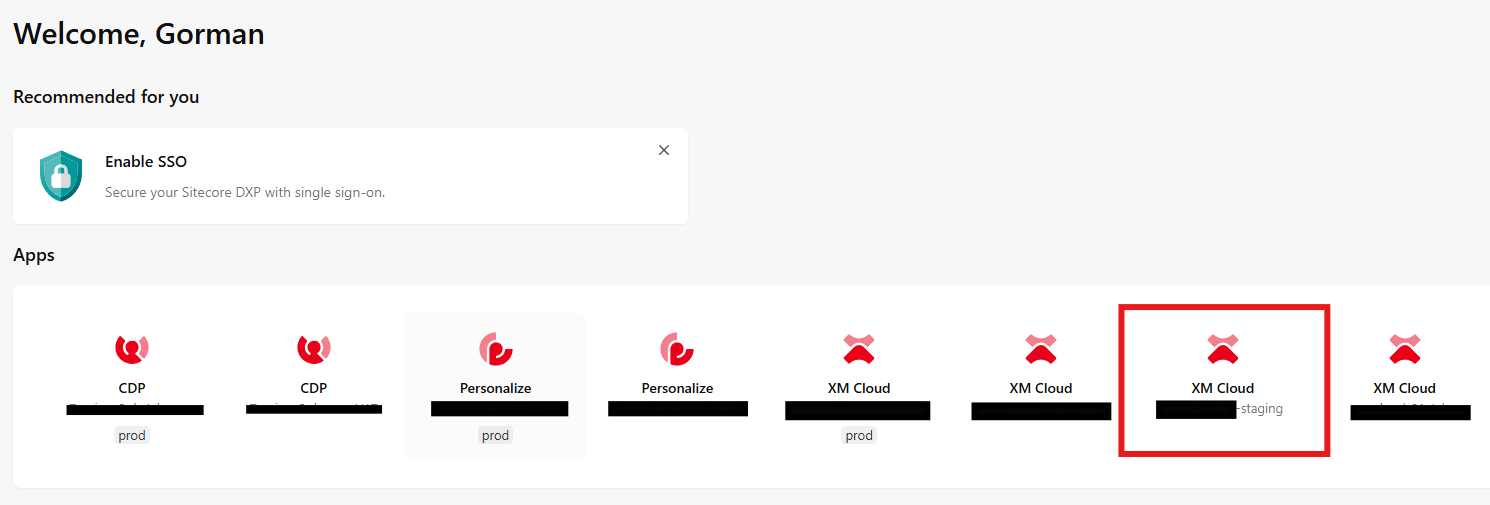
Click on Open app.

Click on Design Library in the top nav bar.
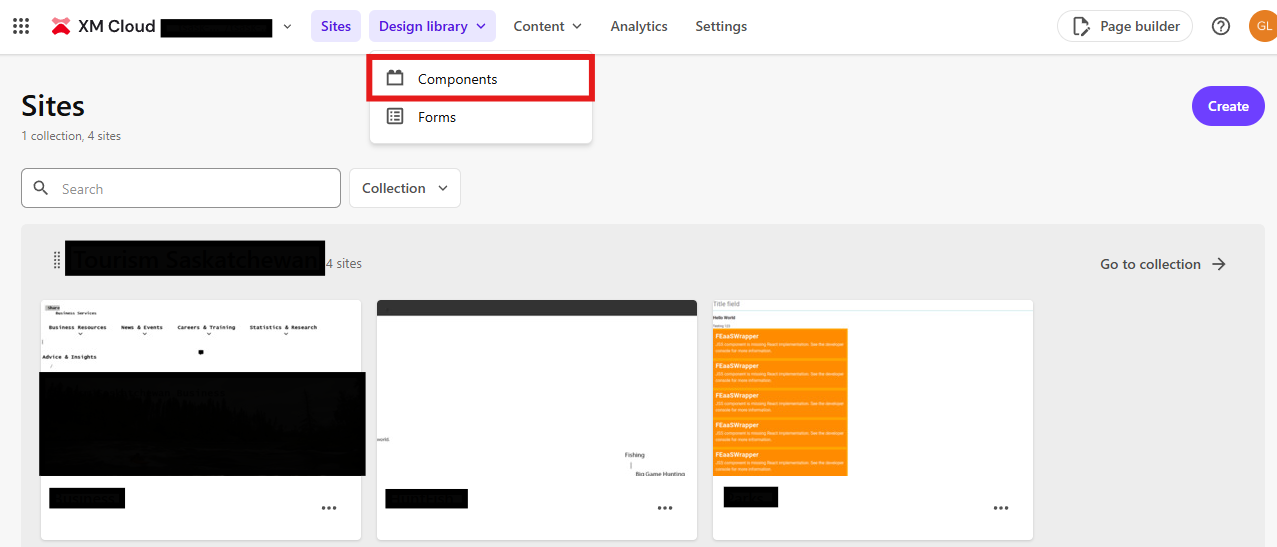
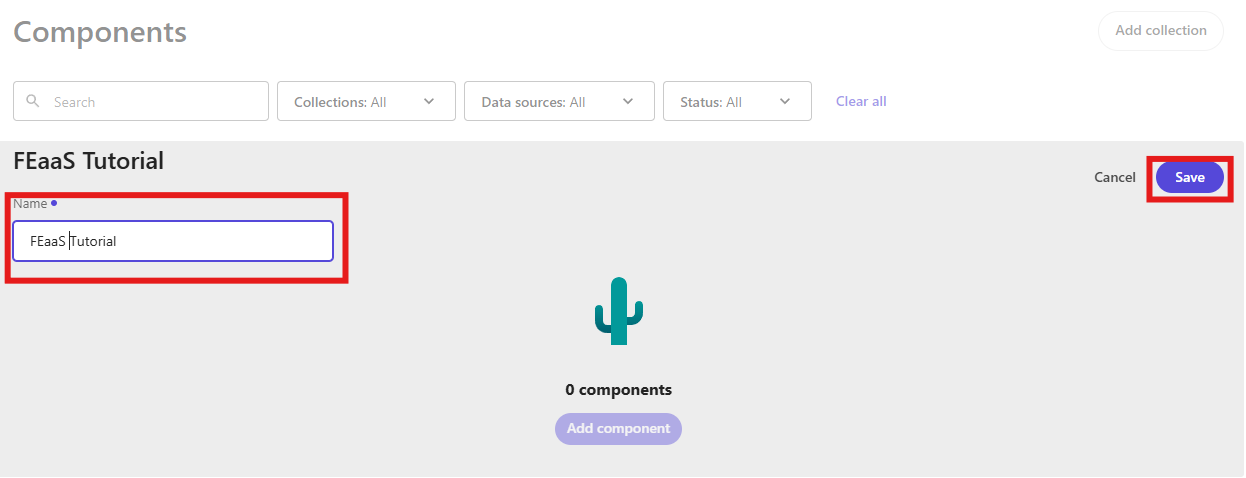
You should now be on components.sitecorecloud.io. Click Add collection in the top right.

Name it FEaaS Tutorial and press Save.
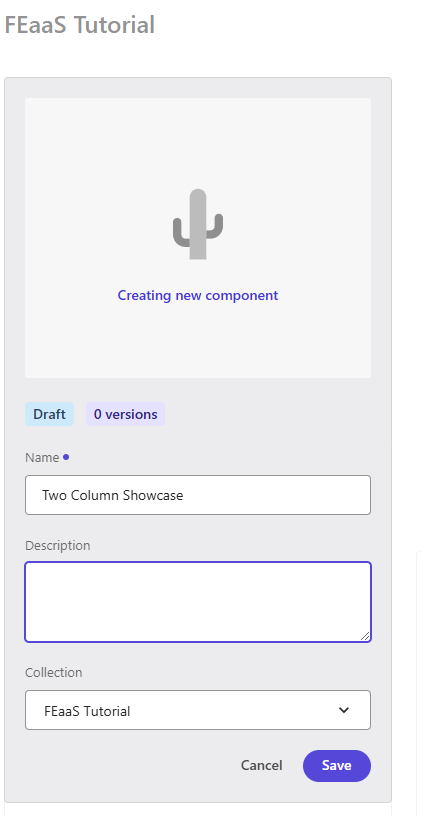
Click Add component. Name it Two Column Showcase and press Save.
Click on Click to start editing.
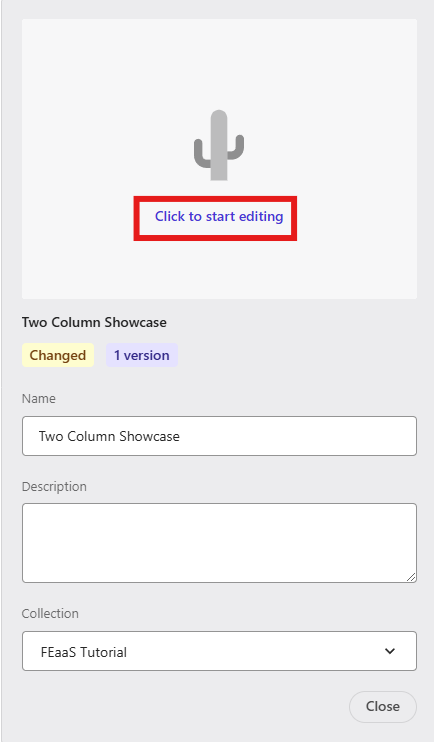
A screen should now appear, as well as a 12x5 grid.
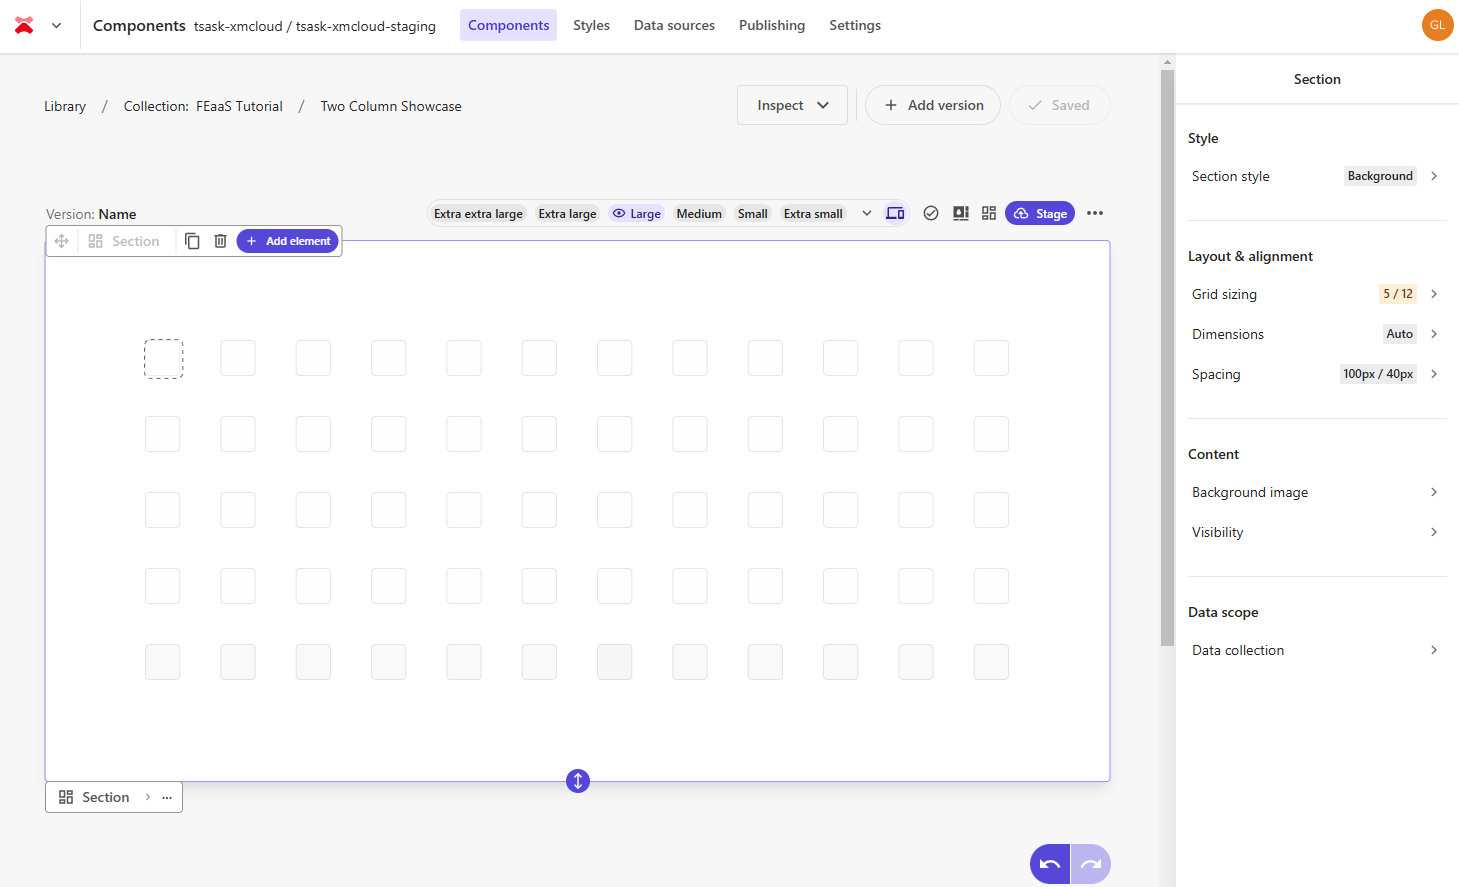
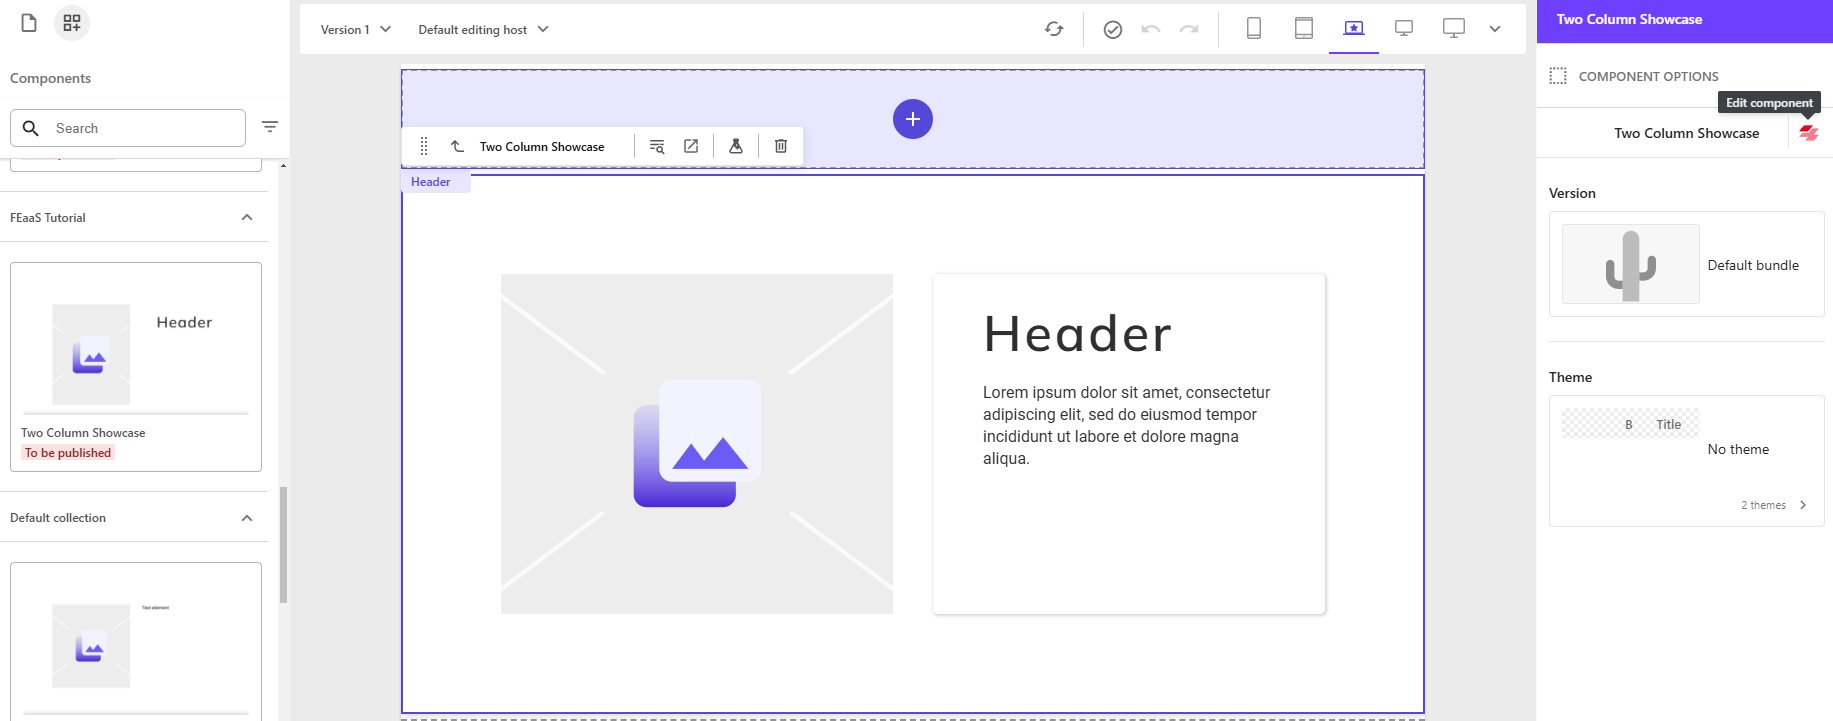
Let’s create the left column first. Click on the top left square, then drag your mouse across 6x5 squares, then select it.
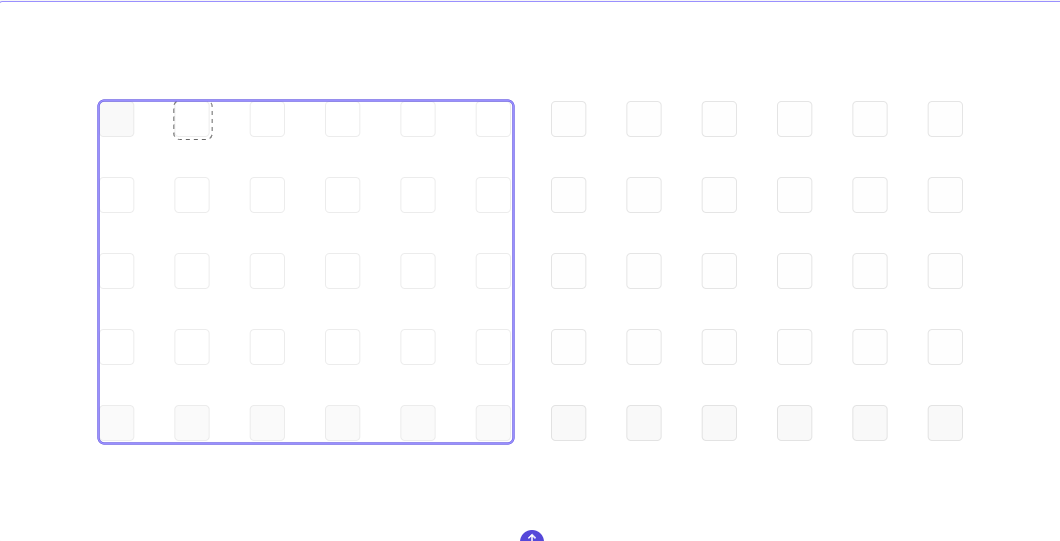
Click on Block and change it to Image.
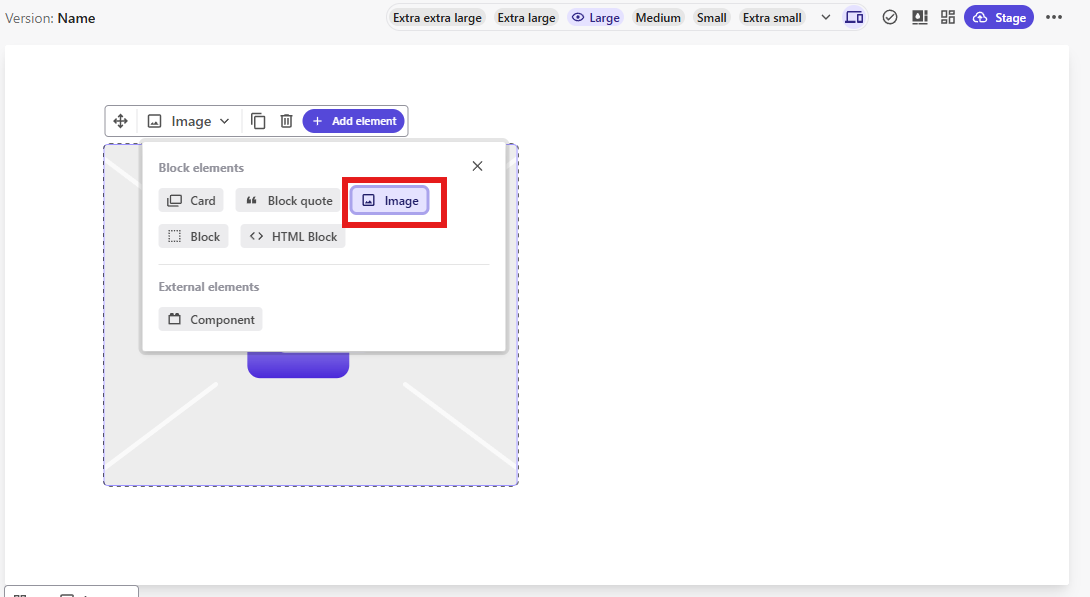
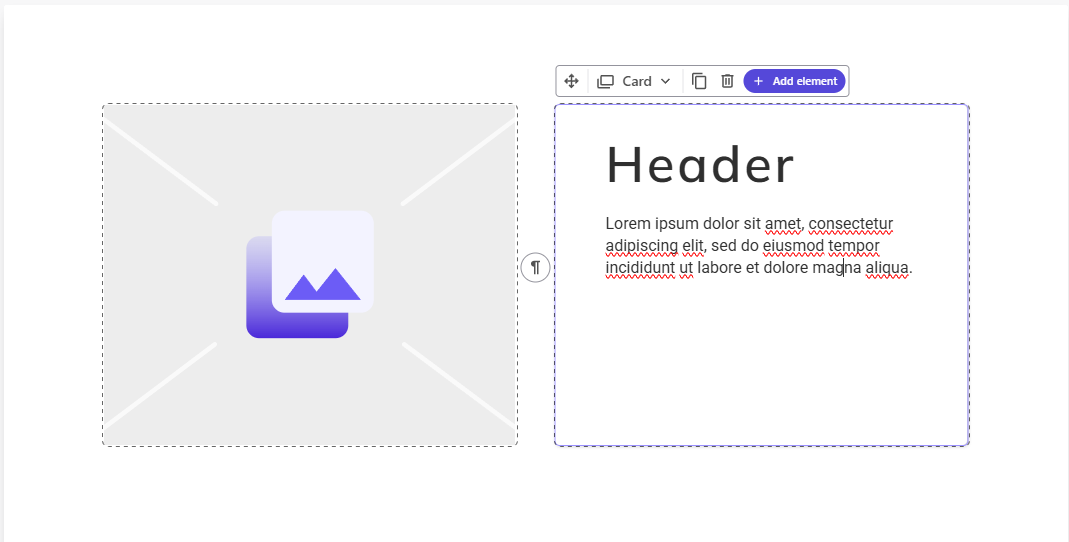
Let’s do the right column now. Select a 6x5 on the right side, then change Block to Card.
Now Click Add Element and select Heading 2.
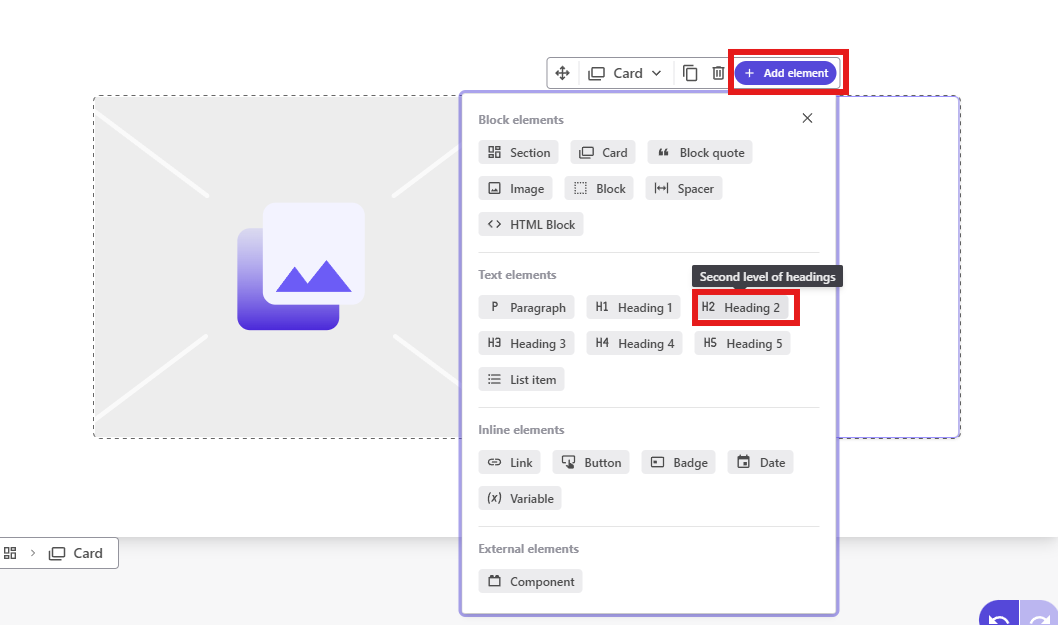
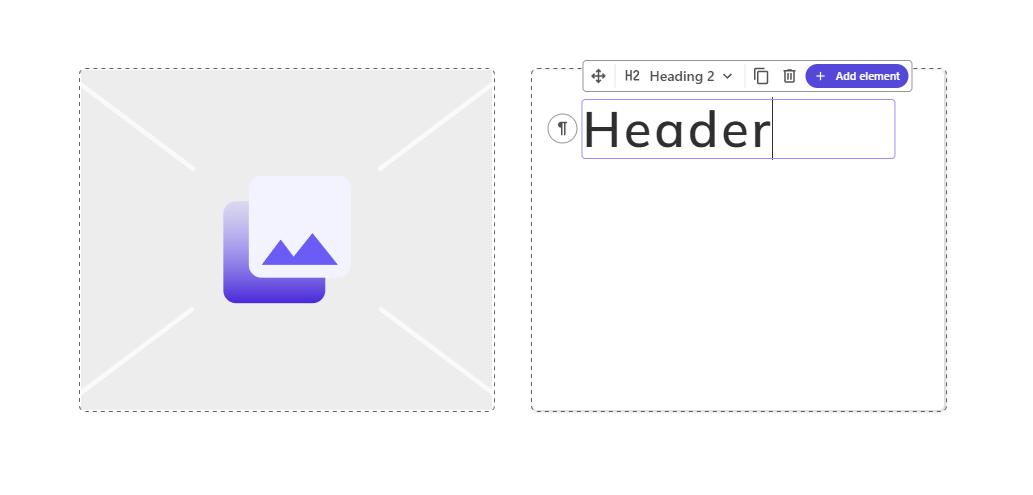
Click at the top of the card to place your heading. It should look like this.
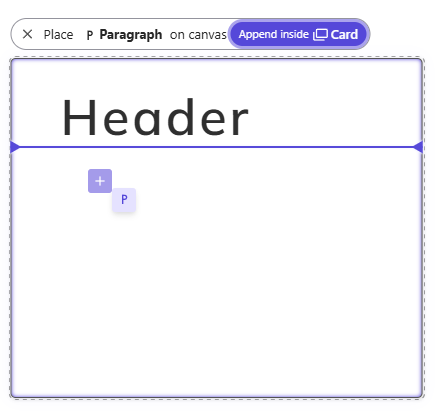
Repeat with Paragraph.
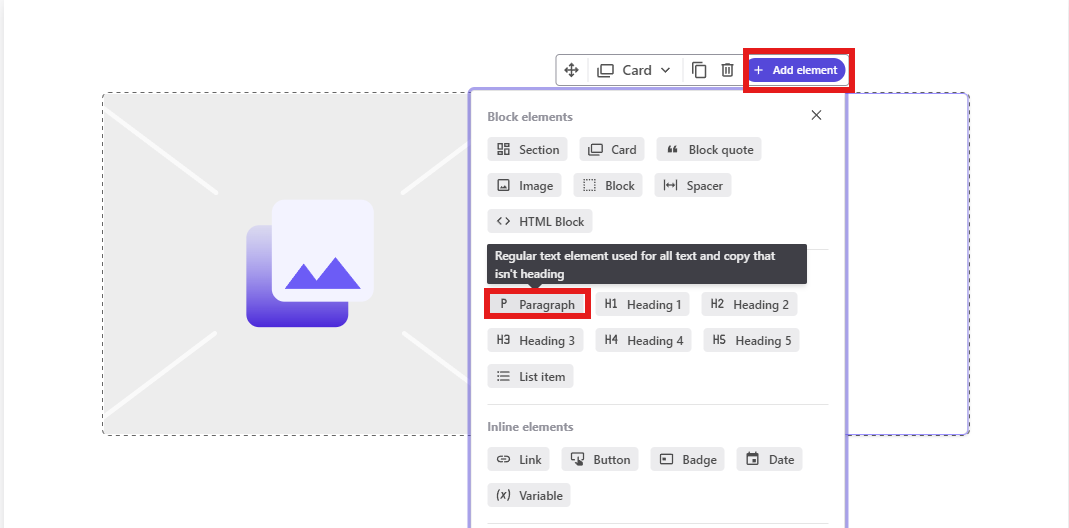
Place it under the heading.
I filled it with Lorem Ipsum. This should be your final result.
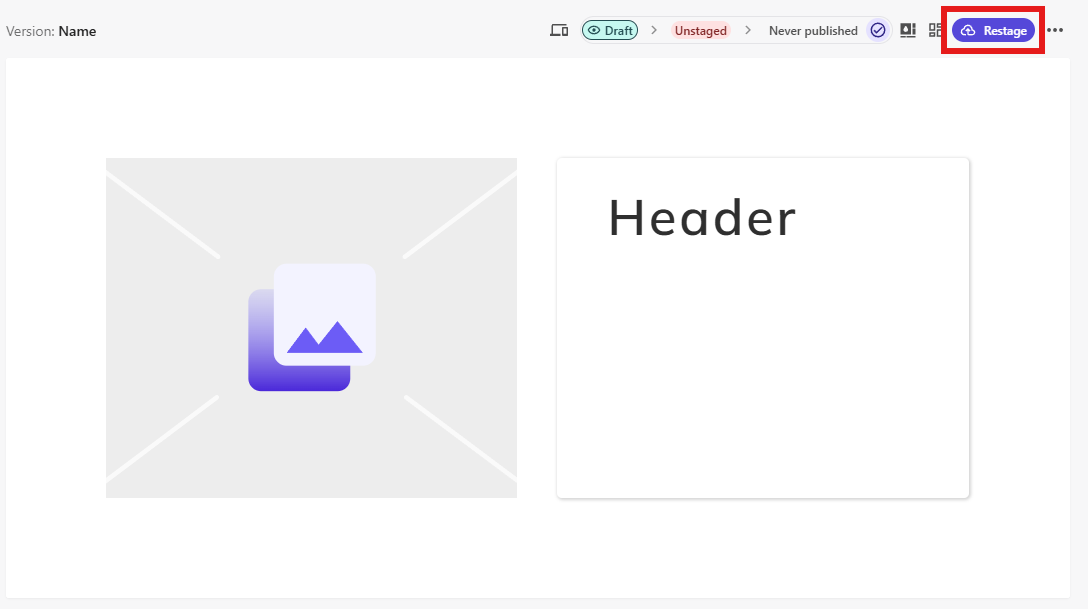
Stage your new component. Go to the top right and click Stage(mine says Restage, because I’ve staged it before).
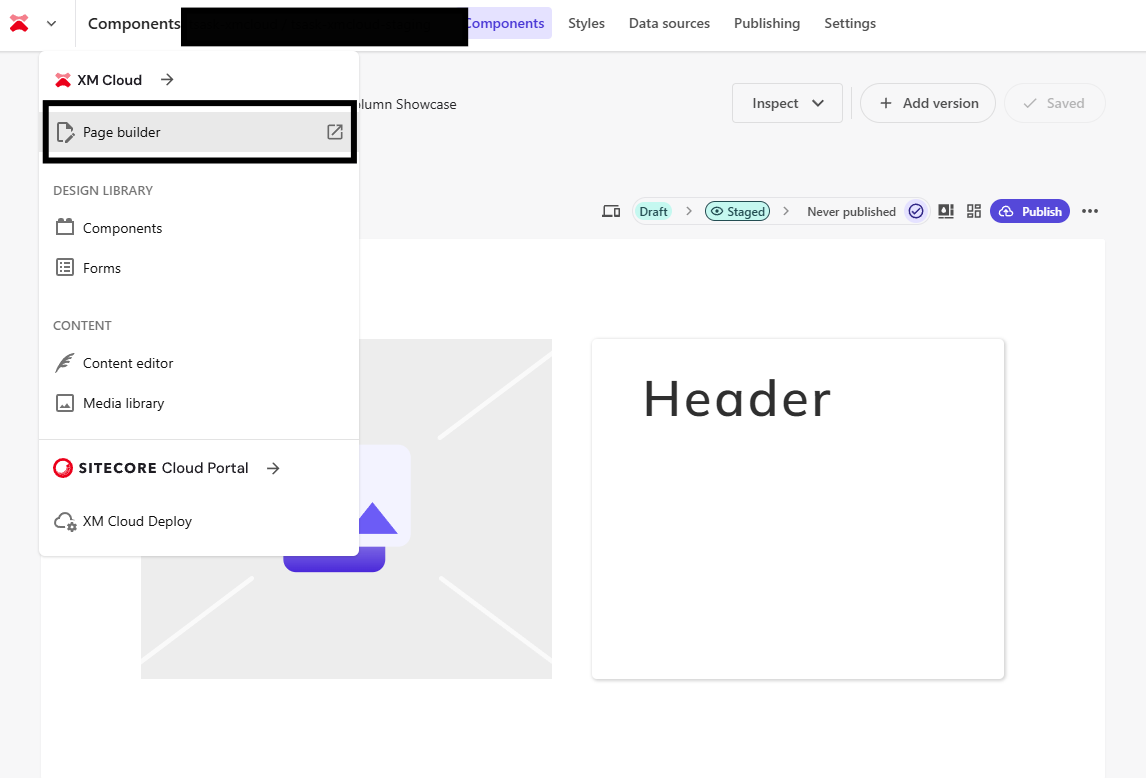
Switch to the Page Builder. You should end up on pages.sitecorecloud.io.
I’ve created a new page for this example. Click on the components tab around the top left. Scroll down to see your new component. If you don’t see it, you’ve forgotten to Stage/Publish it!
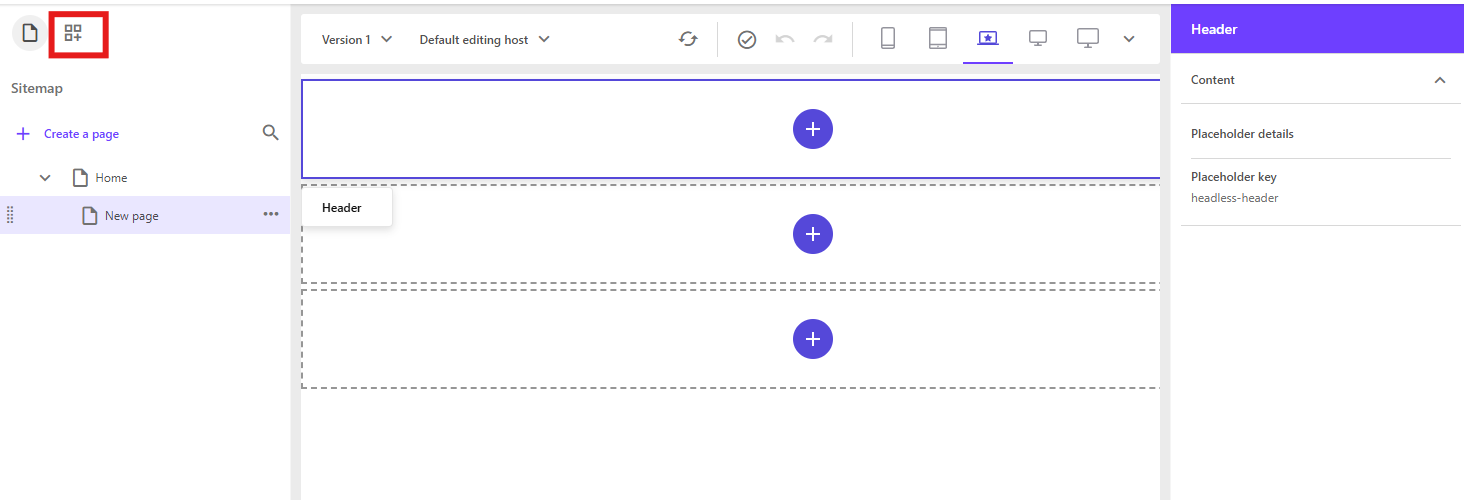
Drag the Two Column showcase to any placeholder you want. This is the final result.
Congratulations! You have created your first FEaaS (no-code) component. Thank you for reading my blog, and keep your eyes out for more!