Reading time: 13 min read
Setting Up Personalization in SitecoreAI
Drive engagement and conversion with data-driven content optimization, maximizing impact through strategic personalization
Start typing to search...
This guide provides an overview of personalization strategies within Sitecore AI, with a focus on A/B/n testing as well as Page Variant testing. These techniques allow content authors and marketers to experiment with different content variations, measure user engagement, and optimize the user experience based on data-driven insights. Whether you're looking to improve conversion rates, test messaging, or tailor experiences to specific audiences, this guide will walk you through the setup, execution, and analysis of effective personalization experiments.
Before diving into the steps below, it’s worth pausing on an important distinction: not all personalization in SitecoreAI is equal, and what’s available to you depends significantly on how your environment is configured.
SitecoreAI (previously XM Cloud) alone supports both A/B/n component testing and Page Variants out of the box. You can test content variations and target experiences using a baseline set of conditions - things like device type and date/time rules. This is powerful on its own, but the audience targeting conditions are relatively limited.
SitecoreAI + Sitecore CDP + Personalize is a different story. When these products are connected, the condition library available in the Pages editor expands significantly. The screenshots throughout this guide reflect this connected setup - conditions like “Point of Sale,” Country/Region targeting, and behavioural rules are drawn from Personalize, not from SitecoreAI itself. Similarly, the Personalize app referenced in the “Analyzing Results” section only applies when Personalize is part of your stack.
One of the more useful aspects of this integration: audiences and segments built inside Personalize become available as targeting conditions directly within the SitecoreAI Pages editor. A strategist can define a complex CDP-backed segment in Personalize, and a content author can apply it to a page variant without ever leaving pages. This tight integration is what makes the connected setup considerably more powerful for teams managing large scale personalization programs.
If you’re working in SitecoreAI without CDP and Personalize connected, you’ll still have access to A/B/n testing and Page Variants, but some of the conditions and the reporting dashboard shown later int his guide won’t be available to you.
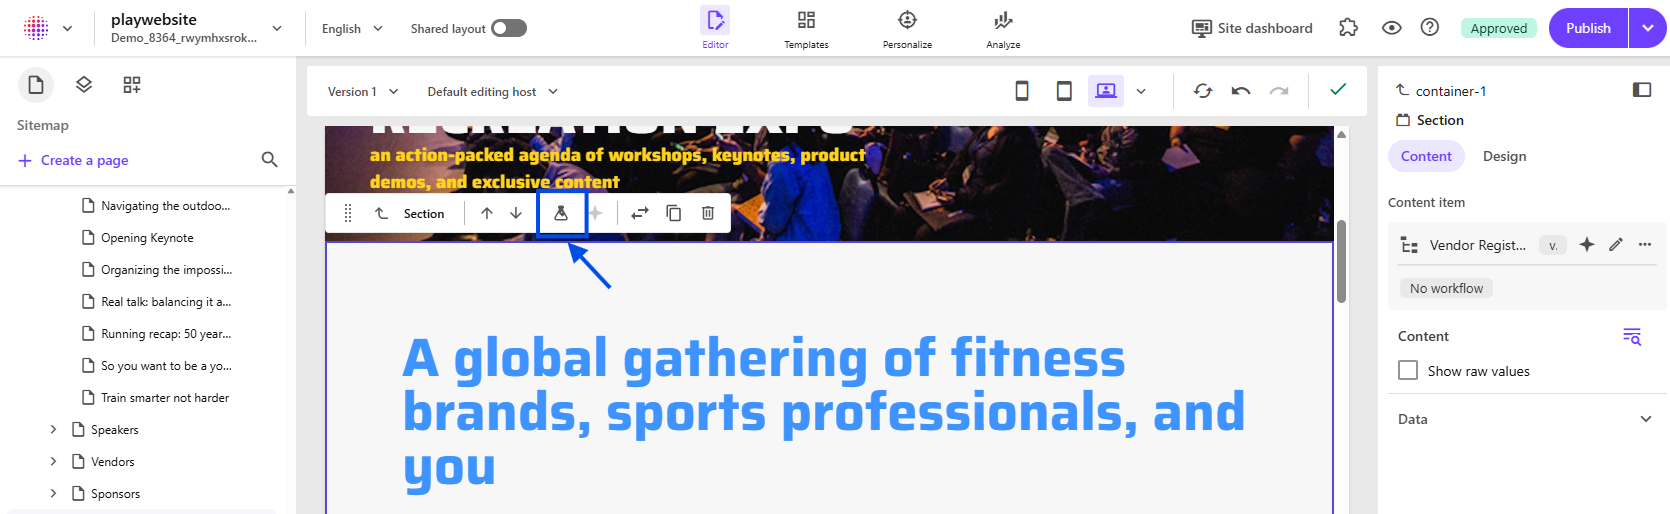
Start off by selecting the component on a page you’d like to setup a test for. With the component selected you will see a beaker icon in the floating ribbon that says A/B/n Test Component.
Click that icon to get started.
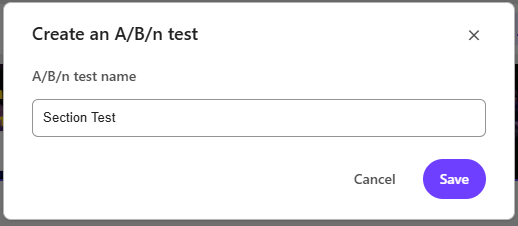
Next you will get a popup where you can name the test, fill that out and click Save.
After clicking Save the page will refresh and you’ll see a new panel open on the right hand side:
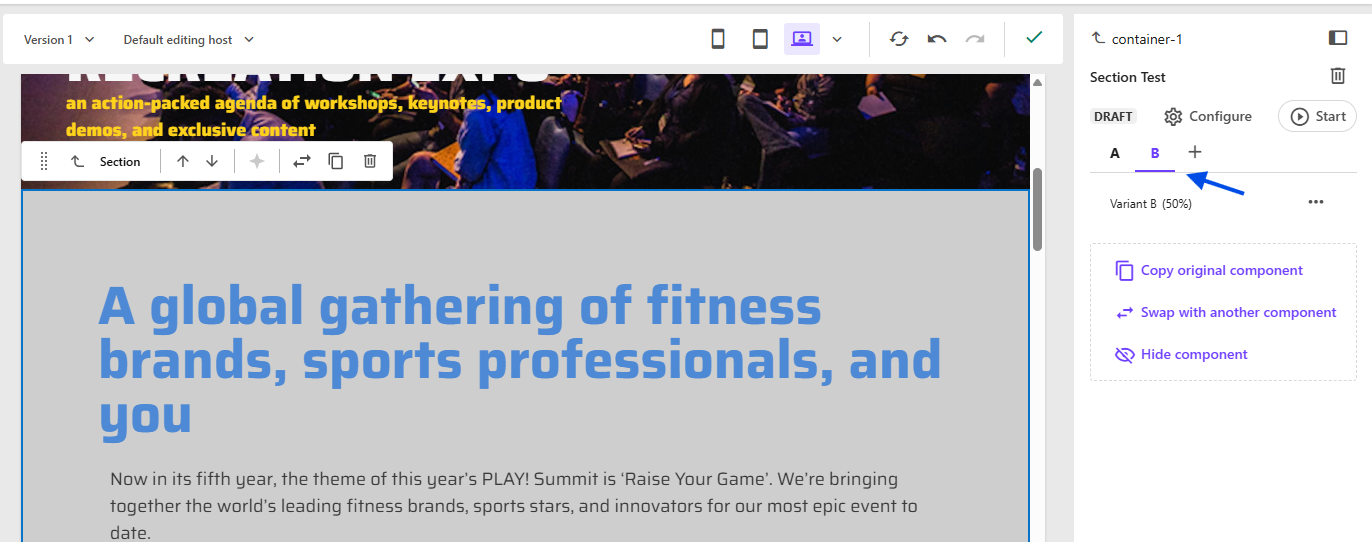
Here you will have three different options available:
The option you select will depend on how exactly you’d like to configure your test. But let’s take a moment to talk about them in more detail.
Selecting this option will create a new variant using the original as a starting point. It will automatically create a new item in the Sitecore tree adjacent to your existing item and will append _var2 to the end of the name, then it will attach that datasource to your new variant.
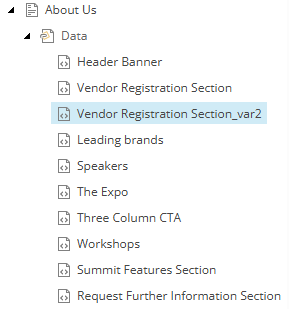
From there you can use the Pages editor to make the changes to the component that you’d like to perform a test for. For example if we want to test if one set of copy performs better than another one we can edit the variant under the currently selected B tab to match the following:
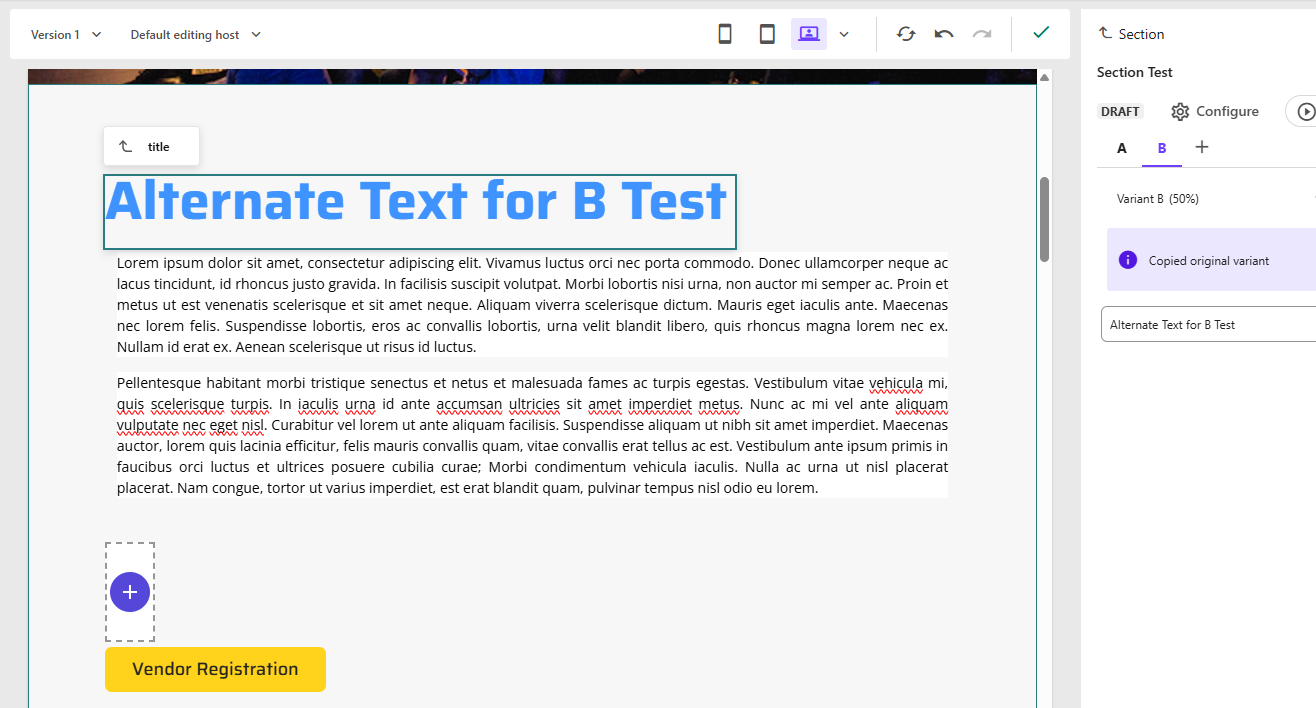
From there you may chose to create even more variants, as you are not restricted to just two. To do so just click the + icon after the B tab:
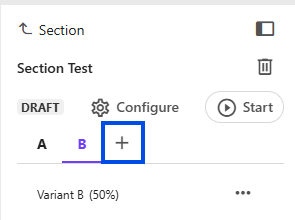
In this case we will be sticking two variants in order to keep things simple.
Another powerful option is swapping out the component entirely to see a different component will get more engagement. To do so click the second option Swap with Another Component.
You will then need to select which component you’d like to add to that placeholder, attach a datasource and populate it accordingly.
Perhaps one of the more simple scenarios you may want to test. Clicking Hide Component removes the component from the page.
After selecting this option you’ll notice that a placeholder shows indicating that the component is being hidden for this test variation.

You will also notice that it has defaulted to showing variant B 50% of the time. If you would like to change this then click the Configure button above the tabs.
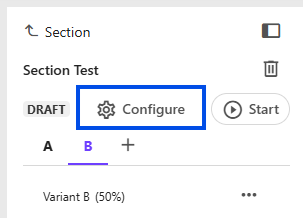
You’ll notice that in addition to changing the percentage of traffic it receives you can also configure other things such as the Test Goal.
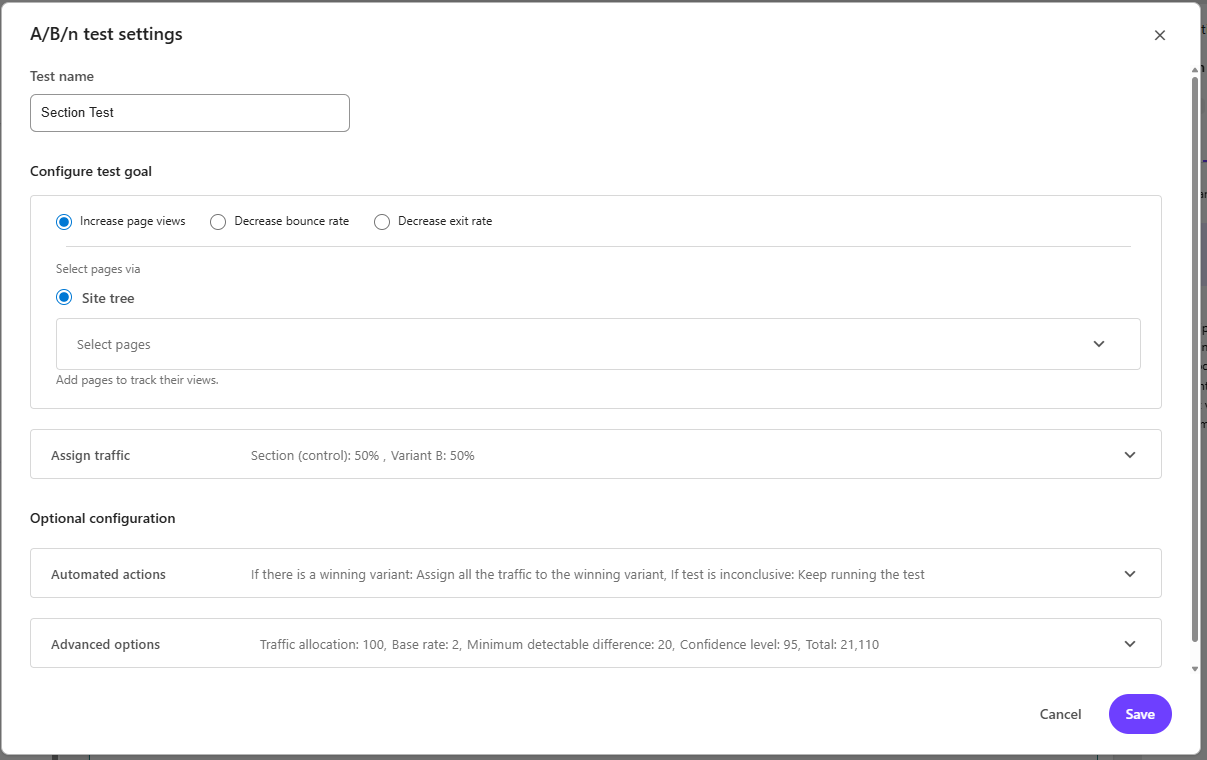
Start off by selecting your goal, if you would like to use the Increases Page Views you will need to select which page you are hoping to select the page views for. So for example with the Section component you may want to increase the number of views on the Cart or even Cart Success page. Use the Site Tree dropdown to select that destination page.
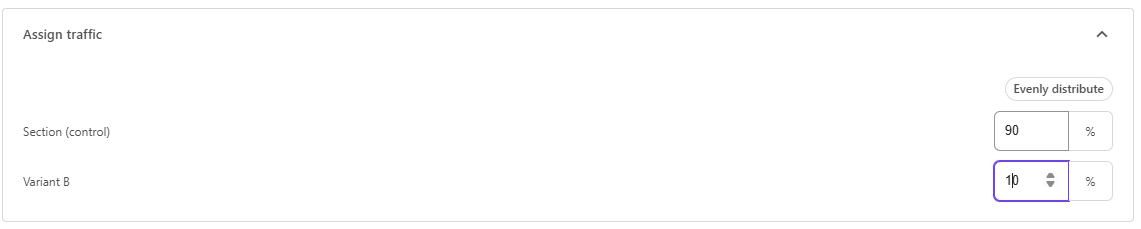
To update the traffic percent expand the Assign Traffic accordion and set the values you’d like to use. For example you may only want to assign 10% of the traffic to the new B variant with 90% of the traffic going to the original version.
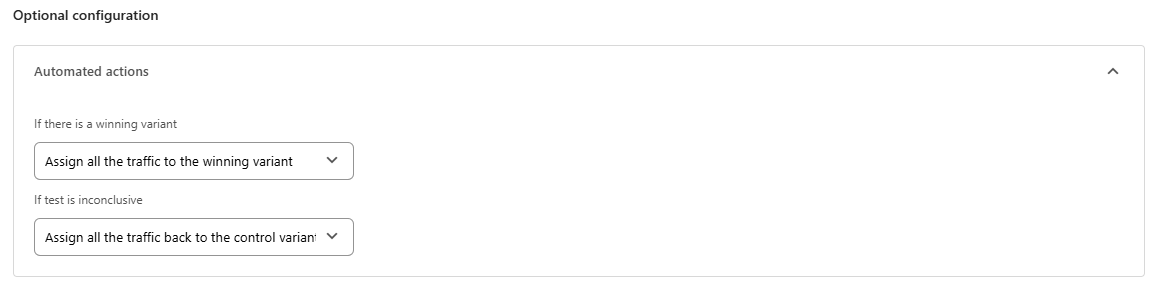
The true power of A/B/n testing is being able to set the Automated Actions for completing a test. For example you may decide that once the test is complete it will automatically send 100% of the traffic to the winning variant. Or you may wish to just collect some data without changing anything permanently in which case you can select Assign all traffic back to the control.
Just the same if no clear winner is found you can configure it to automatically assign all the traffic back to the control source. Or perhaps you’d like to Keep running the test to continue collecting data until a more clear winner is found.
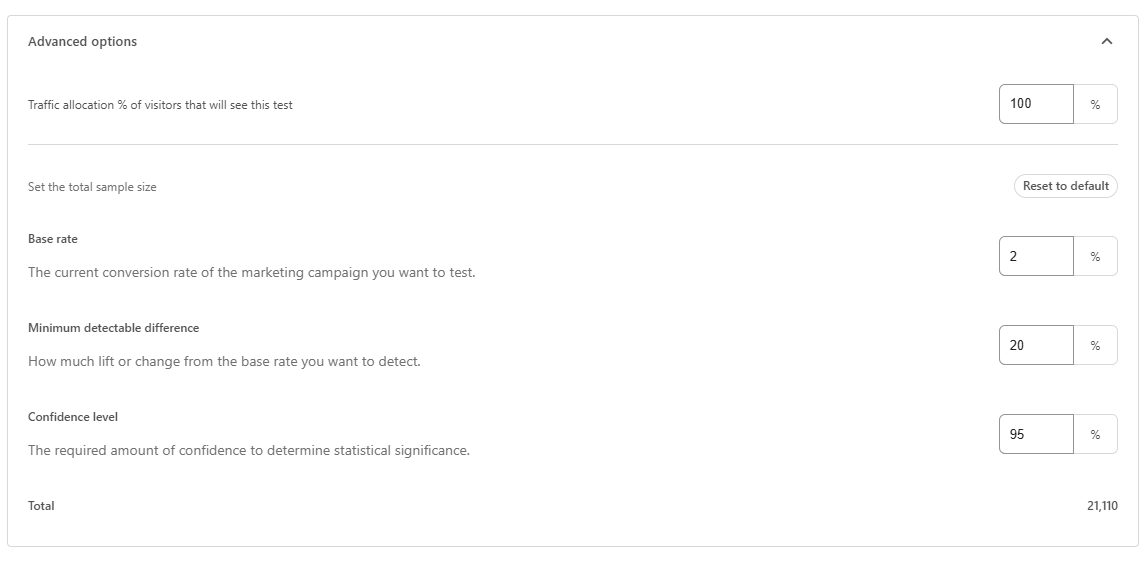
In addition to that you have several advanced options such as setting the Traffic Allocation % of visitors that will see this test, Base Rate, Minimum Detectable Difference, and the Confidence Level.
For now we will just stick with the defaults.
SitecoreAI also offers another powerful option that allows you to create an entirely different page level test. One limitation to be aware of is if you have already created A/B/n tests on this page you will not be able to also set Page Variants, so you will have to decide between one of the two approaches.
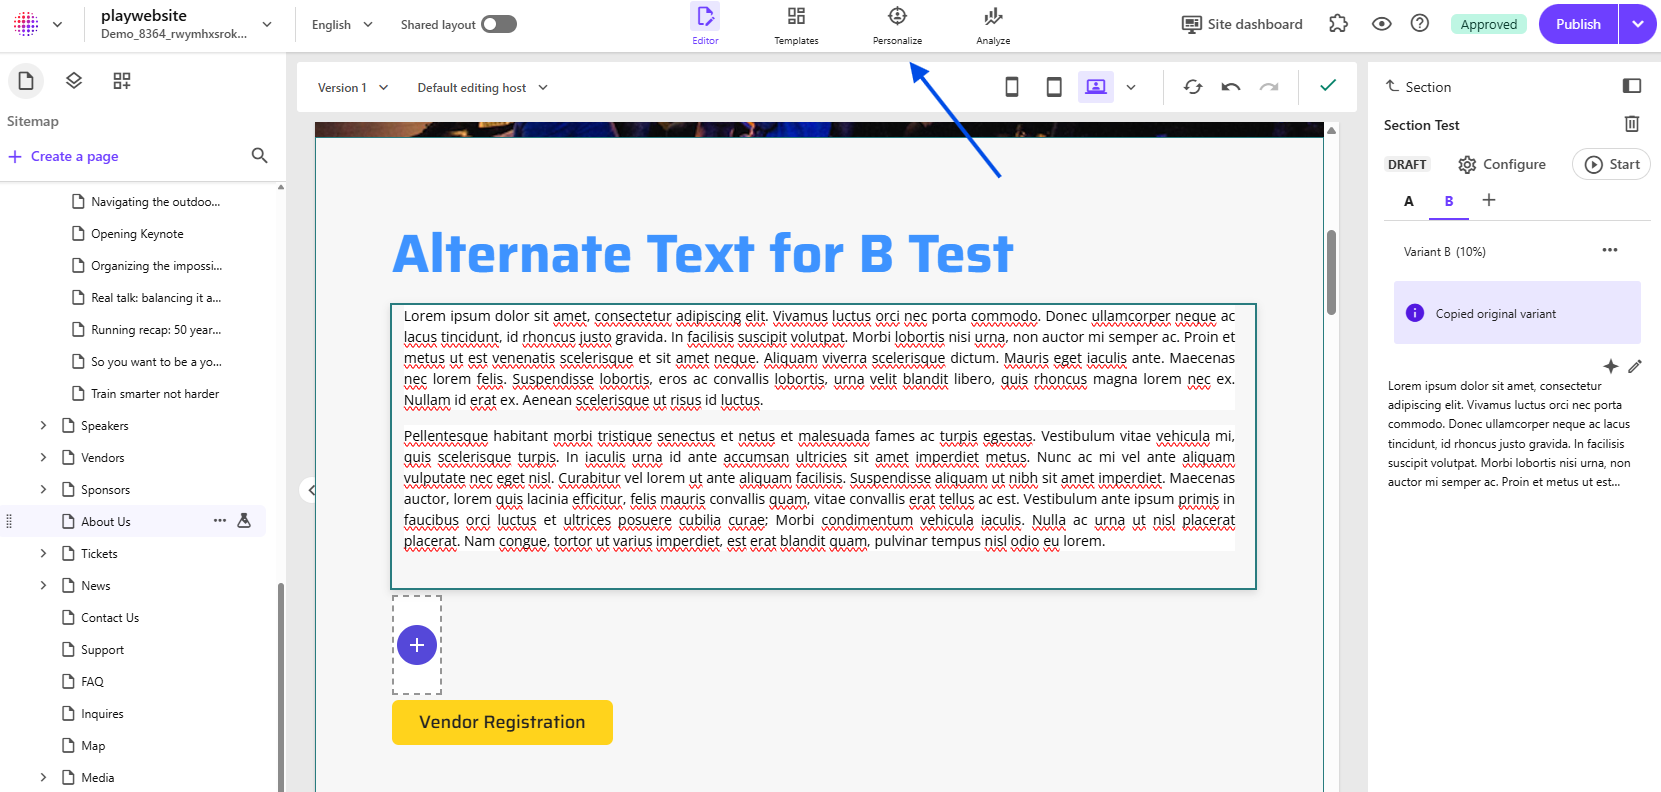
To begin click on the Personalize button at the very top of the Pages editor.
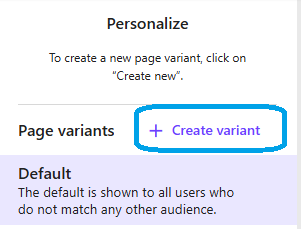
From there you will see a panel open on both the left and right sides, the panel on the left allows you to create Page Variants. You will start with your Default variant, from there we suggest adding another by clicking Create Variant.
From there you will be prompted to create a name for this new page variant, for this example we will use Alternate Variant 1.
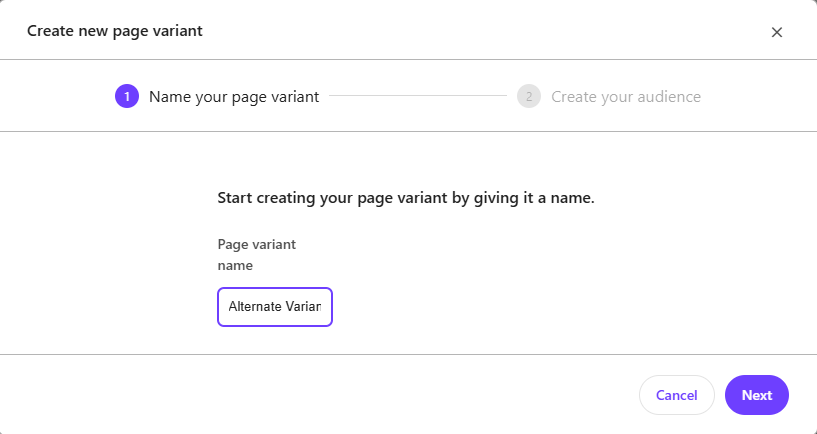
From there click Next.
On the next step you will be prompted to add conditions for which this variant is to be shown.
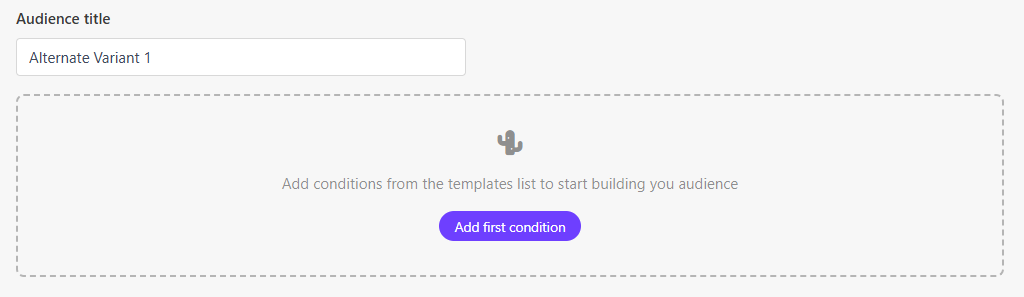
Click on Add first condition to begin. This will open a panel on the right hand side that will list numerous conditions you may select from:
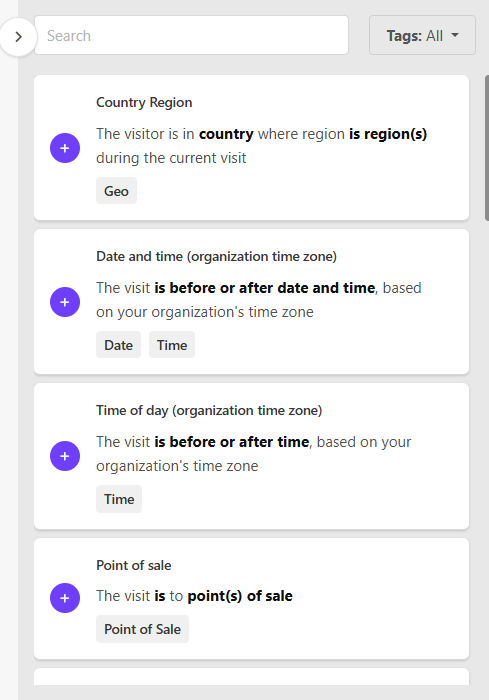
For this test we will see the Device condition in order to personalize the page for users on a Mobile device. To do so we look for the device card in the right hand panel and click the + icon to the left of it:
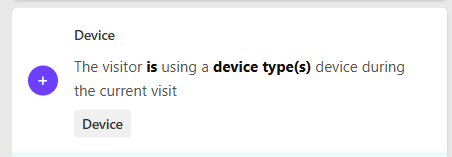
From there it will be added to the left hand side as a condition, with some extra parameters to fill in.
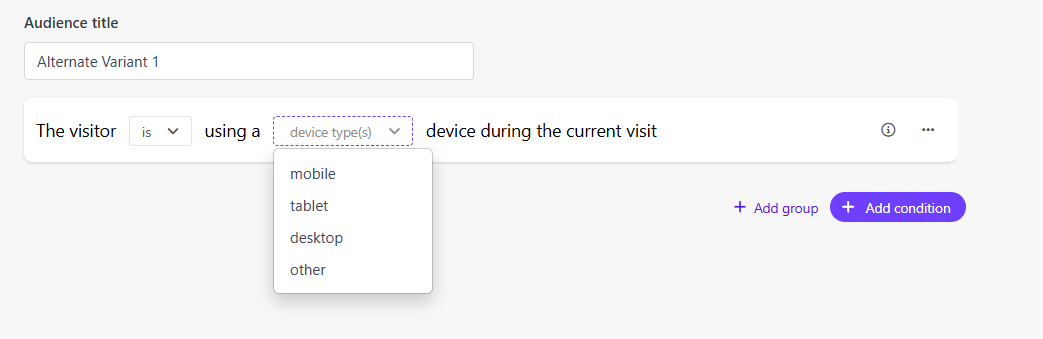
For the first dropdown we will select is, and then in the second we will select mobile. After which we can click the Save button at the top.
From there we will be taken back to the Pages editor where we can make changes to the page design using options on the right hand panel. For this variant we will play with the idea of hiding the Hero component for mobile in order to to have the Section component appear at the top.
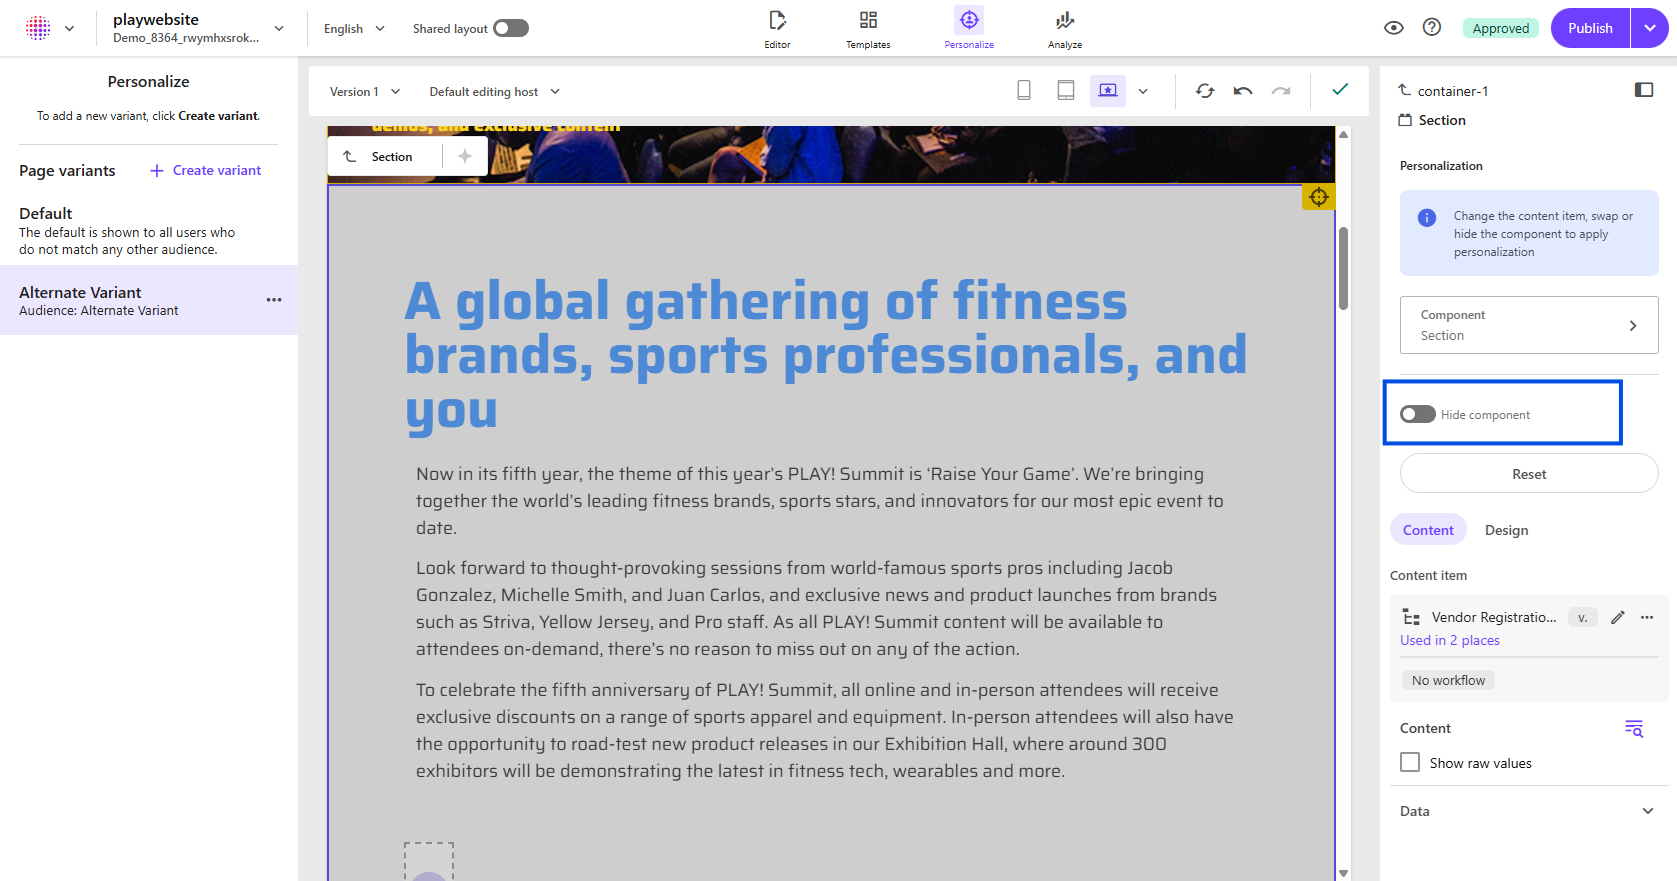
After toggling the Hide Component option the page will refresh and you will see that the component is hidden for this variant. A greyed out placeholder will take its place in the Pages editor allowing you to select it and untoggle the Hide Component option or Reset it to its default state. Please note this will not show on the published page and is just there to assist you in customizing the page.
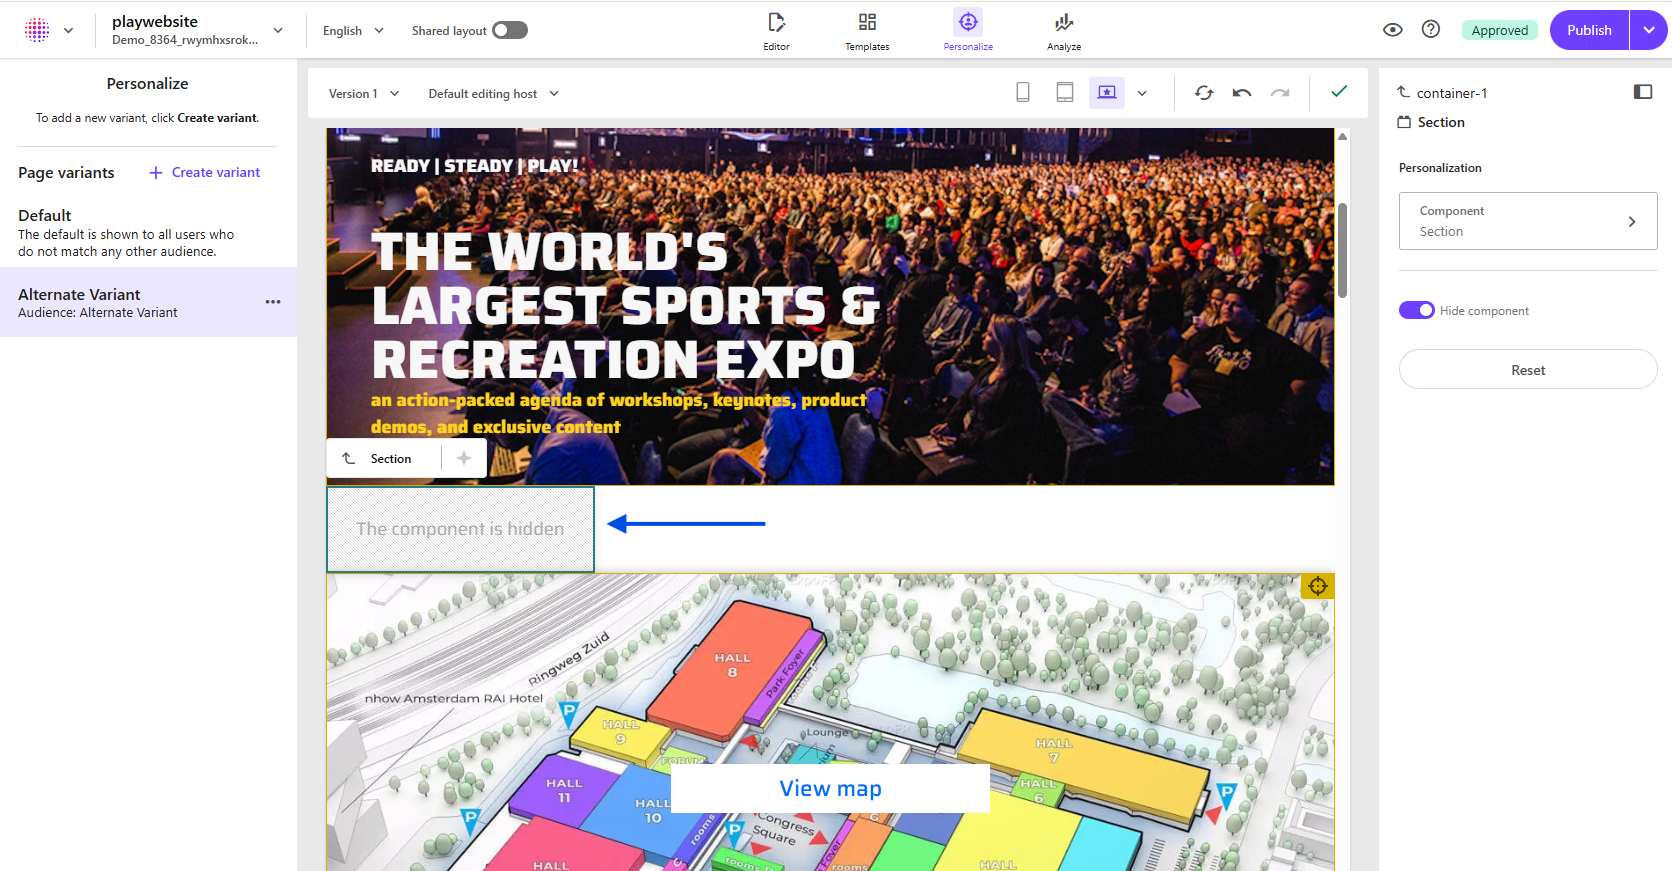
Now let’s say we also want to replace the Vendor Registration Section datasource in the Section component. To do so you will want to swap out the datasource on this page variant. One thing to watch out for is you don’t want to edit the values directly on the right hand panel as that will change it for all variants using this specific datasource.
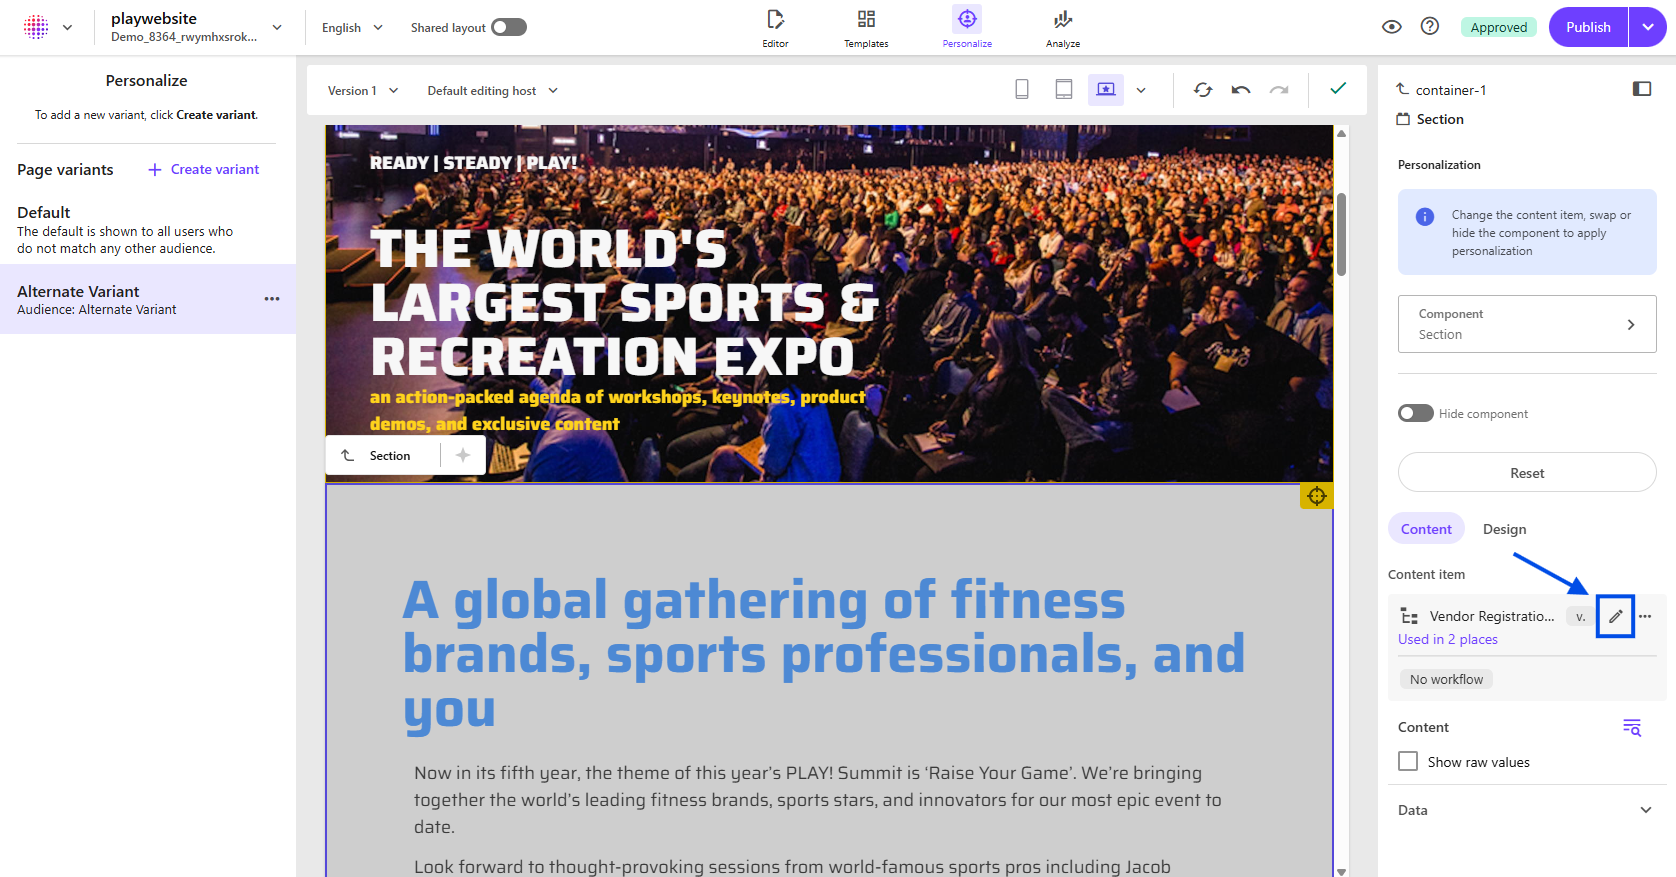
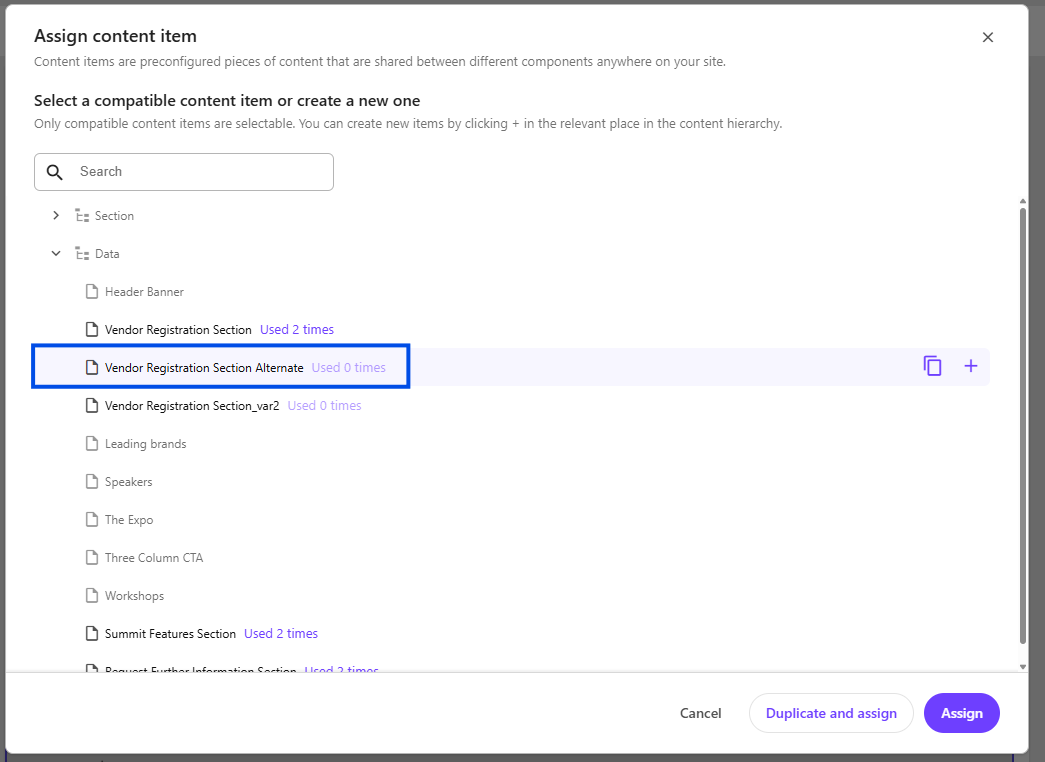
After click on the Pencil icon to the right of the Content Item you will see a popup that allows you to select or create a new datasource. In this case I have already create an alternative called Vendor Registration Section Alternate, let’s go ahead and select that.
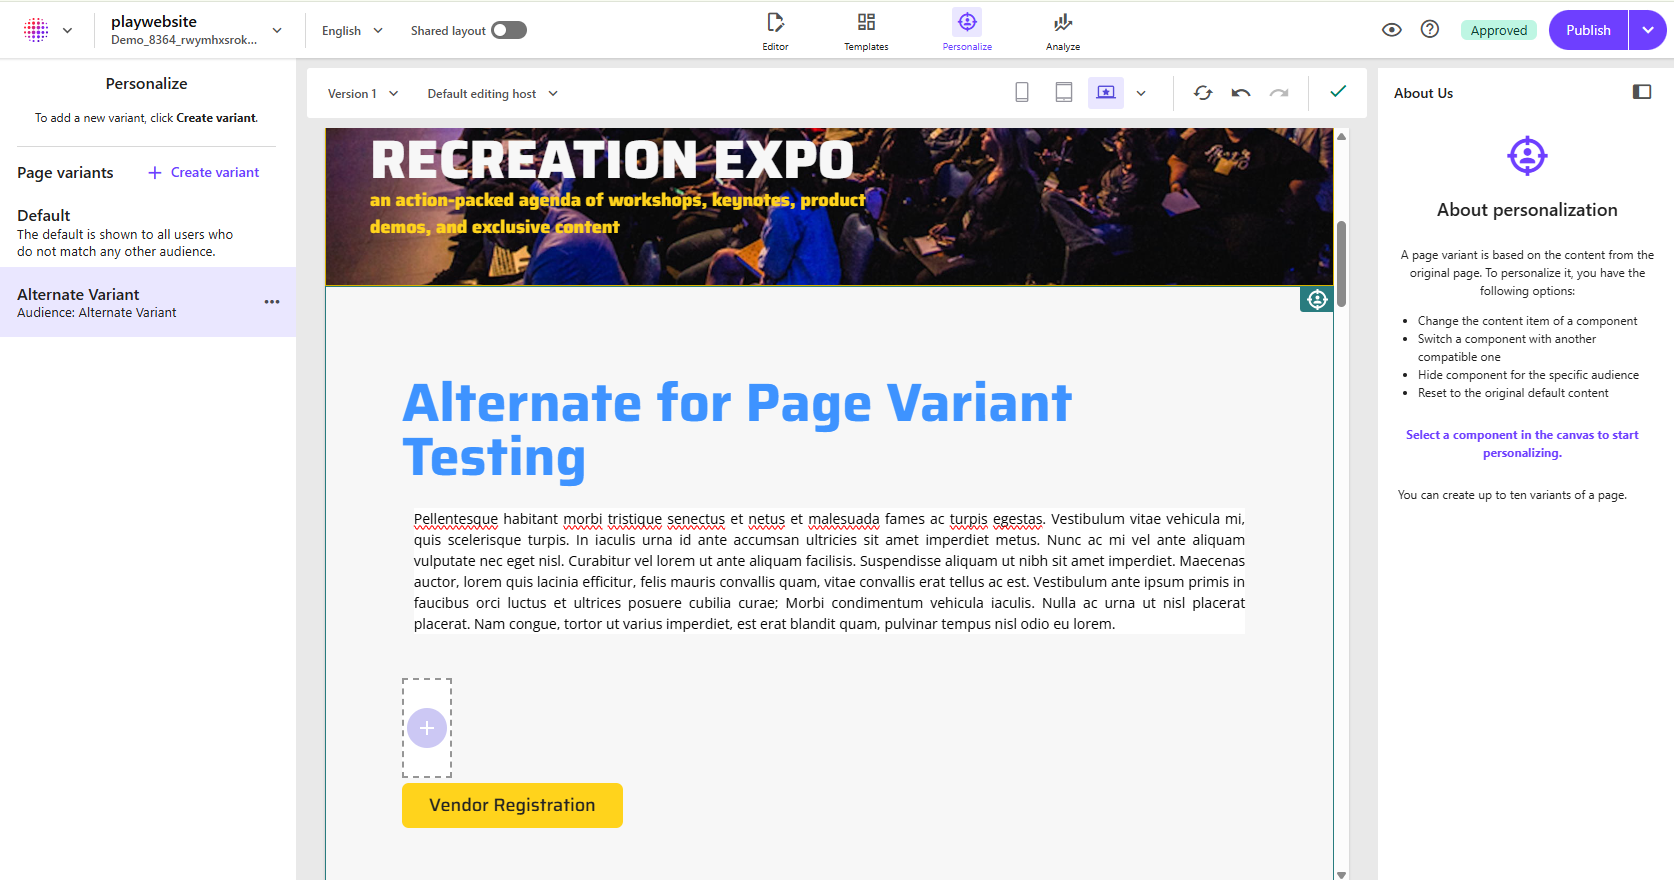
 The page will then refresh and you will see the new content loaded into the Section component:
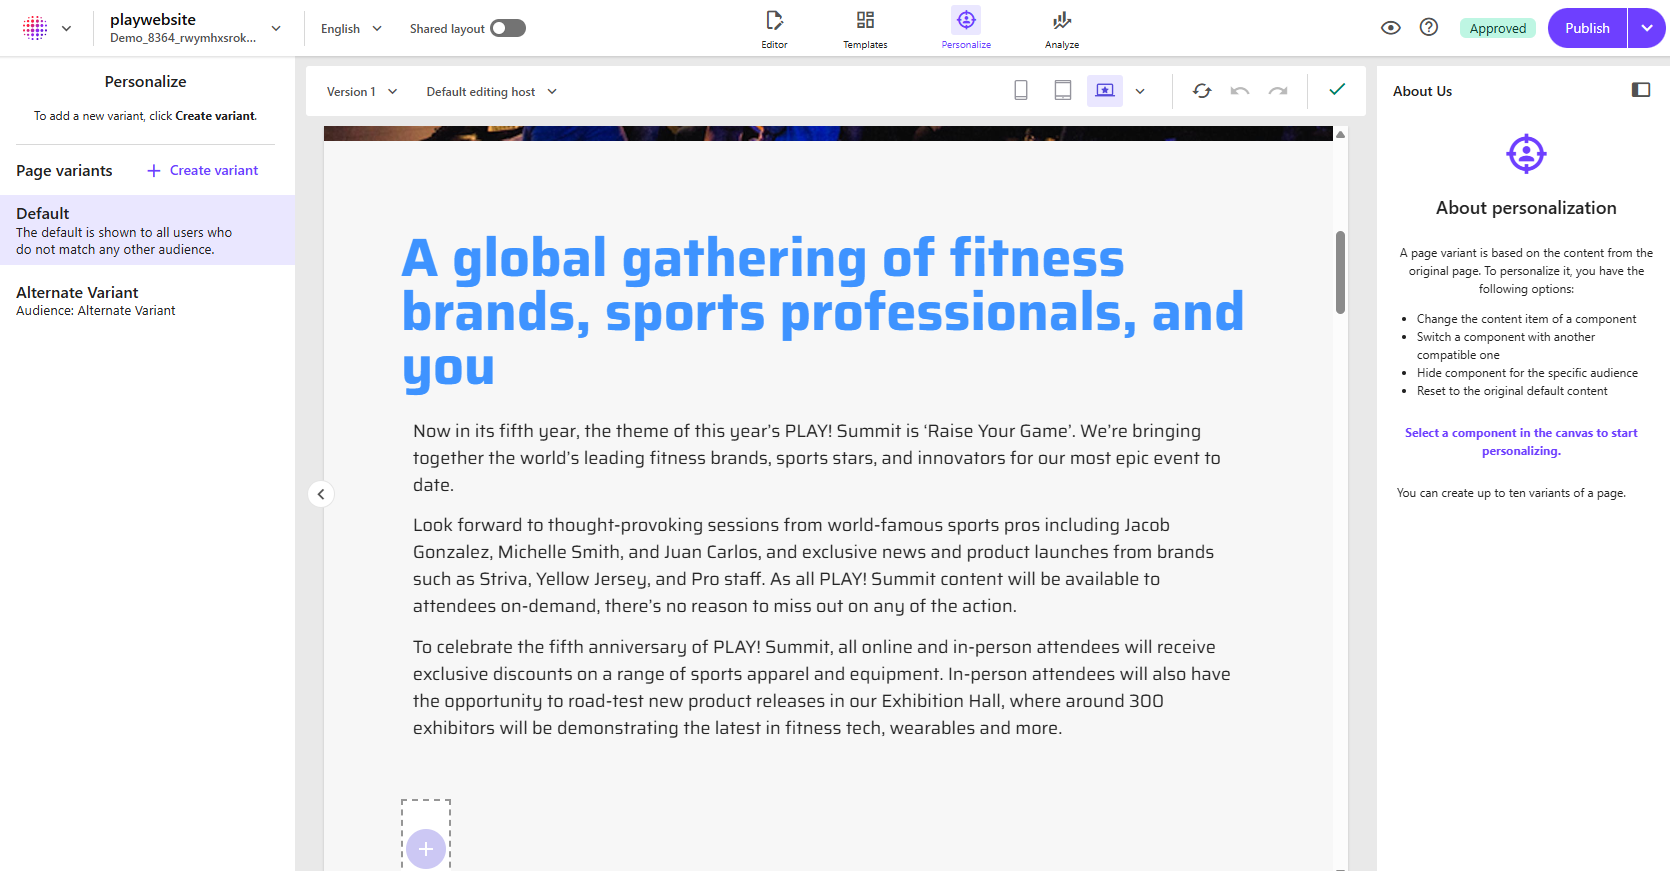
If we were to click on the Default variant on the left hand panel we can see that the Section component is still visible and the Section component is still showing the original content:
Let’s create one more variant by clicking Create Variant in the left hand panel and then entering Alternate Variant 2 as the name, then clicking Next again.
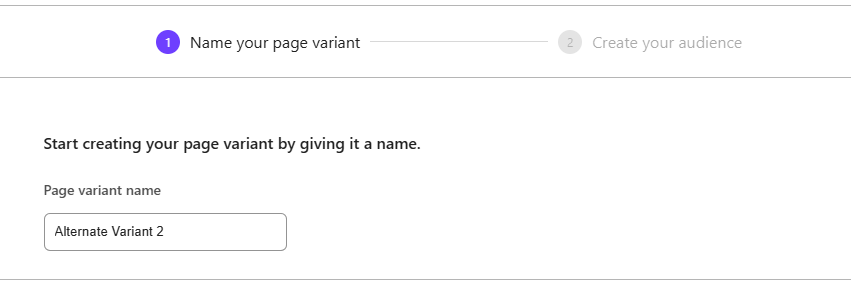
For this variant lets explore the grouping option. To do so first add the first condition we want to use, let’s use the Country condition and click the + button to add it to the list of conditions.
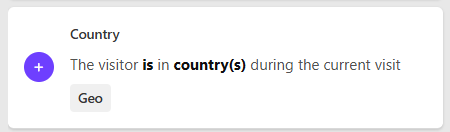
While it would likely make more sense to set the condition to is not in United States for this condition we will instead be combining some other conditions for the sake of illustrating how grouping works.
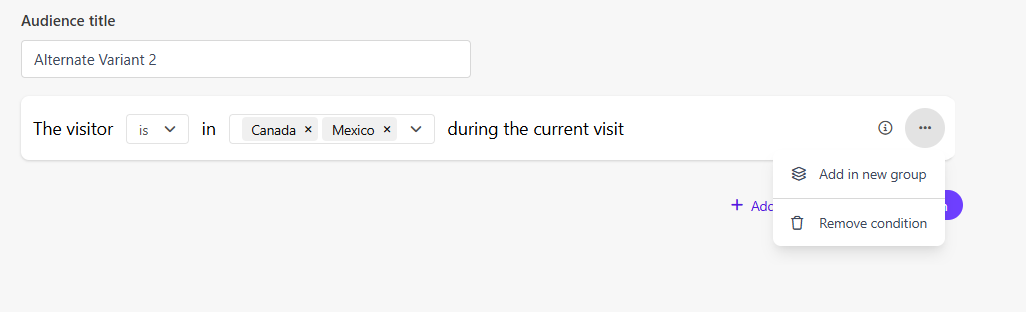
First lets populate the country condition with is for the first dropdown and then in the country dropdown we can actually add more than one option, to do so click the dropdown and select Canada, then after the page refreshes click the dropdown again and select Mexico.
Once done let’s next click the ellipsis to the right of the condition and select Add in new group.
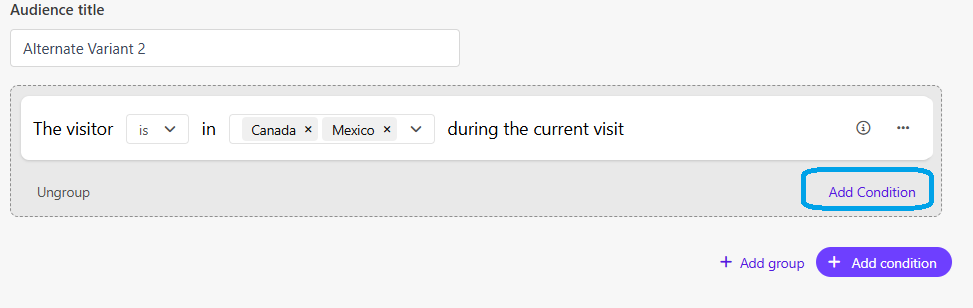
From there we can click Add Condition to add another condition to this grouping.
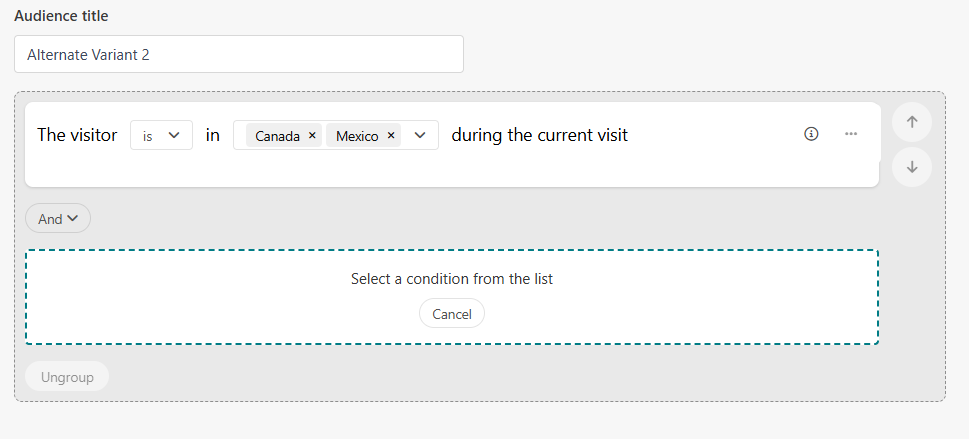
Now we can select another condition from the right hand panel. Let’s add the region condition.
Now lets flip the And option to Or and set the condition to is in South America.
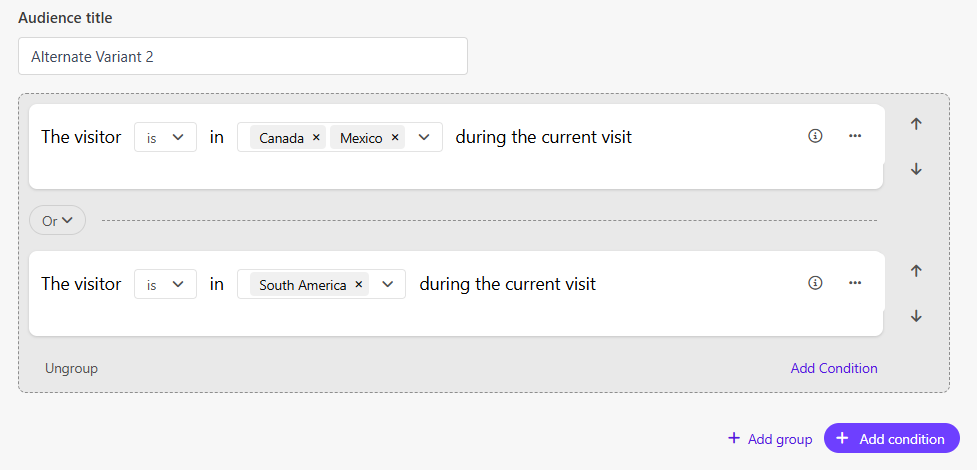
Using this grouping we could potentially hide all the components on a page and add a Rich Text component that just says something like “Sorry, our services are not available in your location!”
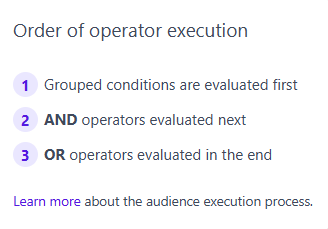
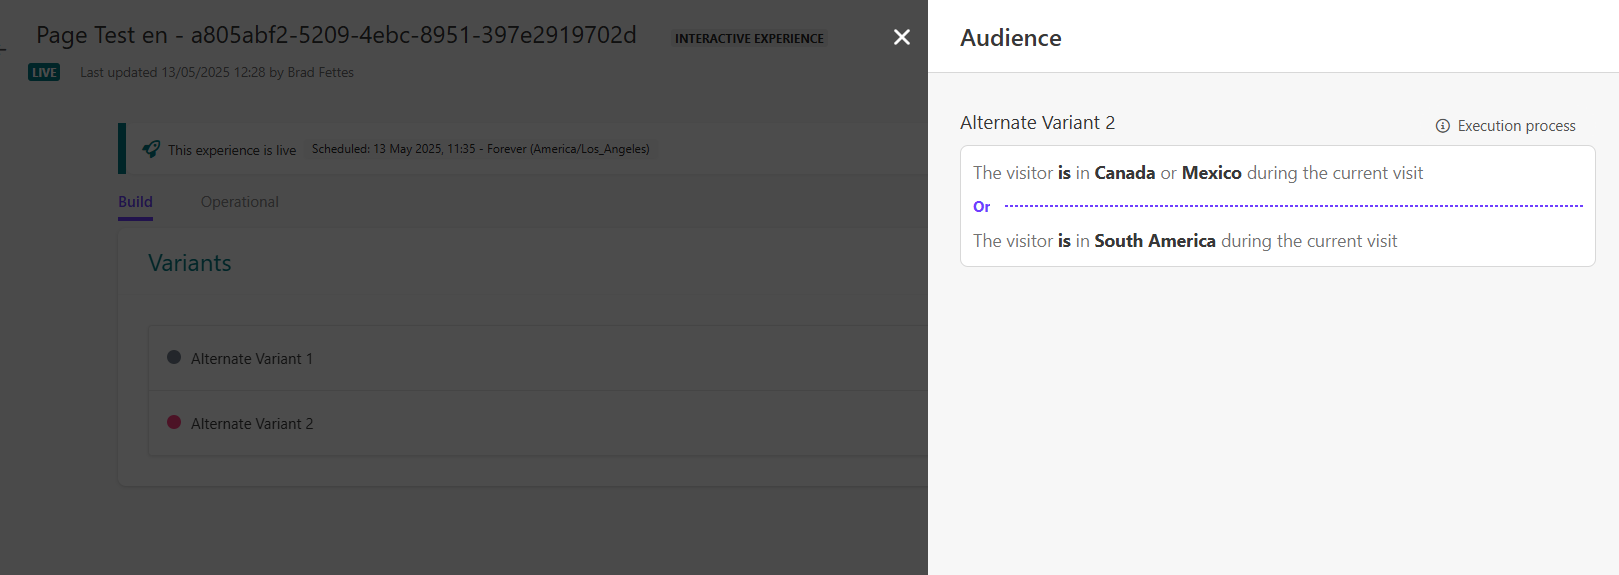
You can also stack multiple groups and conditions to your hearts desire. If you are wondering what the order of operations is when executing the page you can click the info icon next to Execution process and you will see the following information:
Of course there are many more conditions and combinations of conditions grouping we have not explored but to cover them all would be nearly impossible. For more information we suggest reading Sitecore’s documentation on Personalization.
As you start to build out pages variants or A/B/n tests you will start to notice some new icons appearing in the page tree.
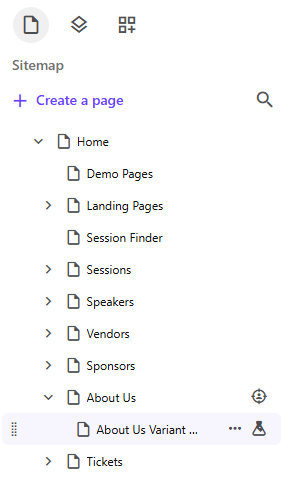
A page with the beaker icon on the right side indicates that page has A/B/n tests applied to the page. Whereas a page with the Crosshair around a Portrait indicates a Page Variant has been setup for the page.
You’ll notice two apps on the Sitecore Cloud Portal dashboard that are of interest. They are the Personalize app and there is one for Non Prod and another for Prod. In this case we’ll be looking at Personalize nonprod, clicking on it will open up a side menu with several options:
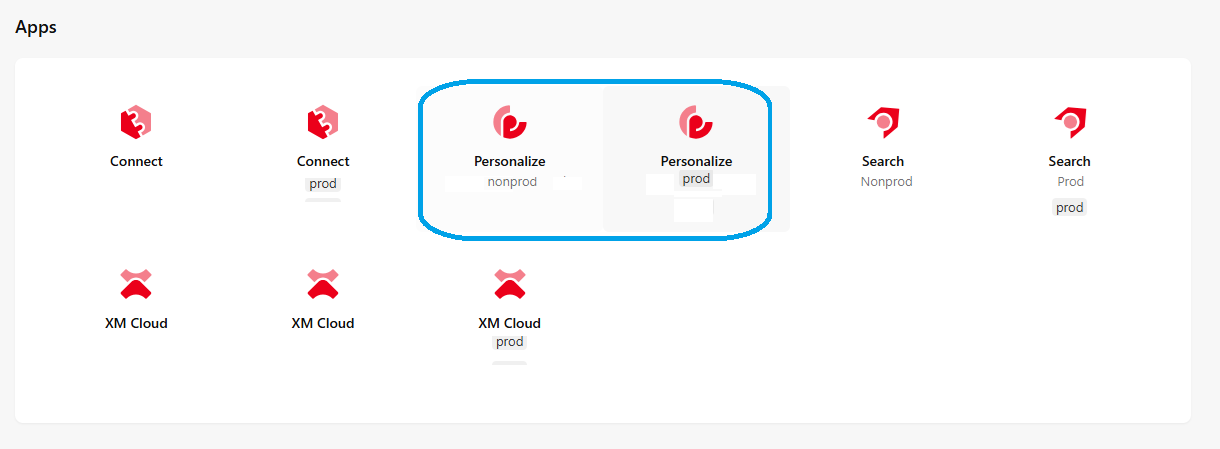
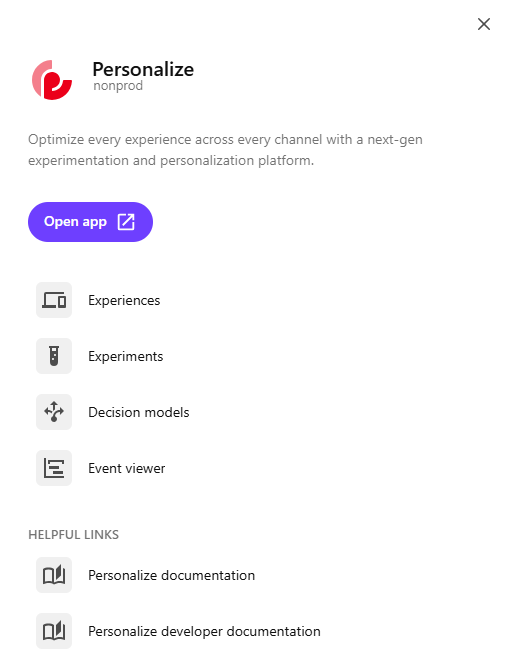
You can dive right into a specific tab or you can simply click on the Open App button which will take you to the Personalization dashboard. Once there you will see several tabs along the top which mostly align with the options on the previous screen, as well as numerous more options.
Entire guides can be written on all of the different screens you’ll find here, so we’ll just focus on tying in the tests we’ve created above to their corresponding reports in the Personalize app. In addition to that, since we are working off of non prod we actually don’t really have much for useful data to show you here, but I’ll try my best to give you an idea of what to expect.
First you’ll notice that going to Dashboard → A/B/n tests will give you a list of the A/B/n tests we setup.
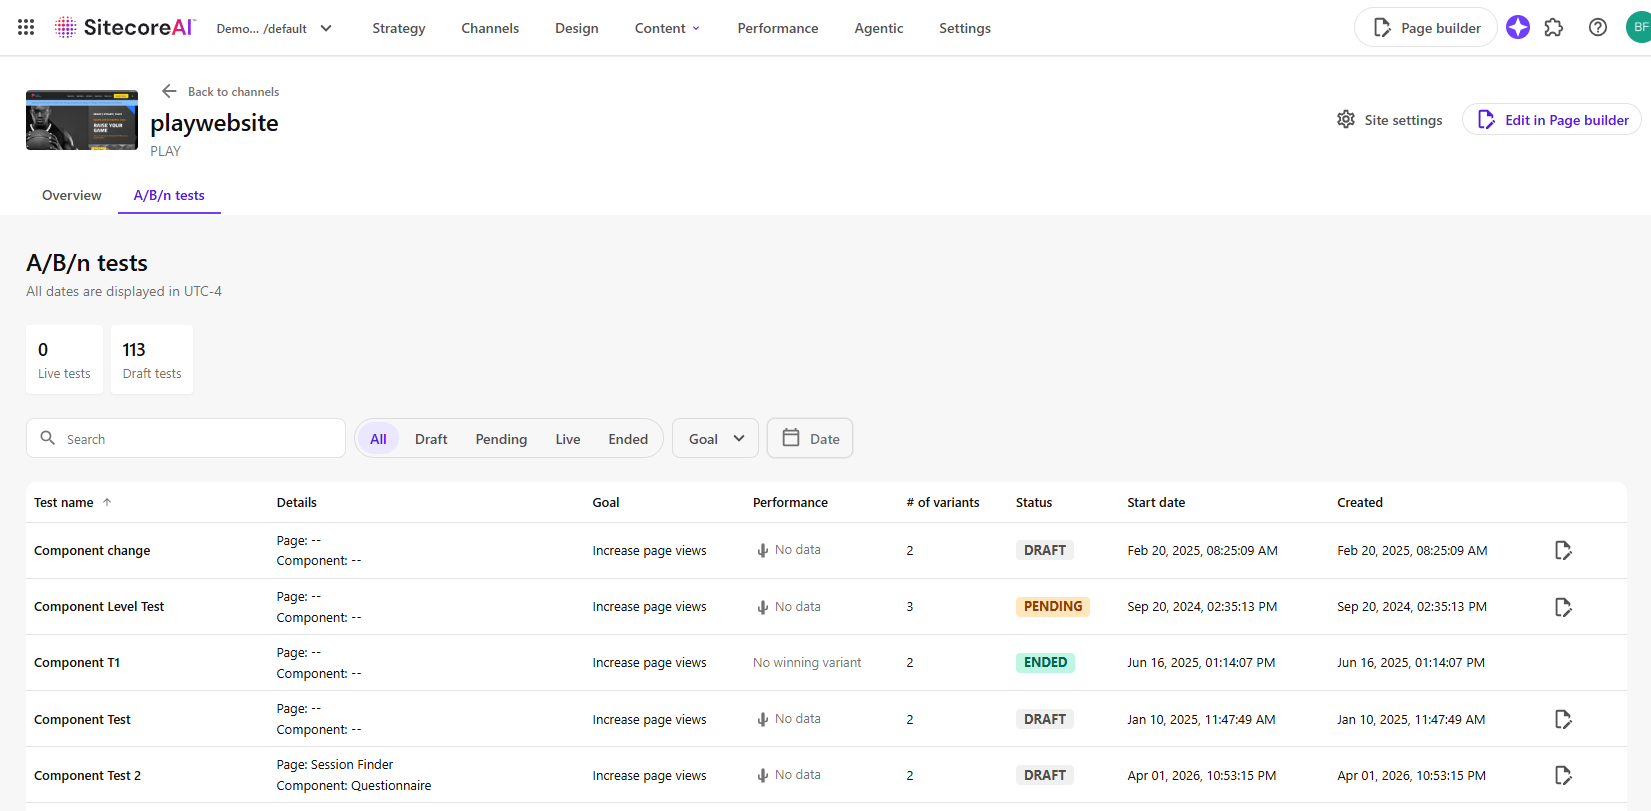
We’ll click on the first one, Section Component component, which we built out above. This will give us a detailed overview of the A/B/n test we have built out:
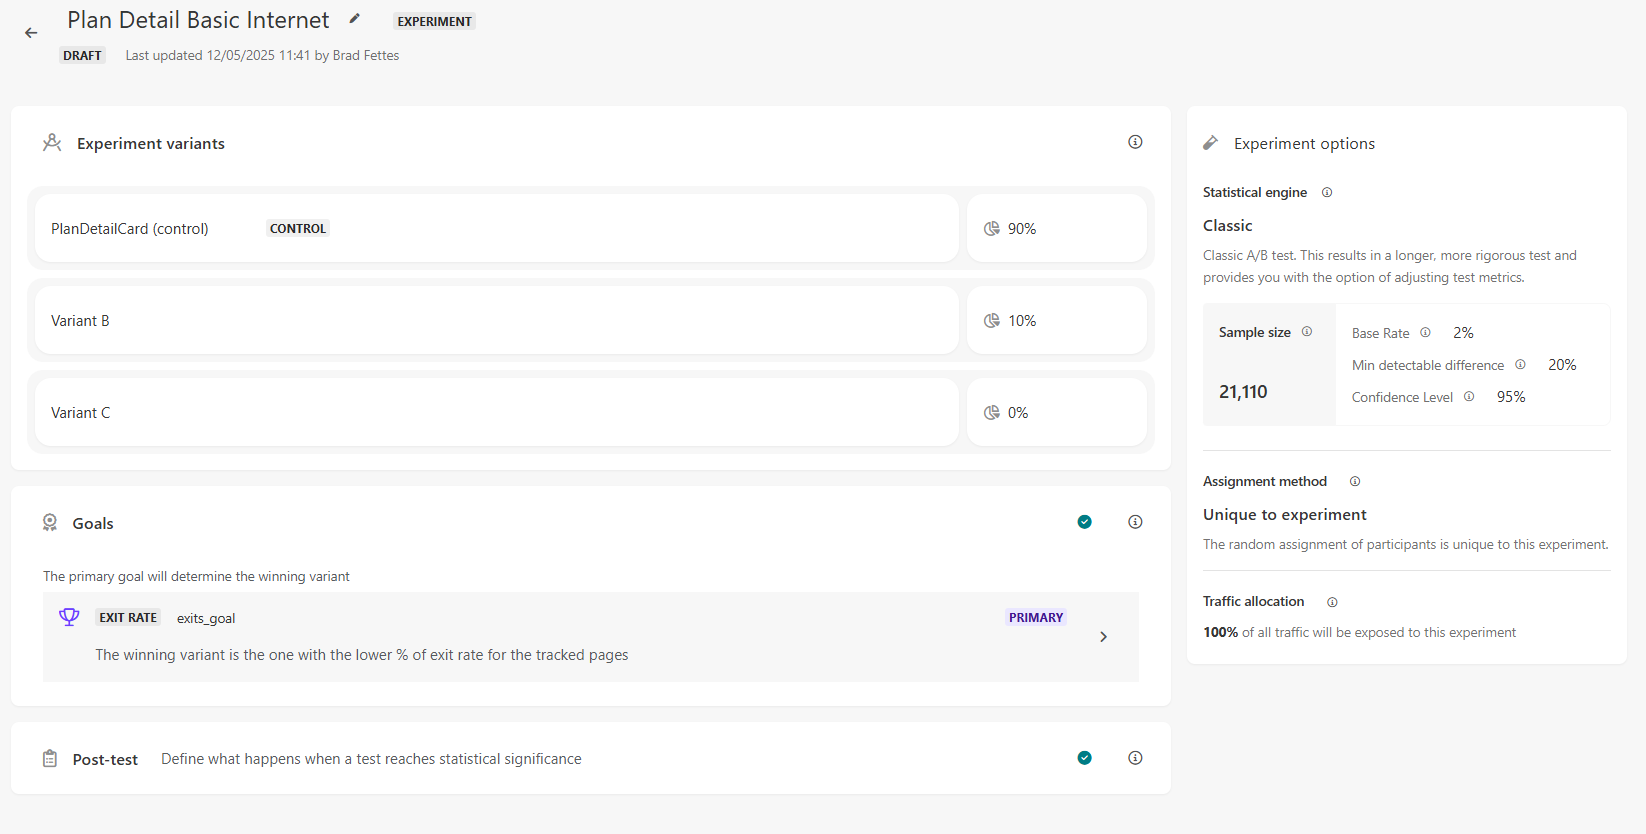
Experiences → SitecoreAI Experiences will correspond to your Page Variant tests.
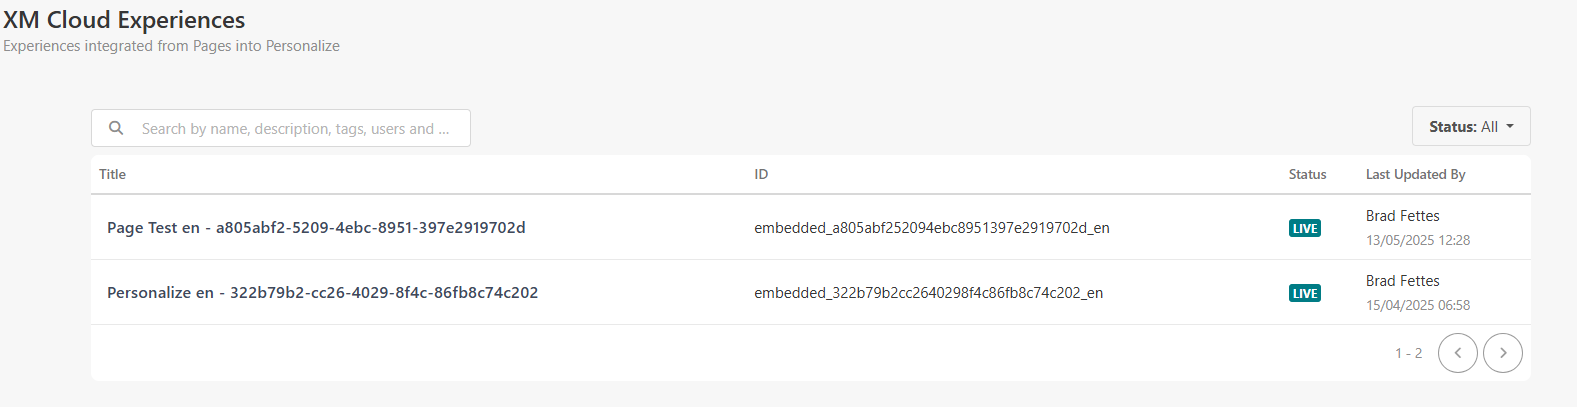
Selecting the Page Test en entry will take us to the test we built above.
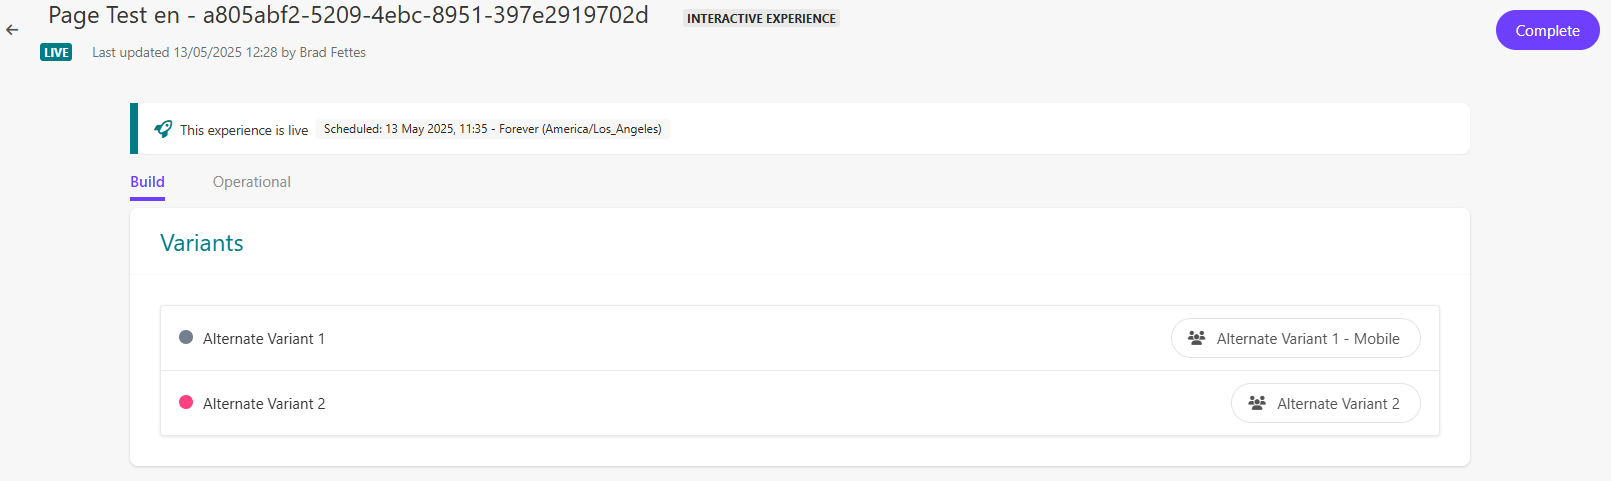
On the first tab (Build) we will see an overview of what we built out inside of Pages:
And clicking on the button on the right side for each variant will give you an overview of what was built out:
The part you will likely be interested in will be the Operational tab which will show you a report of Successful Executions, Failed Executions, and Executions Average Duration.
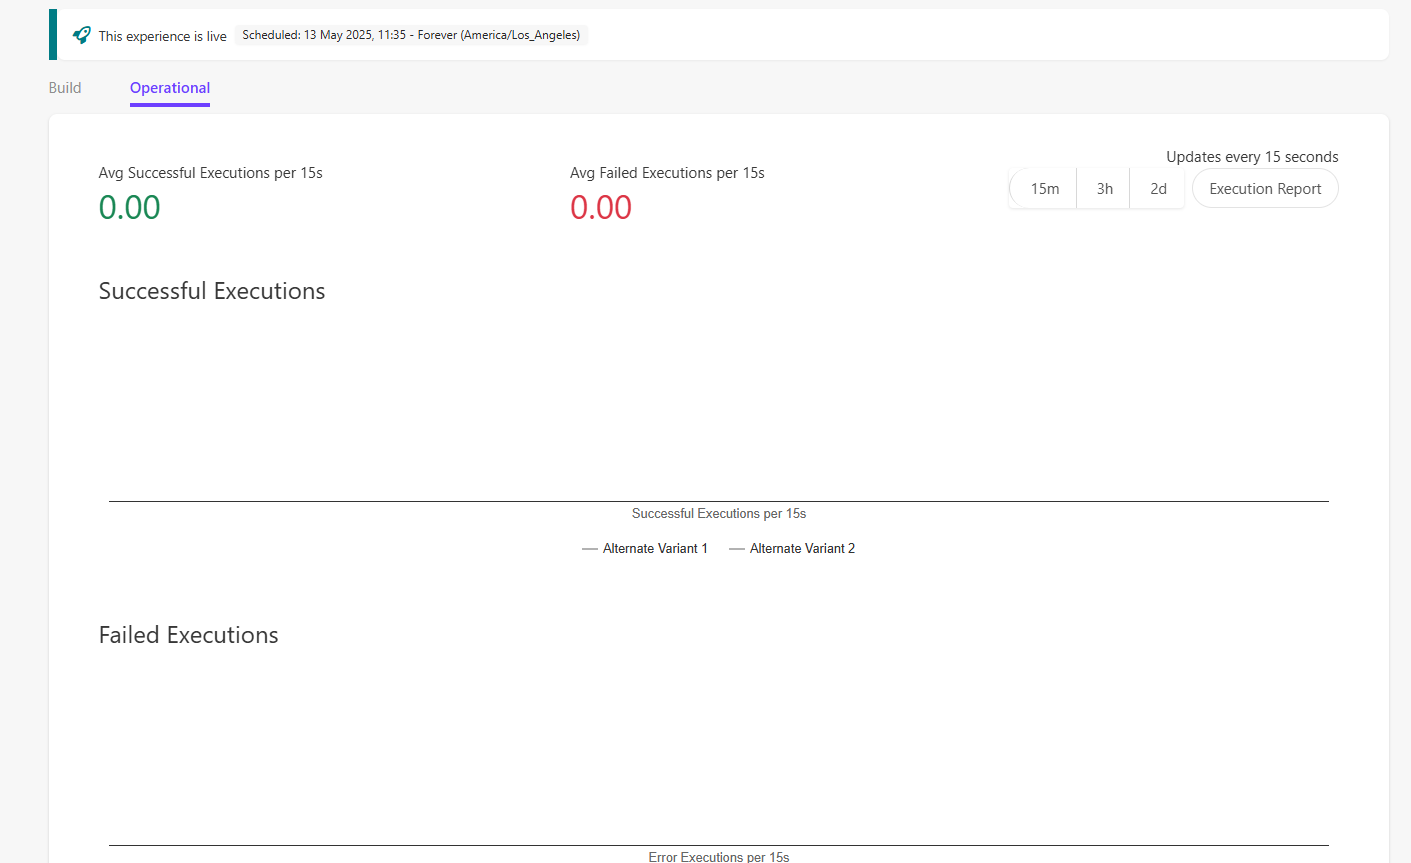
You may also complete the test by clicking the Complete button at the top right (available on both tabs).
For more detailed information on all of the other sections of Personalize, we highly recommend checking out the Sitecore Documentation. There is also additional documentation available for Developers.
SitecoreAI's personalization capabilities through A/B/n testing and Page Variant testing provide content authors and marketers with sophisticated yet accessible tools to optimize digital experiences. Whether you're testing individual component variations, experimenting with entirely different page layouts, or creating targeted experiences based on user conditions like device type or geographic location, these features enable data-driven decision making that can significantly impact user engagement and conversion rates.
The flexibility to choose between component-level A/B/n tests and comprehensive page variants ensures that teams can select the right approach for their specific testing goals. Component tests excel at fine-tuning individual elements like call-to-action buttons or content cards, while page variants offer the power to deliver completely different experiences to distinct user segments. The automated actions and traffic allocation controls further streamline the testing process, allowing experiments to run efficiently with minimal manual intervention.
Success with personalization lies not just in the initial setup of tests, but in the ongoing analysis and iteration cycle. The integrated Personalize dashboard provides the insights needed to understand which variations resonate with your audience, enabling continuous refinement of your content strategy. As you implement these practices, remember that effective personalization is an evolving discipline - one that rewards experimentation, careful measurement, and the willingness to adapt based on what the data reveals about your users' preferences and behaviours.
By mastering these personalization tools within SitecoreAI, your organization can move beyond one-size-fits-all content delivery to create more meaningful, targeted experiences that drive measurable business results and foster stronger connections with your audience.