Reading time: 14 min read
Integrating Sitecore Send Subscription Forms with Sitecore CDP Using Next.js
Custom form handling and API integration for Sitecore Send and CDP in a headless setup.
Start typing to search...
If you’re working with Sitecore Send for email campaigns and Sitecore CDP (Customer Data Platform) for visitor profiles, you might wonder how to bridge the gap between them—especially if you're creating a custom subscription form using Next.js.
In scenarios where Sitecore Send’s default forms fall short—like supporting multi-select preferences or maintaining on-brand styling—a custom solution becomes essential. This guide walks you through building a flexible subscription form using Next.js, and integrating it with Sitecore CDP and Send for a seamless user experience and clean data flow
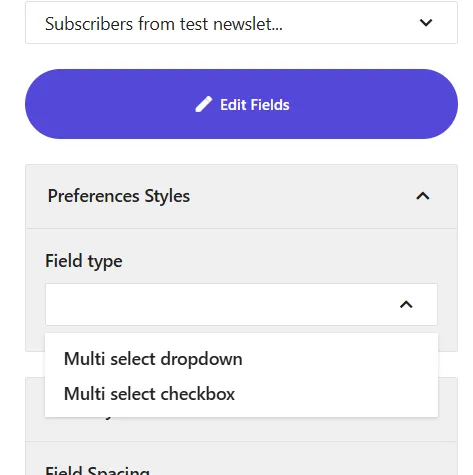
Sitecore Send provides ready-to-use subscription forms that allow you to collect email addresses and other user information without writing custom code. These forms are built directly within the Sitecore Send platform and are designed to help growing your mailing lists quickly and easily. If you're new to Sitecore Send, check out my beginner's guide to Sitecore Send integration to get up and running. Even though these are the easiest to implement, our requirement was to have subscription forms with multiselect checkboxes which is not supported as of now in the ready-made subscription forms. Also the requirement was to build form following the custom branding guidelines. So the next approach was to make use of the Preference Center and Landing Pages
Sitecore Send includes a Preference Center for each mailing list, which is useful for allowing subscribers to manage the types of emails they wish to receive—such as newsletters, event invites, or product updates. This is especially valuable for organizations committed to personalized and compliant email marketing.
While the Preference Center is a powerful feature, it comes with two major limitations:
Branding Restrictions:
The Preference Center is hosted on Sitecore Send’s domain and does not inherit the design or branding of your website. For organizations focused on delivering a seamless user experience, this creates a noticeable disconnect.
Embedding Restrictions:
Attempts to embed the Preference Center within your site using an iframe fail due to browser security headers (such as X-Frame-Options and Content-Security-Policy) that block cross-domain embedding. This results in errors like:
"This content is blocked. Contact the site owner to fix the issue."
A basic workaround is to have the “Manage Preferences” link open the Sitecore-hosted page in a new tab or pop-up window. While this maintains functionality, it compromises the visual continuity and UX of your brand ecosystem.
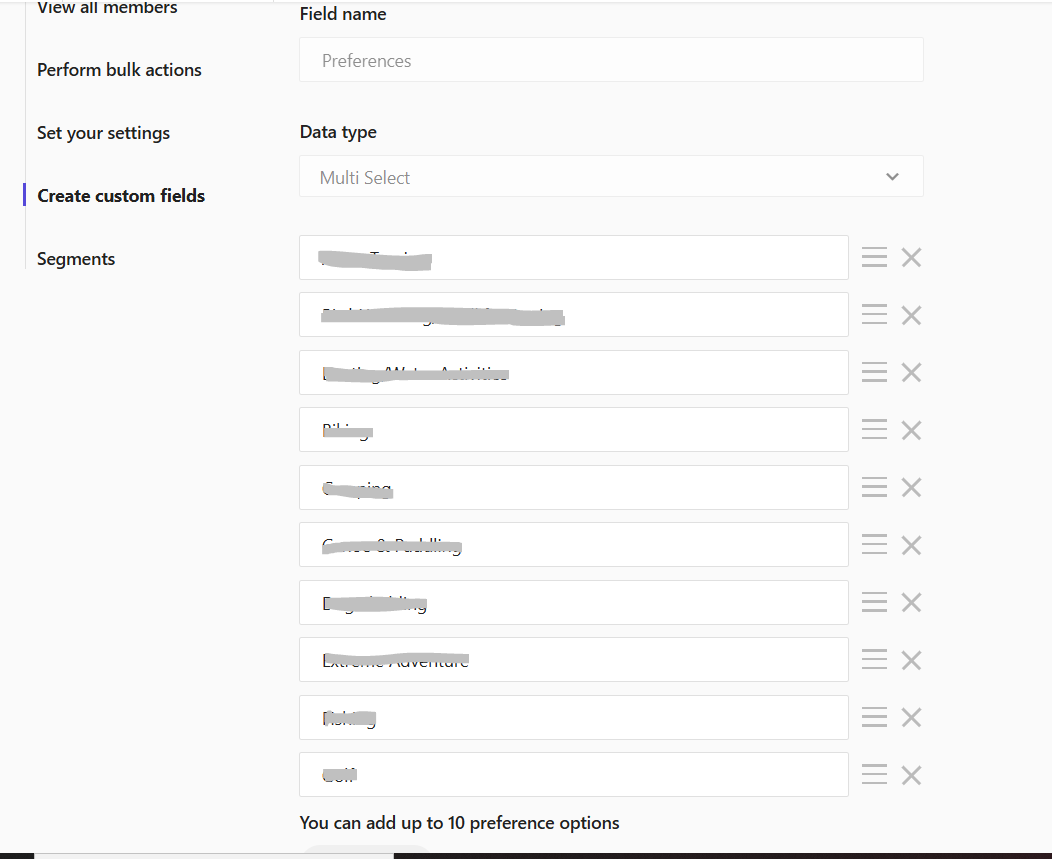
Additionally, Sitecore Send currently supports a maximum of 10 preference options, which can be limiting if your use case involves a broader range of user interests.
However, for organizations that want a fully branded and seamless experience, the ideal approach is to build a custom subscription form on your own domain. Using Sitecore Send’s API, you can fetch and display a subscriber’s current preferences, allow them to update their choices, and push those updates back to Sitecore Send. This gives you full control over layout, styling, and even additional UX features—like user authentication or saving form progress—while keeping your email data synchronized.
The user fills out the custom subscription form built with Next.js, including fields like First Name, Last Name, Email, and Area of Interest (multi-select checkboxes).
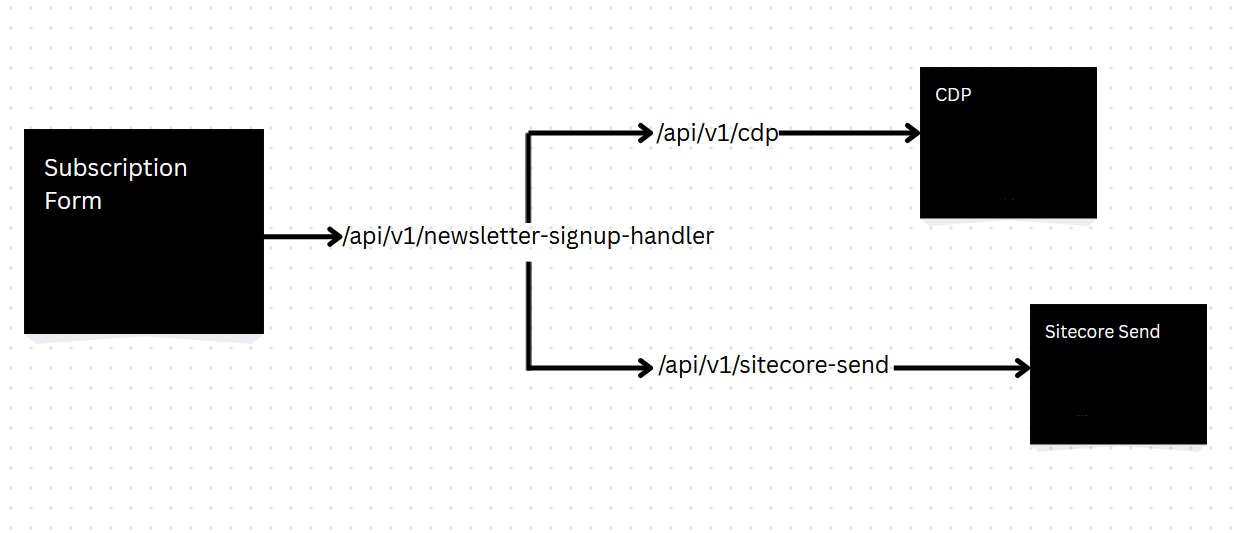
Once the user submits the form, the data is sent to your backend via a POST request to a Next.js API route (api/v1/newsletter-signup-handler). This API is responsible for forwarding the data to Sitecore CDP and Sitecore Send.
Splitting the logic into /api/cdp and /api/sitecore-send allows easier debugging, independent failure handling, and better logging.
The Next.js backend processes the incoming form data and handles two separate API calls:
The first API call creates or updates a guest profile in Sitecore CDP. The request includes details like:
If the profile doesn't exist, the API creates a new guest. If it exists, the API updates the guest's profile with the new data.
The second API call subscribes the user to a newsletter in Sitecore Send. The user’s email and preferences (like areas of interest) are sent to Sitecore Send’s subscriber endpoint.
If both API calls succeed, the backend responds to the front-end with a success message. If either API call fails, an error message is returned, and the form handles the error gracefully (e.g., displaying a message to the user).
The front-end can show a confirmation message to the user after successful form submission, letting them know they have been added to the mailing list and their preferences have been updated.
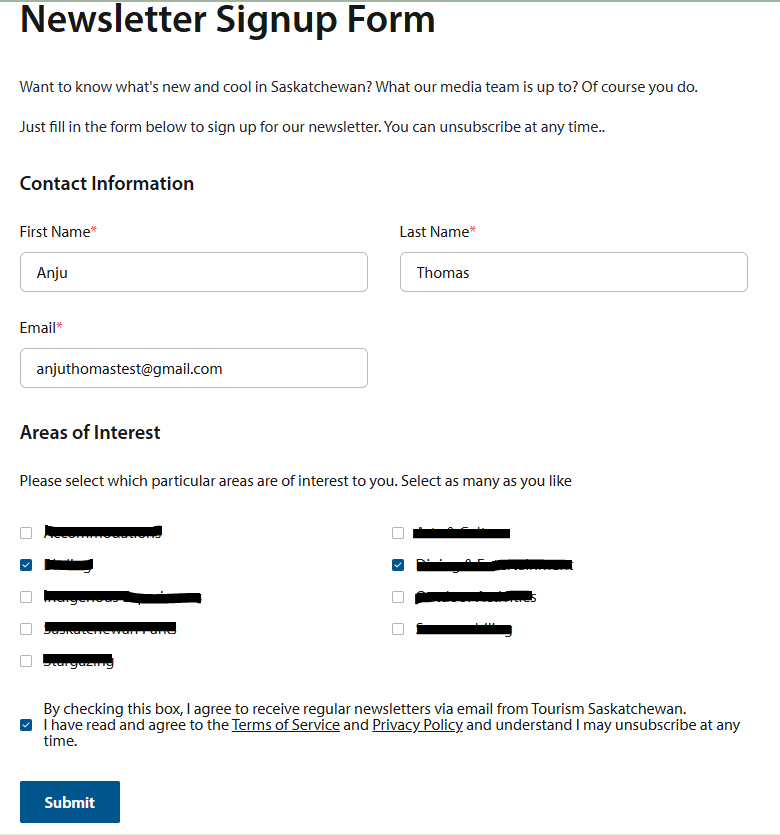
Below is the form design we have for the subscription form
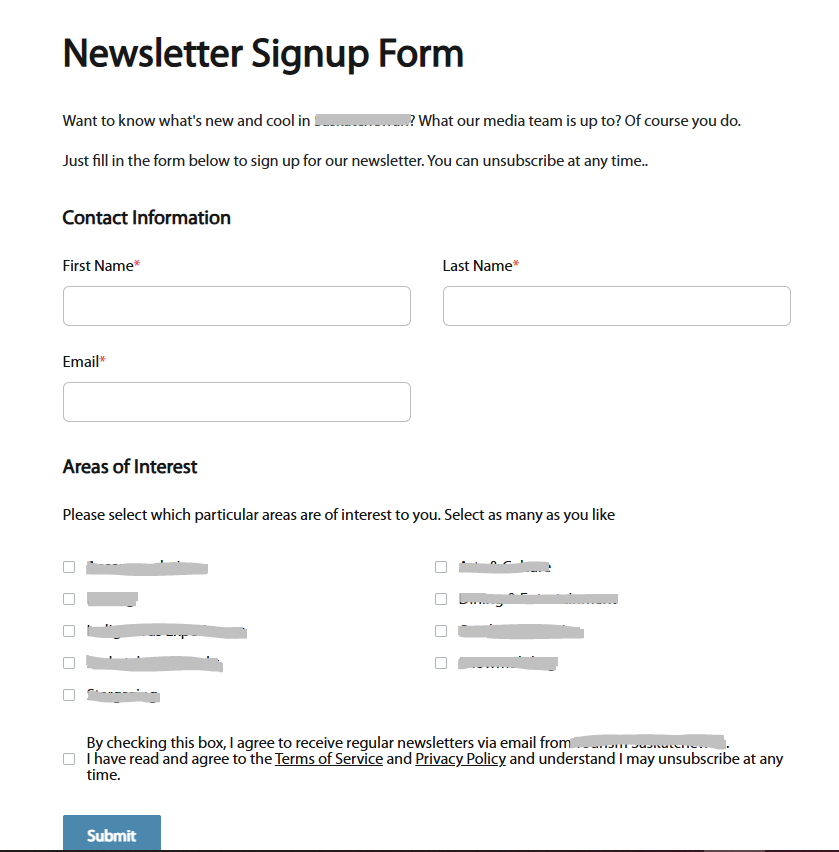
This newsletter signup form includes inputs for First Name, Last Name, Email, a multi-select checkbox group for Areas of Interest, and a required Privacy Consent checkbox.
All labels, headings, and descriptions are powered by Sitecore content fields, making them fully editable by content authors. The Area of Interest field is managed using a Multilist, allowing multiple options to be configured in Sitecore.
User interactions like typing or selecting checkboxes trigger handleChange, which updates the form's submission object in context. The area of interest checkboxes support multiple selections, converting selected options into a comma-separated string to be used in the final submission payload.
Below is the code snippet for the form
export const FormContent: React.FC<{ fields: NewsletterSignupFormProps['fields'] }> = ({
  fields,
}) => {
  const { formData, setFormData } = useFormContext();

  const handleChange = (name: string, value: string) => {
    setFormData((prev) => ({
      ...prev,
      submissionObject: { ...prev.submissionObject, [name]: value },
    }));
  };

  return (
    <section aria-labelledby="newsletter-signup-form">
      <Text tag="h1" className="heading-1 mb-8" field={fields.formHeading} />
      <div className="mb-8">
        <RichText field={fields.formBody} className="paragraph" />
      </div>
      <Text
        tag="h5"
        id="contact-info"
        className="heading-5 mb-6"
        field={fields?.contactInfoHeading}
      />
      <FormRow layout="split">
        <TextInput
          required
          id="firstName"
          label={fields.firstNameLabel.value}
          value={formData.submissionObject.firstName}
          onChange={(value: string) => handleChange('firstName', value)}
          error={formData.errorObject.firstName}
        />
        <TextInput
          required
          id="lastName"
          label={fields.lastNameLabel.value}
          value={formData.submissionObject.lastName}
          onChange={(value: string) => handleChange('lastName', value)}
          error={formData.errorObject.lastName}
        />
      </FormRow>

      <FormRow layout="split">
        <EmailInput
          required
          id="email"
          label={fields.emailLabel.value}
          value={formData.submissionObject.email}
          onEmailChange={(value: string) => handleChange('email', value)}
          error={formData.errorObject.email || ''}
        />
      </FormRow>

      <Text
        tag="h5"
        id="area-of-interest-heading"
        className="heading-5 mb-6"
        field={fields?.areaOfInterestHeading}
      />
      <div className="mb-8">
        <RichText field={fields.selectLabel} className="paragraph" />
      </div>
      <FormRow layout="full">
        <div className="grid w-full grid-cols-2 gap-4">
          {populateFormOptions(fields.areaOfInterestOptions).map((option) => {
            // Convert the current value to array of selected interests
            const selectedInterests =
              typeof formData.submissionObject.areaOfInterest === 'string'
                ? formData.submissionObject.areaOfInterest.split(',').filter(Boolean)
                : [];

            return (
              <div key={option.value} className="flex items-center">
                <Checkbox
                  id={`interest-${option.value}`}
                  label={option.value}
                  checked={selectedInterests.includes(option.value)}
                  onCheckedChange={(checked: boolean) => {
                    const newInterests = checked
                      ? [...selectedInterests, option.value]
                      : selectedInterests.filter((interest) => interest !== option.value);

                    // Join the array back into a CSV string
                    handleChange('areaOfInterest', newInterests.join(','));
                  }}
                />
              </div>
            );
          })}
        </div>
      </FormRow>
      <FormRow layout="full">
        <Checkbox
          required
          id="privacyConsent"
          label={fields.termsAndConditions?.value}
          checked={formData.submissionObject.privacyConsent === 'true'}
          onCheckedChange={(checked: boolean) => handleChange('privacyConsent', checked.toString())}
          error={formData.errorObject.privacyConsent || ''}
        />
      </FormRow>
    </section>
  );
};
This API route handler in Next.js handles the form submission from the newsletter signup form and forwards the data to two different services: Sitecore CDP and Sitecore Send. When a POST request is received, it expects a formData object in the request body. First, it makes a POST request to the /api/v1/cdp endpoint (a backend route you’d have created to handle Sitecore CDP logic), sending the form data. If that call succeeds, it then sends the same data to the /api/v1/sitecore-send endpoint, which is responsible for subscribing users to the newsletter via Sitecore Send. If either call fails, it returns an error with a 500 status. If both calls succeed, the API responds with a 200 status and a success message. This approach ensures the form data is submitted to both services in sequence and is wrapped with proper error handling.
import type { NextApiRequest, NextApiResponse } from 'next';

type ResponseData = {
  success: boolean;
  message?: string;
  error?: string;
};

export default async function handler(req: NextApiRequest, res: NextApiResponse<ResponseData>) {
  if (req.method !== 'POST') {
    return res.status(405).json({ success: false, error: 'Method not allowed' });
  }

  try {
    const { formData } = req.body;

    // First API call - CDP submission
    const cdpResponse = await fetch(`${process.env.PUBLIC_URL}/api/v1/cdp`, {
      method: 'POST',
      headers: {
        'Content-Type': 'application/json',
      },
      body: JSON.stringify(formData),
    });

    if (!cdpResponse.ok) {
      throw new Error('CDP submission failed');
    }

    // Second API call - Newsletter subscription
    const sendResponse = await fetch(`${process.env.PUBLIC_URL}/api/v1/sitecore-send`, {
      method: 'POST',
      headers: {
        'Content-Type': 'application/json',
      },
      body: JSON.stringify(formData),
    });

    if (!sendResponse.ok) {
      throw new Error('Newsletter signup failed');
    }

    // Both calls succeeded
    return res.status(200).json({
      success: true,
      message: 'Successfully submitted to both services',
    });
  } catch (error) {
    console.error('Error in newsletter signup handler:', error);
    return res.status(500).json({
      success: false,
      error: error instanceof Error ? error.message : 'An unknown error occurred',
    });
  }
}
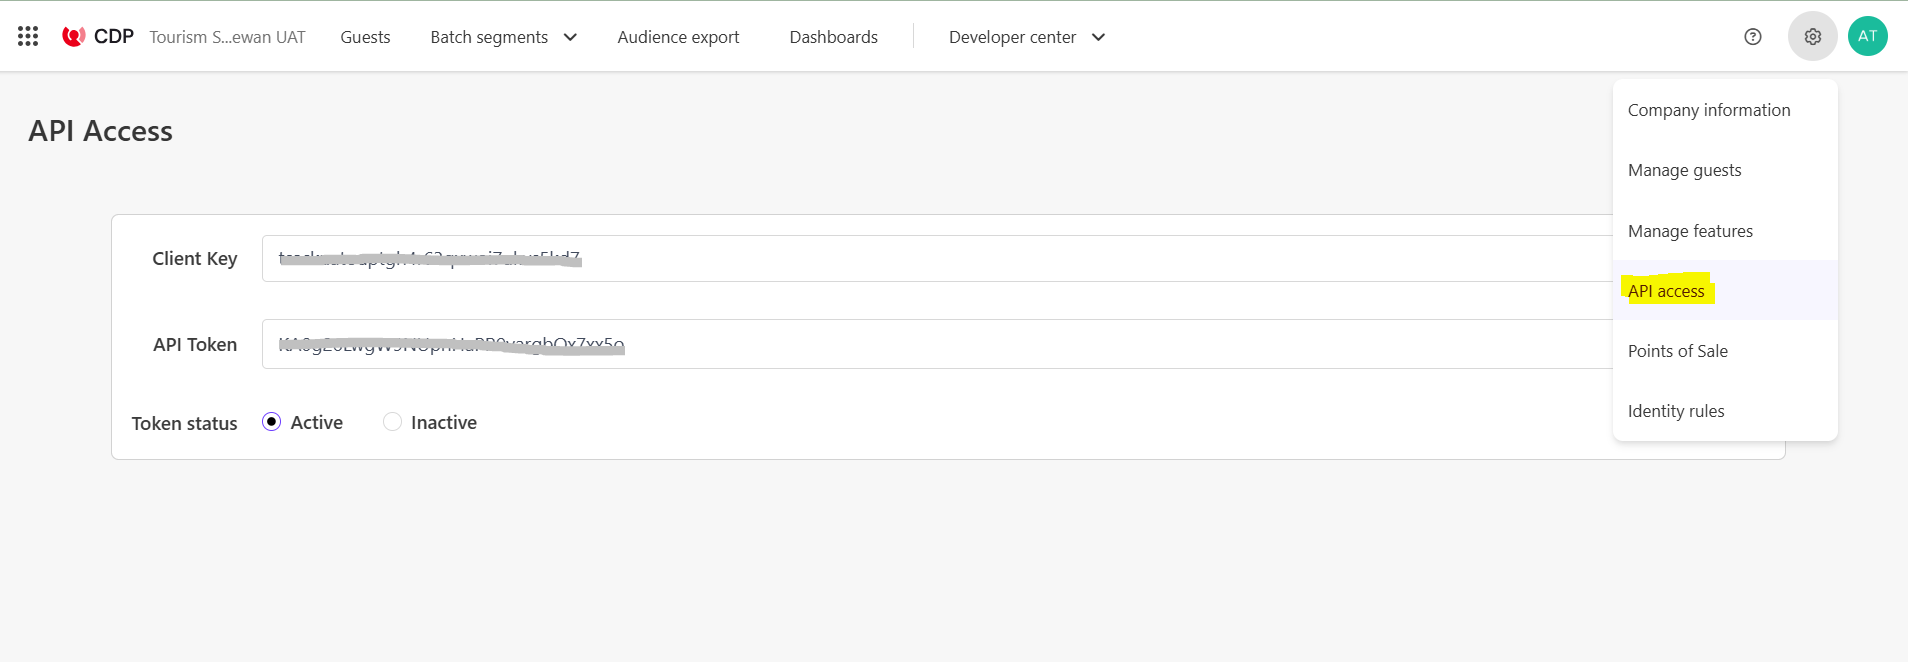
To enable authentication for our API calls to Sitecore CDP, we need to retrieve the Client Key and API Token from the CDP portal, as shown in the screenshot. These credentials are essential for securely connecting to the CDP.
This Next.js API route handles guest creation and custom field extension in Sitecore CDP via Basic Authentication. When a POST request is received, it extracts firstName, lastName, email, and areaOfInterest from the request body. It then:
/v2/guests endpoint to create or identify the guest using their email. If successful, it retrieves the unique ref of the guest./v2/guests/{ref}/extensions to update the guest with a custom extension field (here, areaOfInterest), under the extension name ext.
export default async function handler(req: NextApiRequest, res: NextApiResponse<ResponseData>) {
  if (req.method === 'POST') {
    const { firstName, lastName, email, areaOfInterest }: RequestBody = req.body;

    // Basic auth credentials
    const username = process.env.CDP_API_USERNAME;
    const password = process.env.CDP_API_PASSWORD;
    const authString = Buffer.from(`${username}:${password}`).toString('base64');

    try {
      // First API call to create guest
      const firstResponse = await fetch('https://api-engage-us.sitecorecloud.io/v2/guests', {
        method: 'POST',
        headers: {
          'Content-Type': 'application/json',
          Authorization: `Basic ${authString}`,
        },
        body: JSON.stringify({
          guestType: 'customer',
          channel: 'WEB',
          type: 'IDENTITY',
          identifiers: [
            {
              provider: 'email',
              id: email,
            },
          ],

          firstName: firstName,
          lastName: lastName,
        }),
      });

      if (!firstResponse.ok) {
        const errorData = await firstResponse.json();
        return res.status(400).json({ error: errorData });
      }

      // Get the ref from the first response
      const firstResponseData: CDPResponse = await firstResponse.json();
      const guestRef = firstResponseData.ref;

      // Second API call to update guest with area of interest
      const secondResponse = await fetch(
        `https://api-engage-us.sitecorecloud.io/v2/guests/${guestRef}/extensions`,
        {
          method: 'POST',
          headers: {
            'Content-Type': 'application/json',
            Authorization: `Basic ${authString}`,
          },
          body: JSON.stringify({
            name: 'ext',
            areaOfInterest: areaOfInterest,
          }),
        }
      );

      if (!secondResponse.ok) {
        const errorData = await secondResponse.json();
        return res.status(400).json({
          error: `Error updating guest interests: ${JSON.stringify(errorData)}`,
        });
      }

      res.status(200).json({
        message: 'Successfully created guest and updated interests in CDP',
      });
    } catch (error) {
      console.error('CDP API Error:', error);
      res.status(500).json({
        error: 'Internal server error',
        message: error instanceof Error ? error.message : 'Unknown error occurred',
      });
    }
  } else {
    res.setHeader('Allow', ['POST']);
    res.status(405).end(`Method ${req.method} Not Allowed`);
  }
}
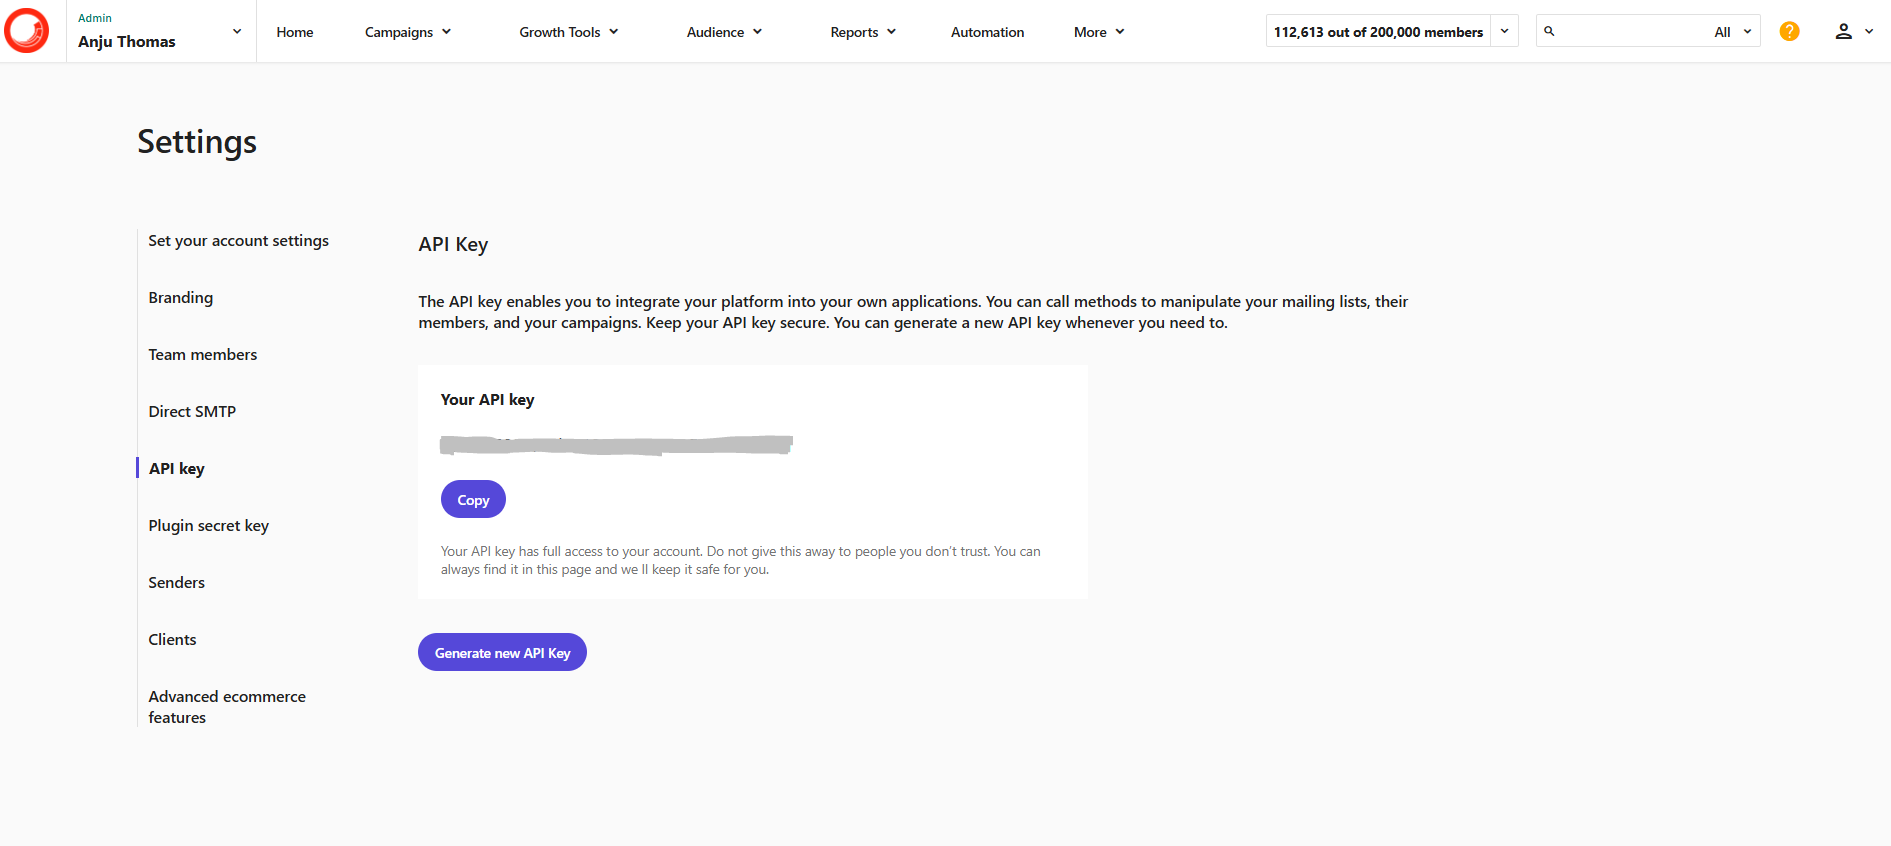
Start by creating an empty Email List in the Sitecore Send portal. Once created, copy the Email List ID — you'll need it later when adding subscribers via the API.
To configure your subscription form with Sitecore Send, you'll also need the following:
These two credentials are essential for authenticating and directing subscriber data to the correct list.
For security and maintainability, store both the API Key and Email List ID as environment variables in your .env file. This practice helps keep sensitive data out of your codebase and makes your configuration easier to manage across environments.
Below is the code snippet for the API route for sending subscriber’s data to Sitecore Send
export default async function handler(req: NextApiRequest, res: NextApiResponse<ResponseData>) {
  if (req.method === 'POST') {
    const { firstName, lastName, email, areaOfInterests }: RequestBody = req.body;
    //API Key
    const apikey = process.env.SITECORE_SEND_API_KEY;
    const mailingListID = process.env.NEWSLETTER_MAILING_LIST_ID;
    try {
      const response = await fetch(
        `https://api.sitecoresend.io/v3/subscribers/${mailingListID}/subscribe.json?apikey=${apikey}`,
        {
          method: 'POST',
          headers: {
            'Content-Type': 'application/json',
          },
          body: JSON.stringify({
            Email: email,
            HasExternalDoubleOptIn: false,
            CustomFields: [`First Name=${firstName}`, `Last Name=${lastName}`],
            Preferences: [areaOfInterests],
          }),
        }
      );

      if (response.ok) {
        res.status(200).json({ message: 'Successfully sent to Sitecore Send' });
      } else {
        const errorData = await response.json();
        res.status(400).json({ error: errorData });
      }
    } catch (error) {
      console.error('CDP API Error:', error);
      res.status(500).json({
        error: 'Internal server error',
        message: error instanceof Error ? error.message : 'Unknown error occurred',
      });
    }
  } else {
    res.setHeader('Allow', ['POST']);
    res.status(405).end(`Method ${req.method} Not Allowed`);
  }
}
This Next.js API route handles newsletter form submissions by integrating with Sitecore Send. Upon receiving a POST request, it:
firstName, lastName, email, and a list of areaOfInterests from the request body.POST request to the Sitecore Send subscriber endpoint.Passes the user's data including:
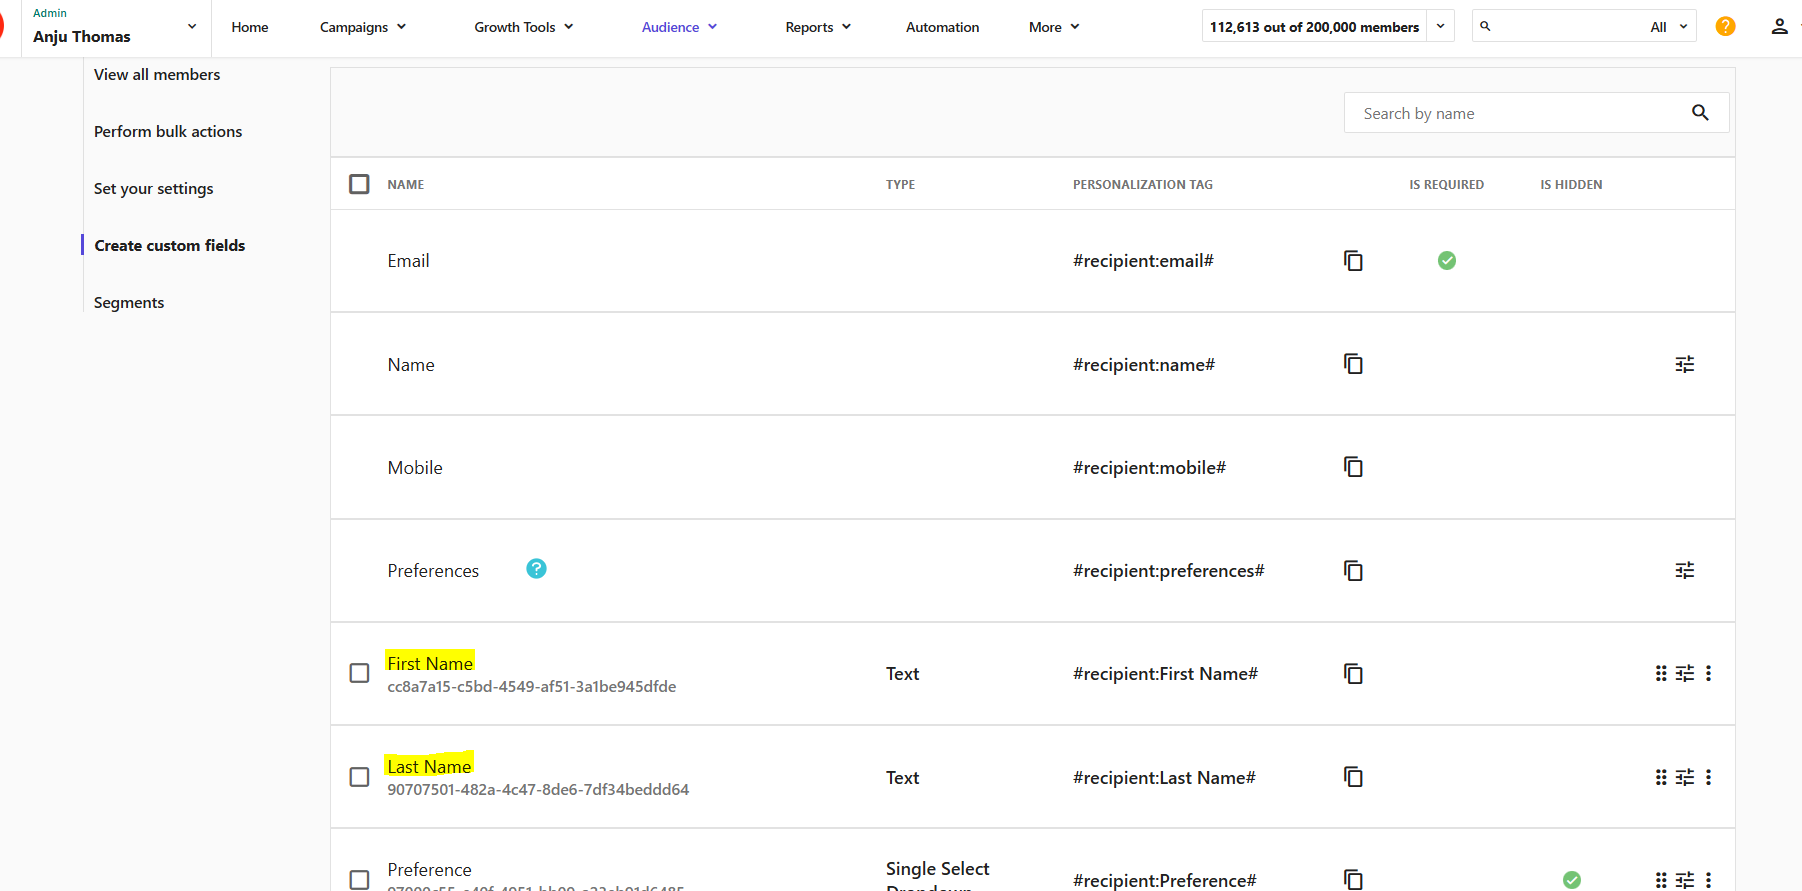
Email: the subscriber's email address.CustomFields: custom fields like first and last name (formatted as "Field Name=Value" strings). Make sure these field names match the custom fields you have created in the Email list
Preferences: the user's selected interests, grouped under one array.
If the request is successful, it returns a 200 status with a success message. If the request fails, it returns the specific error details. This endpoint allows seamless user subscription to targeted mailing lists in Sitecore Send, while capturing relevant personalization data.
Submitting the newsletter subscription form

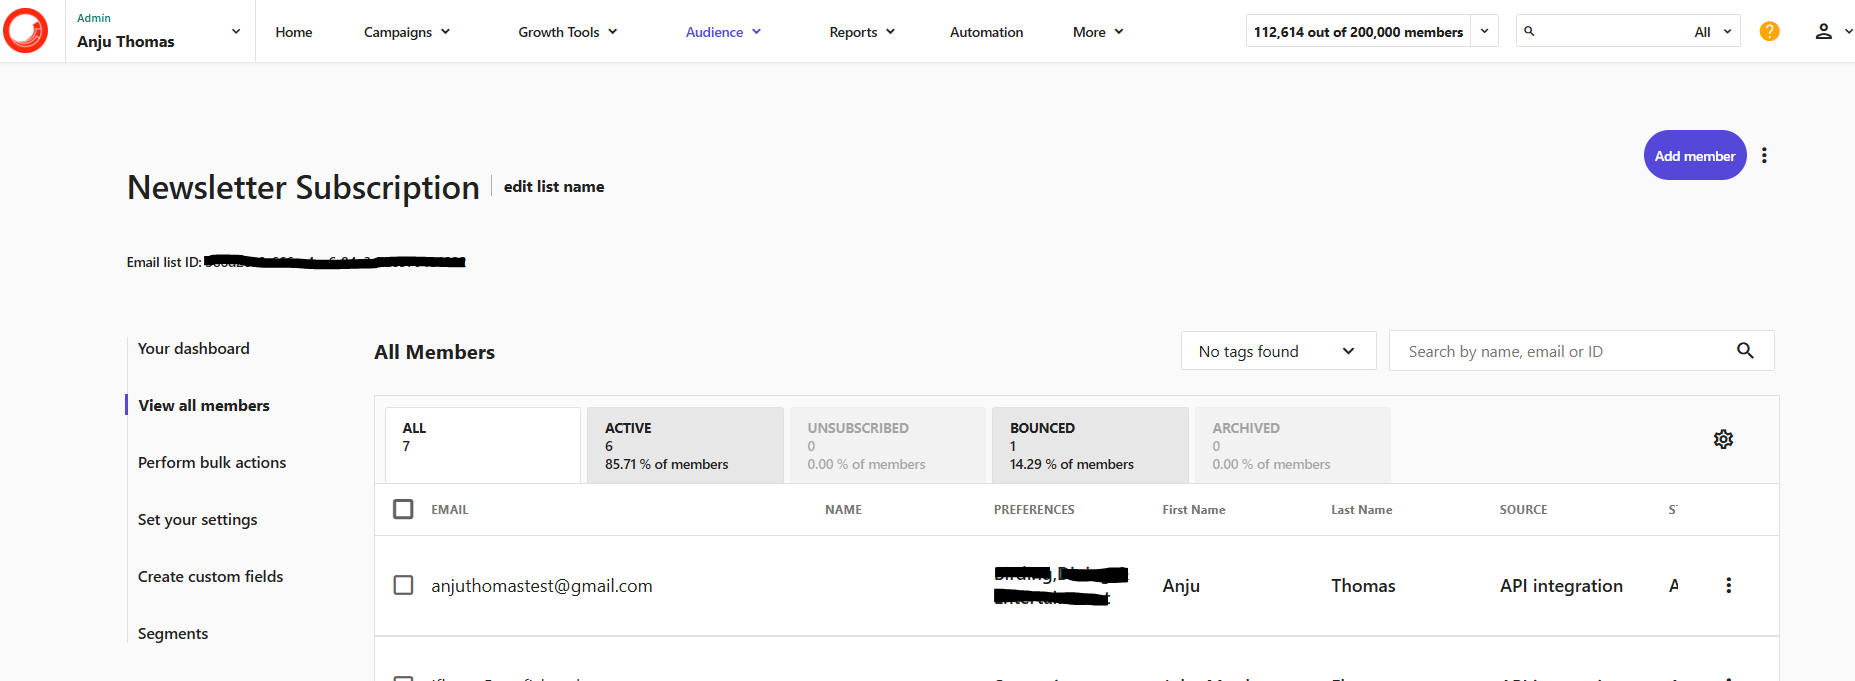
Verifying that the subscriber is added to the email list
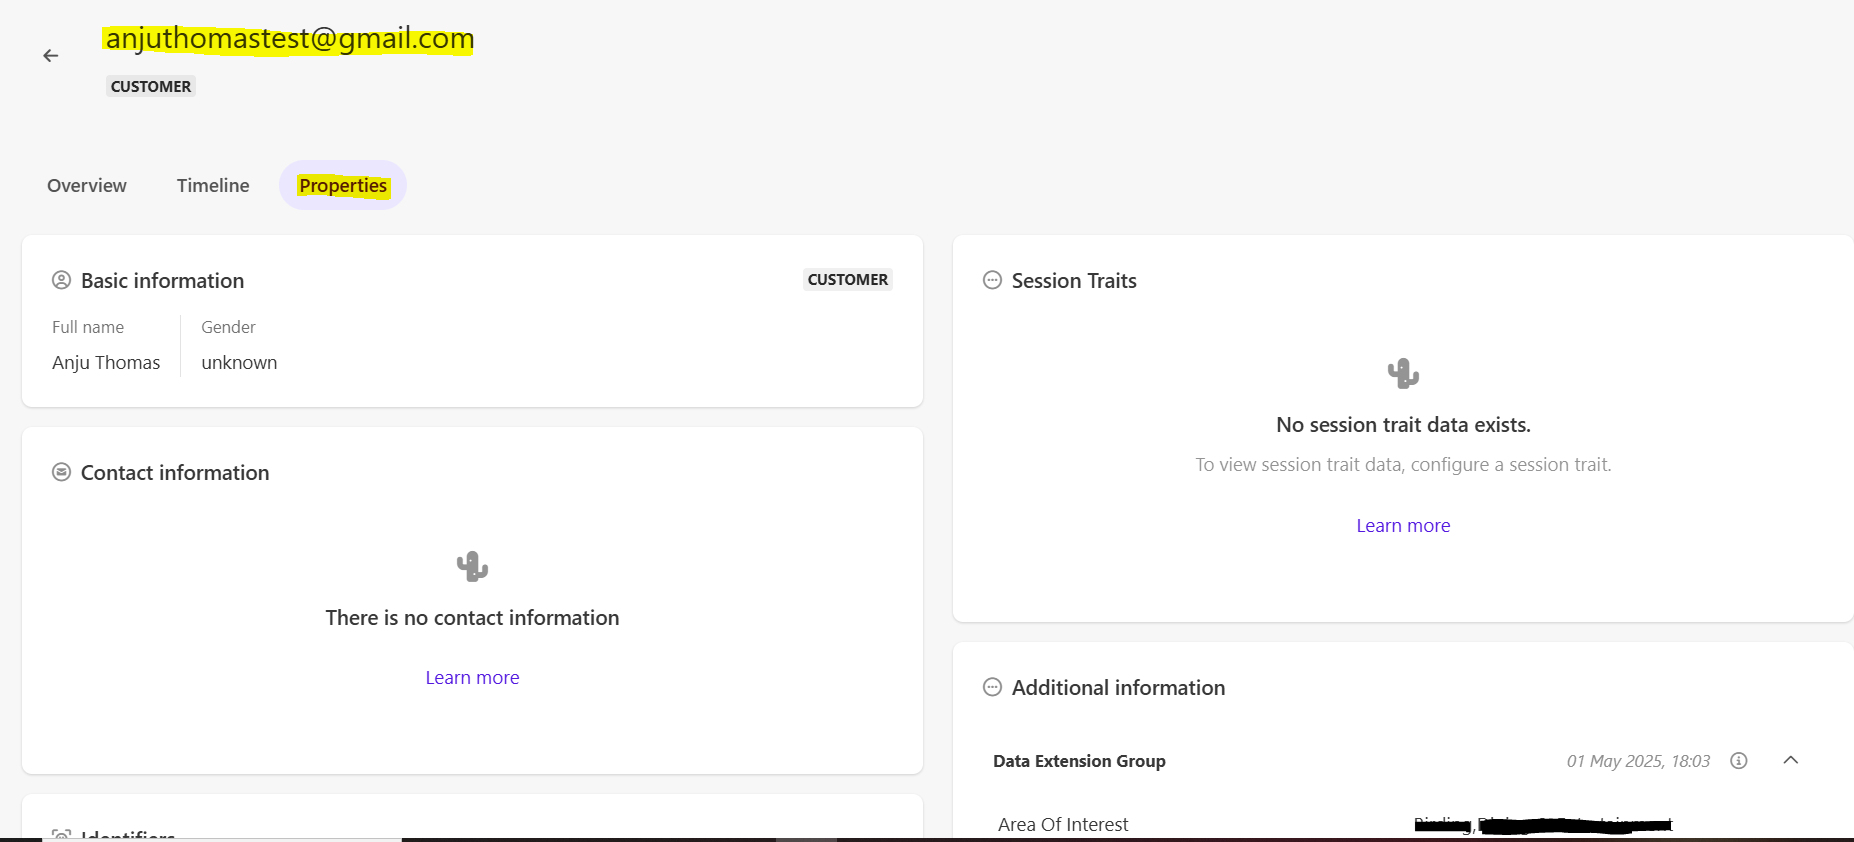
Verifying that the CDP portal has an entry with the subscriber’s details
Building a custom subscription form that integrates both Sitecore CDP and Sitecore Send offers significant flexibility and control over your email marketing workflows. While Sitecore Send’s default forms are quick to implement, they may fall short for organizations with specific needs, such as multi-select preferences or fully branded user experiences. By leveraging the power of Next.js, you can create a personalized and user-friendly subscription form that not only enhances your brand’s look and feel but also ensures that user data is captured accurately and sent seamlessly to both platforms.
Integrating Sitecore CDP and Sitecore Send through custom API calls enables real-time data synchronization, which is critical for maintaining an up-to-date view of your visitors and subscribers. Whether it’s updating preferences, handling custom fields, or ensuring that subscribers are properly segmented in your email campaigns, this approach empowers you to manage data flow and maintain a seamless user experience.
Ultimately, building a custom solution tailored to your specific requirements ensures that you are not limited by the constraints of out-of-the-box solutions, giving you the flexibility to scale, innovate, and engage with your audience in a more meaningful way. Thanks for reading!