Reading time: 9 min read
Implementing a Custom Context API for State Management in Sitecore Headless with Next.js
Enhancing state management in Sitecore Next.js
Start typing to search...
Managing state across pages in a Sitecore headless project can be challenging, especially when your application
relies on more than just Sitecore context data. Often, you'll need to integrate data from third-party APIs alongside
Sitecore content. Ensuring this diverse set of data is consistently accessible throughout your application requires an
effective state management solution. This is where a custom context API comes into play—it allows you to
centralize state management by integrating Sitecore data with additional sources, making the necessary information
readily available across all pages and components in your Next.js app.
In this blog, we’ll walk through setting up a custom context API to manage and persist state in your Sitecore
Next.js project. We’ll cover creating a context in the context folder, integrating it within
app.tsx to make it globally accessible, and using SWR for efficient data fetching. Finally, we'll explain
how to retain state across pages using Next Link or JSS Link for seamless navigation without
losing data.
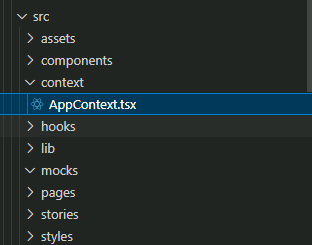
To keep your context files organized, start by creating a new folder called context inside your
src directory:
We'll set up AppContext to manage your application's state—in this case, the
username.
Create a new file called AppContext.tsx inside the context folder and add the following
code:
// src/context/AppContext.tsx

  import React, { createContext, useContext, useState, ReactNode } from 'react';

  type AppContextType = {
    username: string;
    setUsername: (username: string) => void;
  };

  const AppContext = createContext<AppContextType | undefined>(undefined);

  export const AppProvider = ({ children }: { children: ReactNode }) => {
    const [username, setUsername] = useState<string>('');

    return (
      <AppContext.Provider value={{ username, setUsername }}>
        {children}
      </AppContext.Provider>
    );
  };

  export const useAppContext = () => {
    const context = useContext(AppContext);
    if (!context) {
      throw new Error('useAppContext must be used within an AppProvider');
    }
    return context;
  };
Explanation of the Code:
AppContextType):
username string and a
setUsername function.
createContext):
AppContext with undefined to enforce usage within a provider.AppProvider Component:
useState hook to manage the username state.children with AppContext.Provider, passing down username and
setUsername through the value prop.
useAppContext):
useContext(AppContext).useAppContext is called outside of the AppProvider, aiding in
debugging.By initializing AppContext with undefined, you ensure that any component attempting to
access the context outside of AppProvider will receive an error. This helps catch configuration mistakes
early and ensures that the context is used correctly within your application.
To make AppContext available throughout your application, you need to wrap your main component with
AppProvider in app.tsx. This ensures that the context is accessible in all components,
providing a centralized state management solution.
// app.tsx

  import type { AppProps } from 'next/app';
  import { I18nProvider } from 'next-localization';
  import { ExtendedSitecorePageProps } from 'lib/page-props';
  import { AppProvider } from '../context/AppContext';

  function App({ Component, pageProps }: AppProps<ExtendedSitecorePageProps>): JSX.Element {
    const { dictionary, ...rest } = pageProps;

    return (
      <AppProvider>
            <I18nProvider lngDict={dictionary} locale={pageProps.locale}>
              <Component {...rest} />
            </I18nProvider>
      </AppProvider>
    );
  }

  export default App;
Explanation:
AppProvider:
AppProvider from our context to wrap our
application.<Component /> with
<AppProvider>, we make the context available throughout the app.
I18nProvider handles internationalization, using the
dictionary and locale from pageProps.
In scenarios where you need to fetch user-specific information—like the username—after
authentication, you can integrate next-auth alongside your AppContext. Here's how you can
modify app.tsx to include authentication:
// app.tsx

  import type { AppProps } from 'next/app';
  import Router from 'next/router';
  import { I18nProvider } from 'next-localization';
  import { ExtendedSitecorePageProps } from 'lib/page-props';
  import { SessionProvider } from 'next-auth/react';
  import { AppProvider } from '../context/AppContext'; // Updated import

  function App({ Component, pageProps }: AppProps<ExtendedSitecorePageProps>): JSX.Element {
    const { dictionary, ...rest } = pageProps;
    const isEdit = pageProps?.layoutData?.sitecore?.context?.pageEditing;

    return (
      <AppProvider>
          <SessionProvider session={pageProps.session} refetchInterval={300}>
            <I18nProvider lngDict={dictionary} locale={pageProps.locale}>
              <Component {...rest} />
            </I18nProvider>
          </SessionProvider>
      </AppProvider>
    );
  }

  export default App;
Explanation:
SessionProvider:
SessionProvider from
next-auth/react to handle user sessions and authentication.
SessionProvider:
SessionProvider inside
AppProvider, allowing us to access authentication data within our context.
username) after login and store it in the context for global access.Tip: Always ensure that your context and authentication providers are correctly nested to prevent any access issues. The order typically is:
To use the context in your components or custom hooks, import useAppContext and interact with the state
as needed.
Let's create a custom hook that fetches user details and updates the username in the context.
// hooks/useUserDetails.ts

  import { useEffect } from 'react';
  import useSWR from 'swr';
  import { useAppContext } from '../context/AppContext'; // Updated import
  import { UserDetailsResponse } from '../types/type';

  type UserDetails = {
    userId: string;
  };

  const fetcher = async (url: string, arg: UserDetails) => {
    const response = await fetch(url, {
      method: 'POST',
      headers: {
        'Content-Type': 'application/json',
      },
      body: JSON.stringify(arg),
    });

    if (!response.ok) {
      throw new Error(`HTTP error! status: ${response.status}`);
    }

    return response.json();
  };

  export const useUserDetails = (userDetails: UserDetails) => {
    const { setUsername } = useAppContext();
    const { data, error, isValidating } = useSWR<UserDetailsResponse, Error>(
      ['/api/user/details', userDetails],
      ([url, details]) => fetcher(url, details),
      {
        revalidateOnFocus: false,
        revalidateOnReconnect: false,
        fallbackData: undefined,
      }
    );

    useEffect(() => {
      if (data) {
        setUsername(data.username || '');
      }
    }, [data, setUsername]);

    return {
      userDetails: data,
      isUserDetailsLoading: isValidating,
      userDetailsError: error,
    };
  };
Explanation:
useAppContext:
setUsername.username in the
context.setUsername in the dependency array of
useEffect.
For more details about SWR and data fetching in Next.js, please refer to this comprehensive guide.
Now, let's see how to use the useUserDetails hook and access the username from the context
in a component.
// components/UserProfile.tsx

  import React from 'react';
  import { useUserDetails } from '../hooks/useUserDetails';
  import { useAppContext } from '../context/AppContext';

  const UserProfile = ({ userId }) => {
    const { userDetails, isUserDetailsLoading, userDetailsError } = useUserDetails({ userId });
    const { username } = useAppContext();

    if (isUserDetailsLoading) return <div>Loading...</div>;
    if (userDetailsError) return <div>Error loading user details.</div>;

    return (
      <div>
        <h2>User Profile</h2>
        <p>Username: {username}</p>
        {/* Render other user details here */}
      </div>
    );
  };

  export default UserProfile;
Explanation:
useAppContext to access username in the component.To ensure that the state managed by AppContext persists across page navigations, use client-side
routing:
Link Component:import Link from 'next/link';
const Navigation = () => (
<nav>
<Link href="/profile">Profile</Link>
<Link href="/settings">Settings</Link>
</nav>
);
Link Component:import { Link } from '@sitecore-jss/sitecore-jss-nextjs';
const Navigation = () => (
<nav>
<Link field={{ value: '/profile' }}>Profile</Link>
<Link field={{ value: '/settings' }}>Settings</Link>
</nav>
);
Explanation:
<a> tags can cause the state to
reset due to a full page reload.localStorage or cookies.
Implementing a custom AppContext provides a robust and scalable solution for managing global state in
your Sitecore headless Next.js application. By centralizing state management, you can seamlessly integrate data from
third-party APIs alongside Sitecore content, ensuring that essential information—like the username
in our example—is readily accessible across all pages and components.
We've walked through creating a context in the context folder, integrating it within
app.tsx to make it globally available, and using SWR for efficient data fetching. Additionally, we've
demonstrated how to maintain state across pages using client-side navigation with Next Link or
JSS Link, and how to integrate authentication using next-auth for fetching user-specific
information.
This approach not only simplifies state management but also enhances the scalability and maintainability of your application. By avoiding prop drilling and keeping your state logic organized, you can focus on building features rather than managing data flow.
As you continue to develop your Sitecore headless Next.js projects, consider leveraging the power of React Context for your state management needs. It's a straightforward yet powerful tool that can significantly improve the efficiency and user experience of your applications.

