Reading time: 6 min read
Creating a Progressive Web App Using Next.js
A guide to setting up your first progressive web app using Next.js
Start typing to search...
A guide to setting up your first progressive web app using Next.js
Progressive Web Apps (PWAs) have been gaining a ton of popularity as a strong choice of framework to build digital experiences. Due to its abilities of being accessed via a web browser and also providing users an app-like feel, developers prefer building a PWA to benefit from the numerous features it provides. Capabilities such as fast load times, offline access and seemless navigation such as push notifications. When these features get paired up with Next.js, a powerful React framework, developing a PWA becomes very efficient, thanks to Next.js’s support for server-side rendering, static site generation, and compatible PWA configuration.
In this blog post, I am going to go through the process of setting up a PWA app using Next.js. I will explore all the steps involved in detail to get you up and running with your first PWA project. If you are interested in getting an intro about PWA, check out the video below.
Next.js is a great choice for building PWAs. With features such as automatic code splitting, server-side rendering (SSR), static site generation (SSG) and API routes out of the box, it makes it an ideal choice for building high-performance PWAs.
With Next.js, you can easily add PWA features to your application such as:
Lets begin by creating a next.js application and then add the support to make it a PWA. Follow the steps below in this order.
Use the command line interface and run the following command:
npx create-next-app@latest your app name
For the example of this project, I am going to use Typescript so ensure to hit Yes to the following prompts when creating the app:
cd your-app-name
Installing the next-pwa package give access to a bunch of features that makes it easy to create PWAs on next.js. Features such as:
Install the package by entering the command:
npm install next-pwa
Next, we need to configure next-pwa in the Next.js project. If it doesn’t exist already, create a next.config.ts file in the project’s root directory. Here is how the code should look like:
import type { NextConfig } from "next";
import withPWA from 'next-pwa';

export default withPWA({
    dest: "public",         // destination directory for the PWA files
    disable: process.env.NODE_ENV === "development",        // disable PWA in the development environment
    register: true,         // register the PWA service worker
    skipWaiting: true,      // skip waiting for service worker activation
});
Using the next-pwa package, this code sets up your next.js application to benefit from the pwa capabilities. With these settings, next-pwa will automatically generate s service worker within the public directory.
Creating a manifest.json file, in your public directory, is essential for PWAs. It defines the app details and metadata of your app. The file provides important app details such as app name, description, theme and background color, icons etc. Here is a snippet of what the manifest.json file should look like:
{
    "name": "Your app name",
    "short_name": "App shot name",
    "theme_color": "#00ff00",
    "background_color": "#ffffff",
    "display": "standalone",
    "orientation": "any",
    "scope": "/",
    "start_url": "/",
    "icons": [
      {
        "src": "/icon-192x192.png",
        "type": "image/png",
        "sizes": "192x192"
      },
      {
        "src": "/icon-256x256.png",
        "type": "image/png",
        "sizes": "256x256"
      },
      {
        "src": "/icon-512x512.png",
        "type": "image/png",
        "sizes": "512x512"
      }
    ]
  }
You would have notice the reference for several icon sizes in the code above. Icons are crucial for any PWA as they are used when the app is installed on any device. All icons, for different breakpoints and screen sizes, should be placed in the public directory.
The next step is to link the manifest.json file to be recognized and be considered by the app. To do this, open up the layout.tsx from src/app and adjust the metadata in the following way:
export const metadata: Metadata = {
  title: "Your app name",
  description: "Your app description",
  generator: "Next.js",
  manifest: "/manifest.json",
  keywords: ["nextjs", "next14", "pwa", "next-pwa"],
  themeColor: [{ media: "(prefers-color-scheme: dark)", color: "#fff" }],
  viewport:
    "minimum-scale=1, initial-scale=1, width=device-width, shrink-to-fit=no, viewport-fit=cover",
  icons: [
    { rel: "apple-touch-icon", url: "icon-192x192.png" },
    { rel: "icon", url: "icon-192x192.png" },
  ],
};
At this point, you have finished configuring the code for PWA and are ready to test out your application. Start by building you next application by running the following command:
npm run build
As soon as the build process is complete and successful, you will see two new files created in your public directory:
You can now run the app locally by running the following command:
npm run dev
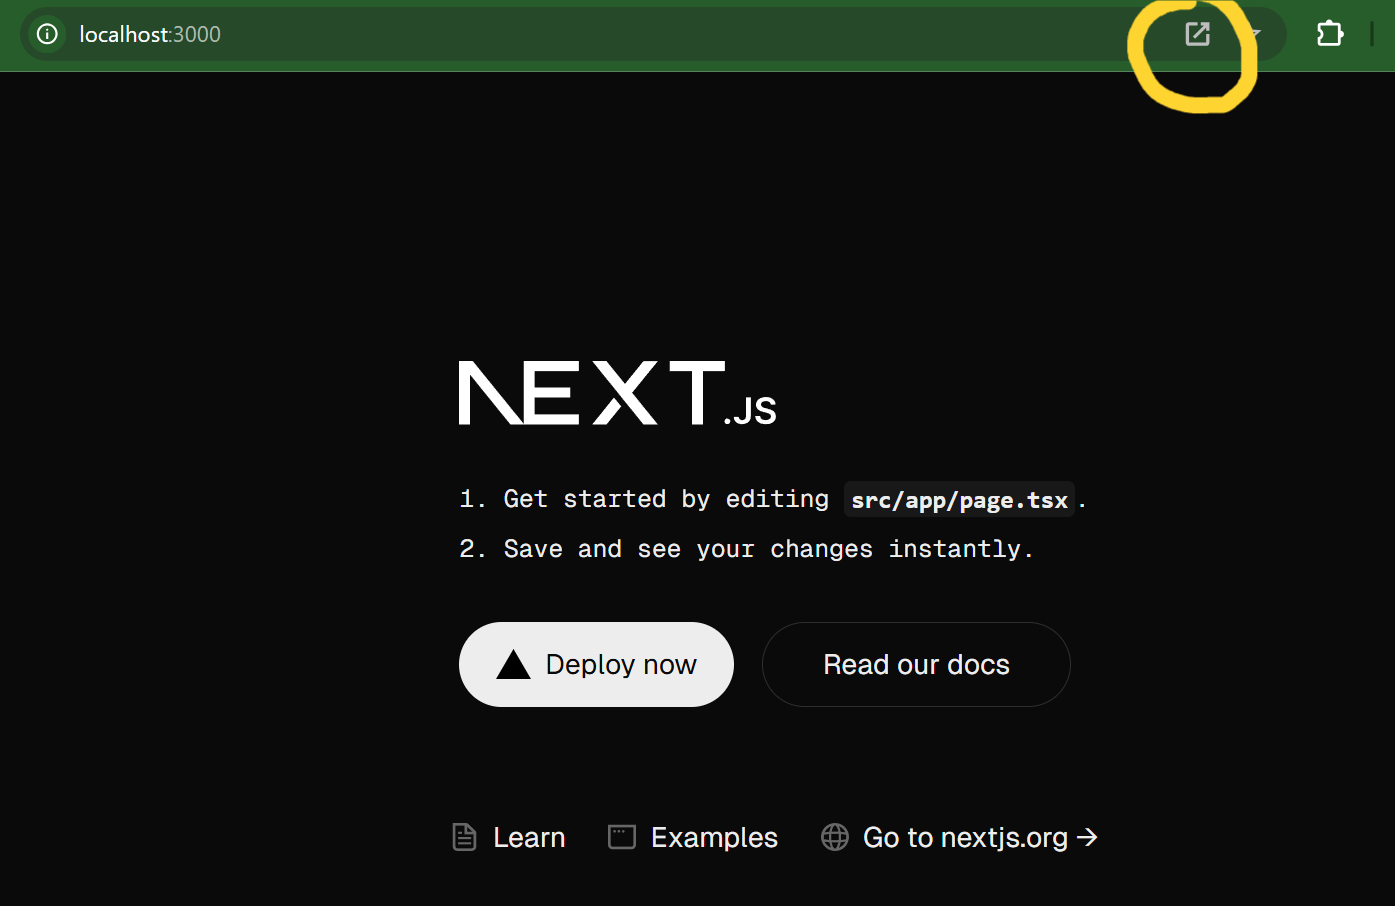
Visit http://localhost:3000/ on your browser and you would see the icon, as highlighted in the below screenshot, to download the app to your device. You can simply click the icon and install the app to your device. After installation, you can search and launch the app on your computer, similar to any other app.
The guide provided in this blog, is a basic setup to get you going with building your first PWA. Following these steps, you have setup a basic PWA app with features like caching, a service worker and generation of a manifest. This setup will further assist you in refining your PWA leveraging the other amazing features it provides. All these features, that PWA offers, combined with the capabilities of neext.js, will be a strong foundation to build and enhance the user experience and engagement that you are looking for in your product.
