Insights

Set Up a Web Experience in Sitecore Personalize

Discover the benefits of experimentation in Sitecore Personalize and master the process of setting up a web experiment in this comprehensive guide.

What Are Experiments?

Experiments are an essential aspect of the optimization process in Sitecore Personalize, particularly when it comes to personalization. Experiments enable you to test the effectiveness of different personalized experiences, such as content, messaging, and offers, to determine which approach resonates best with your audience.

In this blog, I'll take you through the step-by-step process of creating a web experiment in Sitecore Personalize. We'll cover everything from defining the experiment objective and setting up the variants to running the experiment and analyzing the results. By the end of this blog, you'll have the knowledge and tools you need to take your personalization efforts to new heights and deliver exceptional value to your customers.

What Are the Benefits of Experiments?

Through experiments, you can design and assess customized content and incentives for your audience, considering factors such as real-time interactions, propensity scoring, intelligent product recommendations, and other data-driven insights.

Some key benefits of experiments in Sitecore Personalize include the following:

  1. Data-driven decision-making: Experimentation allows you to base your decisions on user behaviour data rather than intuition or guesswork. This helps ensure that your personalization efforts are targeted and effective.
  2. Improved user experience: By testing different variations of an experience, you can identify which version resonates best with your audience. This helps you deliver a better user experience, increasing satisfaction and engagement.
  3. Enhanced conversion rates: Experimentation helps you determine which content, design, or features lead to higher conversion rates. By implementing the winning variations, you can boost the likelihood of visitors completing desired actions, such as purchasing or signing up for a newsletter.
  4. Continuous learning and optimization: Experimentation encourages a culture of continuous learning and improvement. As you test and iterate, you'll gain insights into what works and what doesn't, enabling you to optimize your website or application consistently.
  5. Reduced risk: Experimentation helps you avoid costly mistakes by testing variations before fully implementing them. If a particular change doesn't yield the desired results, you can quickly pivot to a more effective solution without wasting time or resources.

Introduction to Experiments in Sitecore Personalize

With Sitecore Personalize, you can conduct experiments that compare two different versions of an experience to see which one better achieves your desired business goals. (Note: You can only test these variants in a production environment.)

Essentially, an experiment in Sitecore Personalize is an A/B test that runs on the web or within a web-based application. The experiments available in Sitecore Personalize allow marketers to optimize their personalization strategies and effectively manage personalized content on their web pages. It's more than just a test of individual components or a web app—Sitecore Personalize enables you to measure the overall impact of personalized web pages on your customers.

Types of Experiments in Sitecore Personalize

With Sitecore Personalize, you can set up a variety of experiment types, each with unique benefits:

  • Web Experiment: This option enables marketers to create and display dynamic content and offers using web templates. Developers can also use HTML, CSS, and JavaScript to build web experiments with dynamic data. These experiments can run on the web or within a web-based application. (The step-by-step instructions below detail setting up a web experiment in Sitecore Personalize.)
  • Interactive Experiment: Developers can use this experiment type to create dynamic content and offers from back-end systems, delivering maximum server-side personalization. Interactive experiments can run on the web or be deployed within a web-based application.
  • Triggered Experiment: This option is ideal for marketers familiar with FreeMarker. It allows them to create personalized offers and content to send to Email Service Providers (ESPs) or SMS/Push service providers for distribution.

By selecting the most appropriate experiment type for your objectives, you can leverage Sitecore Personalize to enhance your digital experiences and achieve your goals. In this blog, we’re going to focus specifically on setting up a web experiment.

Web Experiments Explained

A web experiment is essentially a statistical test that enables you to compare and evaluate multiple variants of a particular customer experience. For instance, you could create a web experiment to test whether using more enticing images in a pop-up offer increases conversion rates on your Trending Now page. In this case, Variant A could display one set of updated images, Variant B could show a different set, and Variant C would serve as the control, representing the current production site.

What's great about web experiments is that they allow you to explore the effectiveness of various elements in your web content, such as images, headlines, calls-to-action, and more. By testing and comparing different combinations of these elements, you can optimize your content to deliver the best possible user experience and achieve your desired outcomes.

When running web experiments in Sitecore Personalize, you have the flexibility to test various changes to your website elements. This can include anything from small tweaks to major overhauls of key components, such as:

  • Navigation and menu structure
  • Colour schemes and branding elements
  • Image placement and style
  • Font size, style, and colour
  • Text content, tone, and messaging
  • Call-to-action button design, placement, and language

Detailed Guide to Setting Up Web Experiments in Sitecore Personalize

Follow these steps to set up your first web experiment in Sitecore Personalize.

Step 1: Create A Web Experiment

  1. Hover over Experiments in the main navigation, then click on Web.

    Experiments in Sitecore Personalize

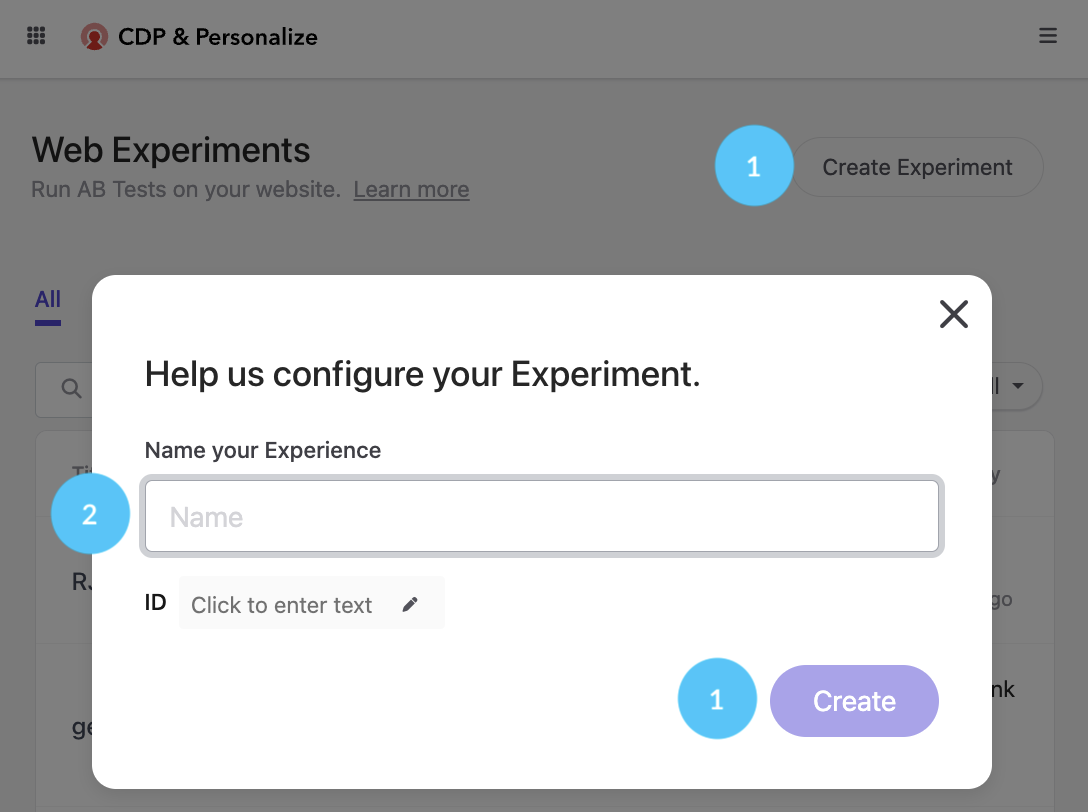
  2. Click on Create Experiment, then enter a unique title for your experiment and click Create.

    Experiments in Sitecore Personalize

Step 2: Create Your Experiment Content

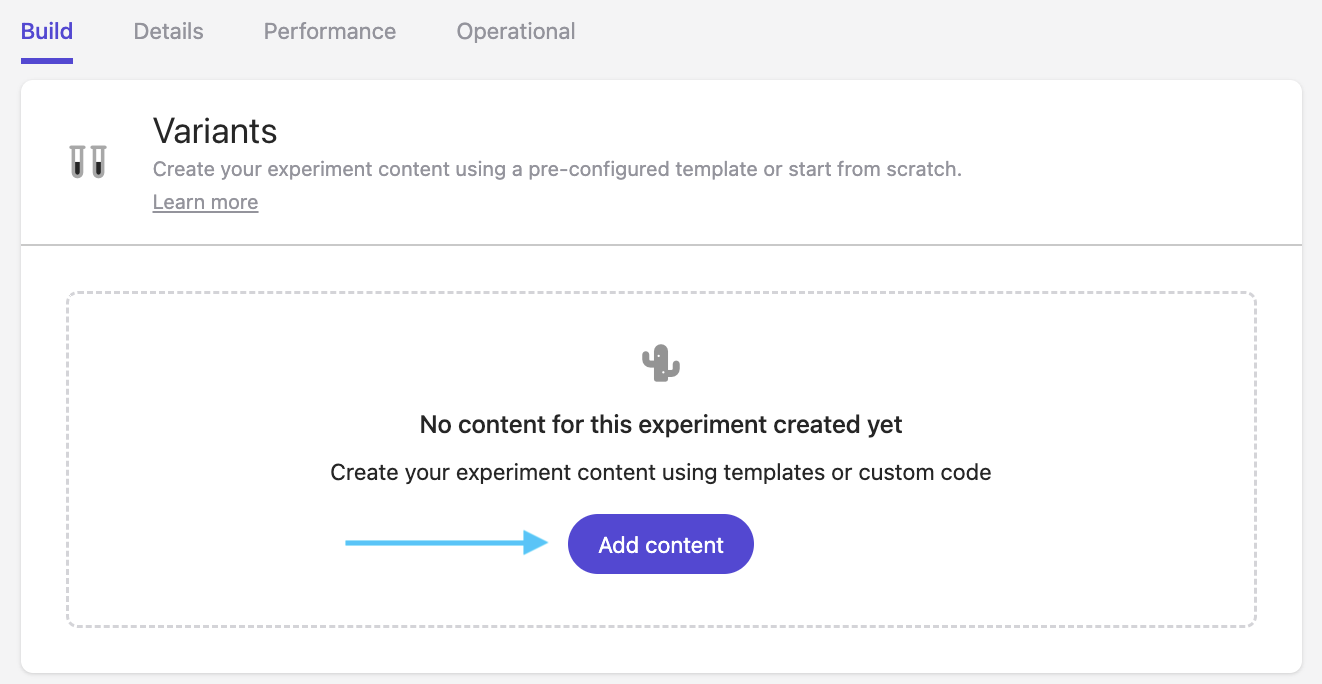
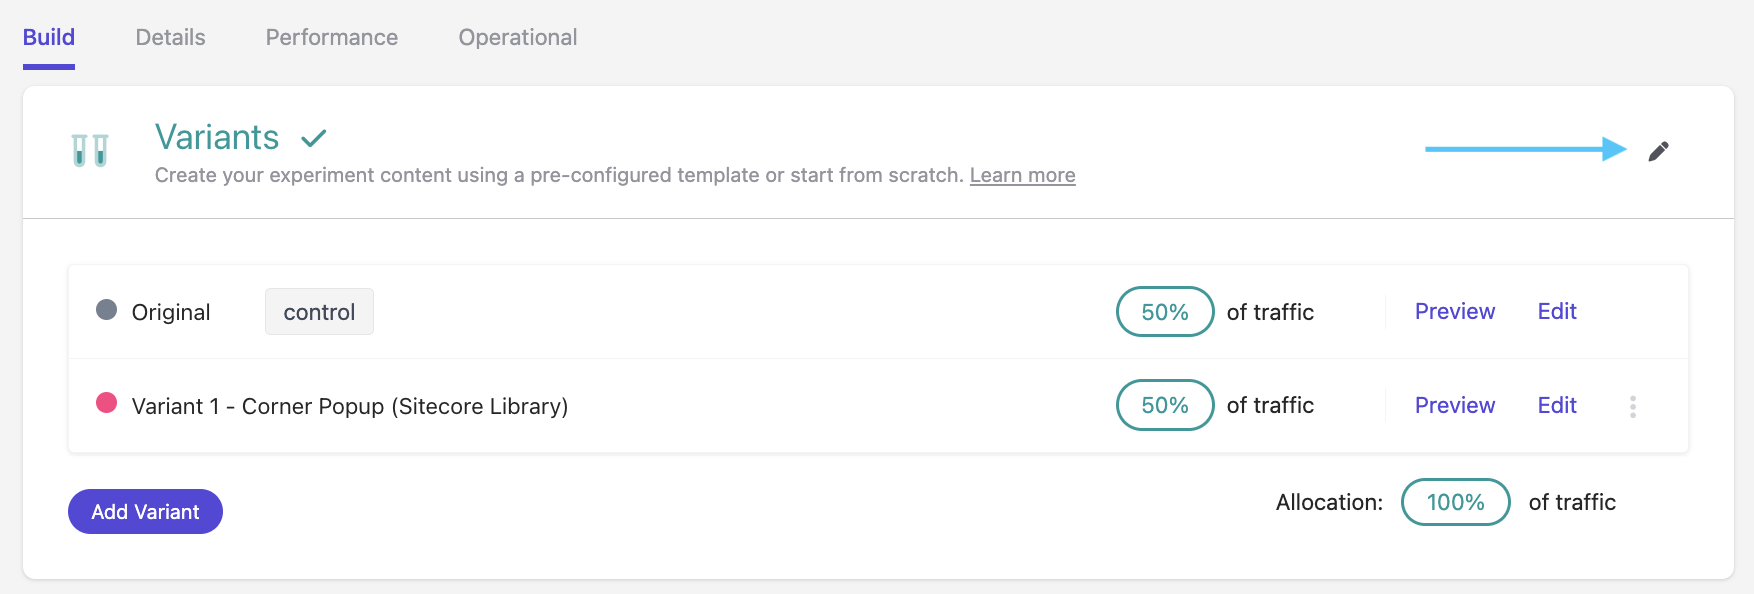
  1. From the web experiment build screen, click the Add Content button under the Variants section on the Build tab.

    Experiments in Sitecore Personalize

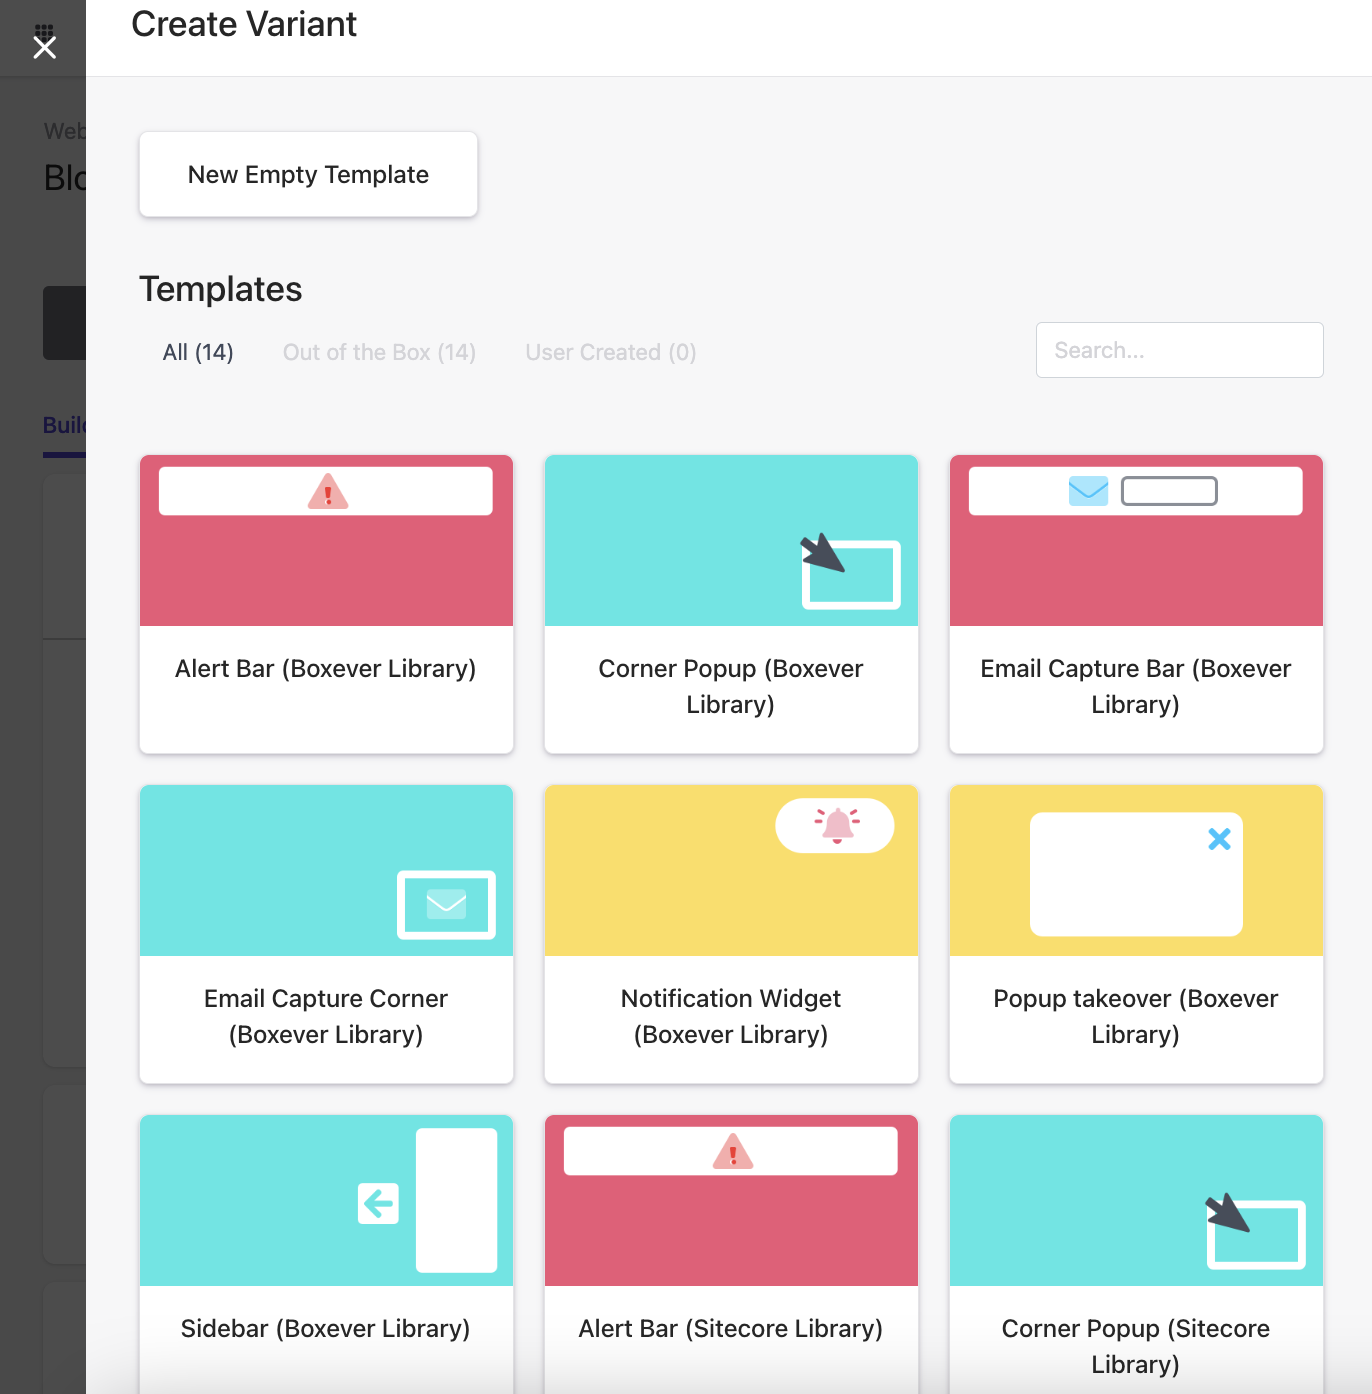
  2. You now have the option to create a variant by either selecting a template or creating your own using custom code. In this example, I’ve selected the Corner Popup template.

    Experiments in Sitecore

  3. Depending on the template, you may have the option to fill out additional fields to customize your experiment further. Some templates even provide a preview feature that shows you what your experiment will look like as you complete the form. Feel free to experiment with different combinations of fields to find the best setup for your needs.

    Experiments in Sitecore

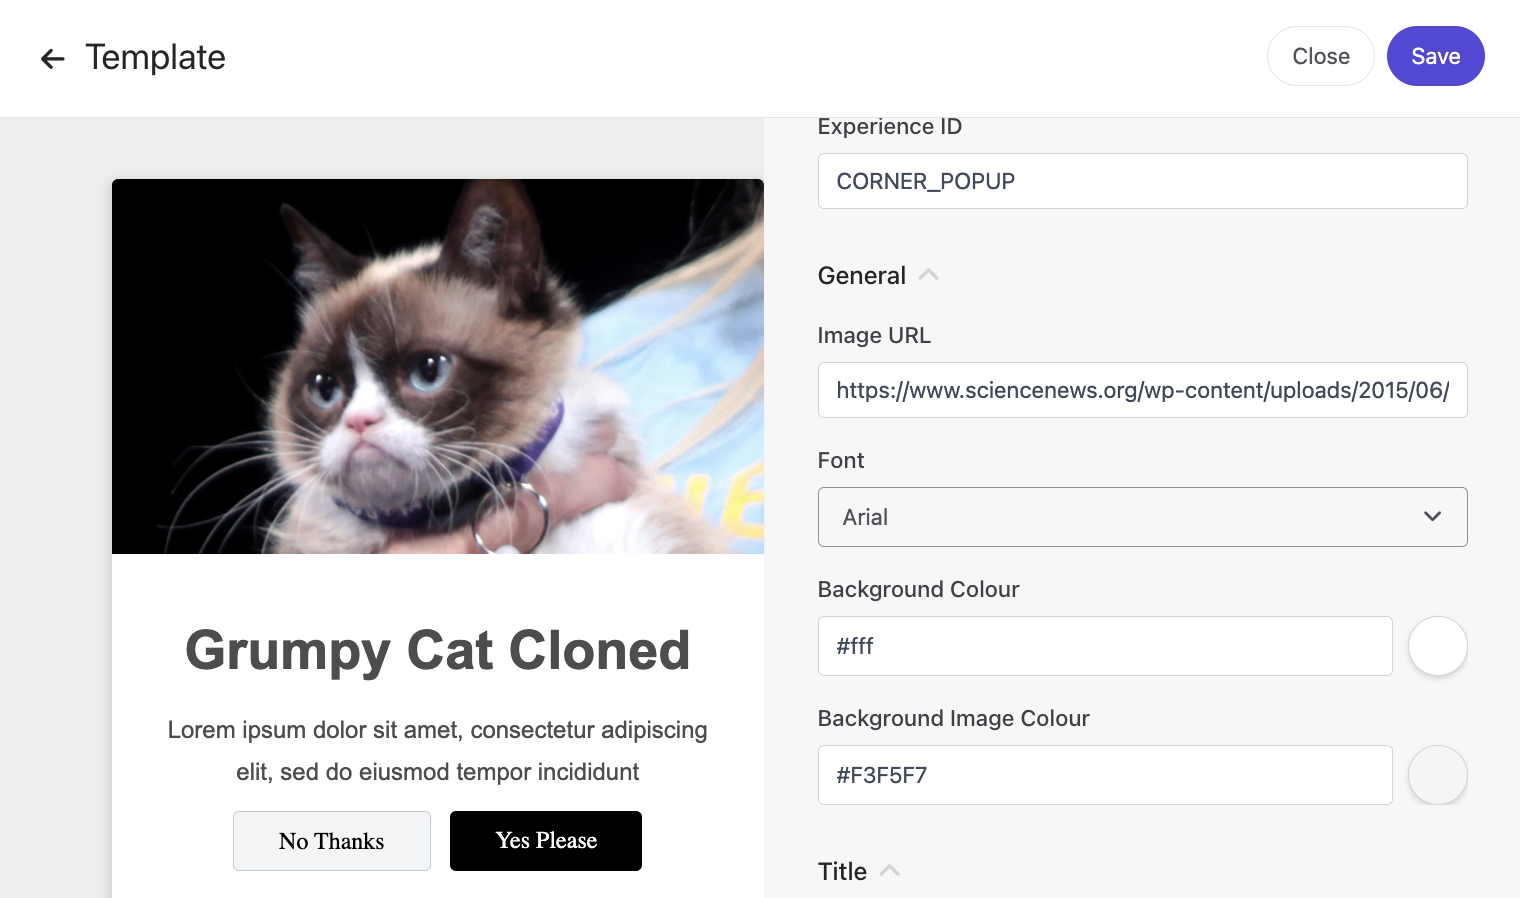
  4. Once you’ve finished defining your experiment, click Save.

Step 3: Set Traffic Allocation

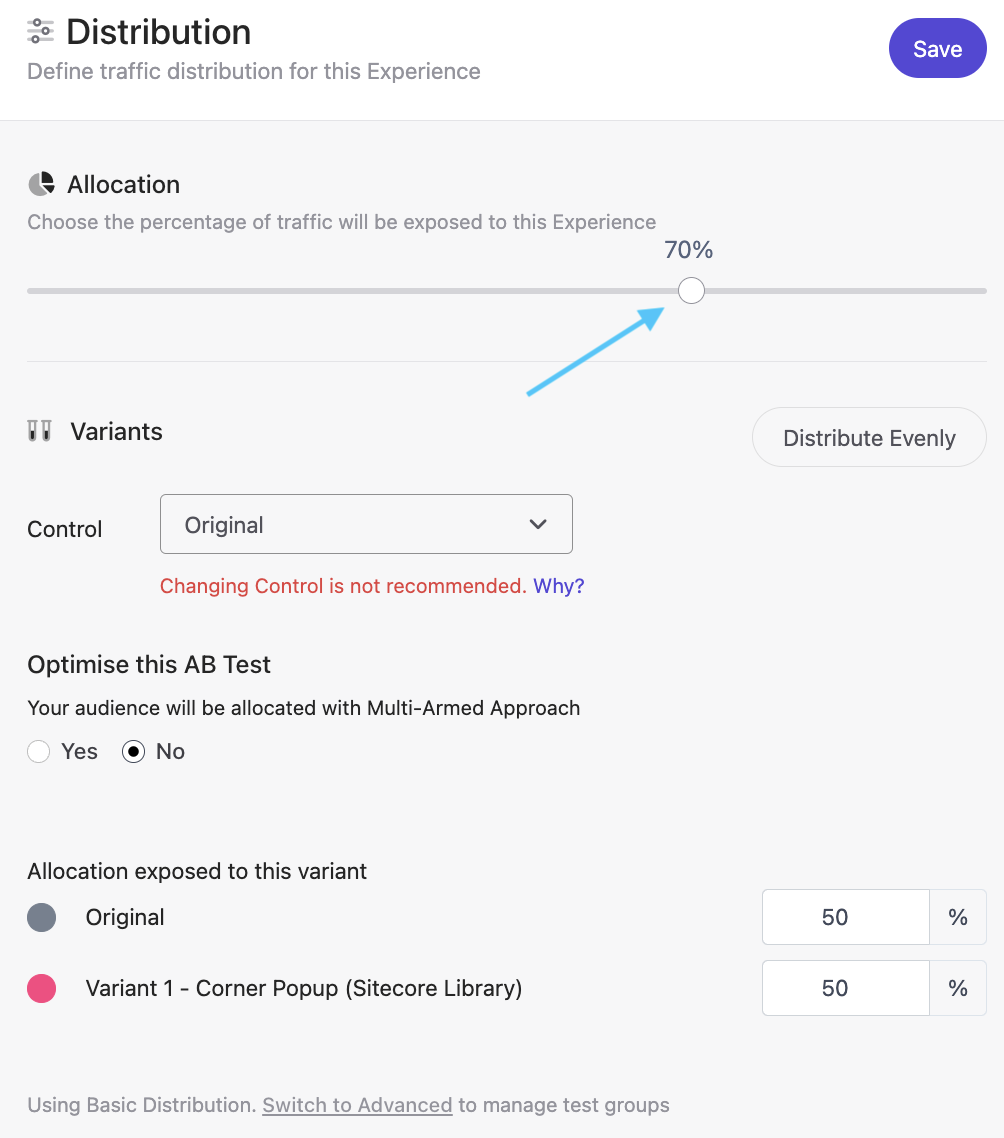
Traffic allocation determines the percentage of visitors who will see the experiment. This ensures that your experiment reaches a large enough audience to gather statistically significant results while minimizing any negative impact on the user experience.

For instance, if you want to test a new product recommendation feature on your product page, you can set the traffic allocation to 50%, meaning that half of the visitors will see the new feature. This allows you to gather a significant amount of data and compare the performance of the new feature against the existing one

  1. From the web experiment build screen, click on the pencil icon.

    Experiments in Sitecore Personalize

  2. Adjust the percentage of guests that will be exposed to the experiment by sliding the Allocation slider. If you want your web experiment to be distributed evenly among multiple variants, click the Distribute Evenly button. Click Save.

    Experiments in Sitecore Personalize

Step 4: Page Targeting (Optional)

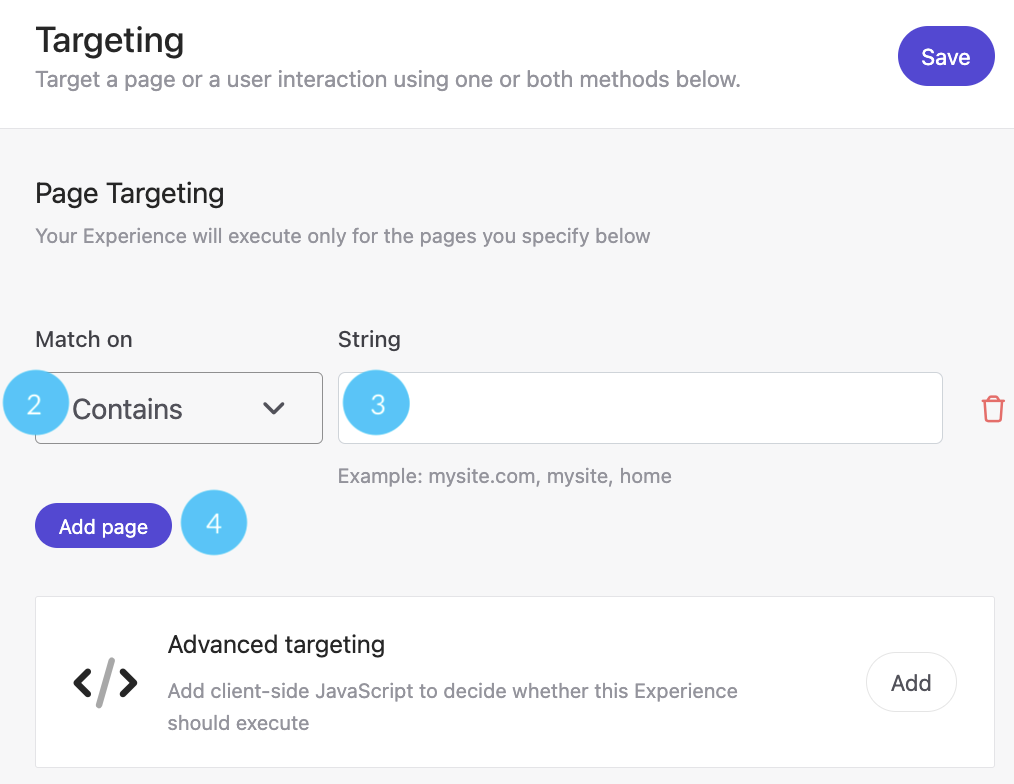
You can target specific pages and set conditions for when a web experiment runs on your site.

  1. From the build page, click on the Add button on the Page Targeting tile.

Experiments in Sitecore Personalize

  1. In the Targeting modal display, select one of the following operators from the Match on the drop-down menu:
    • Equals: The experiment will only run if the URL is an exact match to the specified string. Keep in mind that if the URL has query parameters or UTM parameters, this might not work as intended in preview mode or production.
    • Contains: The experiment will run if the URL contains the specified characters.
    • Starts with: The experiment will run if the URL starts with the specified string. This is usually a better option because many URLs have appended query parameters.
    • Ends with: The experiment will run if the URL ends with the specified string.
    • Matches Regex: Select this operator if you want the experiment to execute if the guest's current page URI matches the specified Regular Expression (RegEx) pattern.
    • Does not equal: The experiment will run if the URL does not match the specified string.
    • Does not contain: The experiment will run if the URL does not contain the specified characters.
  2. Enter the characters or string required in the String field. Note that this is not a full URL, and you may need to enter a partial page path depending operator you selected.
  3. Click the Add page button.
  4. Repeat steps 2-4 as needed. Click Save.

Experiments in Sitecore Personalize

Step 5: Audience (Optional)

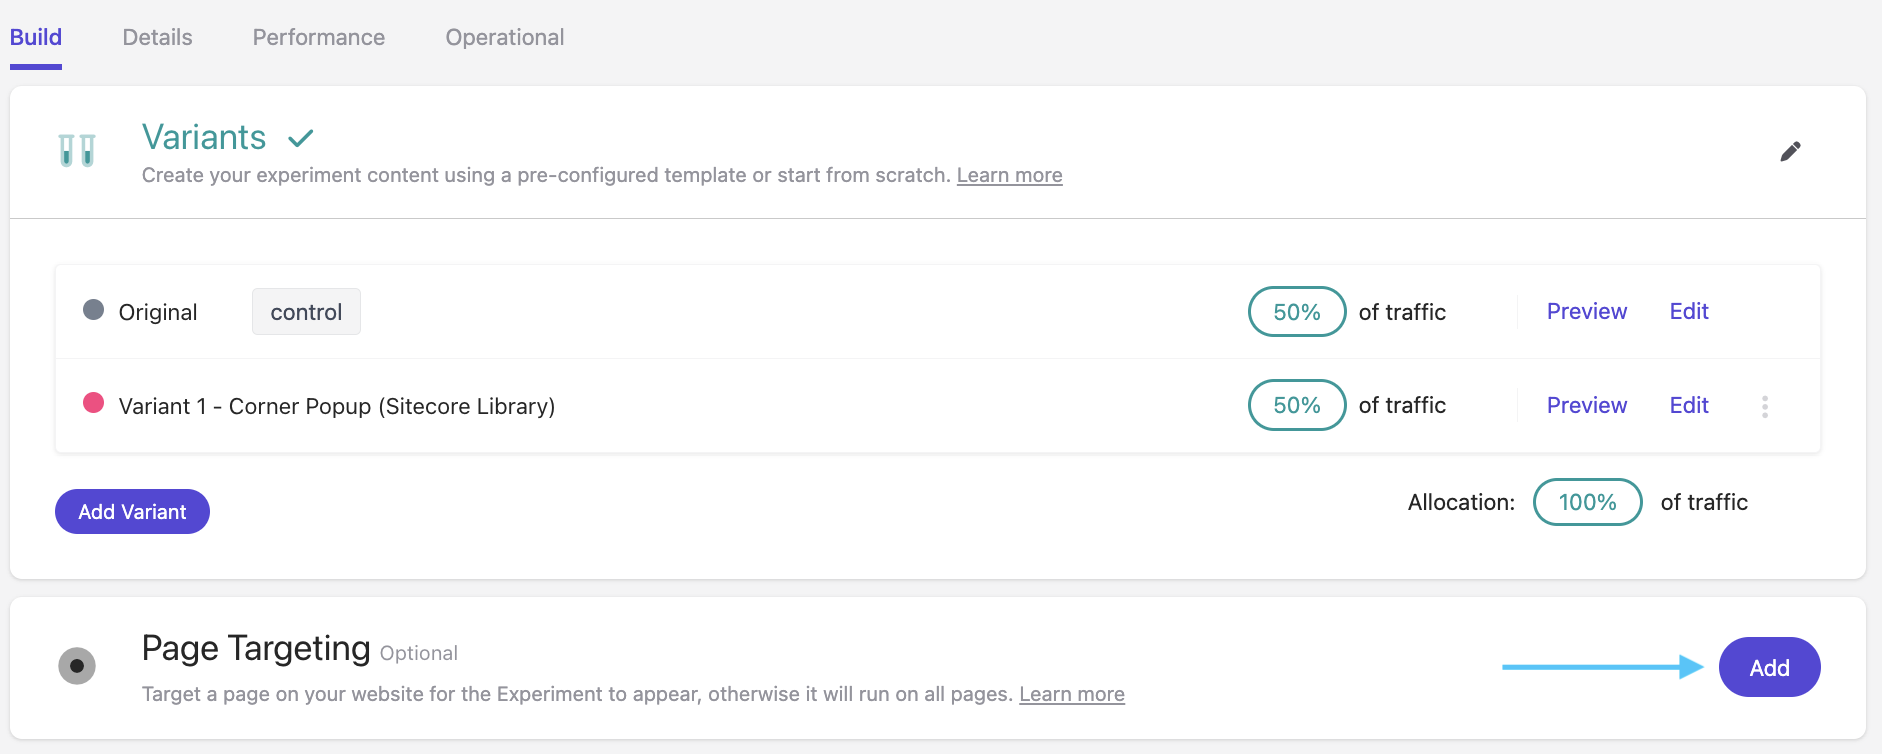
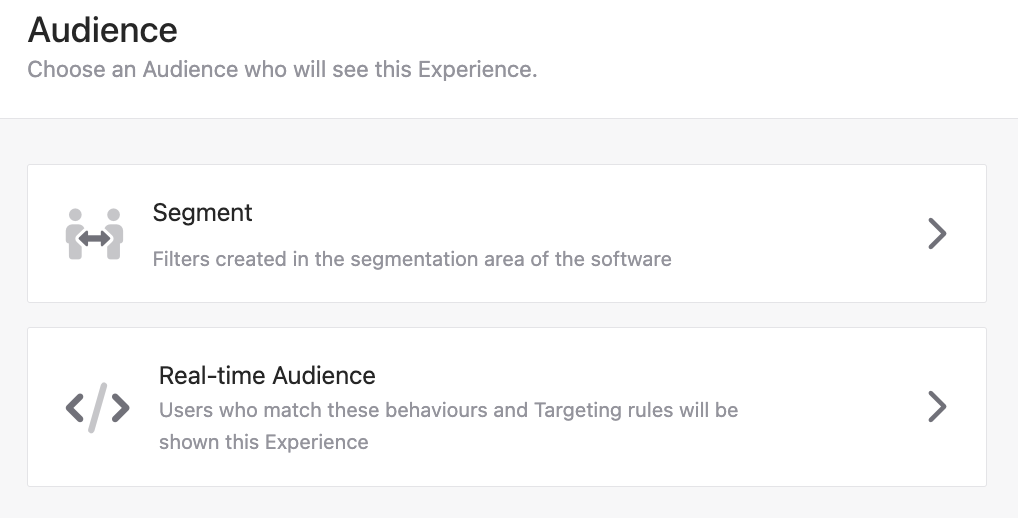
  1. From the build page, click the Add button on the Audience tile.

    Experiments in Sitecore Personalize

  2. Select the Audience that you want to see the Experiment:

    • Segment: Filters created in the segmentation area of the software. Using segments in your web experiment can be helpful to ensure that the right decision model is used based on the segment membership. This is especially useful when you want to personalize content and offers for different types of visitors. Keep in mind that this feature requires a Sitecore CDP license to use.
    • Real-time: If you are familiar with JavaScript, you can build a real-time audience.

      Experiments in Sitecore Personalize

Step 6: Decisioning (Optional)

A decision model is useful for more complex scenarios where you need to determine the best offer or action for a guest based on multiple factors. See this this article, Decisioning in Sitecore Personalize, for how to set up decisioning in Personalize.  

  1. From the build page, click the Add button on the Decisioning tile.

    Experiments in Sitecore Personalize

  2. Select a pre-created Decision Model. The model will save automatically.

Step 7: Add Goals (Optional)

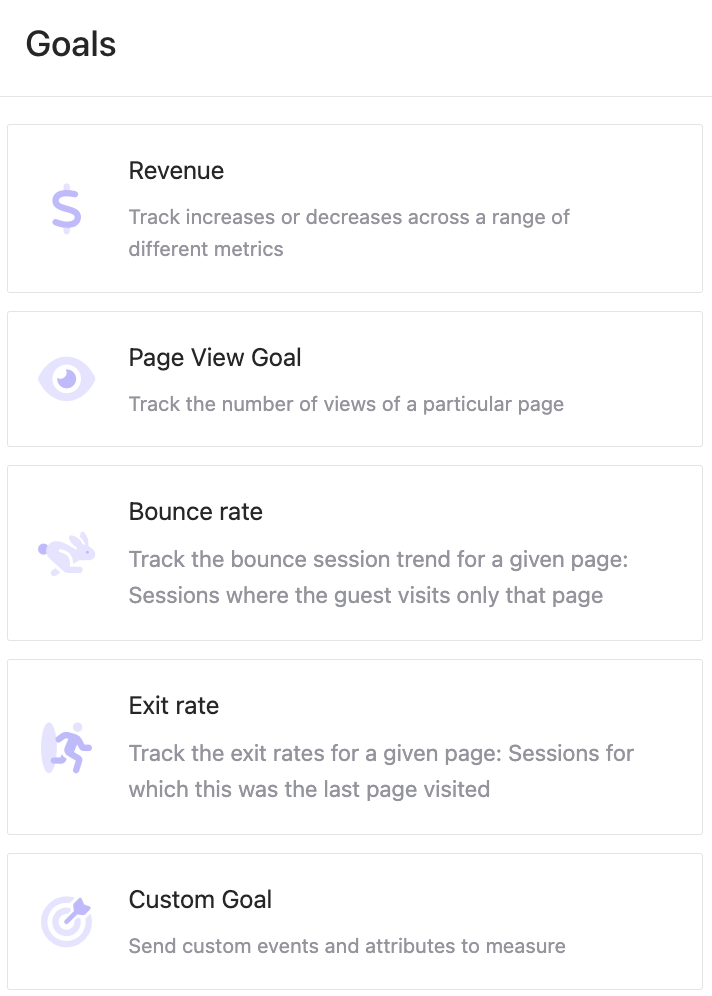
  1. From the build page, click the Add button on the Goals tile.

    Experiments in Sitecore Personalize

  2. Select one of the goals below. Fill in the appropriate fields from the individual goal pages and click Save.

    • Revenue
    • Page View Goal
    • Bounce Rate
    • Exit Rate
    • Custom Goal

      Experiments in Sitecore Personalize


Congrats! You’ve made your first experiment. Be sure to preview it and make any edits (if needed) before the final step: launch!

Quick Guide to Setting Up Web Experiments in Sitecore Personalize (TL;DR)

  1. Choose an out-of-the-box web template or create custom code to build your web experiment. Remember to add at least one variant to the test.
  2. Apply targeting options to your web experiment, such as selecting which webpage or audience to target using JavaScript.
  3. Associate a decision model with your experiment to suggest dynamic offers or content relevant to your guests.
  4. Personalize your experiment by composing an API response using dynamic data.
  5. Insert the experiment into your HTML by specifying where the content appears.
  6. Preview the experiment on your website before launching it to ensure it looks how you want it to.
  7. Add a primary goal to the experiment to measure variant performance and determine which version performs better.
  8. Launch the experiment. You can start monitoring the results on the Performance dashboard after about 24 hours.


đź‘‹ Hey Sitecore Enthusiasts!

Sign up to our bi-weekly newsletter for a bite-sized curation of valuable insight from the Sitecore community.

What’s in it for you?

  • Stay up-to-date with the latest Sitecore news
  • New to Sitecore? Learn tips and tricks to help you navigate this powerful tool
  • Sitecore pro? Expand your skill set and discover troubleshooting tips
  • Browse open careers and opportunities
  • Get a chance to be featured in upcoming editions
  • Learn our secret handshake
  • And more!
Sitecore Snack a newsletter by Fishtank Consulting
 

Meet Robyn James

Content Marketing Strategist | Sitecore Strategy MVP

📚⛰️🎨

Robyn brings over ten years of experience crafting impactful content marketing and communications solutions for a number of high-profile brands. With diverse sector experience—including healthcare, energy, tourism, hospitality, and telecommunications—she has a deep knowledge set and the ability to easily adapt to differing industry needs.

Robyn is adept at blending data-driven research with a pragmatic approach to creativity, delivering results that inform audiences, change perceptions, or inspire action. In her spare time, she enjoys digital painting, reading, and being a pet mom to her fluffy brood of three.

Connect with Robyn