Reading time: 5 min read
Restoring and Upgrading a Sitecore Database with Docker
Upgrading a database from SQL Azure PaaS and integrating it into your local Docker-based Sitecore development environment
Start typing to search...
I wrote an article on Logging Into MS SQL Server When Using Docker & Sitecore which is a prerequisite to beginning the update process. Ensure you can login to your local SQL container instance, of course.
To follow along strictly, the second prerequiste is to have a BACPAC from a SQL database back-up. If you have a database from a different source, that could be used as well. But this article I’m using a database back-up from Azure SQL.
I had exported a Sitecore database from a previous version of Sitecore from Azure. Follow along for the steps to import it, upgrade it and replace the existing database.

Select Import Data-tier Application.
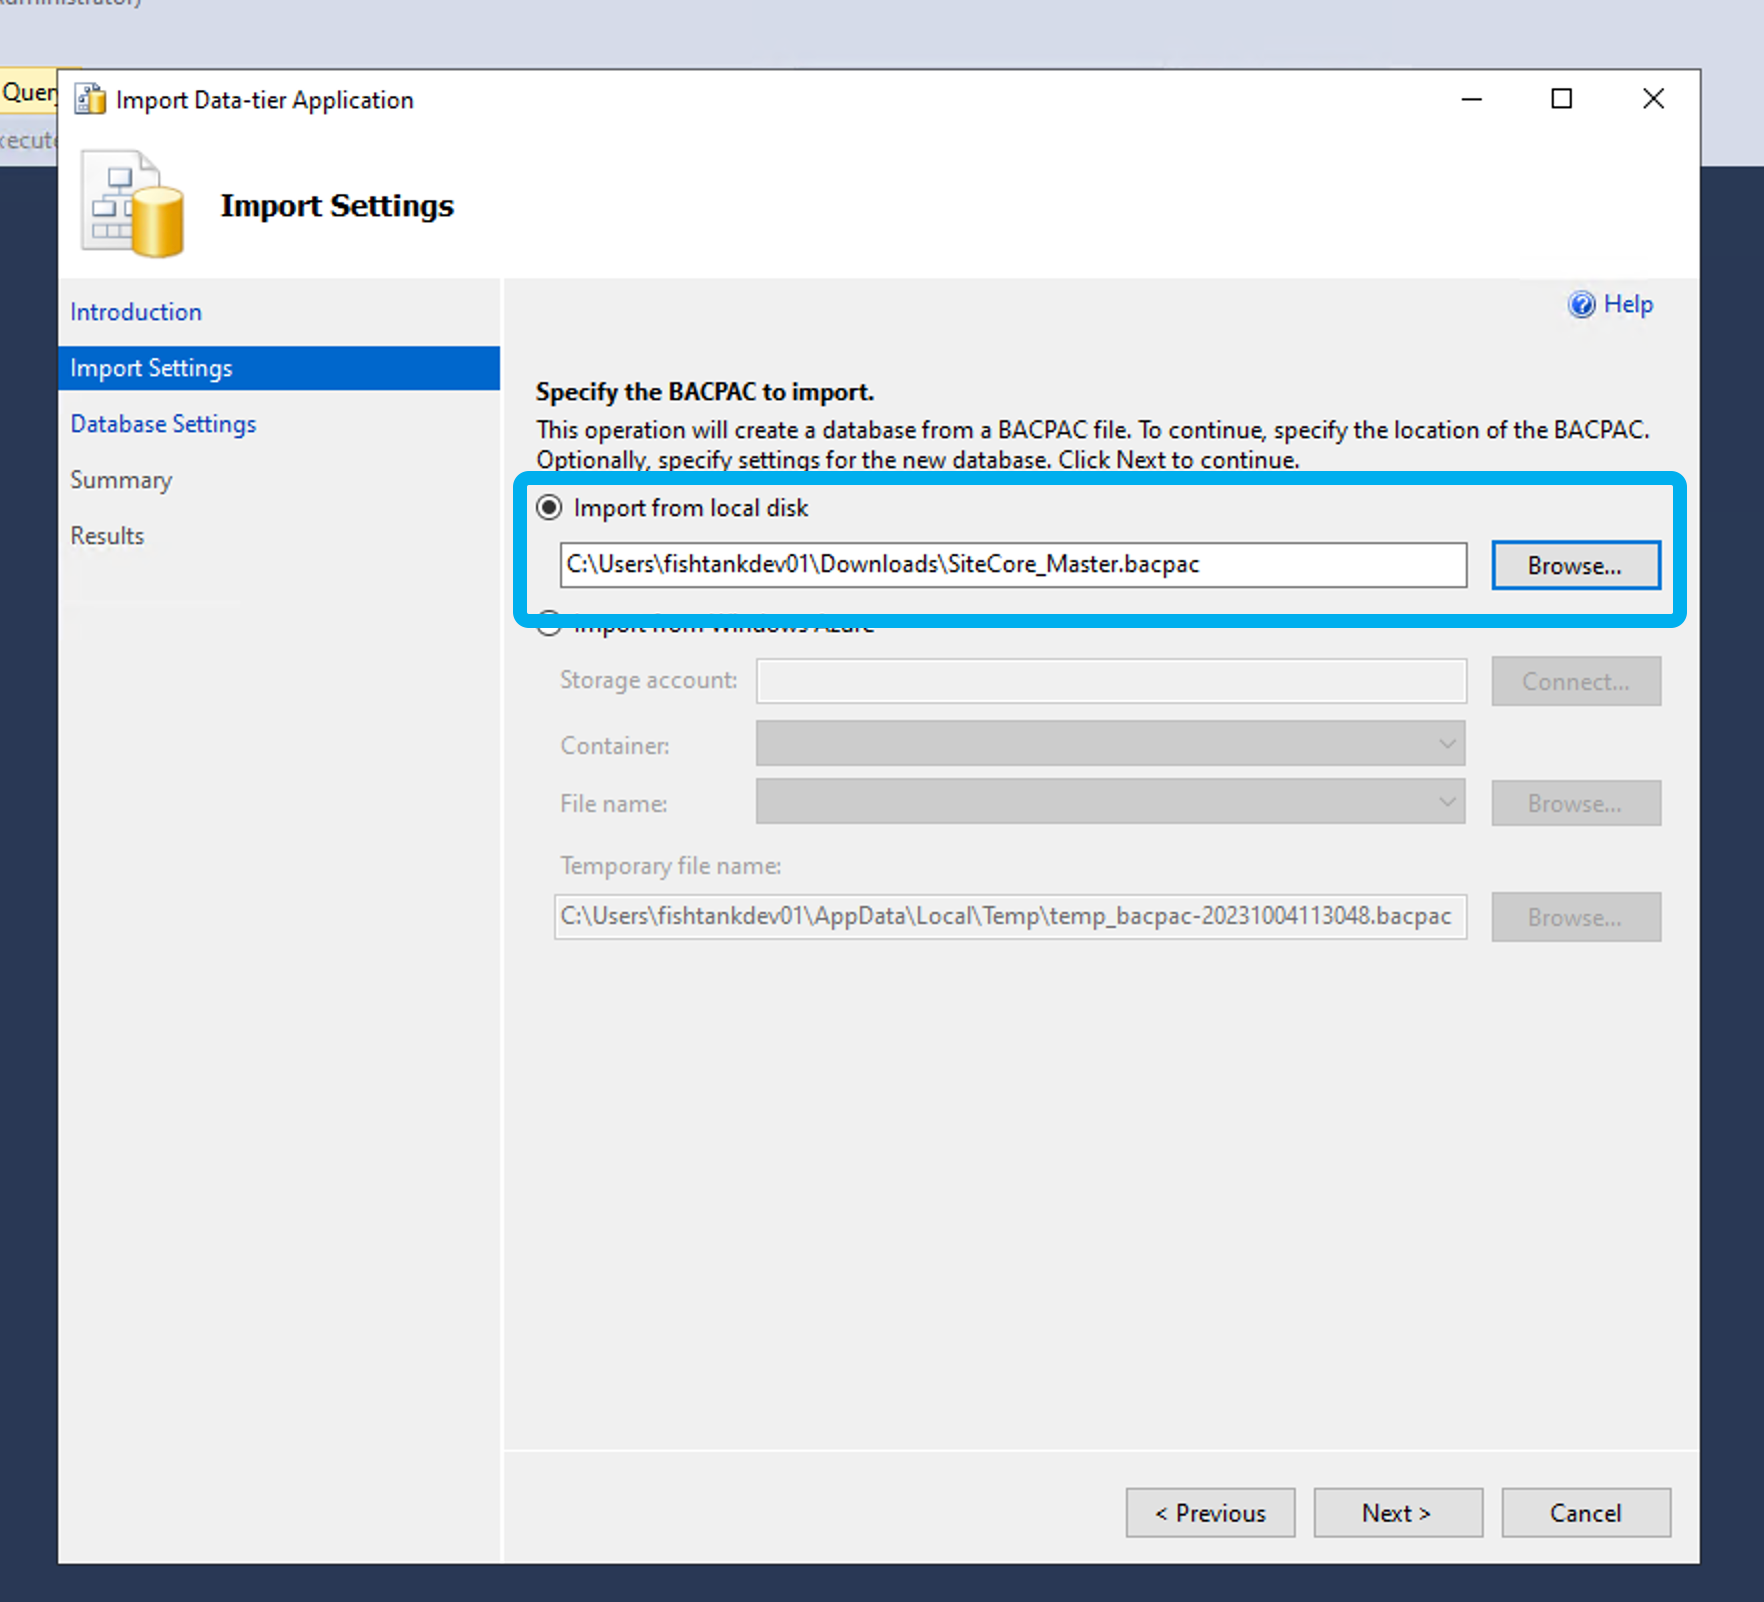
Select browse and select the local bacpac file.
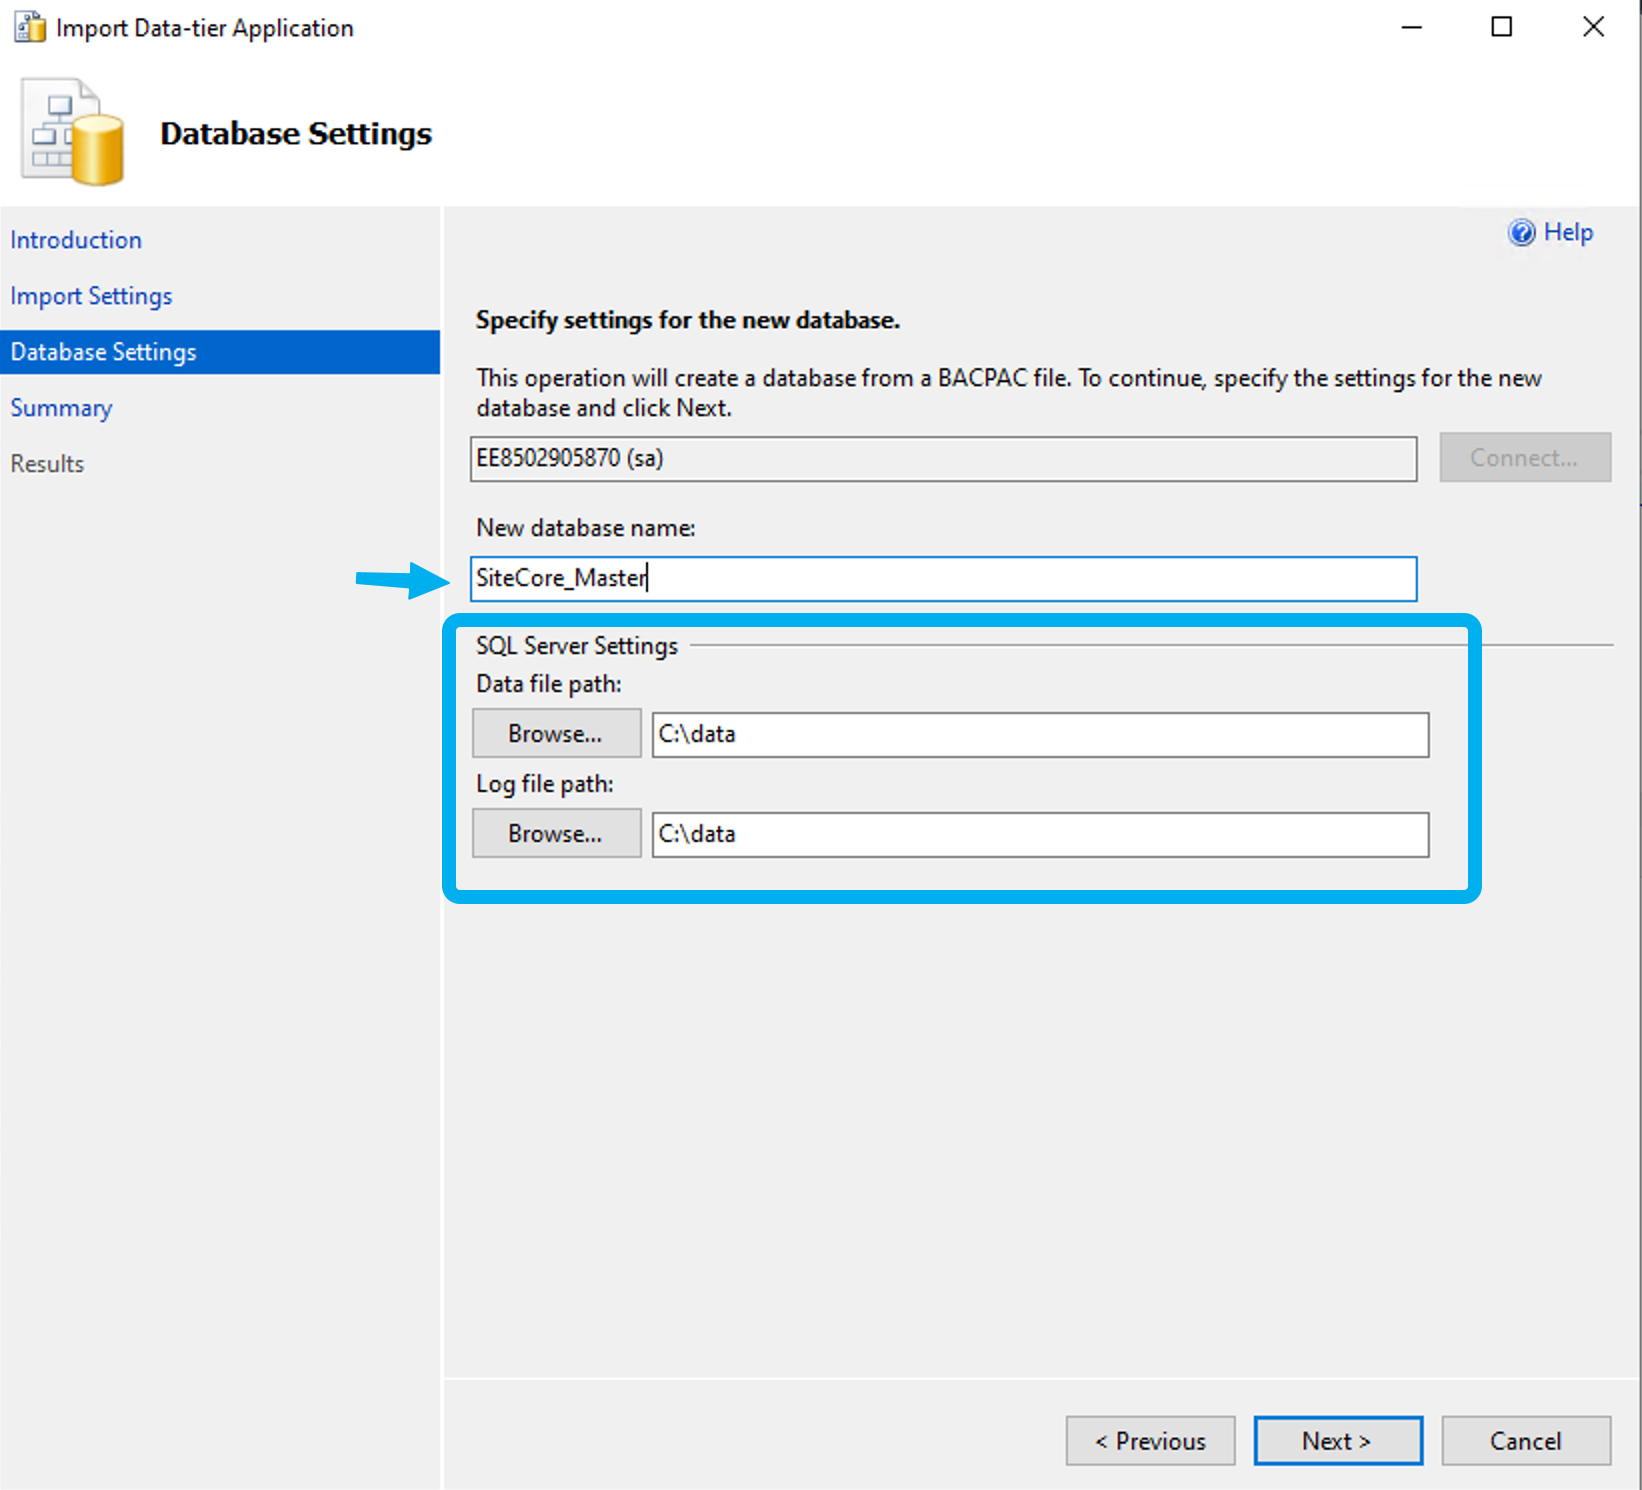
Importantly, you want to make sure this new database is added to mounted as a volume on docker. To do this, press browser and select c:\data. The c:\data folder is inside the container and mapped to the external path of c:\code\project\docker\data\sql.
Update the database name if you need to in order to avoid conflicts.
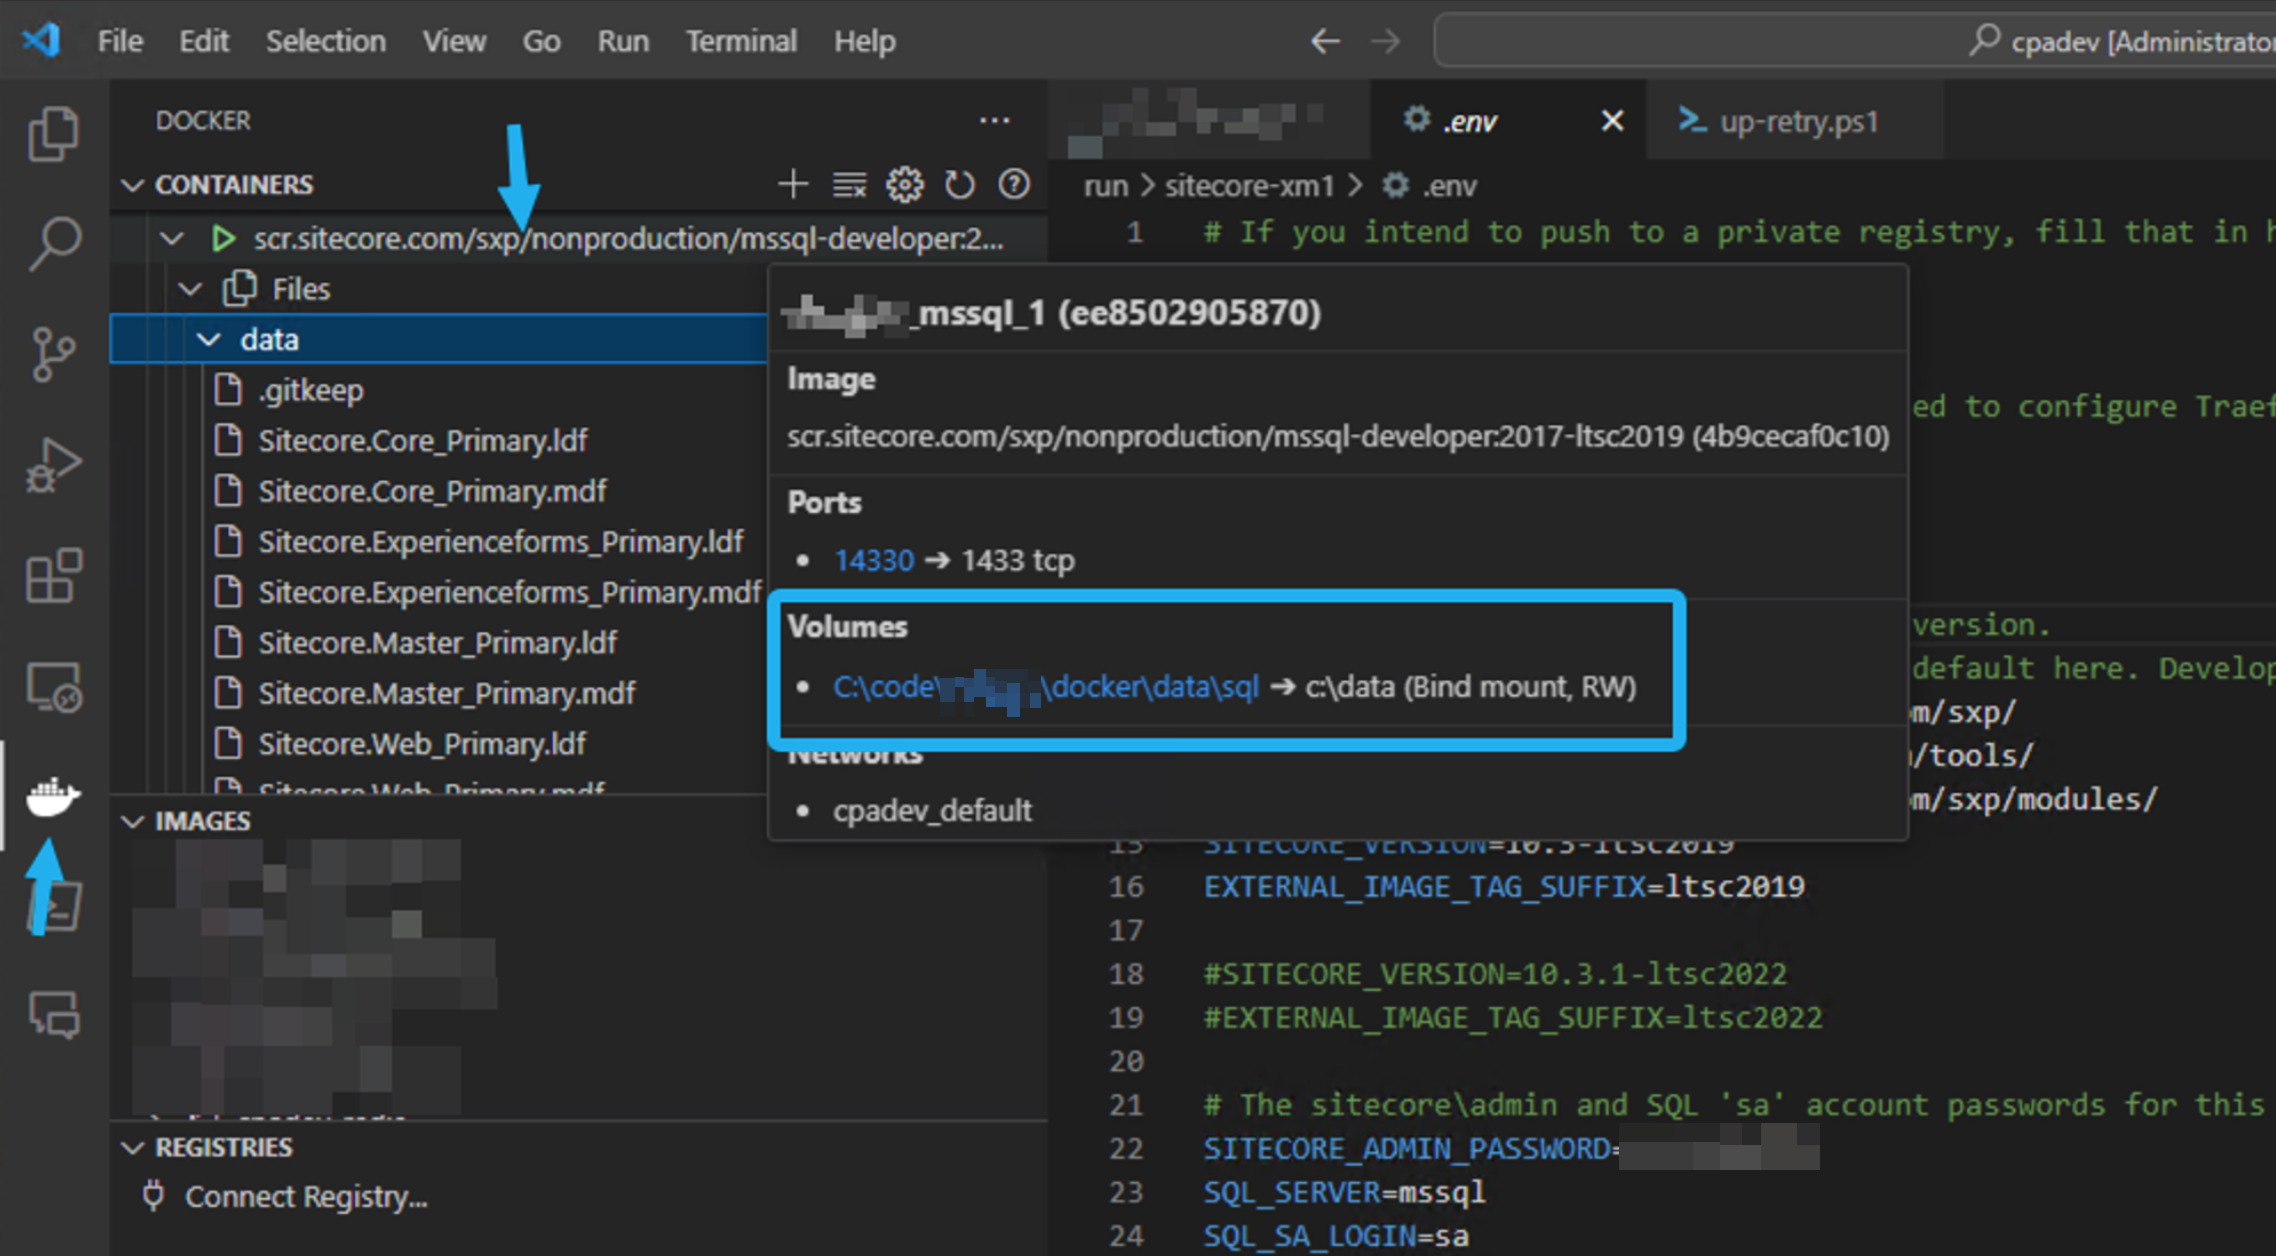
As an aside, you can see this mapping in the docker compose file. Or if you’ve installed the Docker extension for Visual Studio code, you can find the container, hover it with your mouse and will show the volumes that exist.
This lets you understand how the container interacts with your local file system.
Now lets get back to the import.
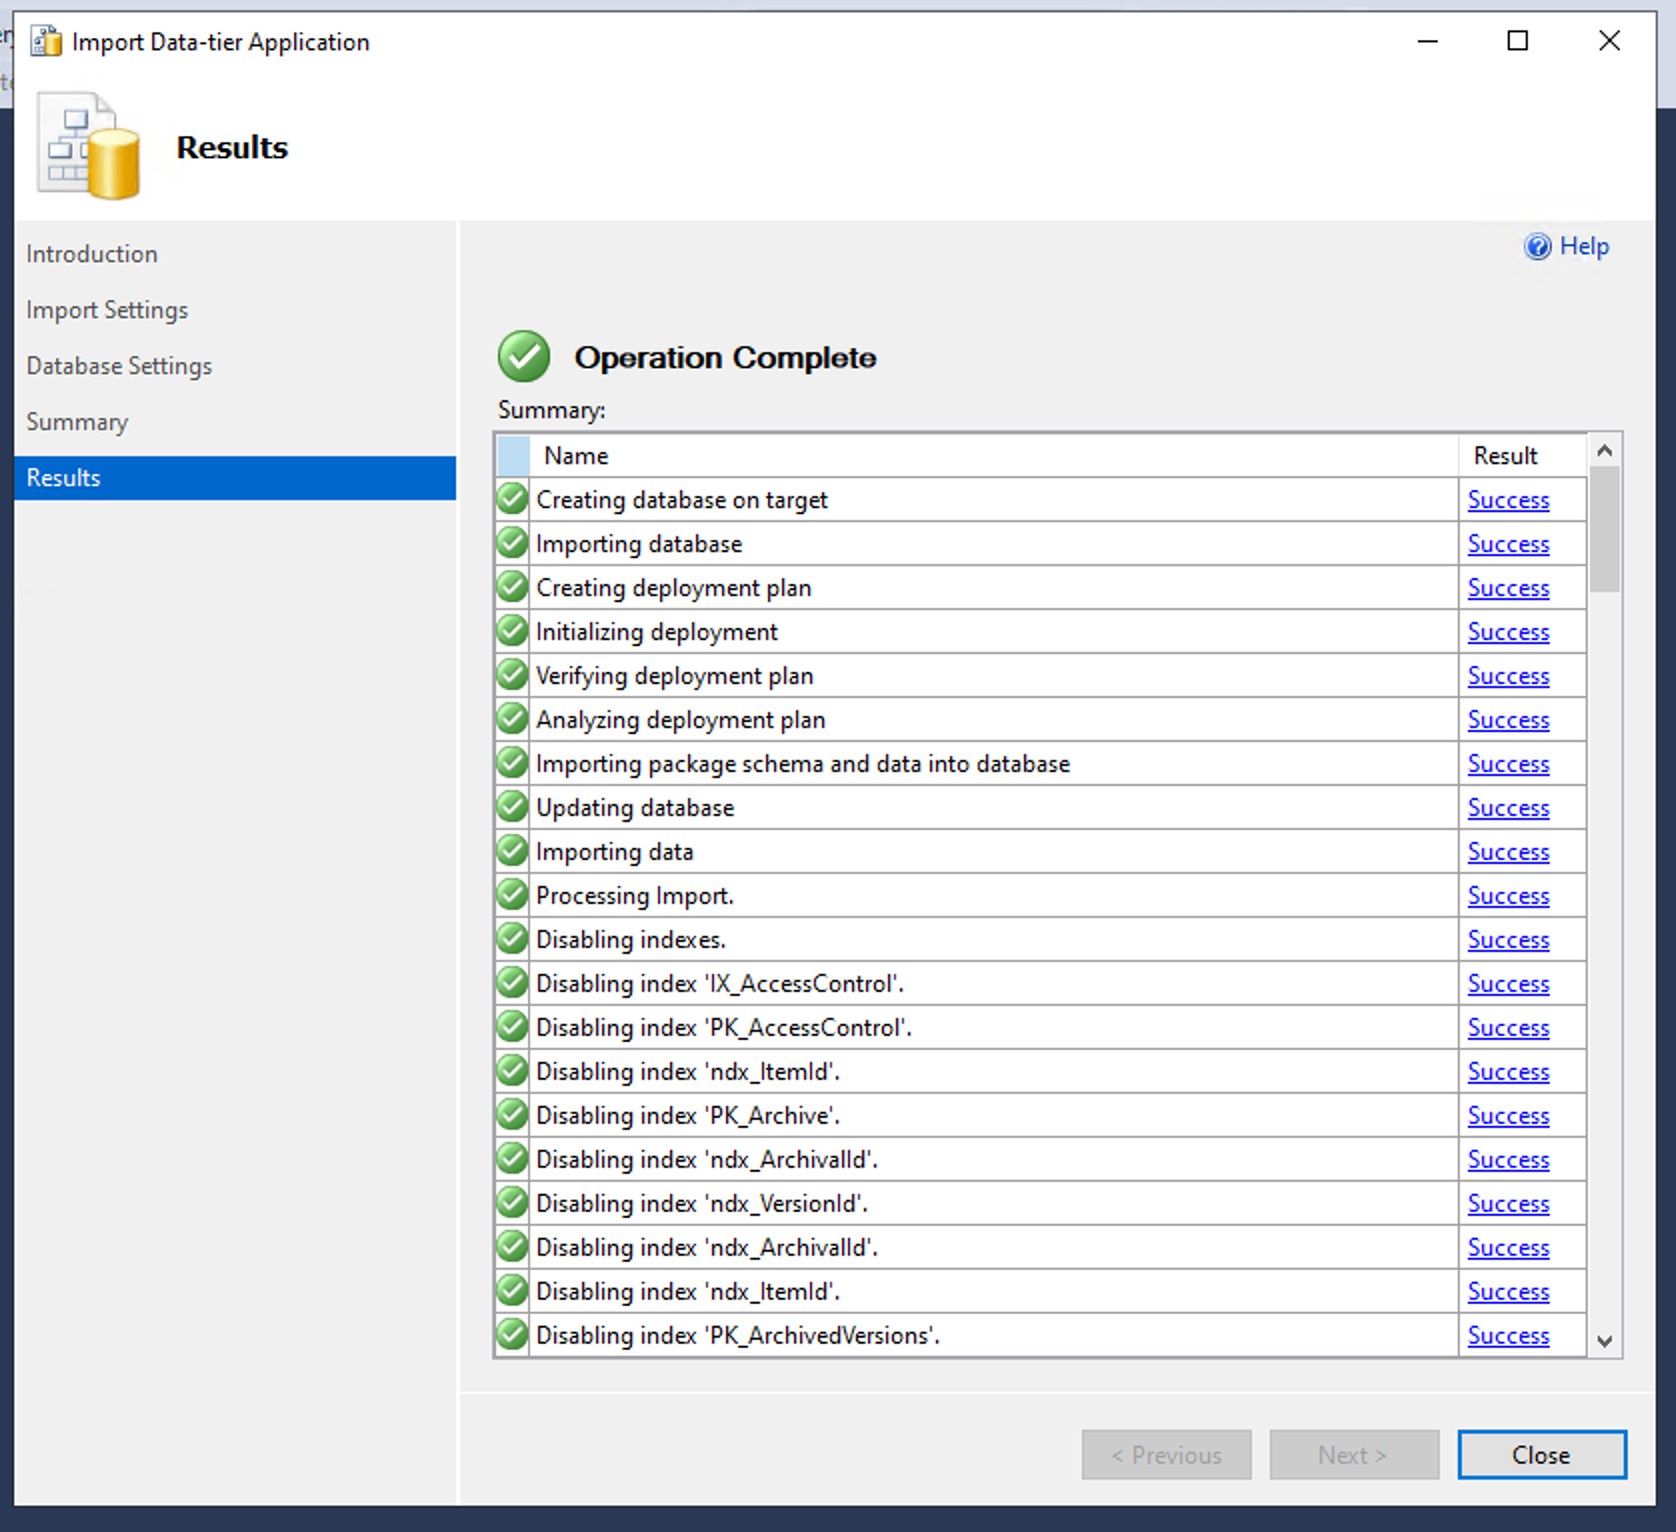
This is what the final screen looks like when it’s successful.
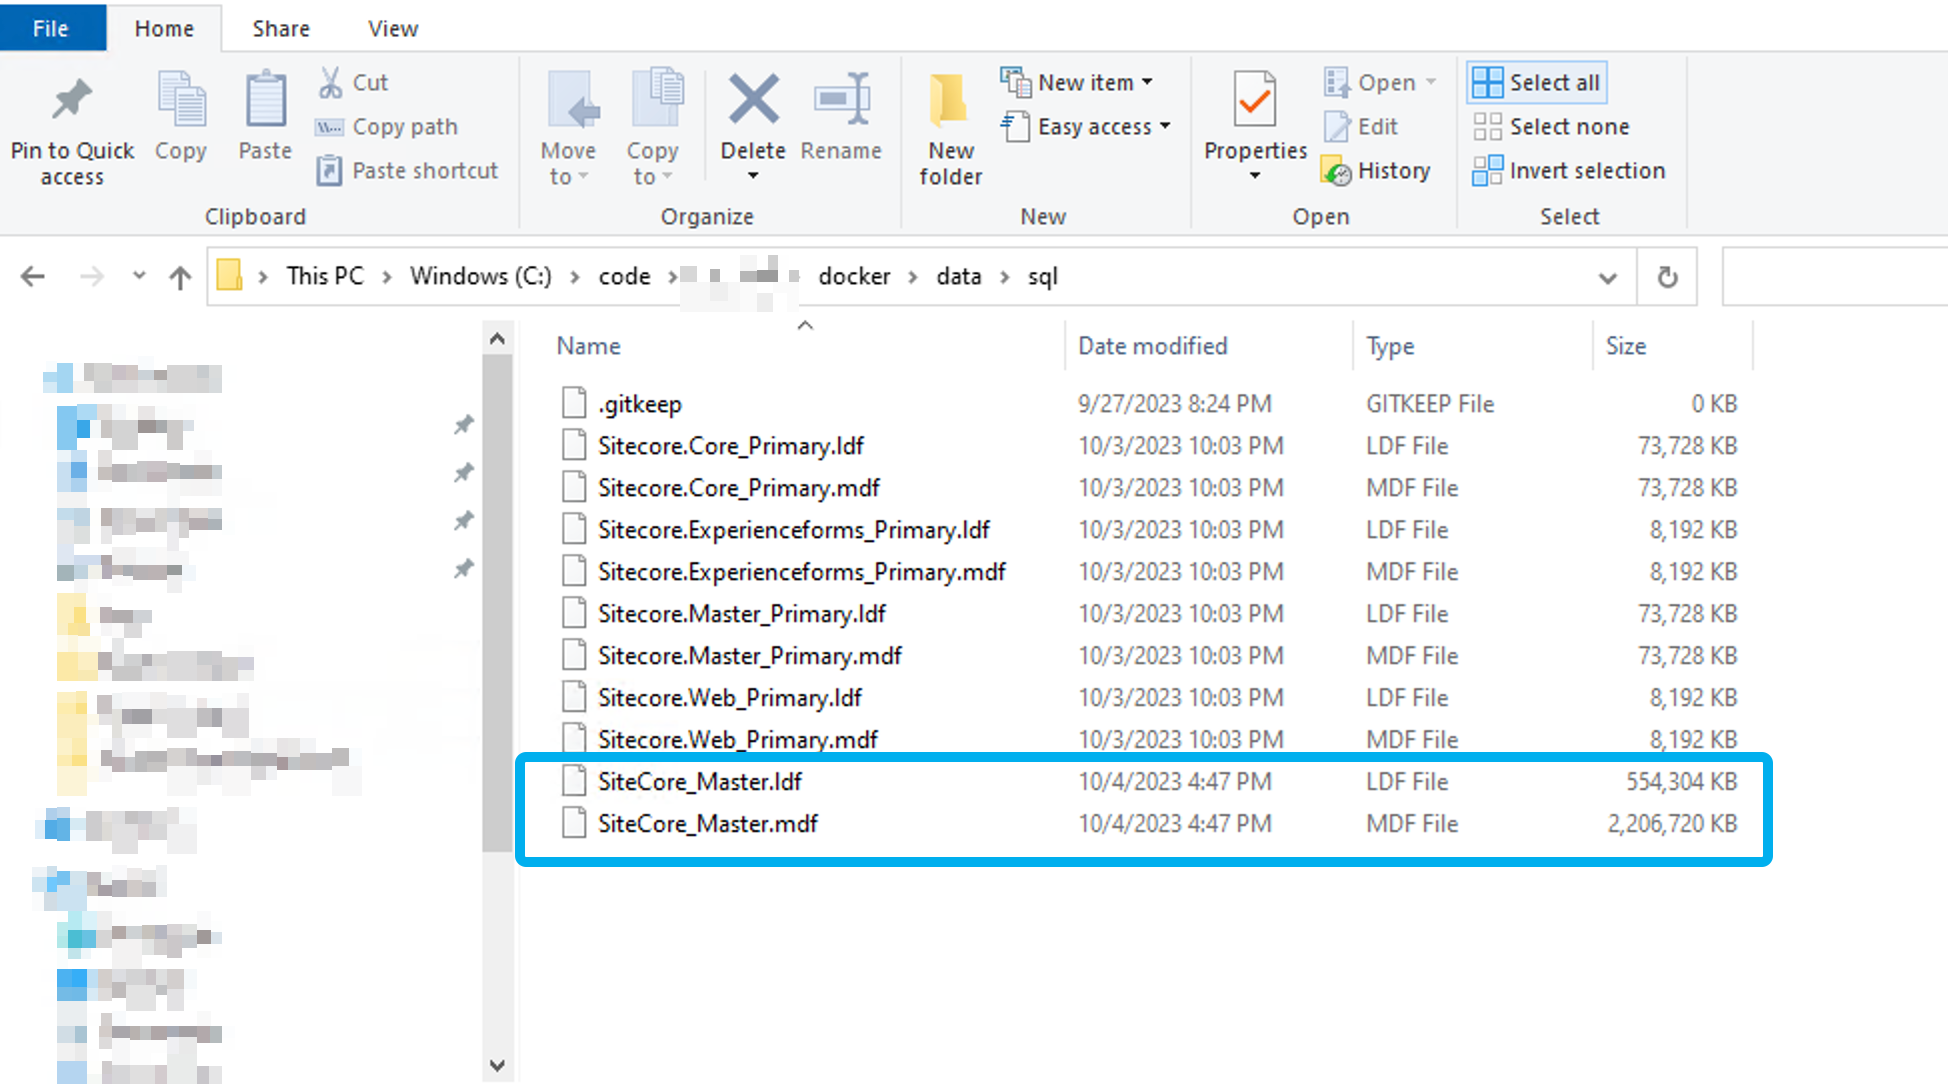
The BACPAC database we imported into our MS SQL container is now available on our local filesystem through the mounted volume.
Part of an upgrade is upgrading the databases. Sitecore provides a couple methods to do this on the Sitecore 10.3.1 downloads page. If you can find others version on downloads page.
Unzip the downloaded file and then unzip and navigate to the Database Upgrade Script folder. In this upgrade, we’re only looking at moving the master database to preserve the content so we will focus on the CMS_master.sql file.
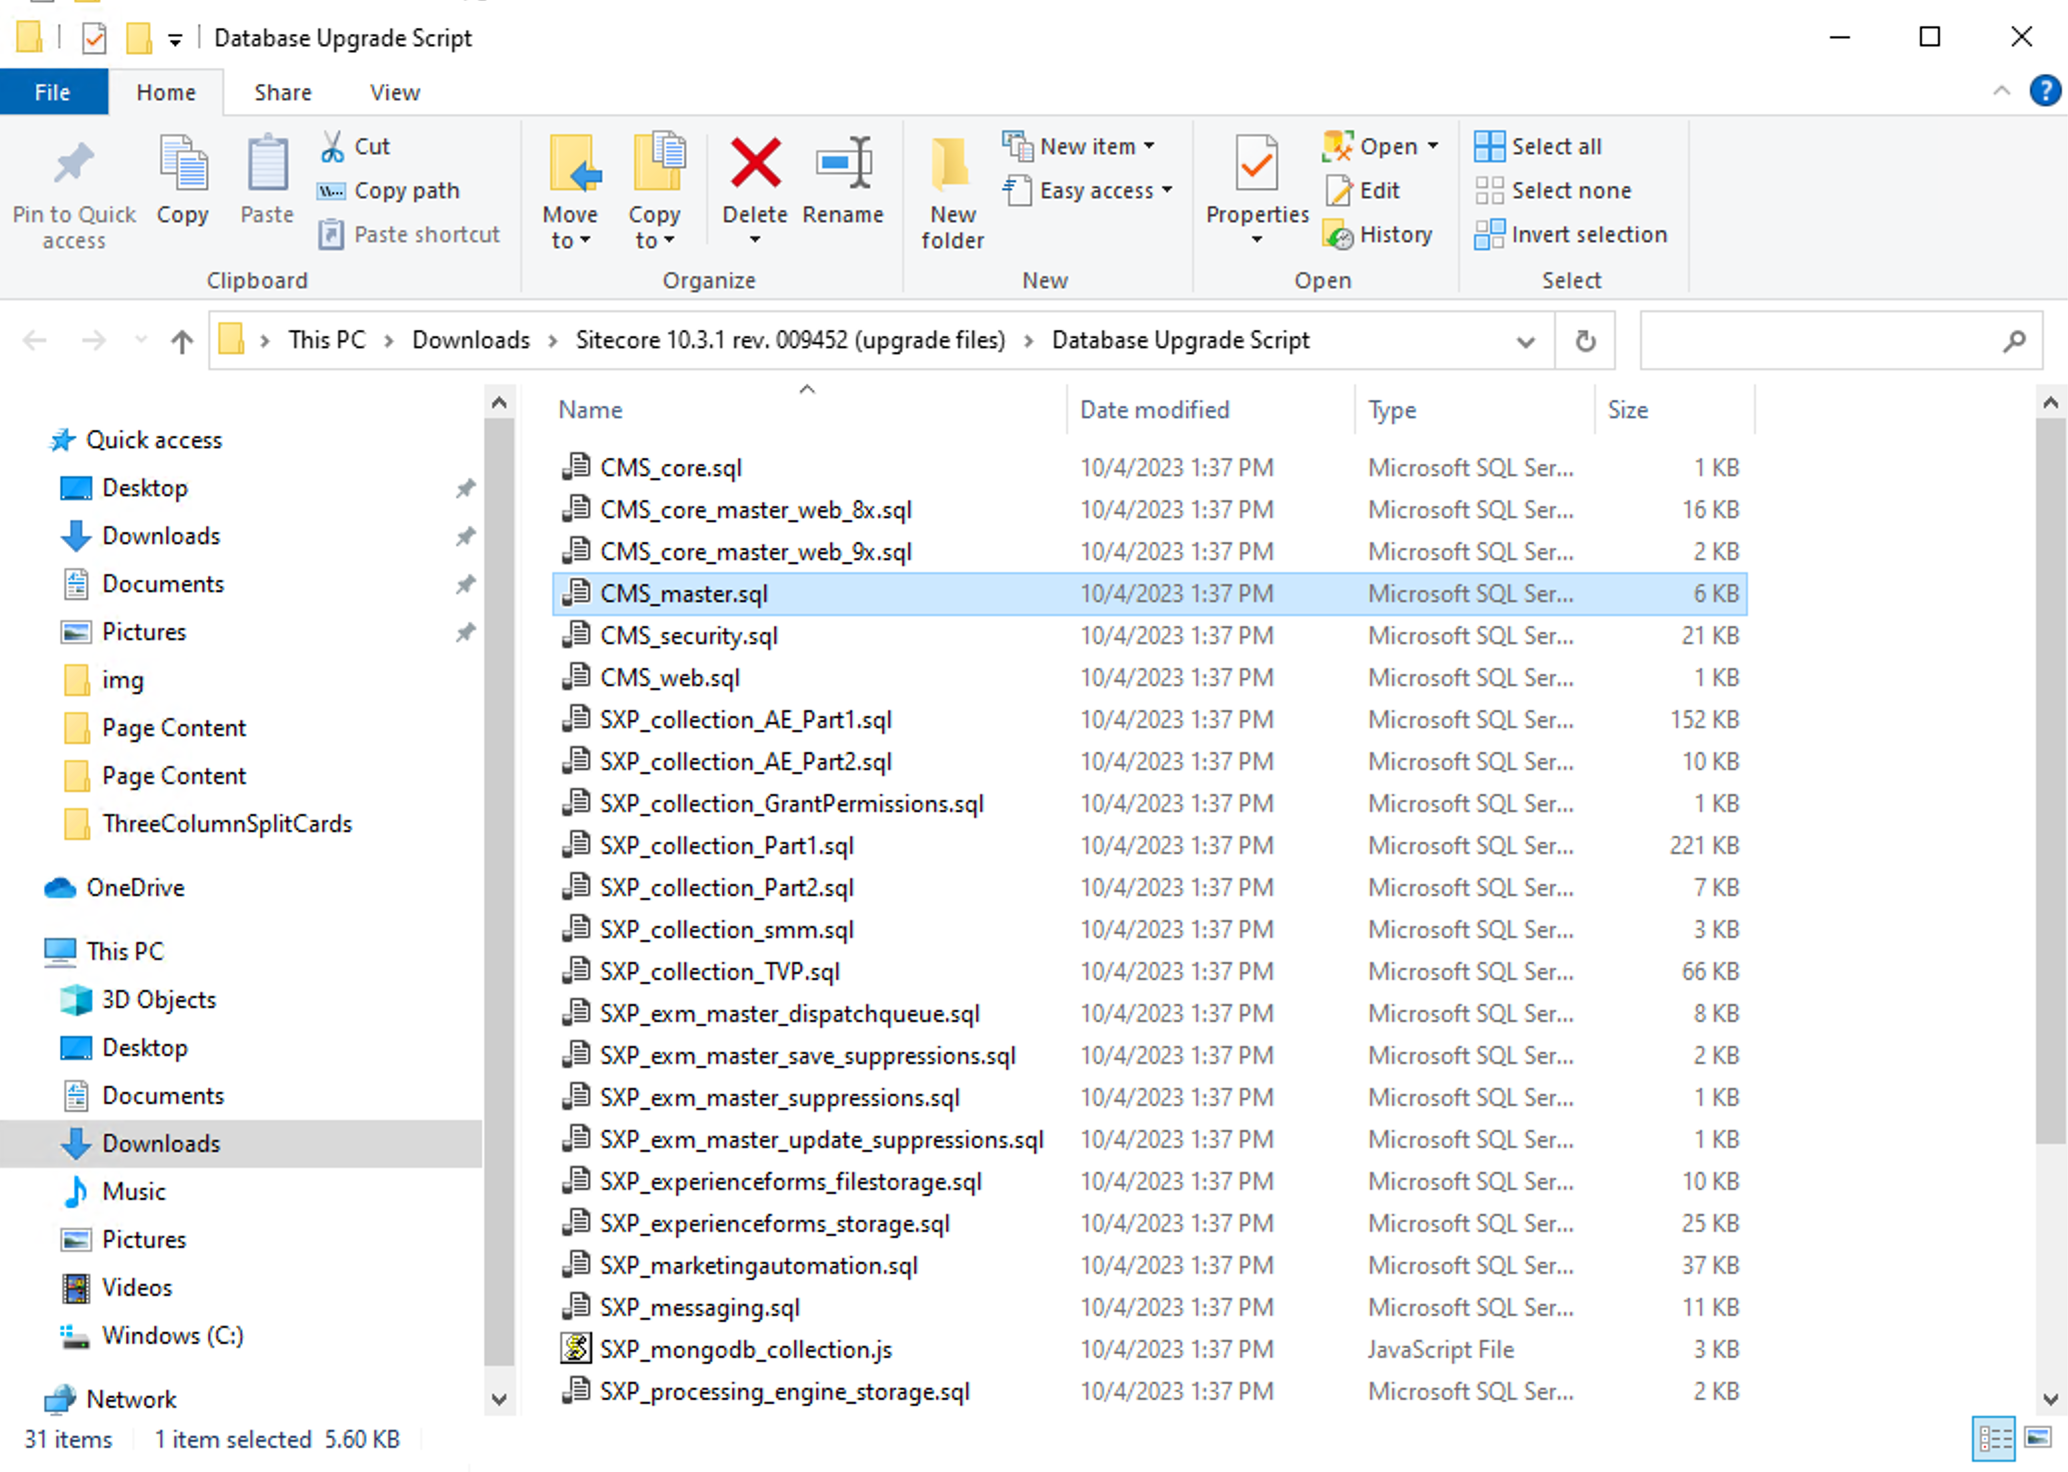
You can see the breadth of files below to potentially upgrade. They don’t offer XP vs XM flavors so just use what you need.
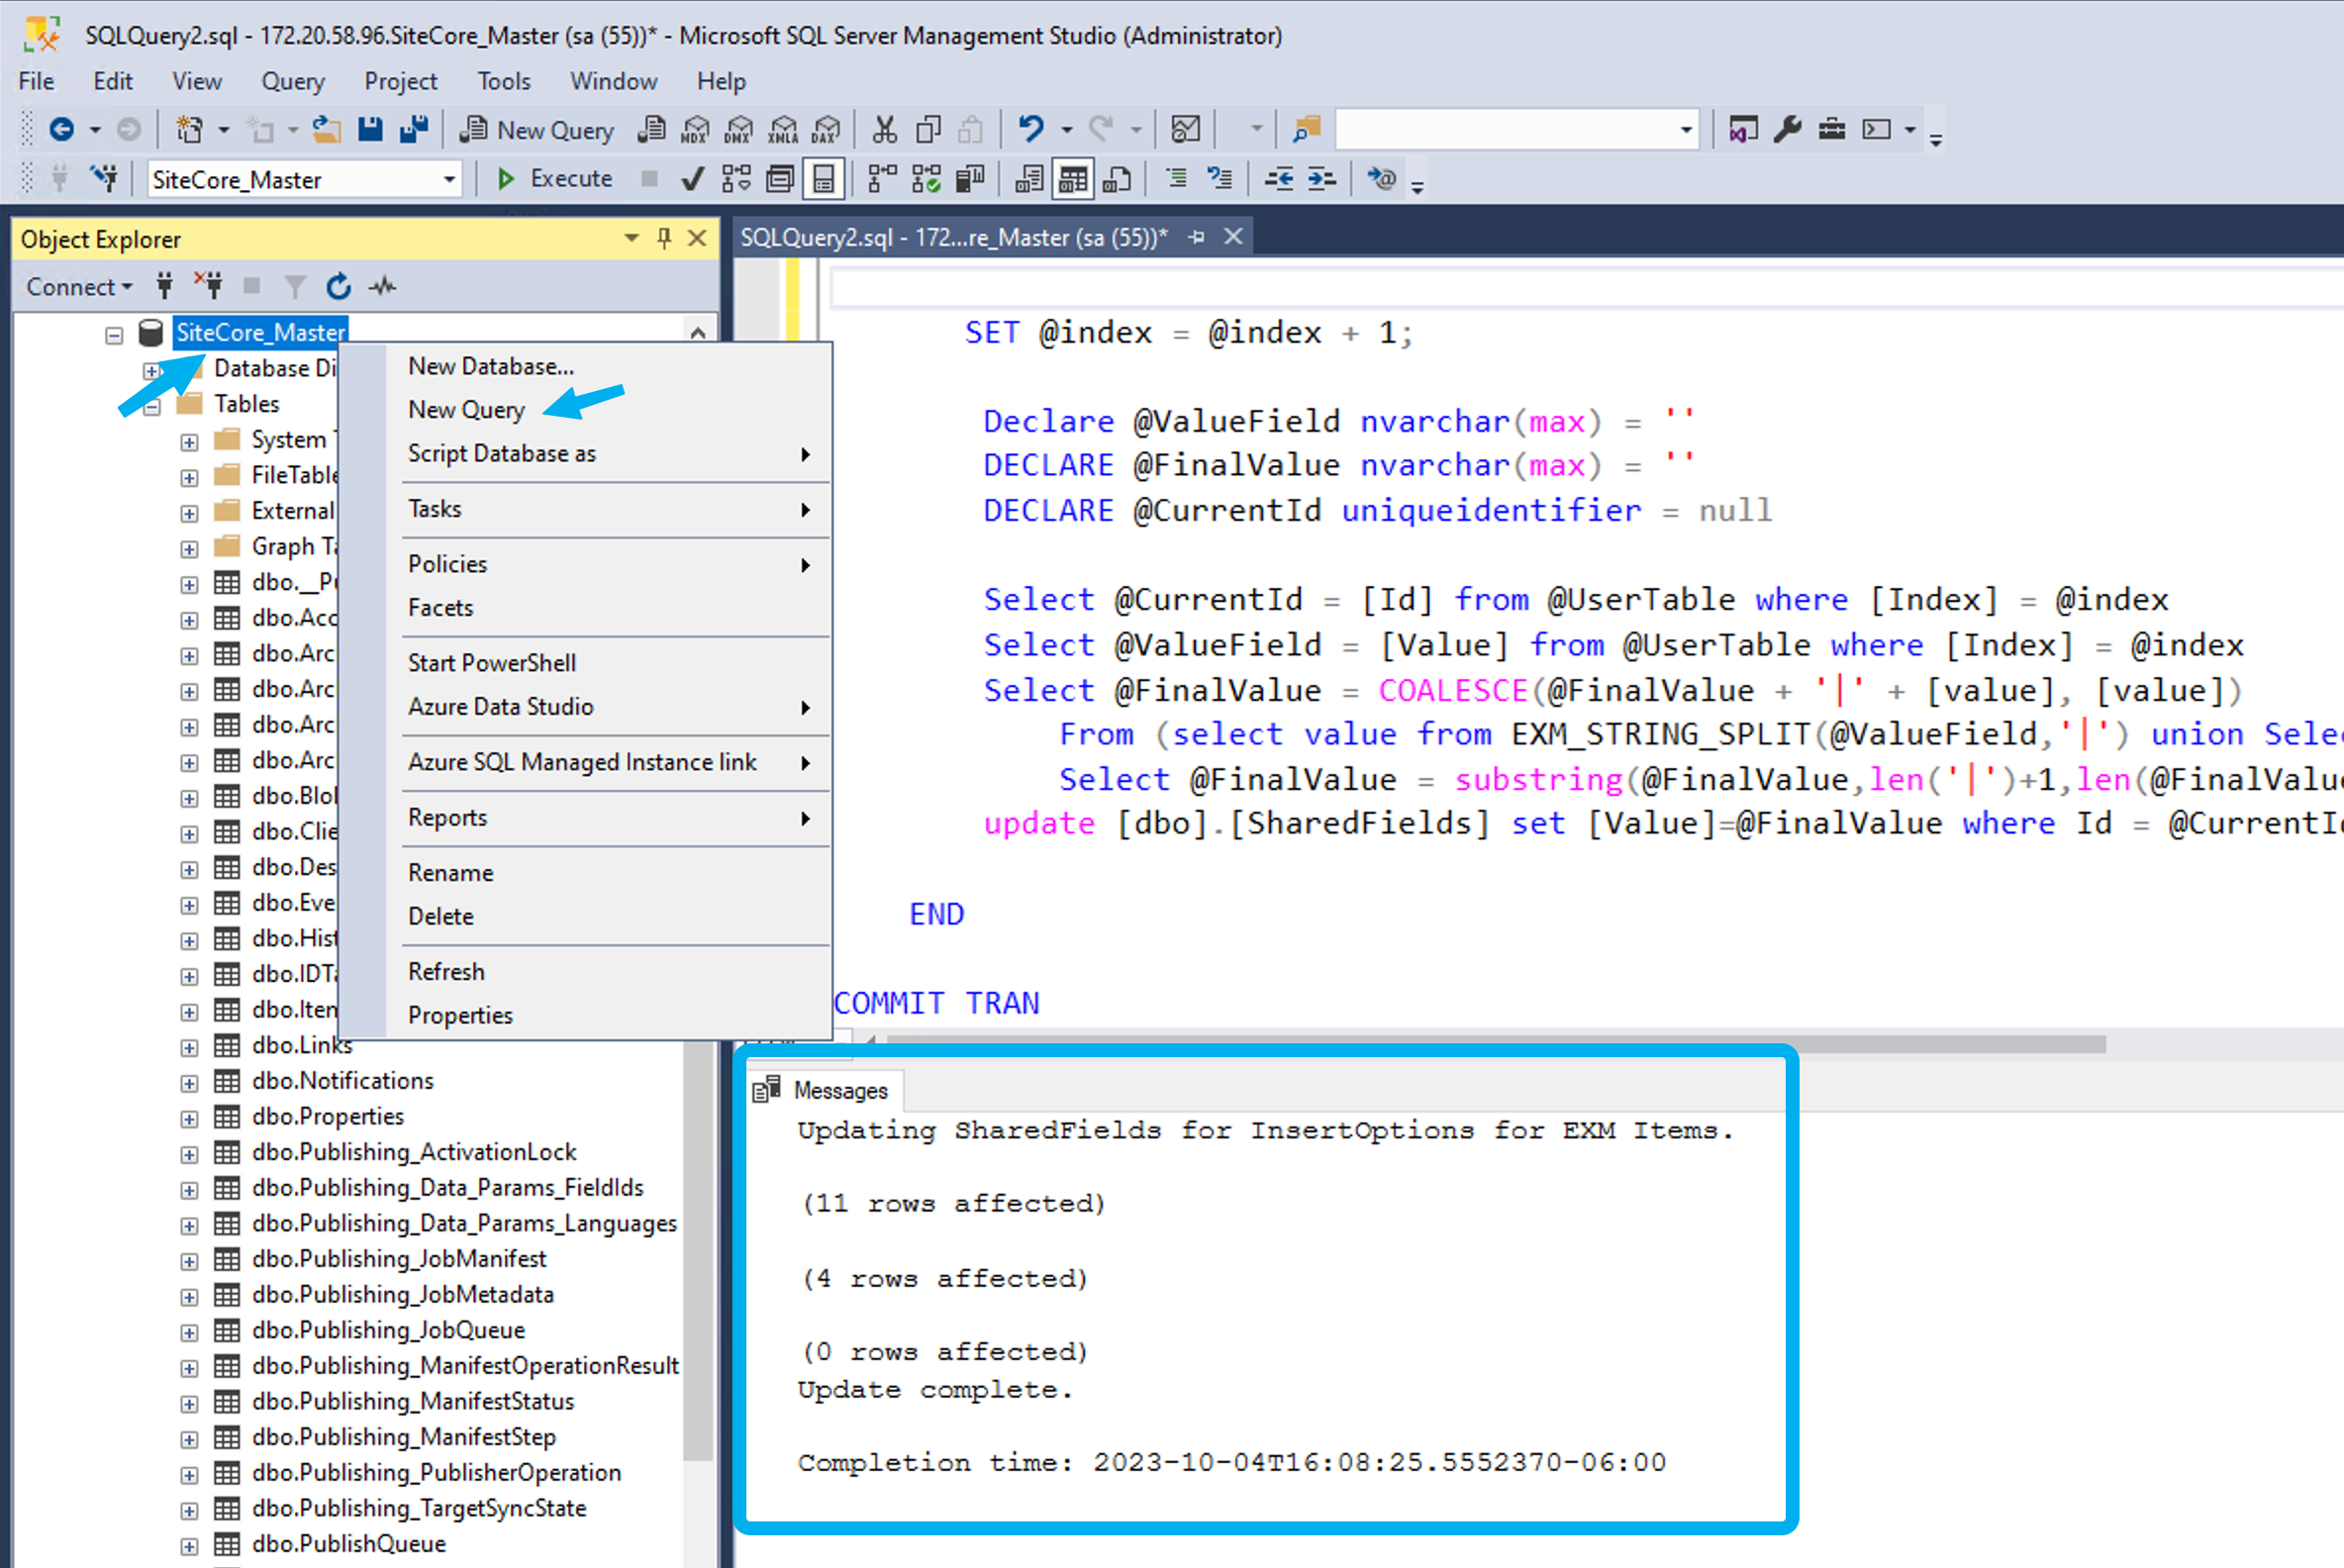
Now right-click on the database (in our case SiteCore_Master) and select New query.
Then open CMS_master.sql in a text editor, copy and paste its contents into the blank new query window. Press the Execute button and you should see a successful update in the messages window.
Now I want to take my upgraded database and swap it in so it is my active Sitecore master database.
SiteCore_Master offline and detach it..mdf and .ldf files we just created.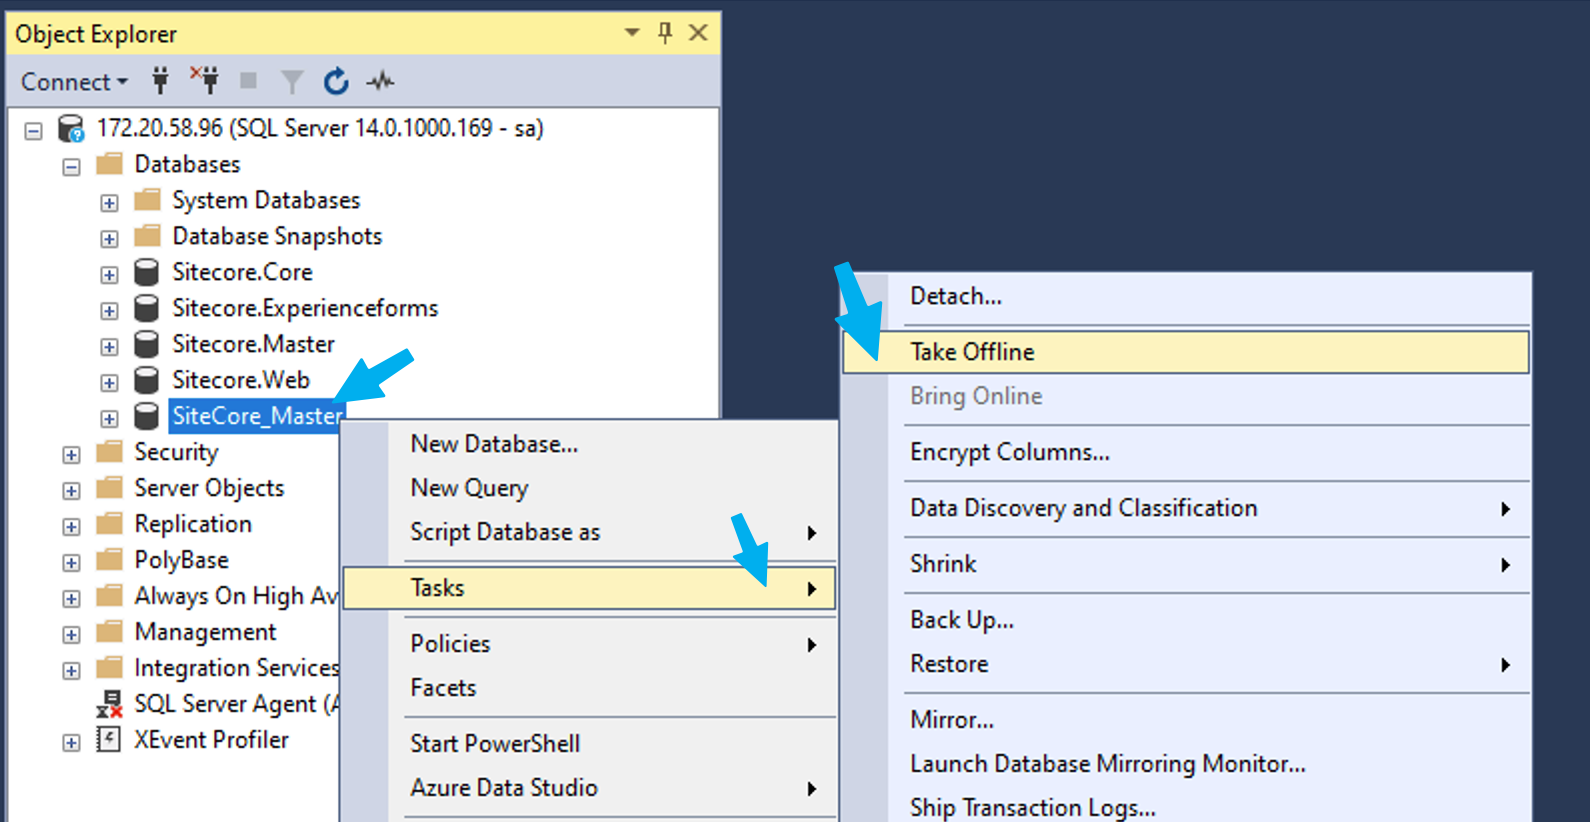
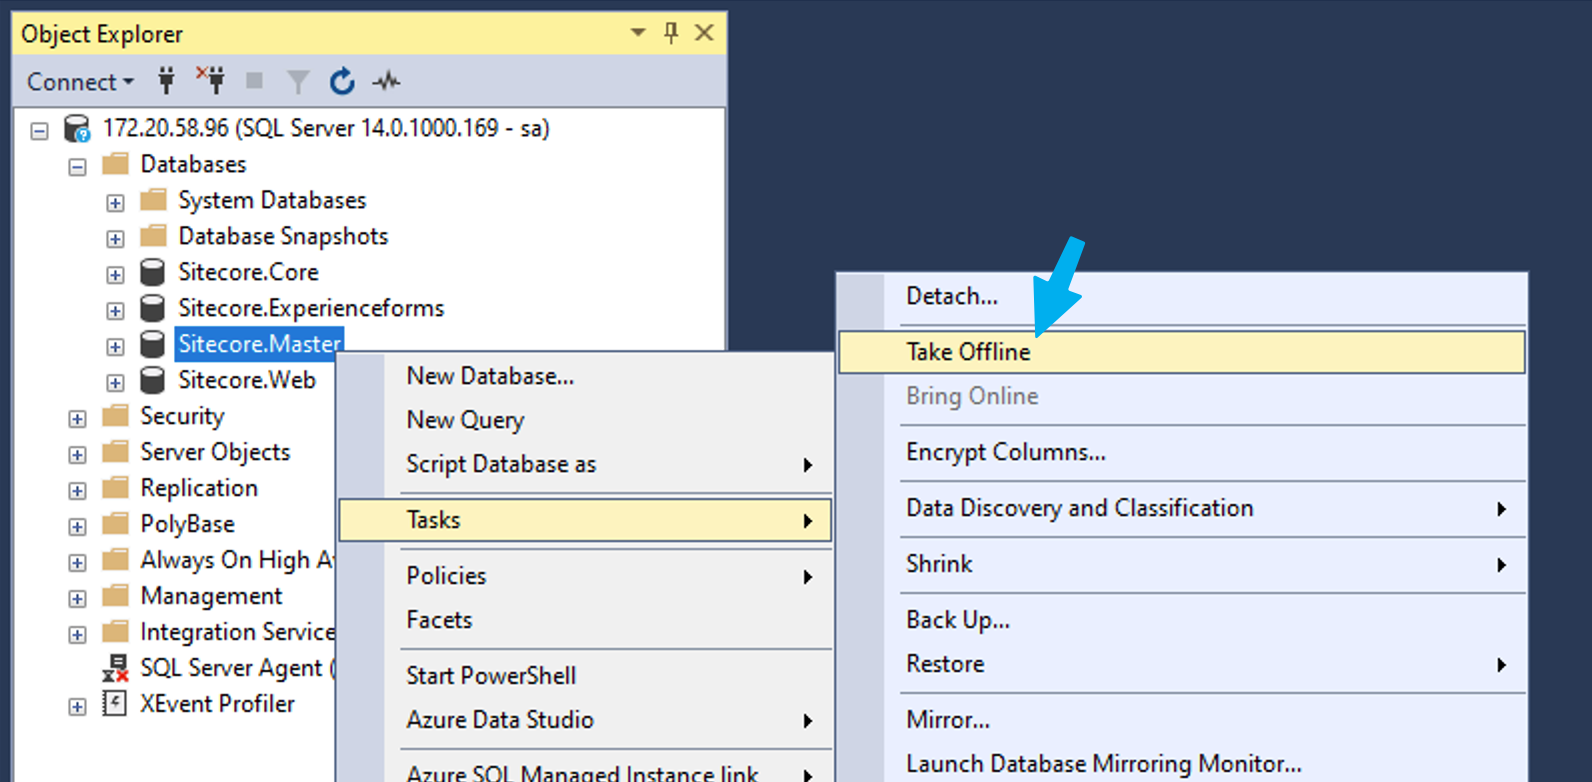
For steps we right-click on SiteCore_Master , then select Tasks > Take Offline . On the next screen click to drop all active connections and click OK.
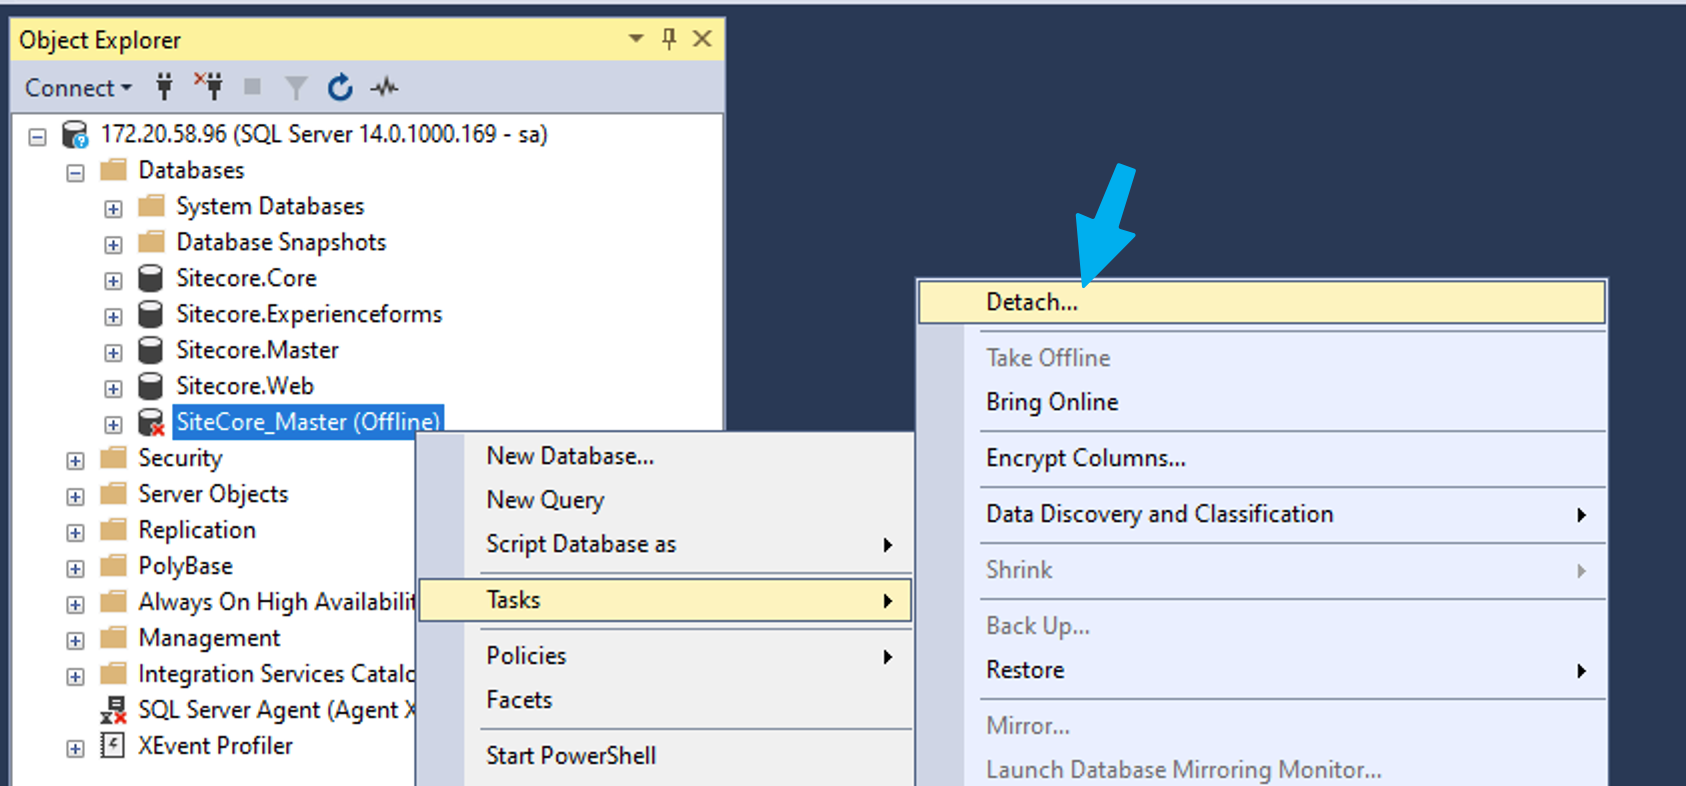
Detach the this database. Click OK.
To do the swap, we’ll want to check the logical names of database files inside Sitecore.Master.
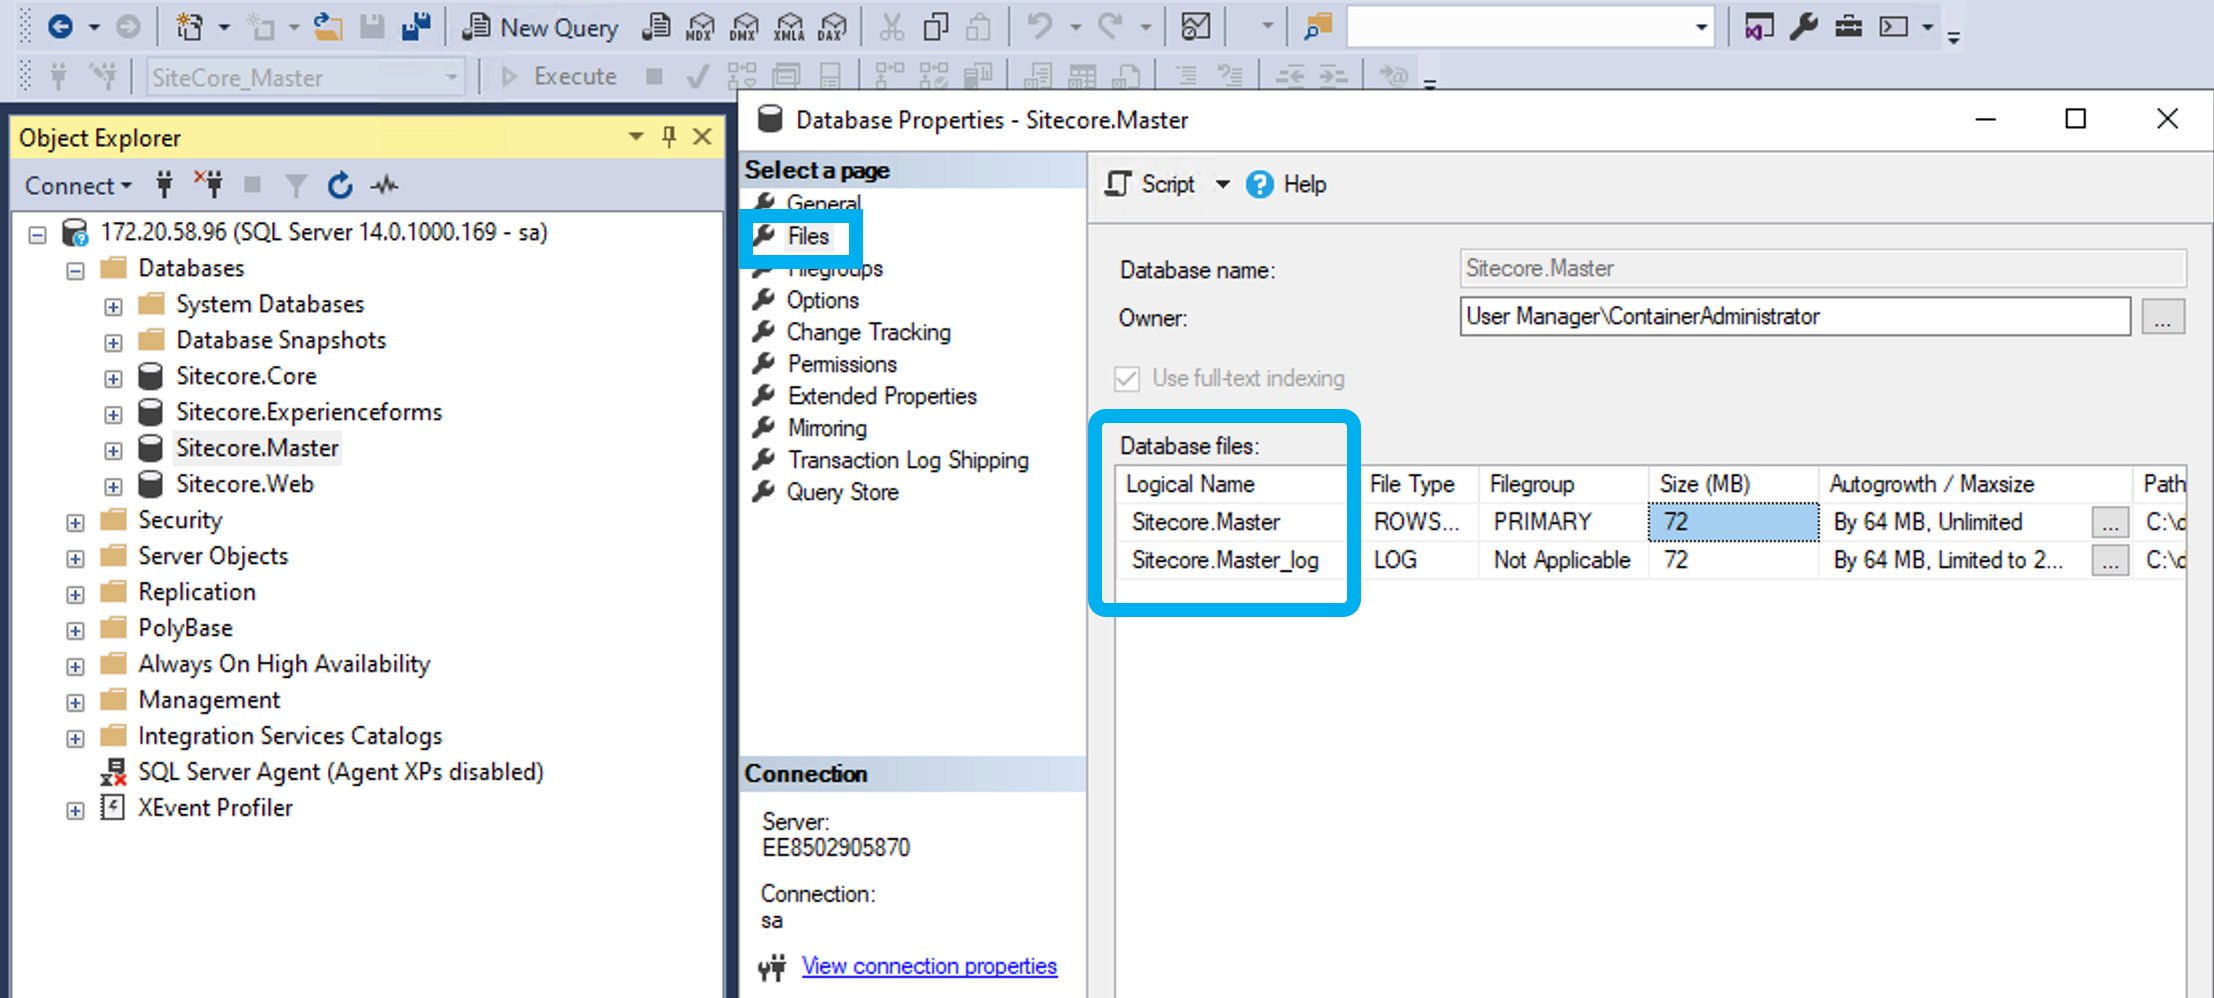
Right-click on the Sitecore.Master database, click properties. Select Files and see the details under the Logical Name heading in the image above. We have Sitecore.Master and Sitecore.Master_log.
Now lets write the script to do the swap.
ALTER DATABASE "Sitecore.Master"
    MODIFY FILE ( NAME = "Sitecore.Master",
                  FILENAME = 'C:\data\SiteCore_Master.mdf');
GO

ALTER DATABASE "Sitecore.Master"
    MODIFY FILE ( NAME = "Sitecore.Master_log",
                  FILENAME = 'C:\data\SiteCore_Master.ldf');
GO
Update the values appropriately to reflect the database name, logical name and file location.
Note in this case, quotes were needed because of the dot in the database name. And the file path needs to reference the location inside of the container which is c:\data
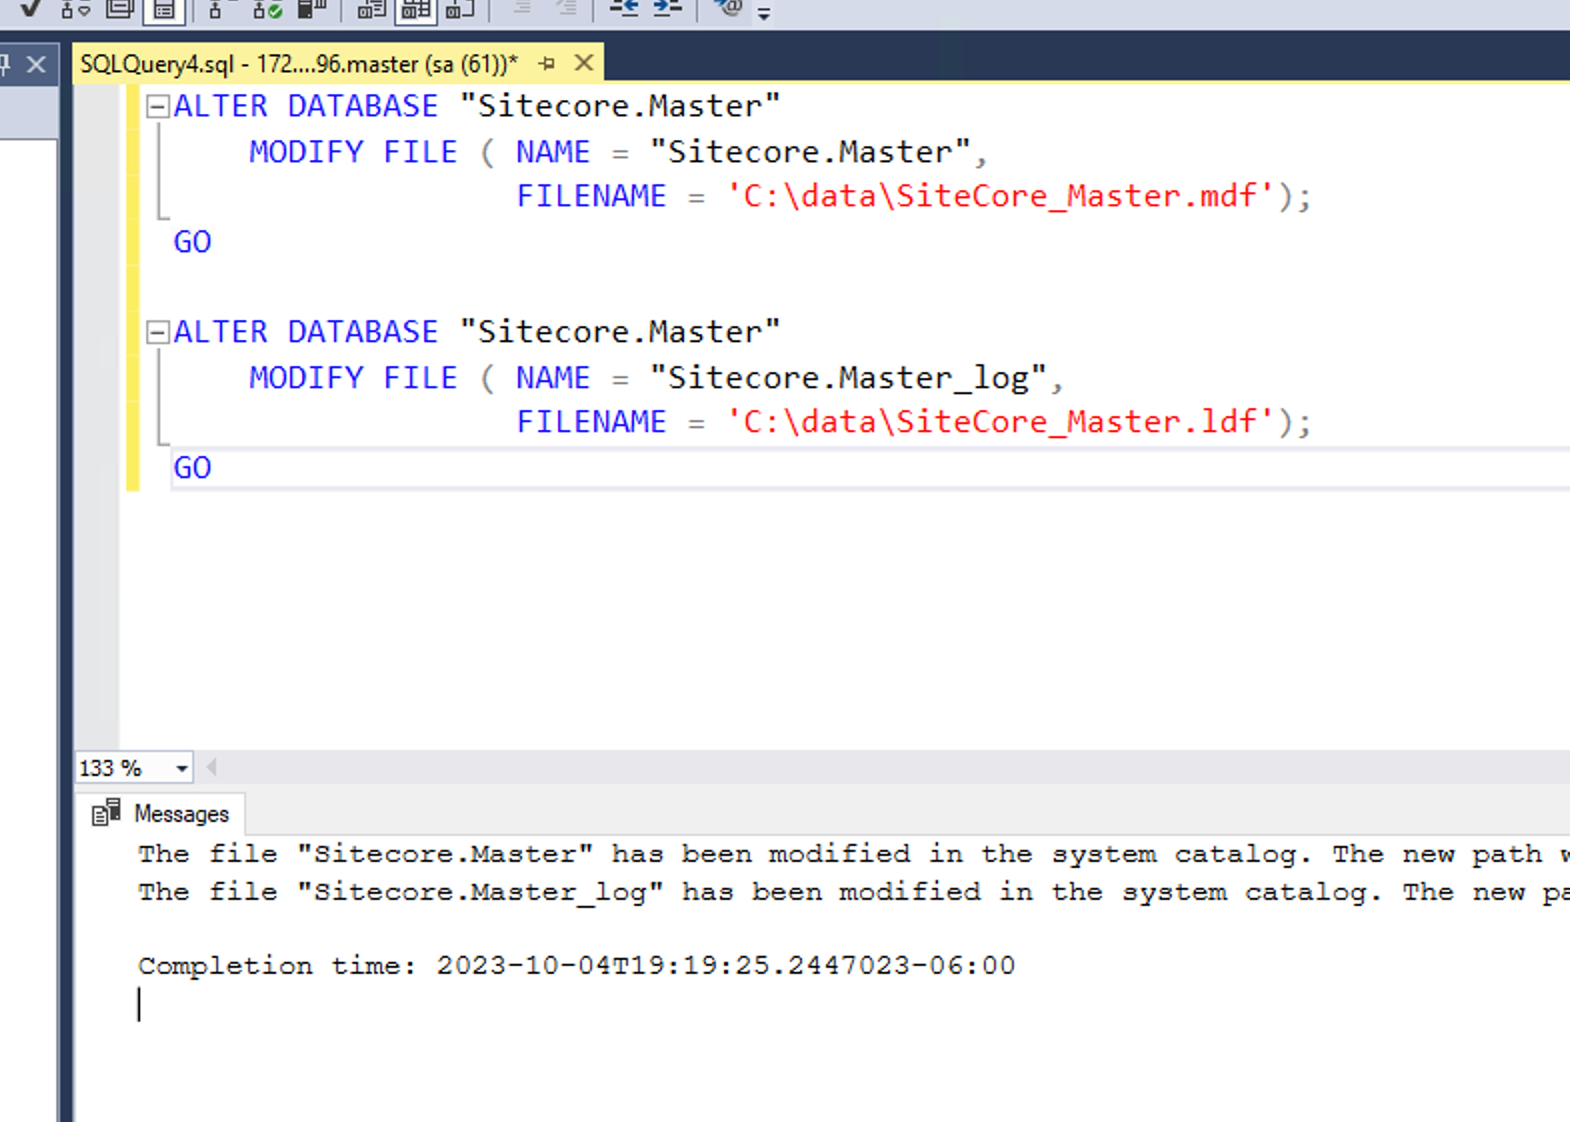
You can see it has run successfully. A restart of the SQL Server server is required to pick-up the changes.
To see these changes take affect I will run docker-compose down or the shorthand .\down.ps1 and bring it back up to restart Sitecore.
All done.
The steps are a little different, but overall its not too that different. BACPAC files need to be imported a specific way. Run the SQL scripts from Sitecore required for your upgrade. Then lastly swap those files into the Sitecore.Master database that your Sitecore instance is already using.
If you ever find yourself working on XM Cloud or an upgrade leveraging Docker, I hope you found this to be some help.
Thanks for reading.