Reading time: 17 min read
Sitecore XM Cloud: How To Setup Sitecore Headless SXA And Next.js
Getting Started With XM Cloud and Sitecore 10.x
Start typing to search...
We are not looking at getting Headless SXA running with Docker. That would be too easy. 😄
Jump to
This is of course formative work for getting started on XM Cloud which is based on SXA, Headless & Next.js. Though if you have access to environment, you may want to start using SXA Starter repo that is docker-based. Without access to XM Cloud, or maybe you can't run Docker, this is one way you can get started.
For this Install we're going a little more old school, hoping to gain a deeper understanding by hooking up the pieces manually. Here's what we'll be doing:
We also be running in connected mode which means that we're getting our content Sitecore from a live Sitecore instance.
We're not starting from ground zero. We will assume you've already done the following activities:
I used the Sitecore Installation Assistant (SIA) program to install Sitecore 10.3 then installed.
The hostname for our website is s103demo1cm.dev.local (specified as s103demo1cm during SIA). I'll be referencing the Sitecore instance by that hostname throughout. Use the same hostname or replace that with your own as we go through.
Added Jan 14, 2023: I've just published a guide addressing the common errors encountered when setting up the initial Sitecore Headless SXA / Next / XM Cloud Dev stack.
Yes. When working with XM Cloud, it's important to use the Sitecore CLI to sync up your items between the environments. You'll want to pull down from XM Cloud and push those items into your local. I would also create a separate rendering host item for you local environment to not overwrite the default XM Cloud configuration.
In SXA you have tenants and sites. A tenant can have many sites (or in this case one). And configurations can be set at the tenant or site modules, though most settings are going to be at the site level.
sitecore\content, select Insert / Headless Tenantgetfishtank and select all the modules (yolo)sitecore\content\getfishtank select Insert / Headless SitewwwGraphQL endpoint can stay as default and Deployment secret can
be blank
(we'll get to that later)Note for later: Calling our site www gives us the www item name that we
want in
our tree, but we'll ultimately be renaming the site's name within SXA site definition so it
matches
the name given to our Next.js app.
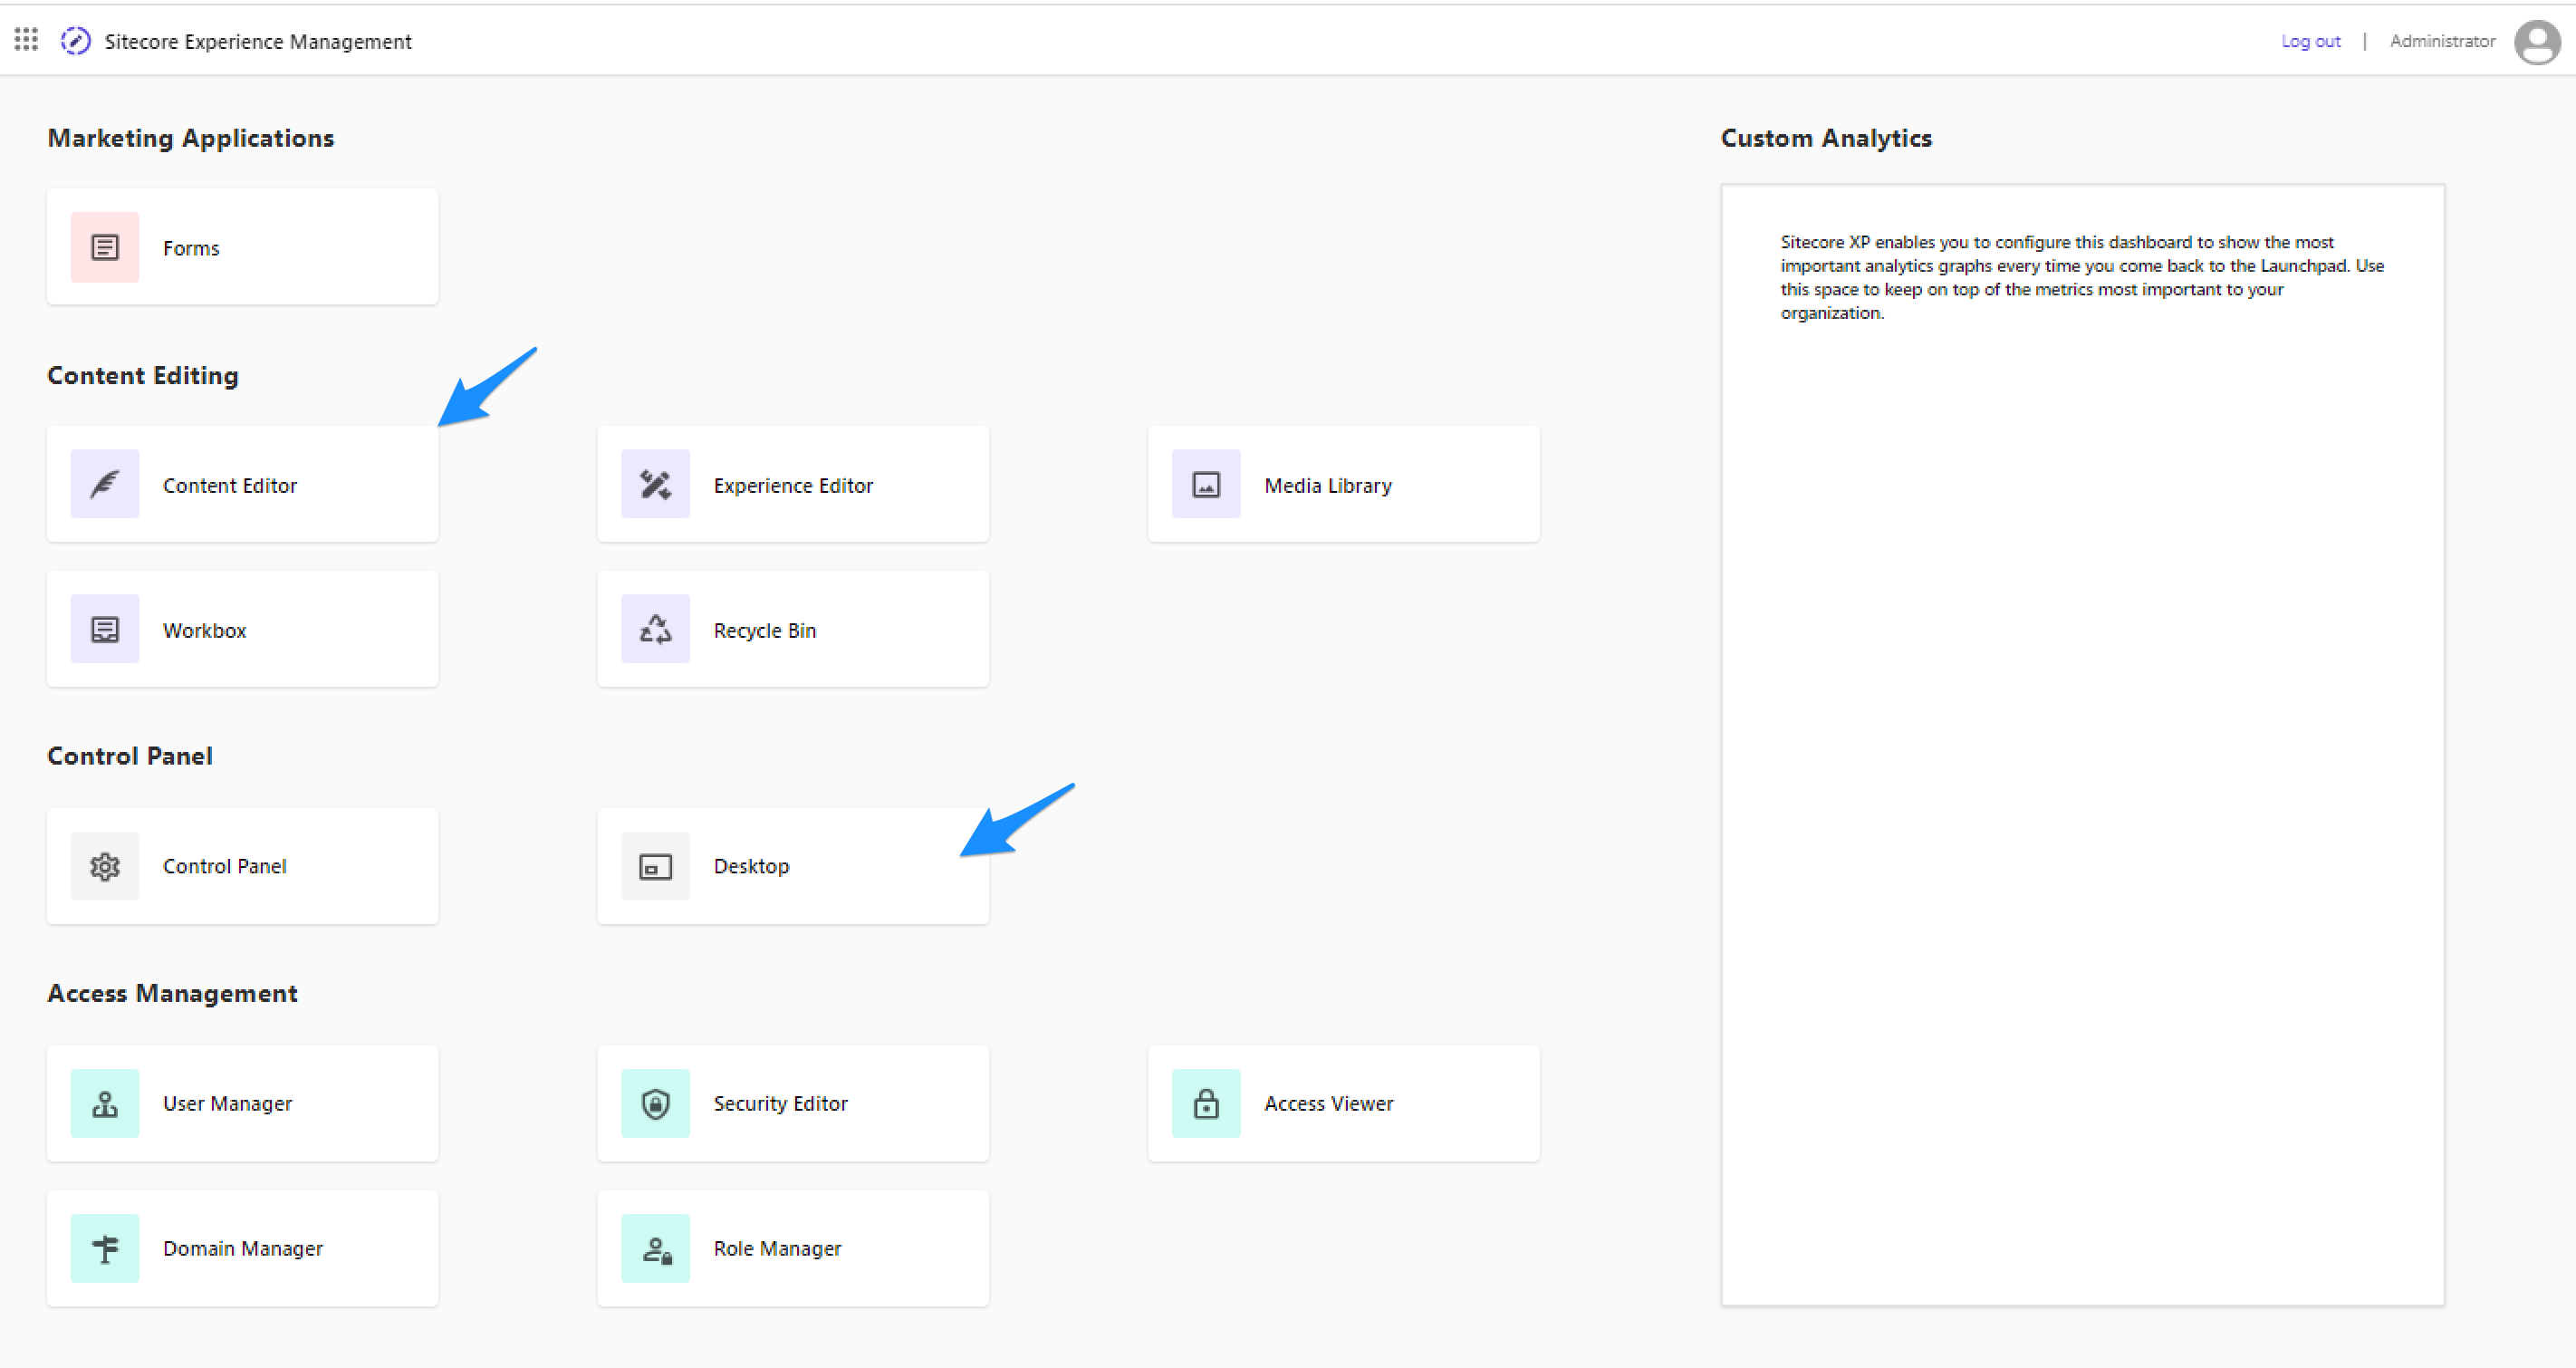
Of course we'll start in the Content Editor or select Desktop then the Content Editor.
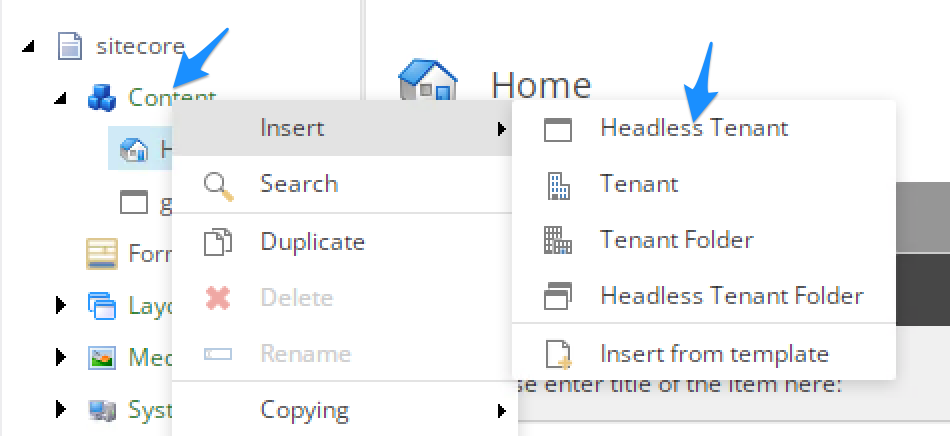
Right-click on sitecore\content, select Insert / Headless Tenant.
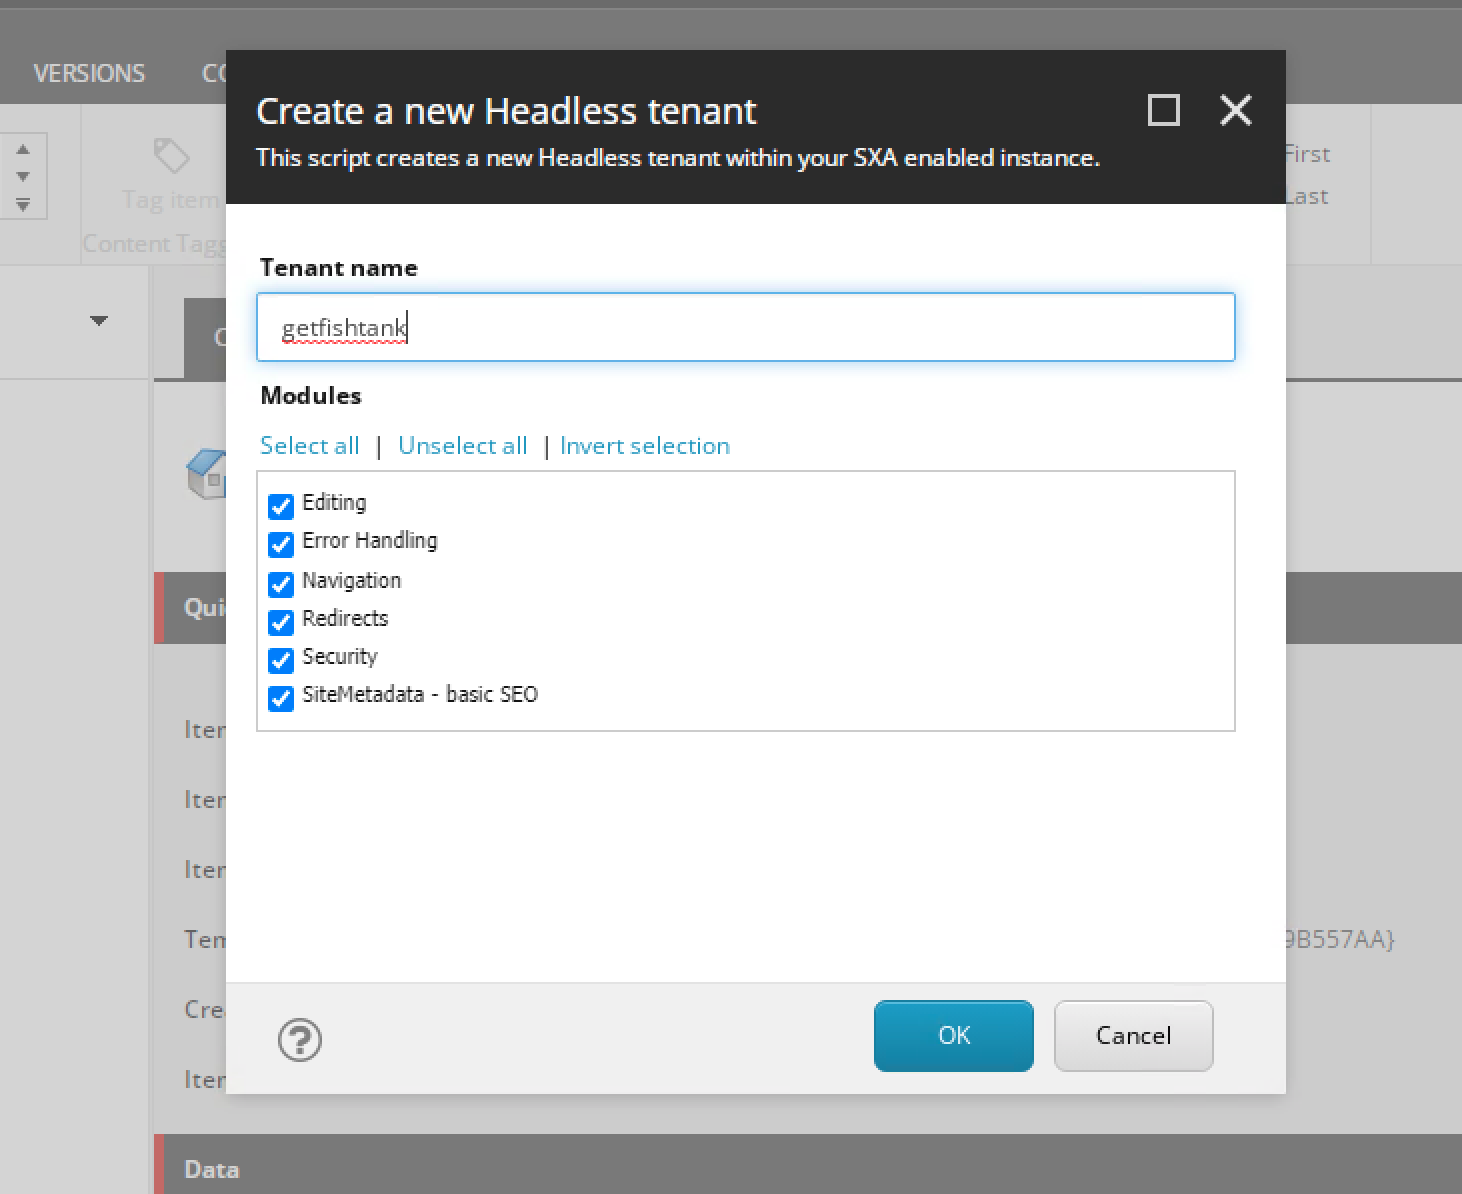
Our tenant name is getfishtank and select all the modules.
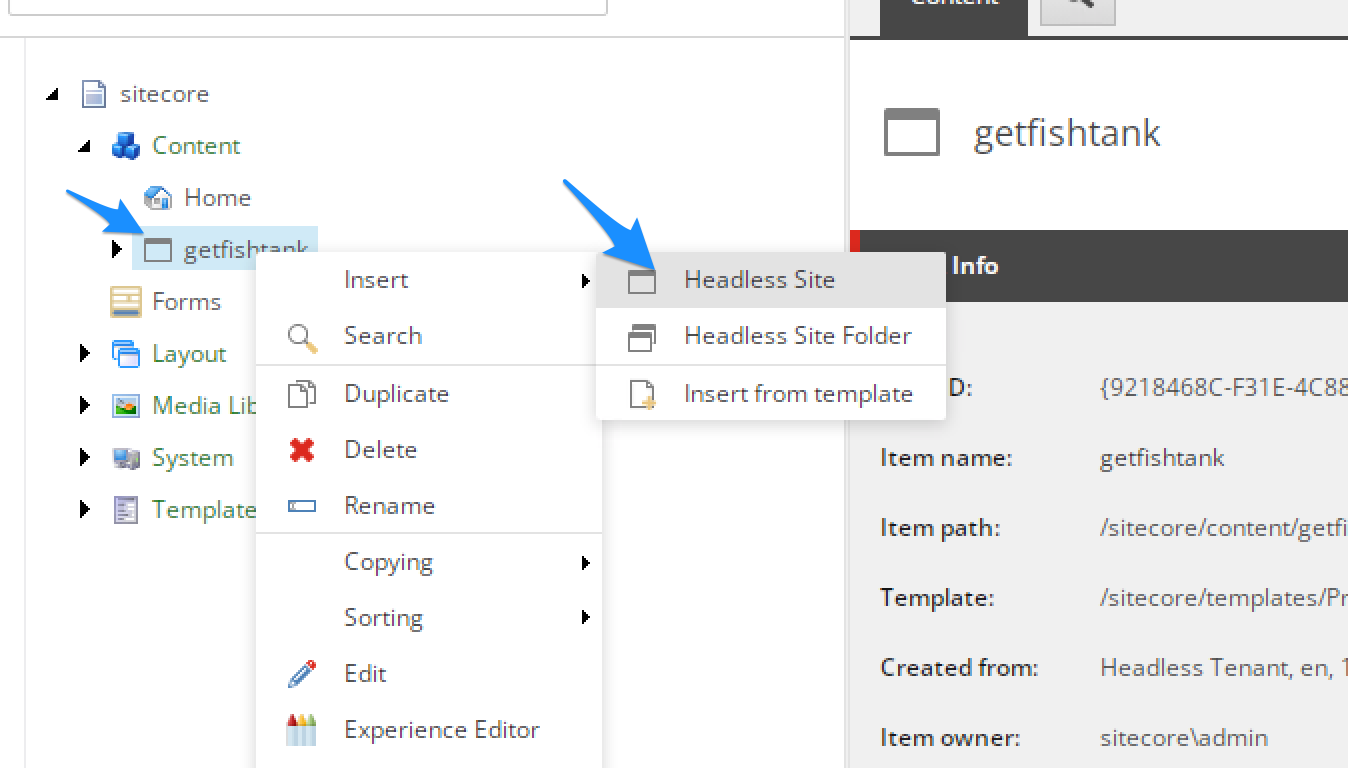
Right-click on sitecore\content\getfishtank select Insert / Headless Site.

General tab: Our site name is www
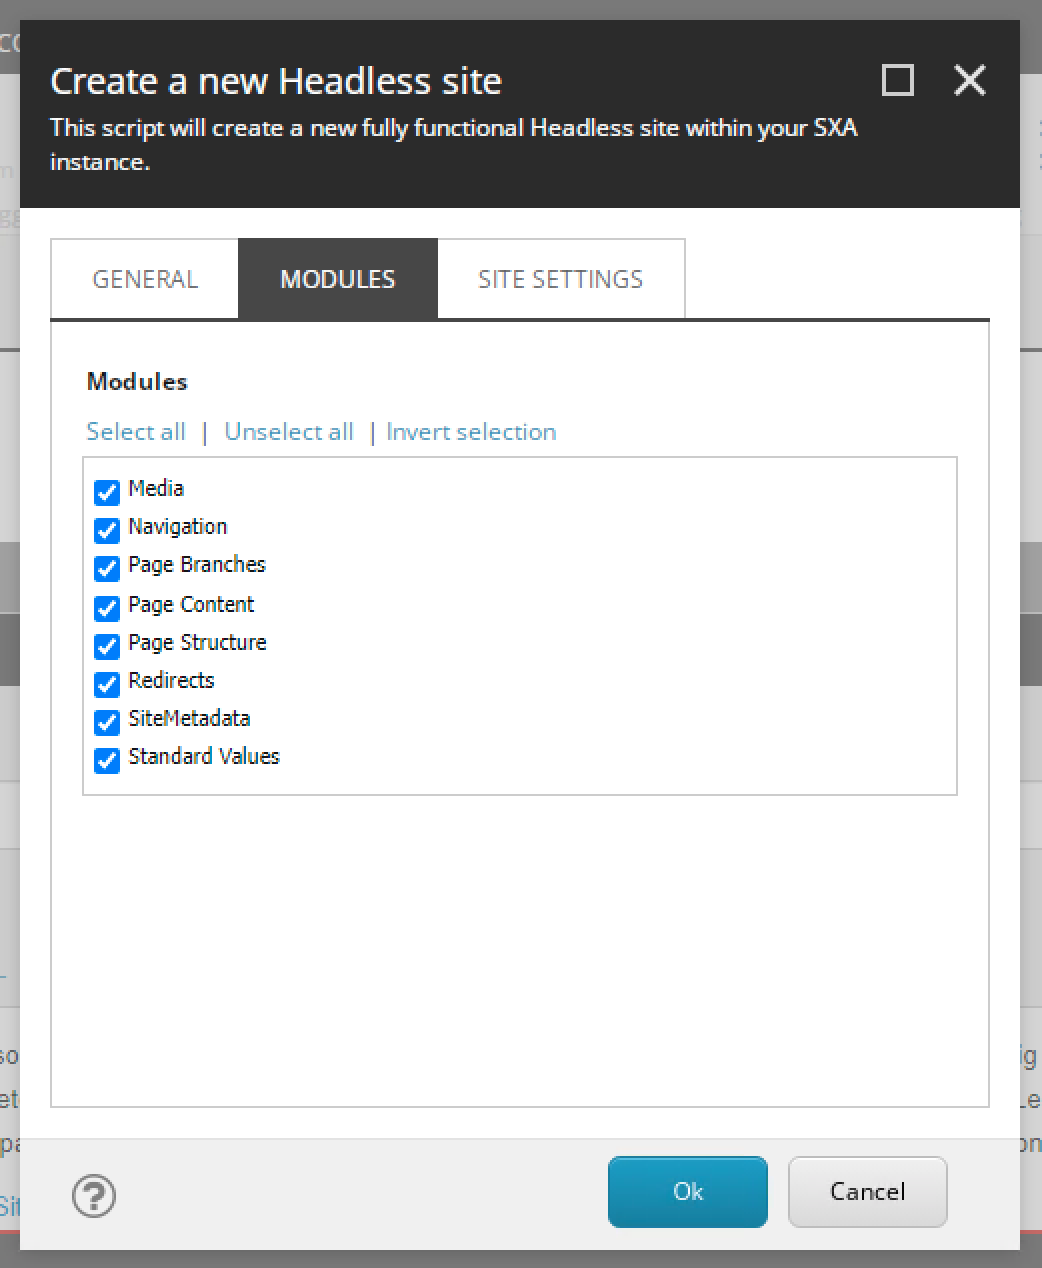
Modules tab: Select all the modules (yolo)
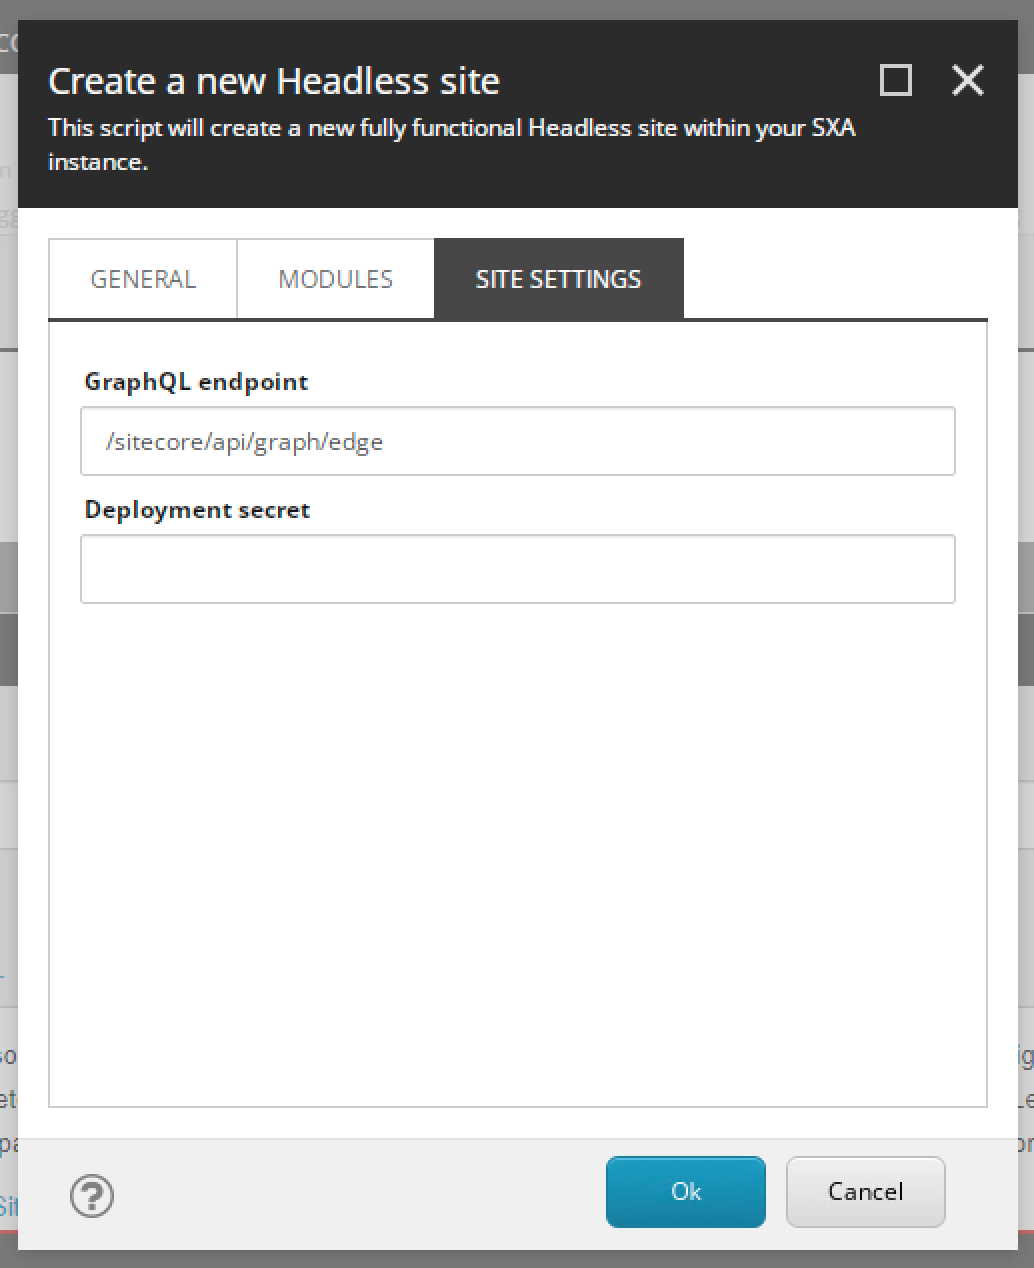
Site Settings tab: the GraphQL endpoint can stay as default and Deployment secret can be
blank
(we'll get to that later)
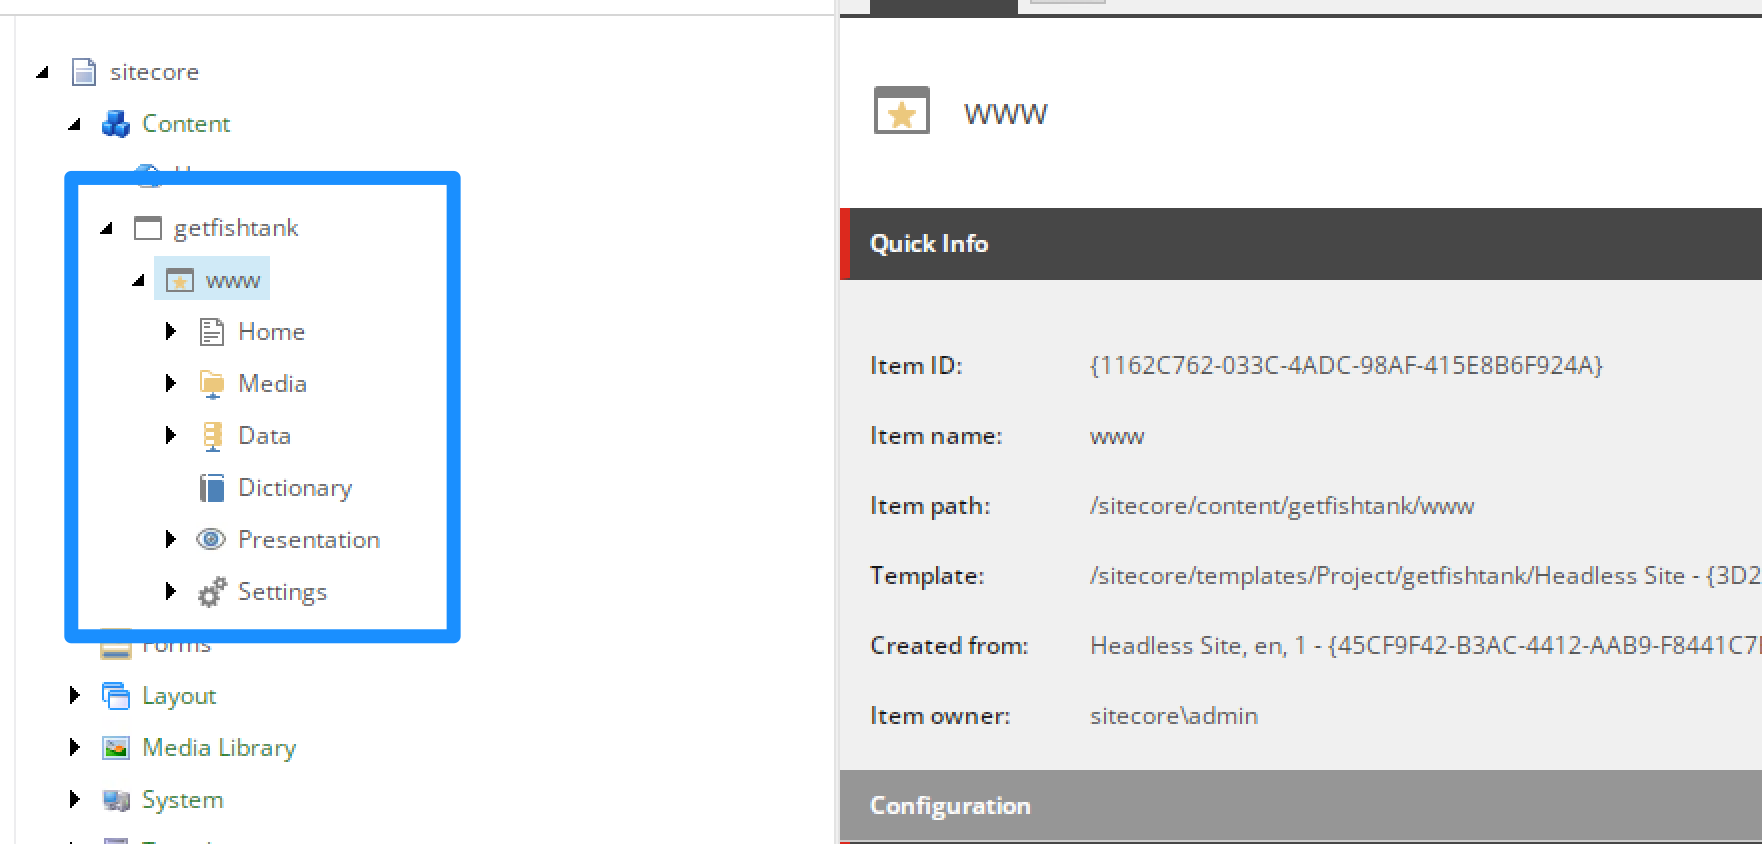
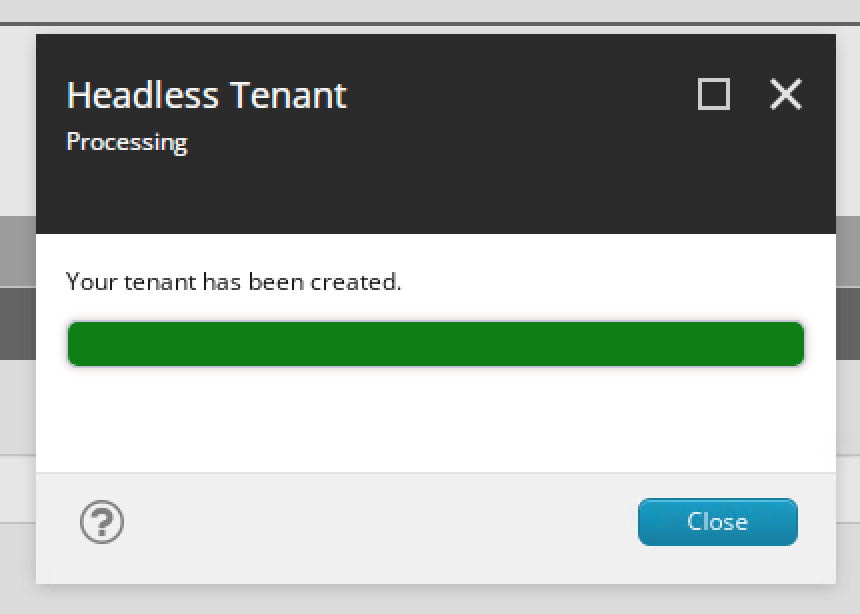
Now you'll see the general structure of your SXA-based site.
Sitecore needs to know where our Next.js front-end is located. This allows Sitecore to essentially proxy the site into Experience Editor and Preview modes to create a seamless (and super impressive) experience.

Your SXA site will by default point to this
/sitecore/system/Settings/Services/Rendering Hosts/Default as its rendering host. Values should be as follows:
http://localhost:3000/api/editing/renderhttp://localhost:3000fishtank-nextjs-app (of course change if appropriate)Note: If you were deploying to XM Cloud (or have a more complicated environment setup) you will want multiple rendering hosts. For instance, XM Cloud will point to a hosted application server (likely on Vercel), not localhost. To that end, its important to have distinct rendering host items (I'd recommend naming them per environment) so that they are not overwritten or in conflict when using the Sitecore CLI.
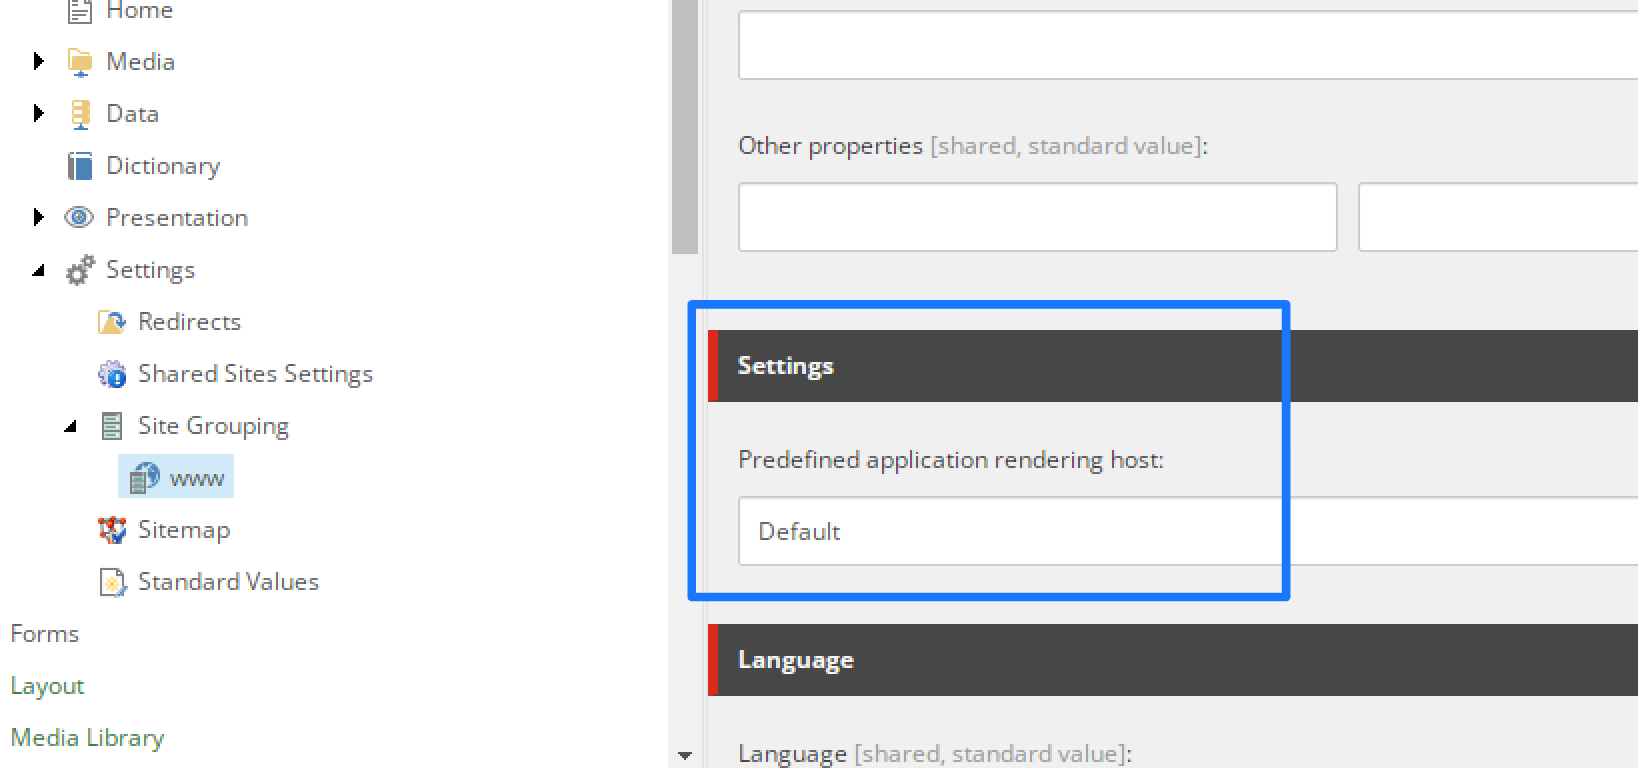
To see how this connects to your SXA site, you can see and change the selected rendering host at /sitecore/content/getfishtank/www/Settings/Site Grouping/www under the Settings and Predefined application rendering host.
A quick bit of setup to create an API Key to communicate with Sitecore. You can have multiple API Keys with different setups, we'll setup a very plain one here for development.
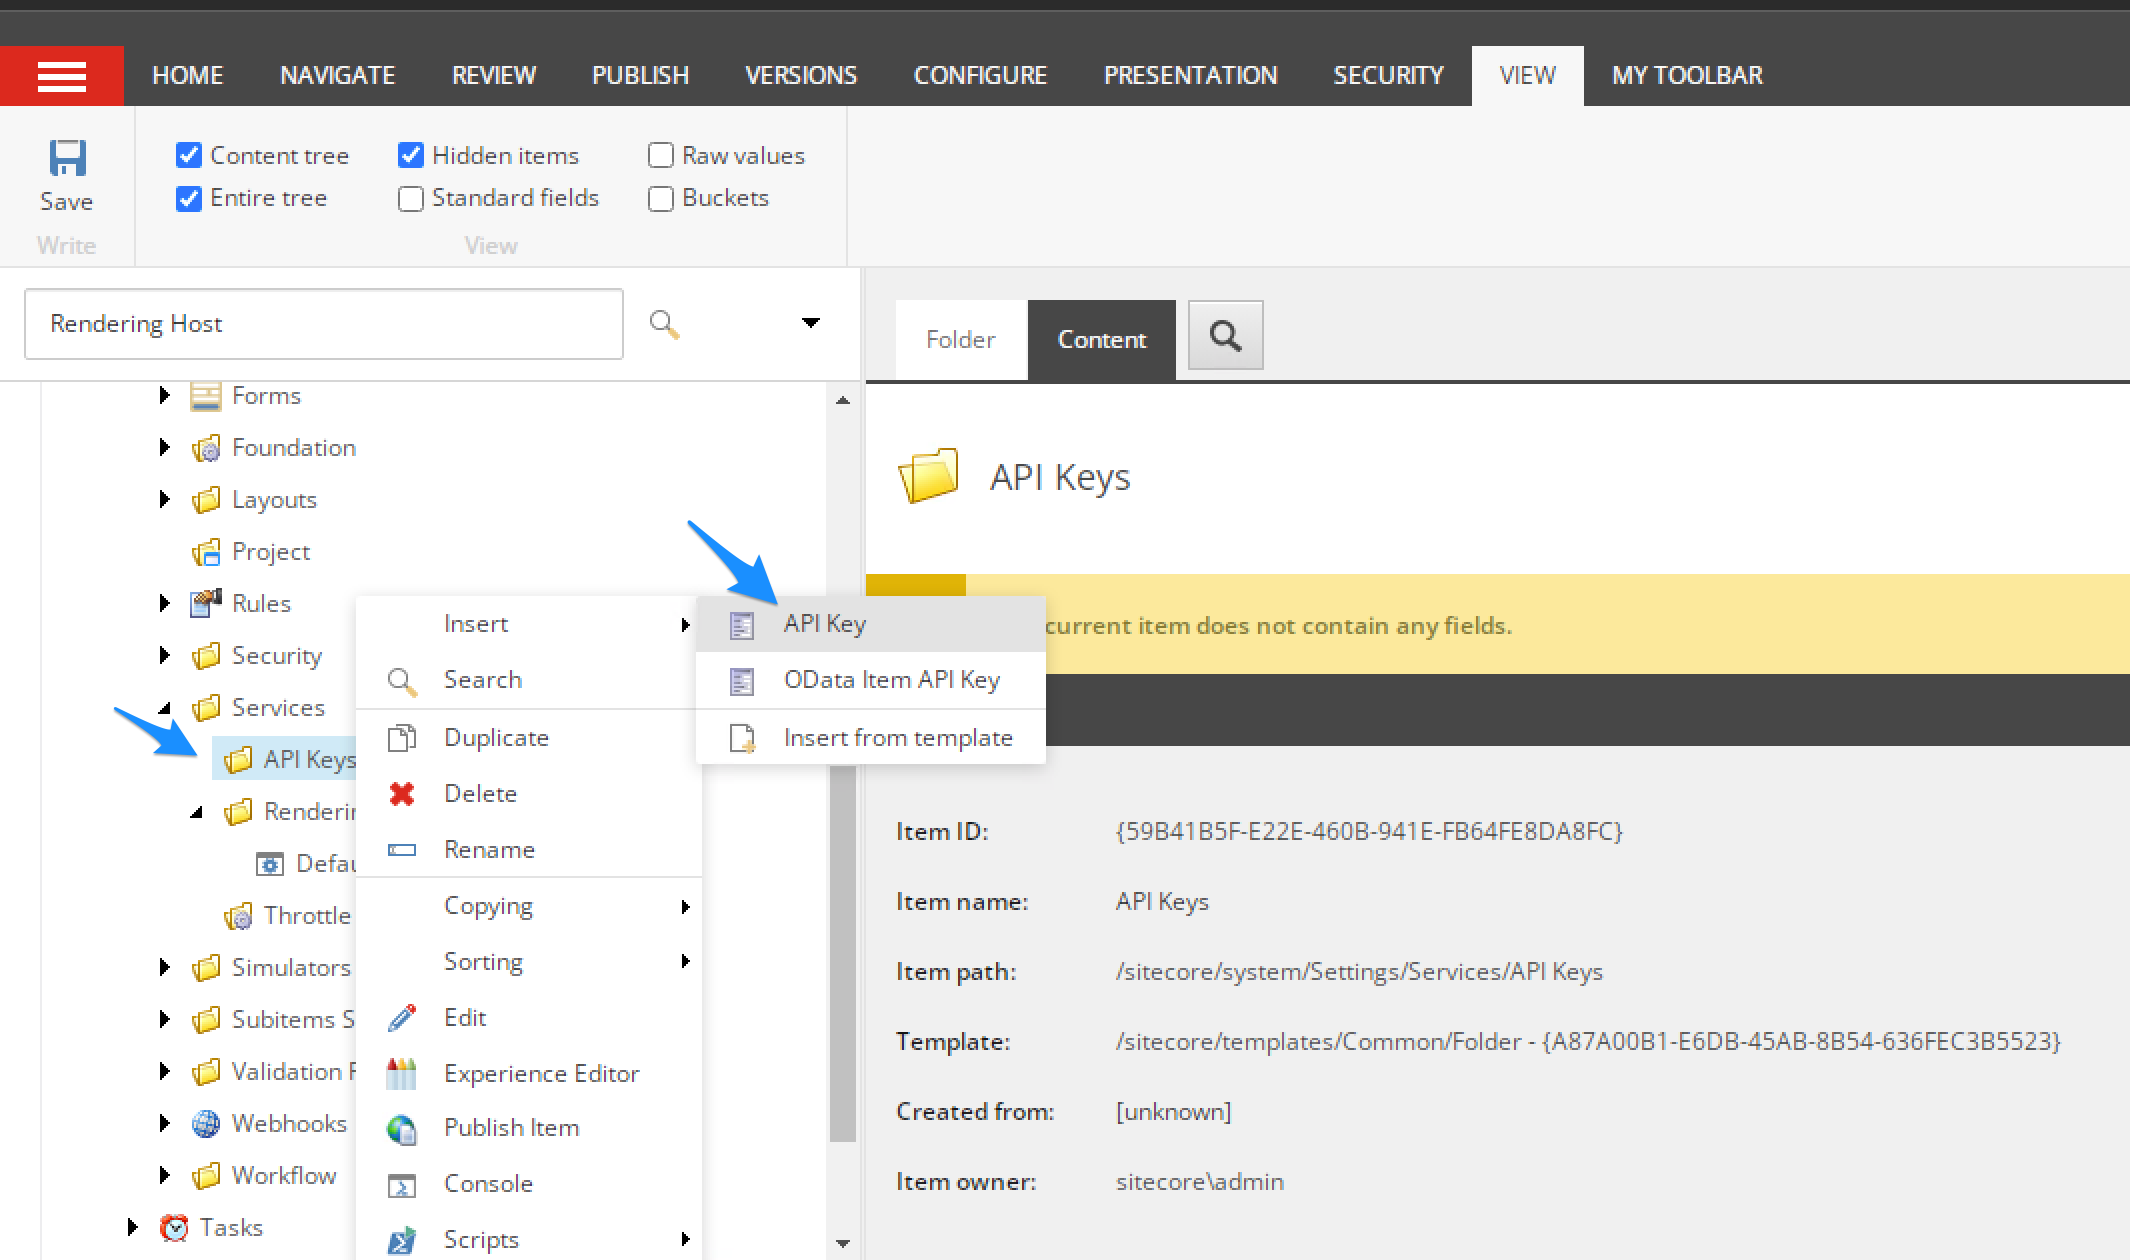
Navigate to /sitecore/system/Settings/Services/API Keys, right-click and an insert API Key
item.
The name is only informational, name it as you like.
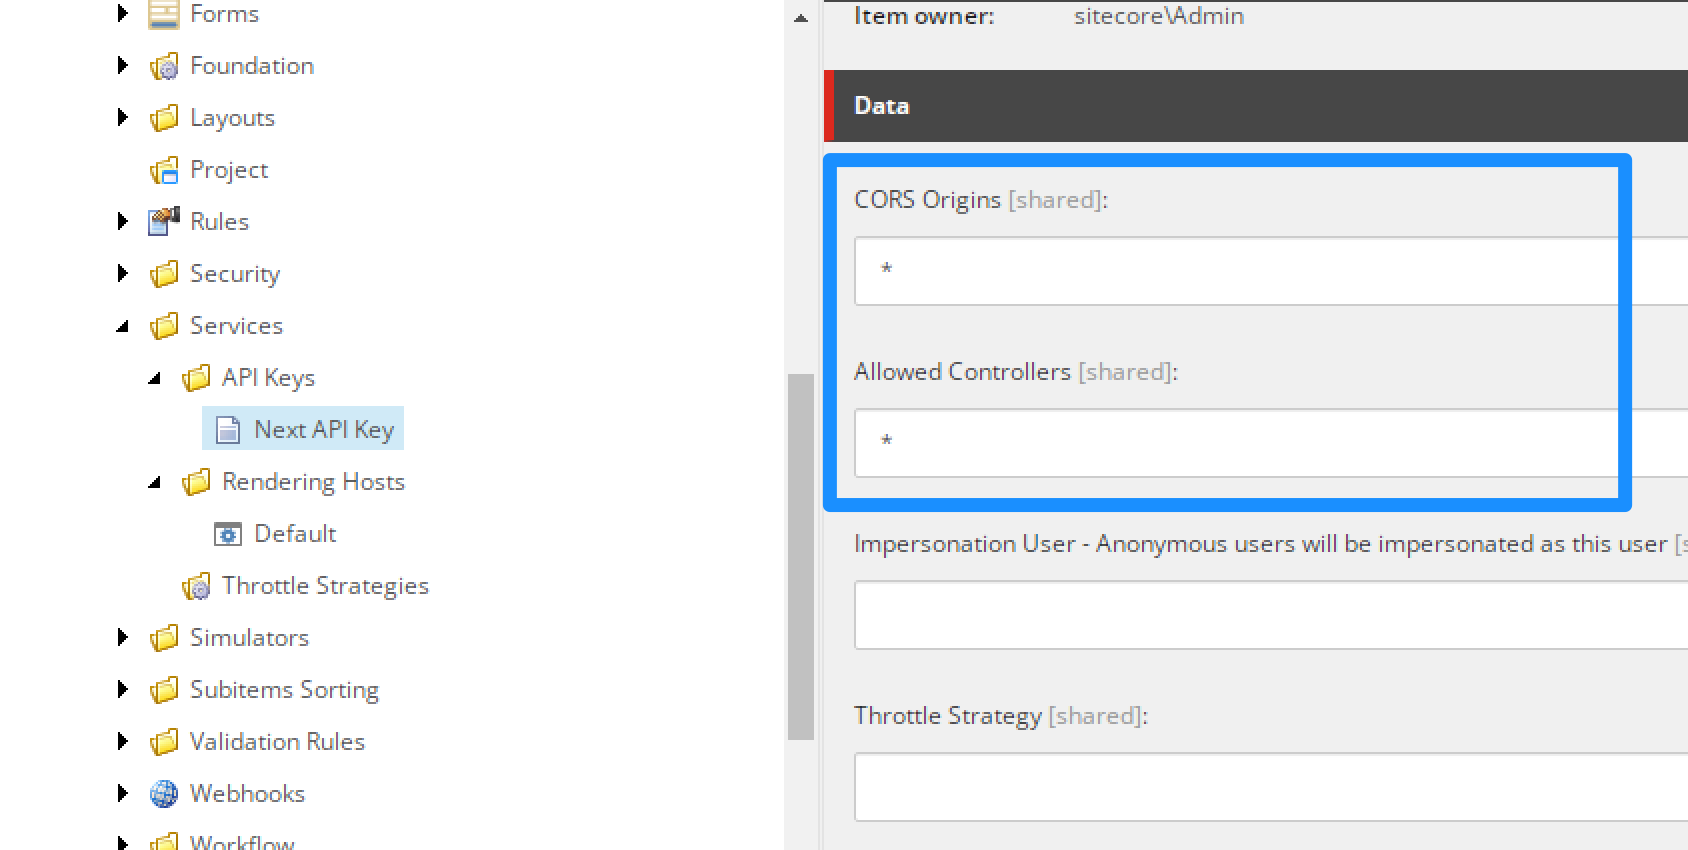
We'll set CORS Origin: * and Allowed Controllers: * to leave it open as we're in development.
He have no need for a Throttling Strategy (see the item below) nor Impersonation.
This API Key value is important.
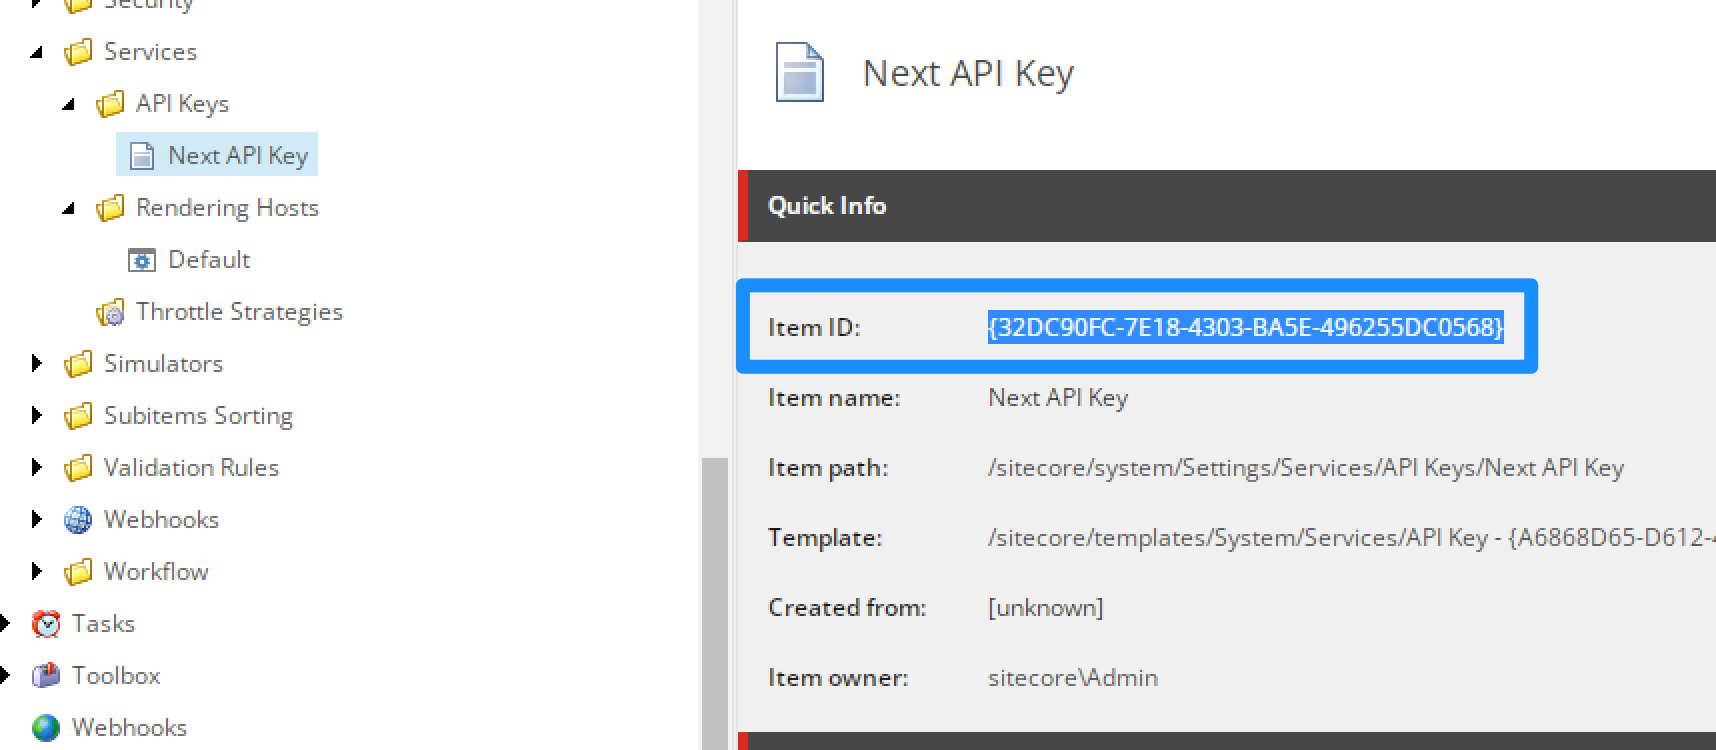
Grab the Item ID of the API Key. Save it. Copy it to notepad.
We'll need it for the jss setup steps soon.
Save and publish the item.
When we use the API Key in the setup we will drop the curly brackets but keep the dashes.
Sitecore JSS is a big part of the magical glue that helps our headless app interact so seamlessly with Sitecore.
You'll need the latest (or very recent) version of node installed for this to work. I use NVM for Windows to manage multiple node versions locally. It is not necessary but if you want to try it, you can download NVM for Windows here. There are other Node Version Management tools available as well.
Load up your favourite terminal.
We are working out c:\code\ and will create the folder nextjs-sxa-intro-1 as the base of
our
overall install. Move into that folder.
PS C:\code\nextjs-sxa-intro-1>
Run npm install @sitecore-jss/sitecore-jss-cli to install the latest CLI for Sitecore. It should look
like
this.
PS C:\code\nextjs-sxa-intro-1> npm install @sitecore-jss/sitecore-jss-cli

added 221 packages, and audited 222 packages in 15s

25 packages are looking for funding
  run `npm fund` for details

found 0 vulnerabilities
PS C:\code\nextjs-sxa-intro-1>
You can try to install this package globally, but later we'll run a jss setup command which will
prompt
us for a non-global install.
Run jss --help to verify the setup. It should look something like:
PS C:\code\nextjs-sxa-intro-1> jss --help
jss <command>


Commands:
  jss setup    Sets up the scjssconfig.json config file, which defines how this
                application connects to a Sitecore instance for content or
                deployment.
  jss deploy    Deploys the JSS app artifacts to a Sitecore instance. Use `jss
                deploy --help` for subcommands.
  jss package  Generates a JSS manifest package file that can be deployed to
                Sitecore. Nothing is deployed. See also jss deploy package,
                which takes the package and deploys it to Sitecore. `jss package
                --help` for options.
  jss manifest  Generates a JSS manifest file which defines app assets to import
                into Sitecore. Nothing is deployed or added to a deployment
                package; this just collects assets. See `jss package`, which
                takes the manifest and turns it into a deployable package. `jss
                manifest --help` for options.
  jss clean    Cleans the contents of a directory, by default the
                buildArtifactsPath.


Options:
  --version  Show version number                                      [boolean]
  --help    Show help                                                [boolean]
PS C:\code\nextjs-sxa-intro-1>
From that folder, enter the following command, note the hostname. This Sitecore link regarding JSS App Initialization is a useful reference.
npx create-sitecore-jss --templates nextjs,nextjs-sxa --appName fishtank-nextjs-app --hostName
s103demo1cm.dev.local --fetchWith GraphQL
When asked for application location we'll leave it blank.
When asked how to prerender our application select SSG for static site generation.
Note that we're asking to build an app using the nextjs and nextjs-sxa app templates.
The
nextjs-sxa will install the code to run the OOTB Headless SXA components we installed earlier.
Using --fetchWith GraphQL is actually the default, but I'm including it specifically to reenforce
the
idea that we're running in *connected mode
The output should look like:
PS C:\code\nextjs-sxa-intro-1> npx create-sitecore-jss --templates nextjs,nextjs-sxa --appName fishtank-nextjs-app --hostName s103demo1cm.dev.local --fetchWith GraphQL

Need to install the following packages:
  [email protected]
Ok to proceed? (y) y
? Where would you like your new app created? C:\code\nextjs-sxa-intro-1\fishtank-nextjs-app
Initializing 'nextjs'...
? How would you like to prerender your application? SSG
Initializing 'nextjs-sxa'...
Installing packages...
> npm install

(I removed a lot of output for brevity)


                      __________
                  __ / / __/ __/
                / // /\ \_\ \
                \___/___/___/


JSS application fishtank-nextjs-app is ready!


Next steps:
* Connect to Sitecore with jss setup (optional)
* Enable source control (i.e. git init) (optional)
* Check out the JSS documentation at https://jss.sitecore.com


Enjoy!
PS C:\code\nextjs-sxa-intro-1>
First thing, let's navigate up into our newly created Next.js application folder. This Important because with app now created, this will be our new base for commands.
PS C:\code\nextjs-sxa-intro-1\> cd fishtank-nextjs-app
PS C:\code\nextjs-sxa-intro-1\fishtank-nextjs-app>
Now run jss setup. This will create /scjssconfig.json which contains most of the
connectivity
configuration for your app. See the comments below.
PS C:\code\nextjs-sxa-intro-1> cd .\fishtank-nextjs-app\
PS C:\code\nextjs-sxa-intro-1\fishtank-nextjs-app> jss setup
Is your Sitecore instance on this machine or accessible via network share? [y/n]: y
Path to the Sitecore folder (e.g. c:\inetpub\wwwroot\my.siteco.re): c:\inetpub\wwwroot\s103demo1cm.dev.local
Sitecore hostname (e.g. http://myapp.local.siteco.re; see /sitecore/config; ensure added to hosts): http://s103demo1cm.d
ev.local
Sitecore import service URL [http://s103demo1cm.dev.local/sitecore/api/jss/import]:
Sitecore API Key (ID of API key item): 32DC90FC-7E18-4303-BA5E-496255DC0568
Please enter your deployment secret (32+ random chars; or press enter to generate one):
Deployment secret has been generated. Ensure the JSS app config on the Sitecore end has the same secret set.
Deploy secret Sitecore config written to C:\code\nextjs-sxa-intro-1\fishtank-nextjs-app\sitecore\config\fishtank-nextjs-
app.deploysecret.config
Ensure this configuration is deployed to Sitecore.
JSS connection settings saved to C:\code\nextjs-sxa-intro-1\fishtank-nextjs-app\scjssconfig.json


NEXT STEPS
* Ensure the hostName in /sitecore/config/*.config is configured as s103demo1cm.dev.local, and in hosts file if needed.
* Deploy your configuration (i.e. 'jss deploy config')
* Deploy your app (i.e. 'jss deploy app -c -d')
* Test your app in integrated mode by visiting http://s103demo1cm.dev.local
PS C:\code\nextjs-sxa-intro-y\fishtank-nextjs-app> cd ..
Here is how we answer the questions. Please note that the hostname, folder and especially
the
API Key could have unique values.
YC:\inetpub\wwwroot\s103demo1cm.dev.local32DC90FC-7E18-4303-BA5E-496255DC0568 (Use your Item ID here from
the
previous API Key step)Note that for the API Key, we keep the dashes but remove the curly brackets.
Also look at the file .\sitecore\config\fishtank-nextjs-app.deploysecret.config that was created. That
will
get copied into our Sitecore website configs when we eventually run jss deploy config.
Almost there. Next step is to clean-up some of the standard configs and make sure they'll work for Headless SXA.
For our final bit of configuration, we're going to do the following this.
rootItemId to the DictionaryServiceFactory codeWe have two places we need to config the the JSS Editing Secret. It's used to "secure the Sitecore editor endpoint exposed by your Next.js app".
Open the .env file in your Next.js app root.
Find the JSS_EDITING_SECRET= and create and add a long alphanumeric value. (I used my
API Key GUID
with brackets and dashes removed)
PUBLIC_URL=http://localhost:3000

# To secure the Sitecore editor endpoint exposed by your Next.js app
# (`/api/editing/render` by default), a secret token is used. This (client-side)
# value must match your server-side value (see \sitecore\config\fishtank-nextjs-app.config).
# We recommend an alphanumeric value of at least 16 characters.
JSS_EDITING_SECRET=32DC90FC7E184303BA5E496255DC0568
Now we'll set this same value 32DC90FC7E184303BA5E496255DC0568 as the JSS Editing Secret in our
Sitecore
patch file (that will be pushed by jss deploy config).
Around line 41 of .\sitecore\config\fishtank-nextjs-app.config update the
JavaScriptServices.ViewEngine.Http.JssEditingSecret setting.
Please note, in my experience testing I needed to restart IIS to get this config patched in as no DLLs were deployed and the config was net-new. The file containing an empty secret that should be patched is at \App_Config\Sitecore\JavaScriptServices\Sitecore.JavaScriptServices.ViewEngine.Http.config.
  <!--
        JSS EDITING SECRET
        To secure the Sitecore editor endpoint exposed by your Next.js app (see `serverSideRenderingEngineEndpointUrl` below),
        a secret token is used. This is taken from an env variable by default, but could be patched and set directly by uncommenting.
        This (server-side) value must match your client-side value, which is configured by the JSS_EDITING_SECRET env variable (see the Next.js .env file).
        We recommend an alphanumeric value of at least 16 characters.
    -->
        <setting name="JavaScriptServices.ViewEngine.Http.JssEditingSecret" value="32DC90FC7E184303BA5E496255DC0568" />
Be aware that you'll need to uncomment this setting.
Around line 65 of .\sitecore\config\fishtank-nextjs-app.config comment out the OOTB
site
definition. This is managed by SXA configuration items within Sitecore so its not needed.
      <site patch:before="site[@name='website']"
            inherits="website"
            name="fishtank-nextjs-app"
            hostName="s103demo1cm.dev.local"
            rootPath="/sitecore/content/fishtank-nextjs-app"
            startItem="/home"
            database="master" />
      -->
Near line 91, update the sitecorePath in the app definition the website's root item:
/sitecore/content/getfishtank/www.
        <app name="fishtank-nextjs-app"
            layoutServiceConfiguration="default"
            sitecorePath="/sitecore/content/getfishtank/www""
            useLanguageSpecificLayout="true"
            graphQLEndpoint="/sitecore/api/graph/edge"
            inherits="defaults"
            serverSideRenderingEngine="http"
            serverSideRenderingEngineEndpointUrl="http://localhost:3000/api/editing/render"
            serverSideRenderingEngineApplicationUrl="http://localhost:3000"
        />
Open the file .\src\lib\dictionary-service-factory.ts and look at around line 19. We will add the
property
rootItemId : {home-item-guid}.
export class DictionaryServiceFactory {
  create(): DictionaryService {
    return process.env.FETCH_WITH === constants.FETCH_WITH.GRAPHQL
      ? new GraphQLDictionaryService({
          endpoint: config.graphQLEndpoint,
          apiKey: config.sitecoreApiKey,
          siteName: config.jssAppName,
          rootItemId: "{C81EAB15-5486-4604-AD74-4DB61E3363F2}"
          /*
            The Dictionary Service needs a root item ID in order to fetch dictionary phrases for the current
            app. If your Sitecore instance only has 1 JSS App, you can specify the root item ID here;
            otherwise, the service will attempt to figure out the root item for the current JSS App using GraphQL and app name.
            rootItemId: '{GUID}'
          */
        })
      : new RestDictionaryService({
          apiHost: config.sitecoreApiHost,
          apiKey: config.sitecoreApiKey,
          siteName: config.jssAppName,
        });
  }
}
The rootItemId is the item ID of Home item at
/sitecore/content/getfishtank/www/Home. The
home page of your SXA site. There is a handy comment in the file as well.
If this step is not completed you will see the following error:
Error: Valid value for rootItemId not provided and failed to auto-resolve app root item
The site name is used in requests to Sitecore to resolve the headless content. The app name and the name attribute of the site definition in SXA must be made to match.
In the content editor navigate to /sitecore/content/getfishtank/www/Settings/Site Grouping/www.
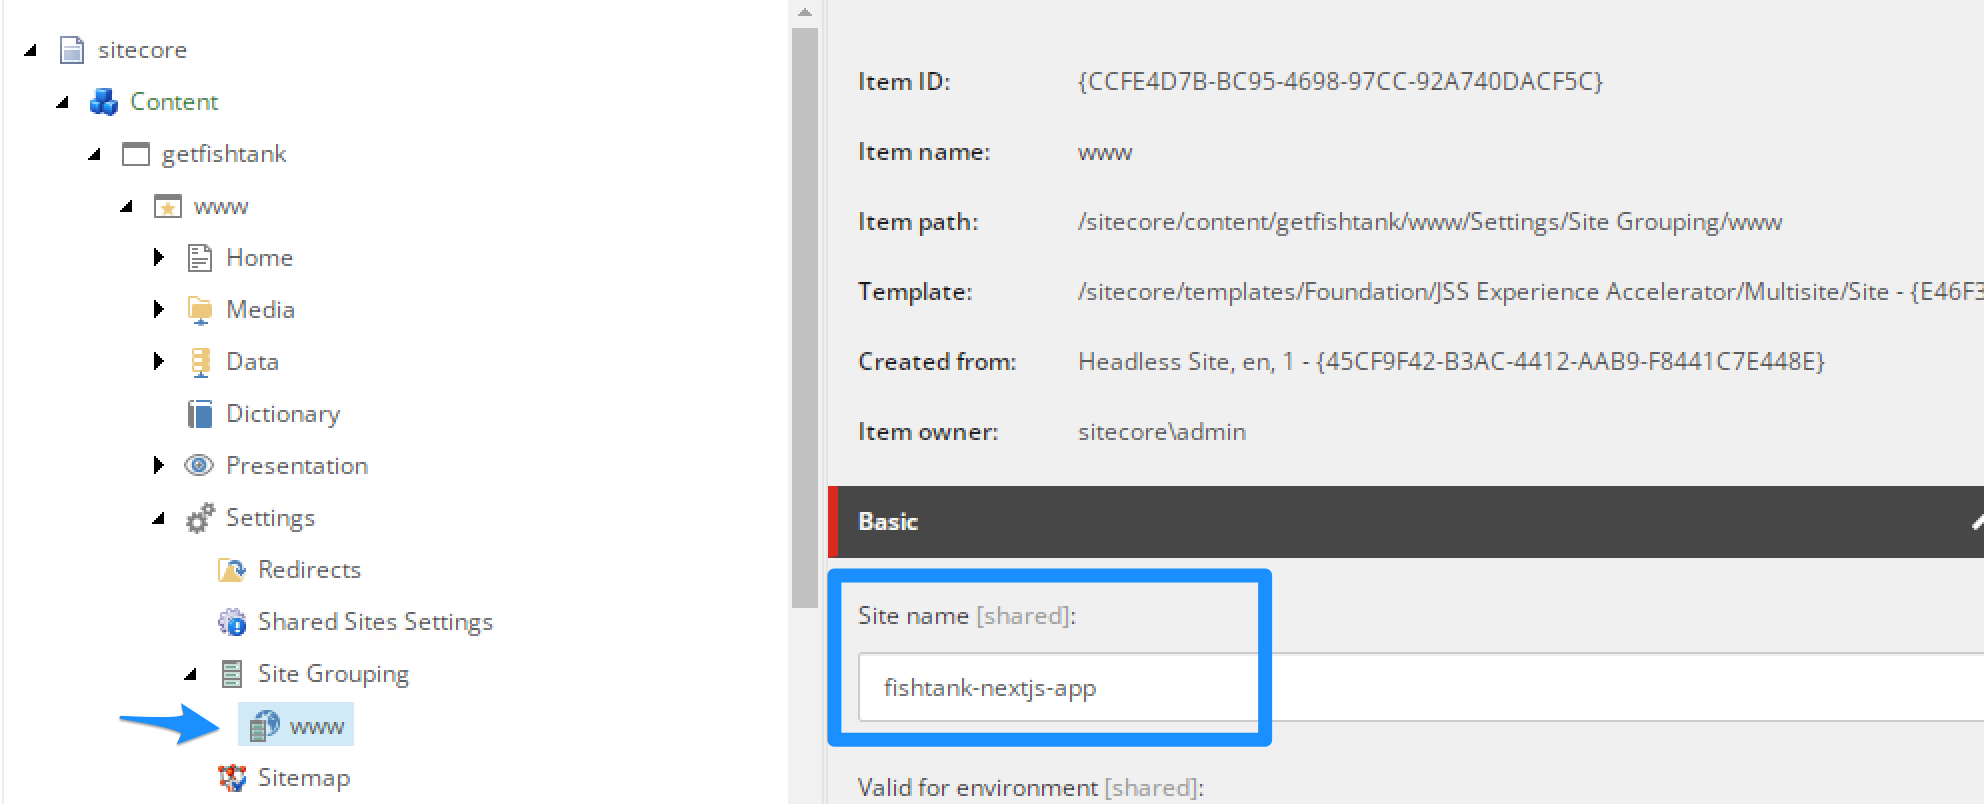
Update the Site name field to fishtank-nextjs-app. Now the site and the app have the same
name and
will work together.
We should be pointing at the master database running in live mode, but just incase feel
free to publish.
Alternatively, we could have named our app www and these values would naturally align. Or named our website after our app. But I really think our site should be called www and our app should be called fishtank-nextjs-app.
It's important to understand how these names and fields link up!
Now that we've done all this setup, we will deploy the config files in the ./sitecore/config folder.
Run: jss deploy config
PS C:\code\nextjs-sxa-intro-1\fishtank-nextjs-app> jss deploy config
Creating nonexistant destination path C:\inetpub\wwwroot\s103demo1cm.dev.local\App_Config\Include\zzz...
Copying ./sitecore/config to C:\inetpub\wwwroot\s103demo1cm.dev.local\App_Config\Include\zzz...

JSS app build artifacts have been deployed to Sitecore.
Note: Restart your IIS to be safe. I've found new configs did always trigger an IIS restart. For
example, when I checked ShowConfig.aspx I did not see my JSS Editing Secret until
after a restart.
Then start our Next.js site in connected mode.
Run: jss start:connected
PS C:\code\nextjs-sxa-intro-1\fishtank-nextjs-app> jss start:connected
> npm run start:connected --
> fishtank-nextjs-app@21.0.2 start:connected
> npm-run-all --serial bootstrap --parallel next:dev start:watch-components
> fishtank-nextjs-app@21.0.2 bootstrap
> ts-node --project tsconfig.scripts.json scripts/bootstrap.ts
Writing runtime config to C:\code\nextjs-sxa-intro-1\fishtank-nextjs-app\src\temp\config.js
Registering JSS component ColumnSplitter

(... output deleted in this post for brevity ...)

Registering next-config plugin sitemap
Writing next-config plugins to C:\code\nextjs-sxa-intro-1\fishtank-nextjs-app\src\temp\next-config-plugins.js
> fishtank-nextjs-app@21.0.2 start:watch-components
> ts-node --project tsconfig.scripts.json scripts/generate-component-factory.ts --watch
> fishtank-nextjs-app@21.0.2 next:dev
> cross-env NODE_OPTIONS='--inspect' next dev
Debugger listening on ws://127.0.0.1:9229/4c9d2d6c-bb0b-43df-b034-8102dca47a68
For help, see: https://nodejs.org/en/docs/inspector
ready - started server on 0.0.0.0:3000, url: http://localhost:3000
info  - Loaded env from C:\code\nextjs-sxa-intro-y\fishtank-nextjs-app\.env
Watching for changes to component factory sources in src/components...
info  - Disabled SWC as replacement for Babel because of custom Babel configuration ".babelrc" https://nextjs.org/docs/messages/swc-disabled
info  - automatically enabled Fast Refresh for 1 custom loader
info  - Using external babel configuration from C:\code\nextjs-sxa-intro-y\fishtank-nextjs-app\.babelrc
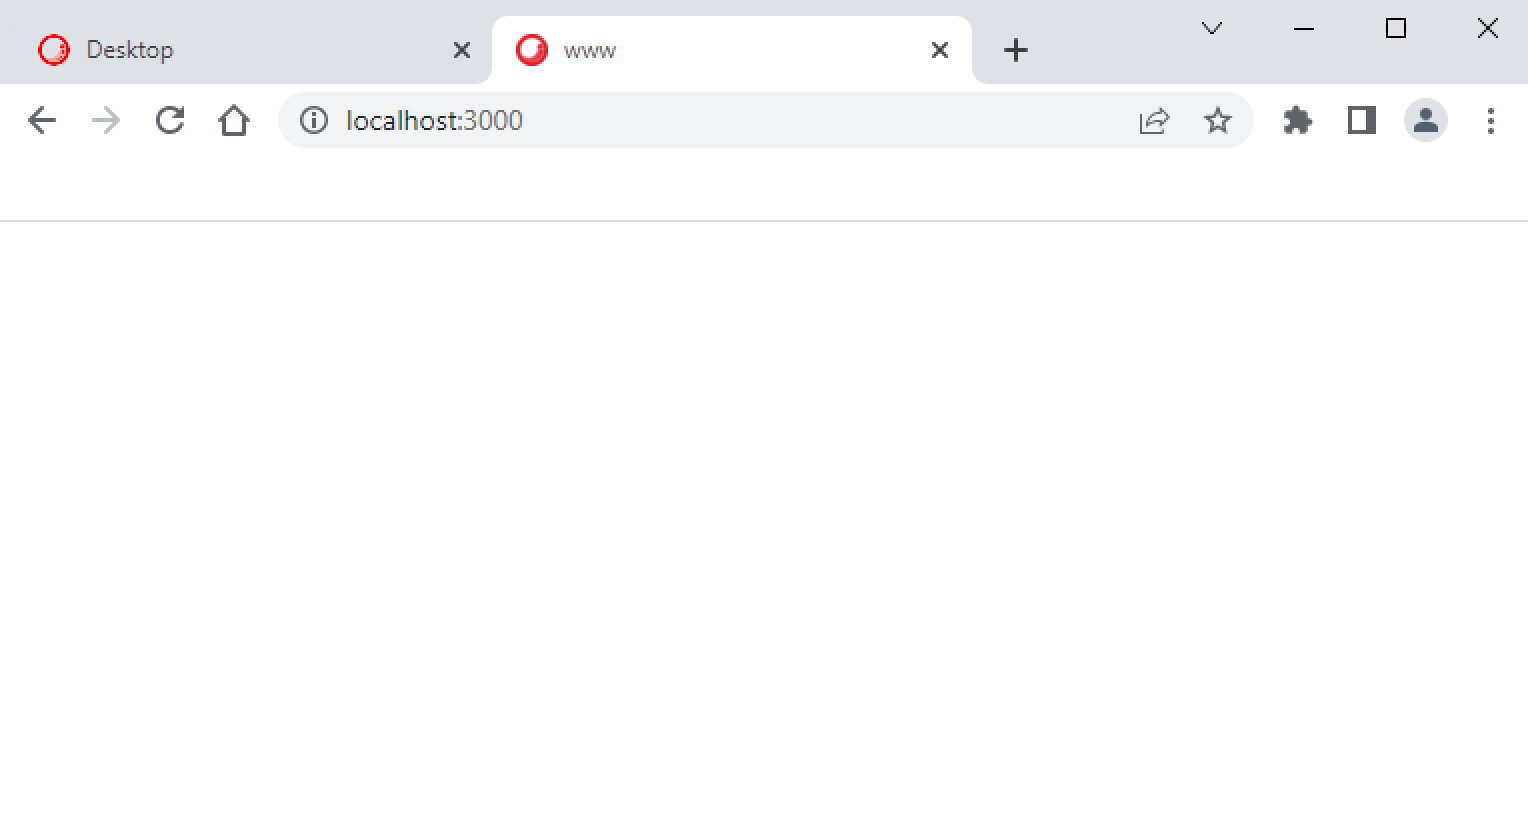
Load http://localhost:3000 to see it in action!
Now since you probably haven't added anything to your home page, it will be blank. But the page title in the
browser should have a value like www
Go back into Sitecore, navigate to your home item at /sitecore/content/getfishank/www/home, right-click
the
item and select Experience Editor.
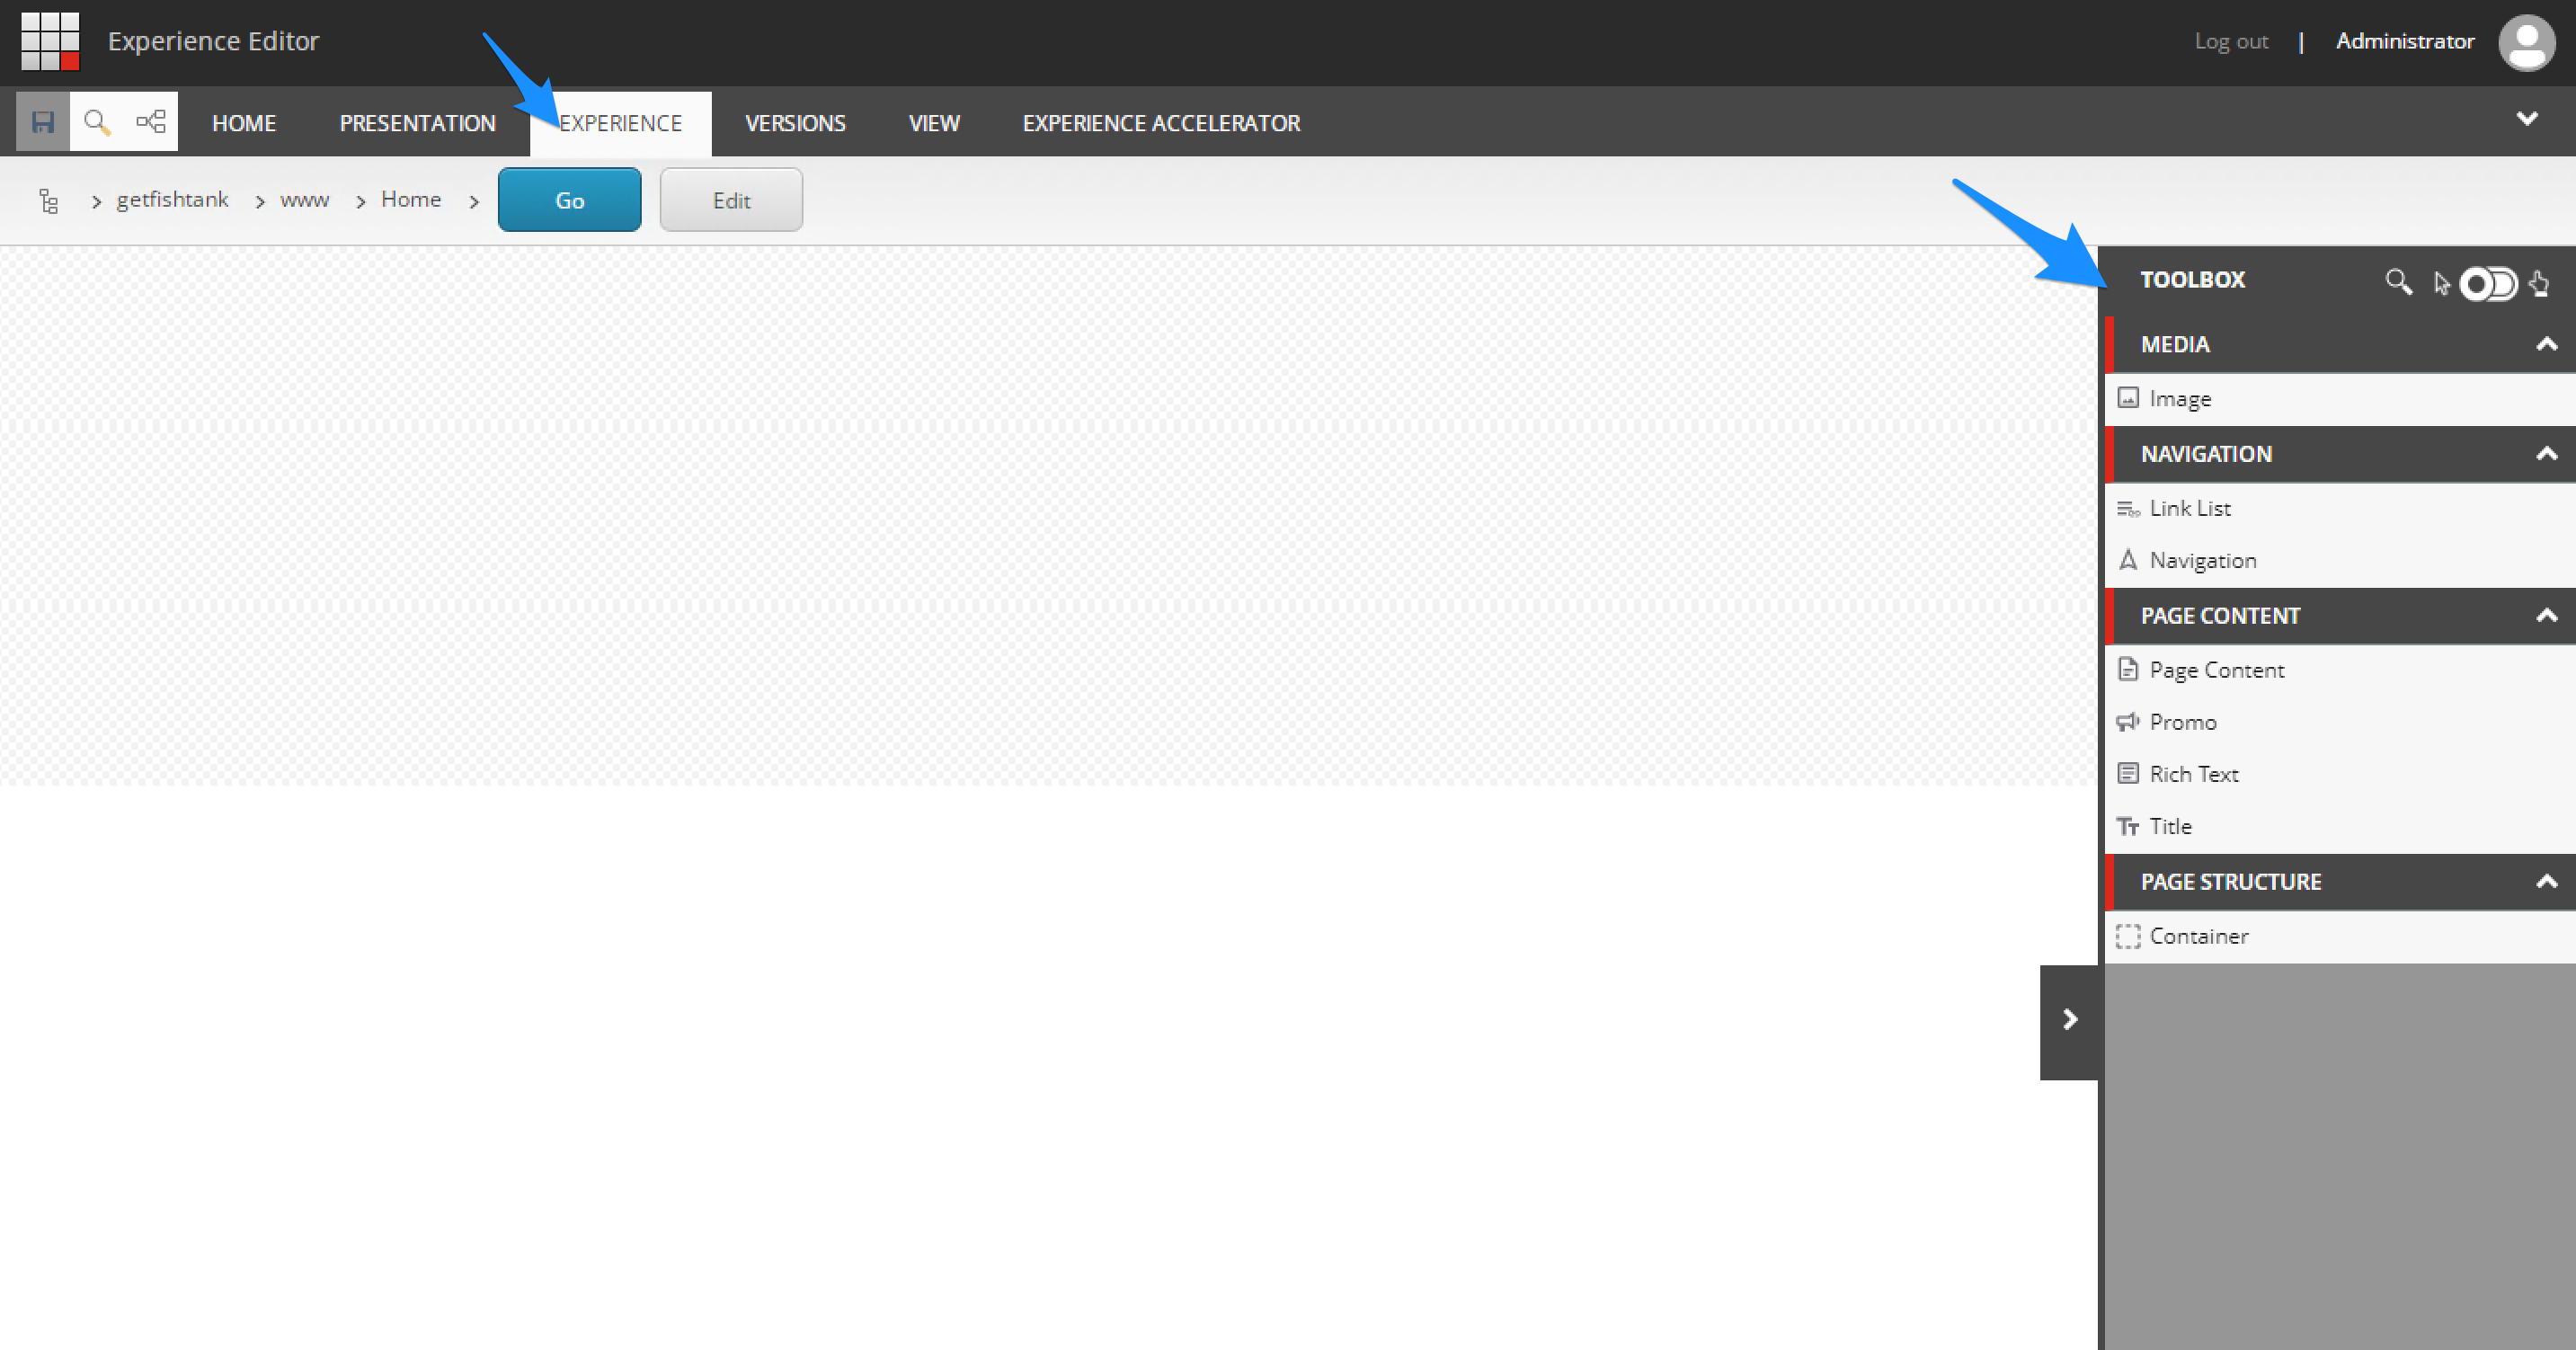
Oh my goodness. I can't believe we made it this far. Looks like we're all up and running. 🙂
I know we're at very early days with Sitecore 10 and Headless SXA. I it wasn't easy to find my way through the documentation to set it up (especially without Docker). There is documentation on SXA, documentation on JSS & Next.js but nothing that really pulled together the two (or three) so I hope you found this useful. I found this article on JSS App Initialization and running JSS In Connected Mode to be helpful. Be sure to check them out.
This is all related to XM Cloud which will leverage Headless SXA. It's good to get ahead. Perhaps what I've documented here could help with future product versions and documentation.
My goal is create another post soon highlighting all the errors and troubleshooting I encountered during this process. This was long enough without. Thanks everyone for reading.