Reading time: 5 min read
Sitecore Azure PaaS: Visual Step-By-Step Setup Walk-through
See what you're getting into.
Start typing to search...
Sitecore! Azure! PaaS! It's all so exciting. But it's also a bit scary because it's frankly outside of most of our comfort zones. Sitecore is a system with many moving parts that we're just mastering, and now we're transforming those moving parts into a platform as a service model? Eek.
Most of us have never even installed anything through the Azure Marketplace. So I'd like to take a moment to demystify installing Sitecore PaaS through the Azure marketplace.
Search for "Sitecore" at https://azuremarketplace.microsoft.com. When you click through you'll find yourself in inside the actual Azure portal at https://portal.azure.com. If you don't have an Azure account, you'll be prompted to create one. Just select a *Free Trial*.
Click the **Create** button.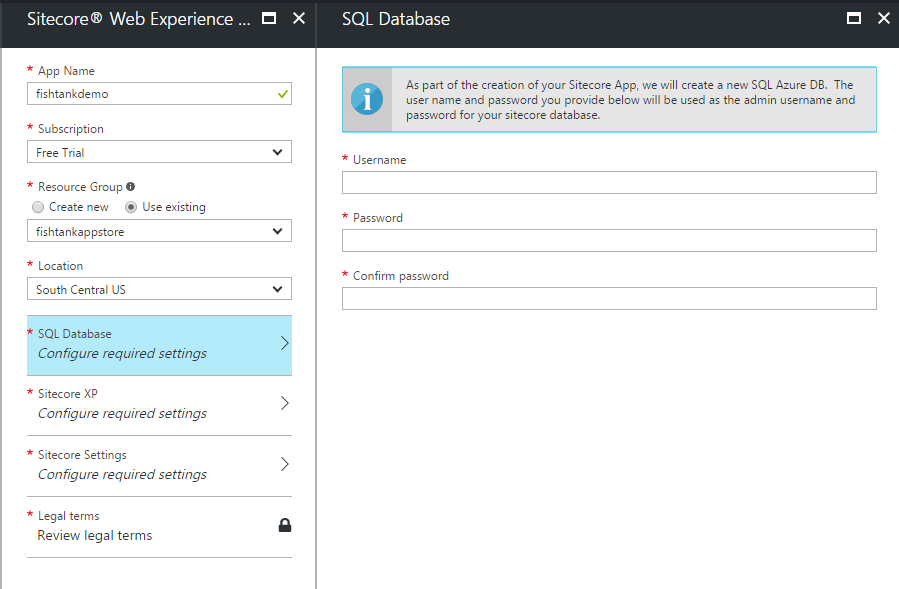
Upon clicking create, you'll be prompted to fill in some default fields about your instance. The important one here is *Location* as the complete stack of services required by Sitecore PaaS are not available in all regions.
We need **Application Insights** and **Azure Search** available in the selected region for deployment to be successful. Here is a list of Azure services by region.
As of the end of April 2017 **Application Insights** is only available in *East US*, *South Central US*, *North Europe* and *Western Europe*. Use of those regions.
The *Resource Group* is a logical container for all of your Azure resources. I'd recommend creating a new group for Sitecore.
And we've also selected the *SQL Database* step to setup our username and password.
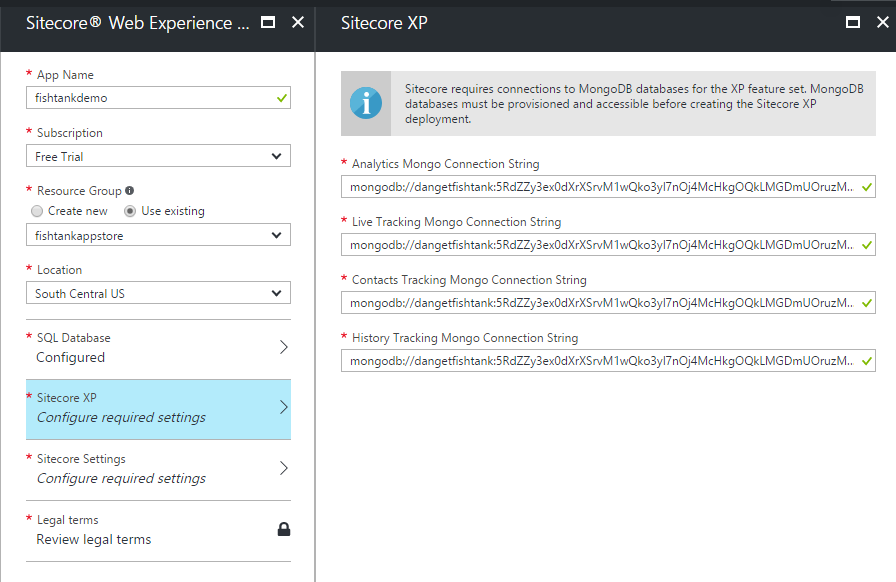
This is Sitecore XP so it requires MongoDB. MongoDB is not provisioned as part of the Sitecore PaaS installation so you'll need a MongoDB database-as-a-service spun up. For our purpose, this can reside anywhere. Using the Free Tier for mLab on Azure seems to be a popular option.
We need our MongoDB connection strings for *Analytics*, *Tracking_Live*, *Tracking_Contact* and *Tracking_History* that will end up in your *ConnectionStrings.config*.
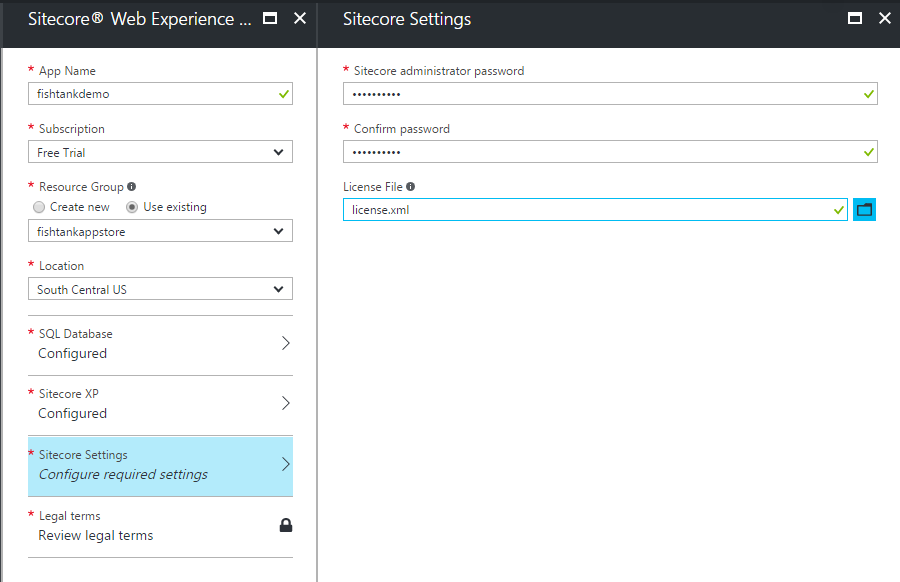
Enter your password for your Sitecore admin account. Also, include your Sitecore license for use with this instance.
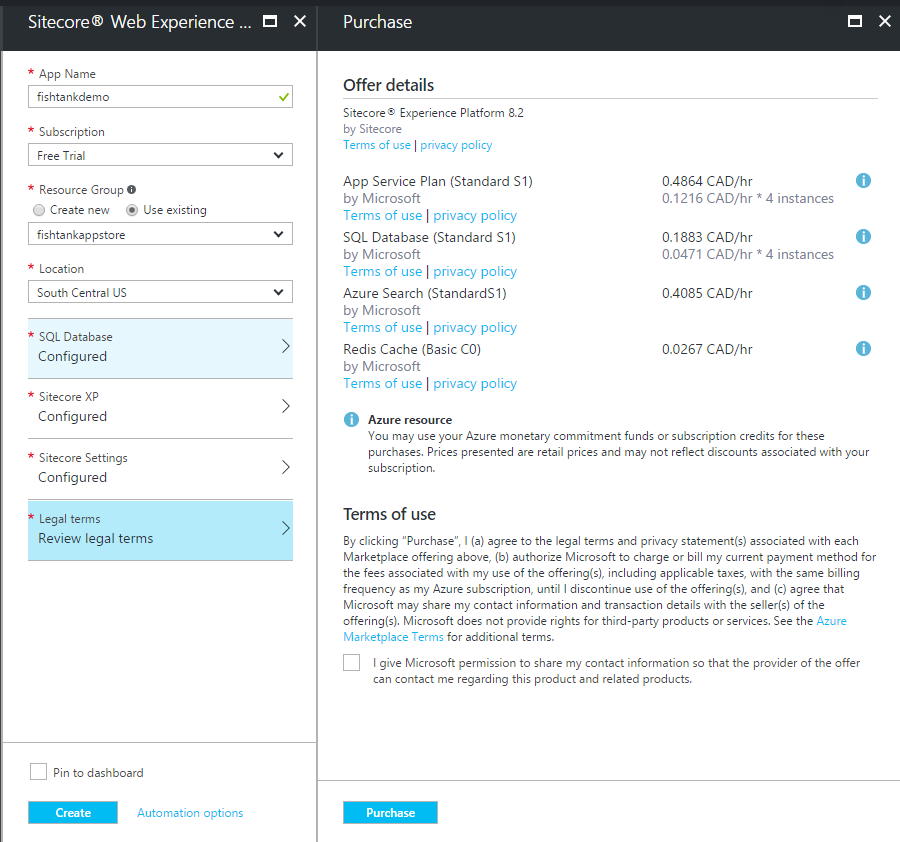
We have to agree to terms, but this also shows you the default provisioning and pricing. Out of the box, we're not necessarily provisioning the most cost-effective sizing here. Everything is an S1. We'd like want small Reporting and Aggregation servers. Larger for Content Management. And larger still for Content Delivery.
Have no fear, these can be resized easily after deployment using the Azure interface.
Be sure to click **Pin to dashboard** for easy access to monitor the deployment.
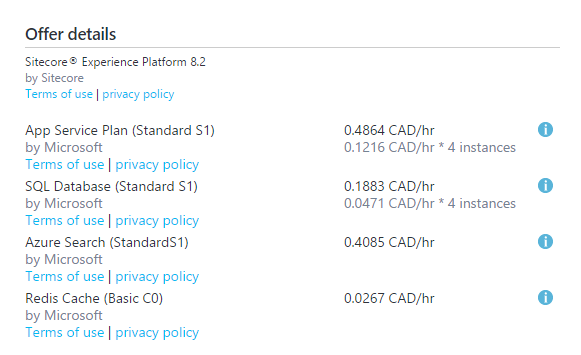
Just a reminder that this pricing does reflect the actual cost of running a true production instance. Also with a *Free Trial* Microsoft generously comps +$200 of services. It will vary per country but it's a great opportunity to play around with Sitecore PaaS for free.
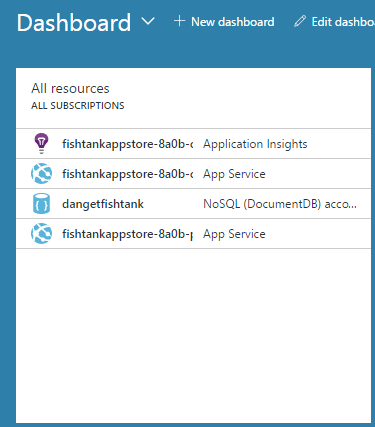
On your Azure portal dashboard you can see that resources are already being spun up. They're not finished yet, but they've started.
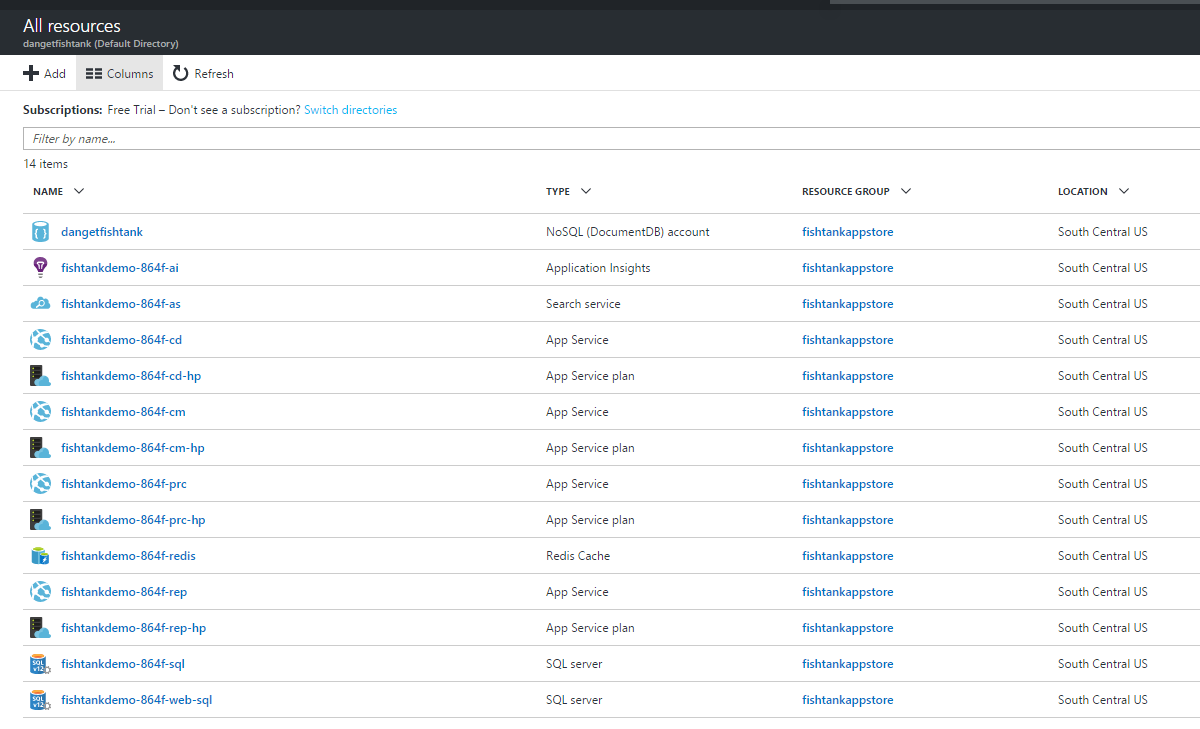
Select *All Resources* in the main menu gives you a more detailed view of what's being deployed for resources.
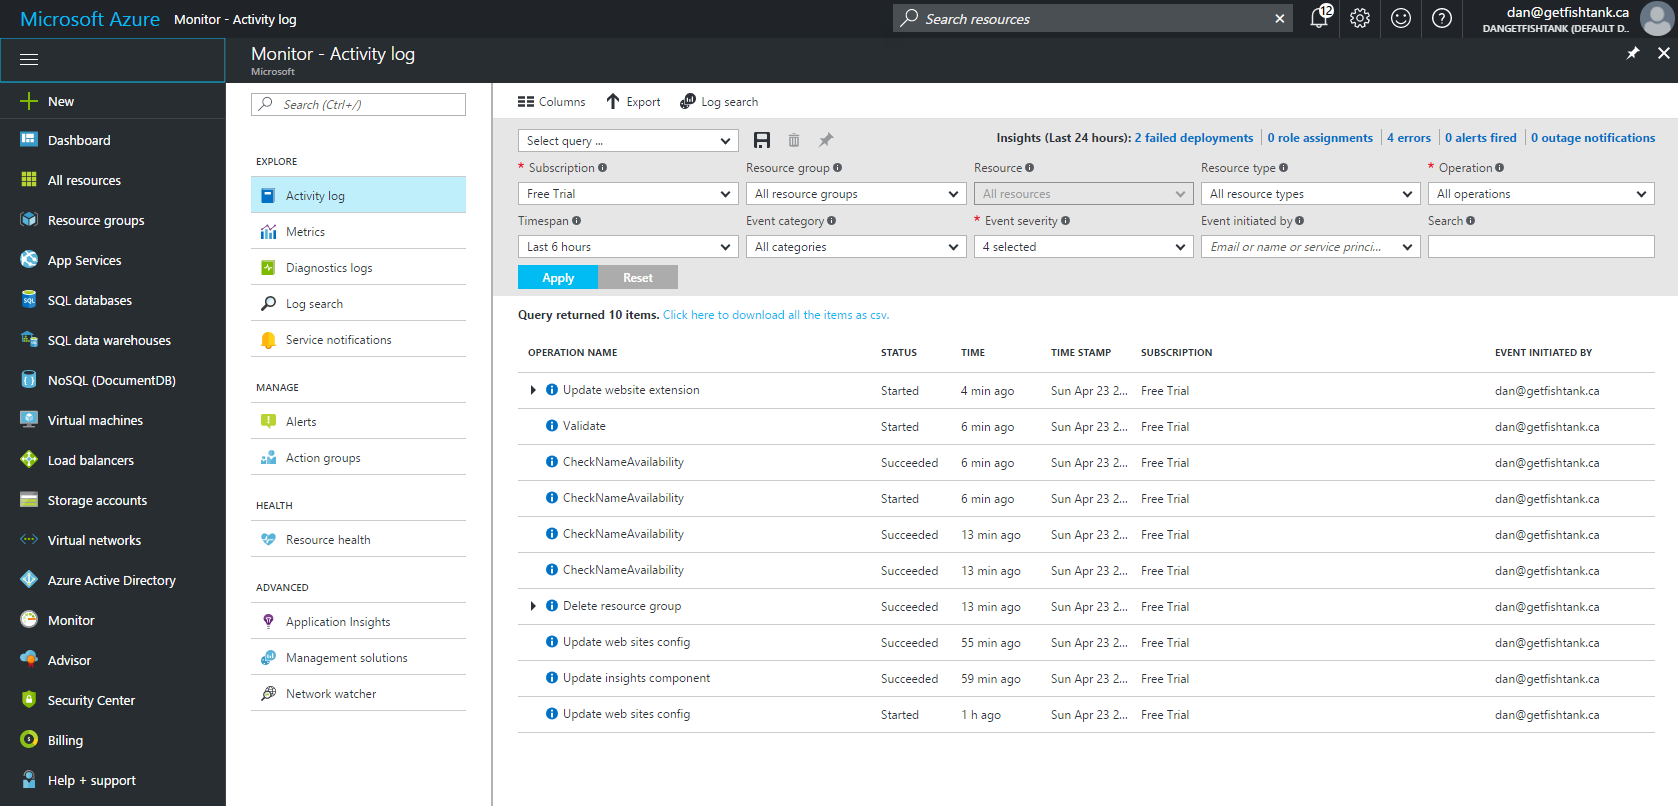
Using *Monitor / Activity Logs* from the menu gives you a filterable view of the activity.
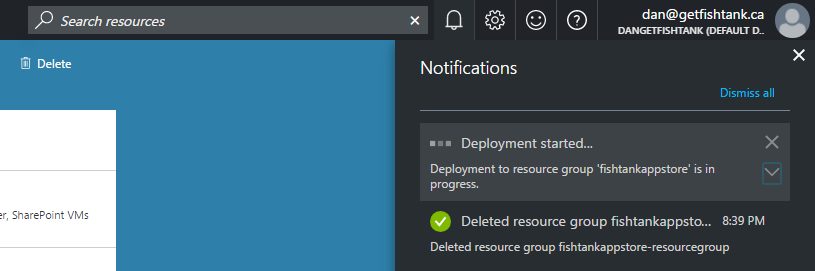
Click the "bell" icon in the top right of the portal dashboard to see your notifications. Click "Deployment started..." to get the best view of how your resources are deploying.
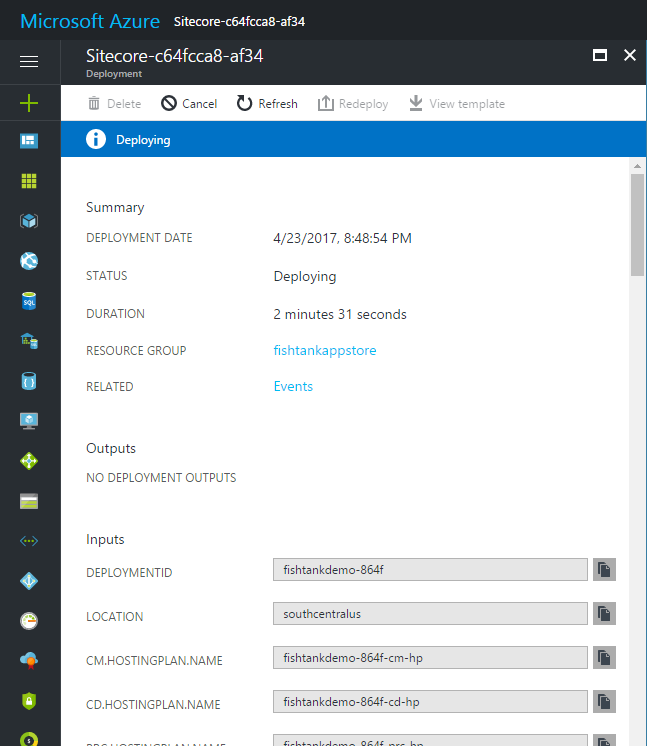
Clicking on our deployment notification or pinned deployment gives us our most holistic overview of the deployment. Click *Events* to see what's happening on a granular level.
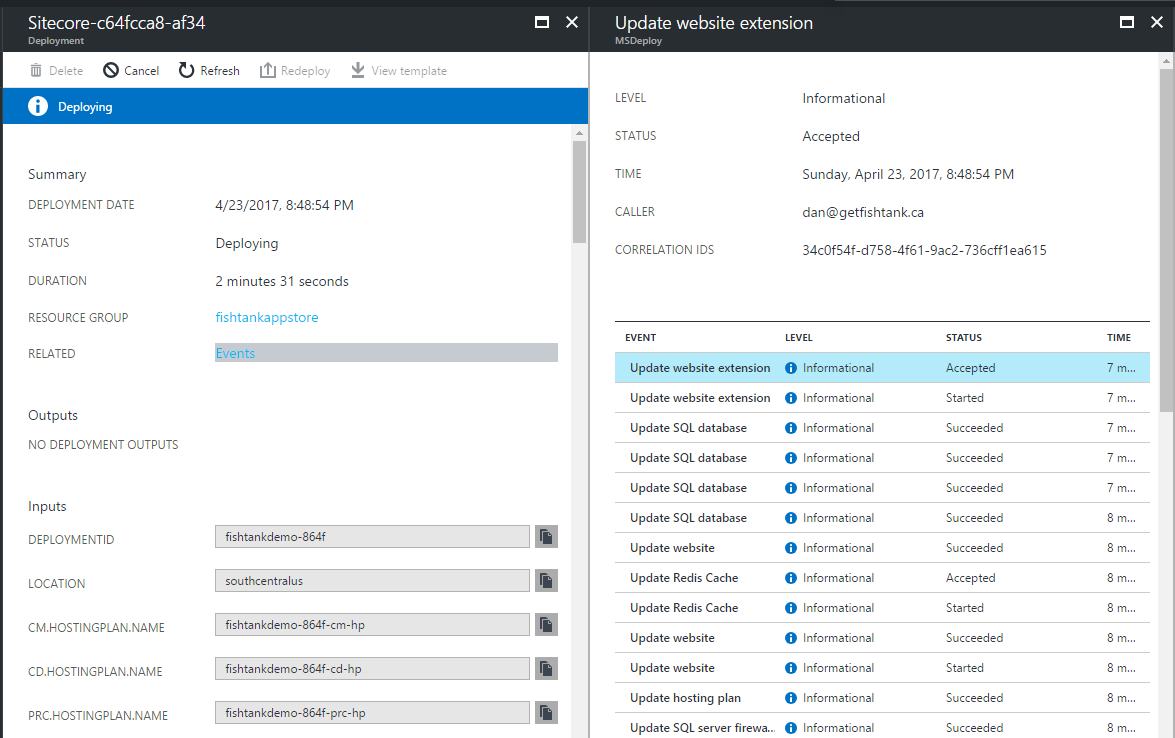
This is a very detailed view into when each part of the deployment starts, stops, succeeds or fails. It definitely sheds light on everything going on behind the scenes.
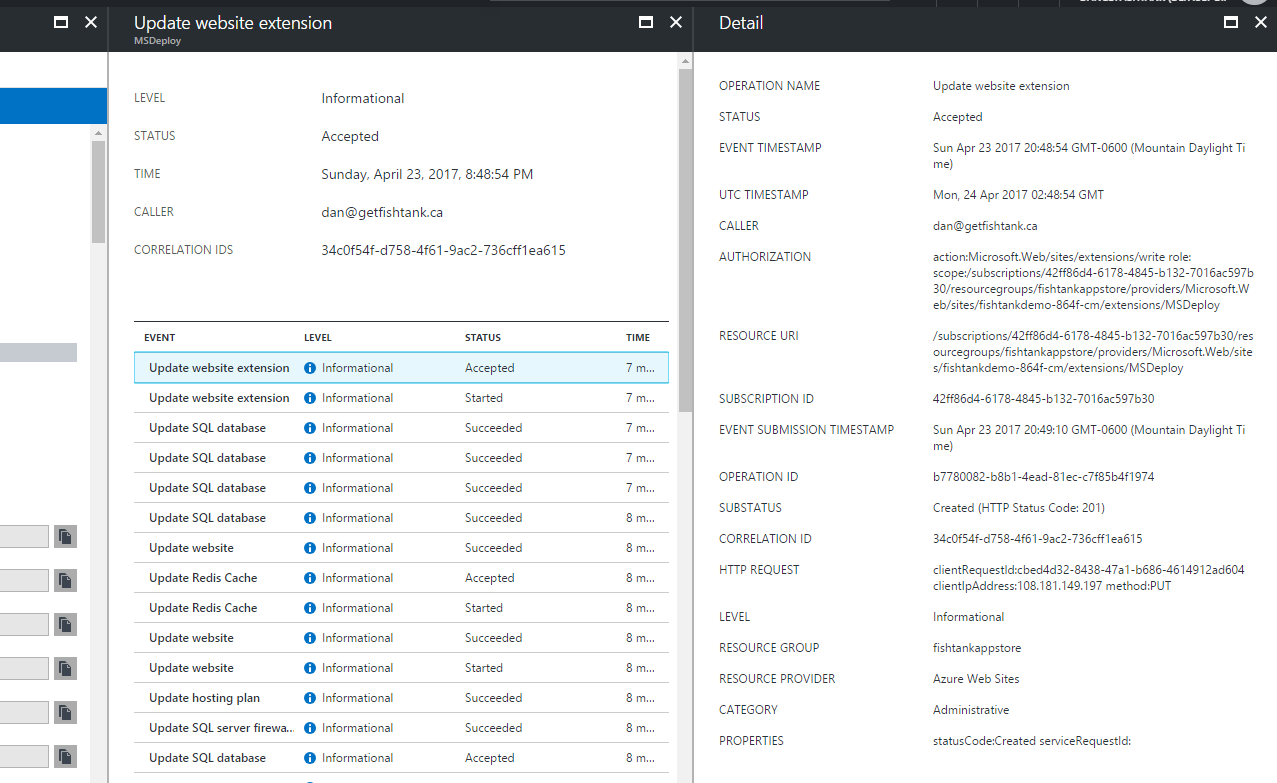
Click any event to see the nitty-gritty of details.
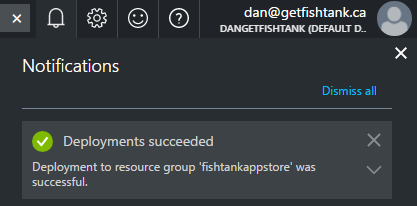
Throughout my Sitecore PaaS installs I've never established a consistent length of time for the process. Expect between 20 to 30 minutes and you'll receive a notification that it's all set up and ready to go.
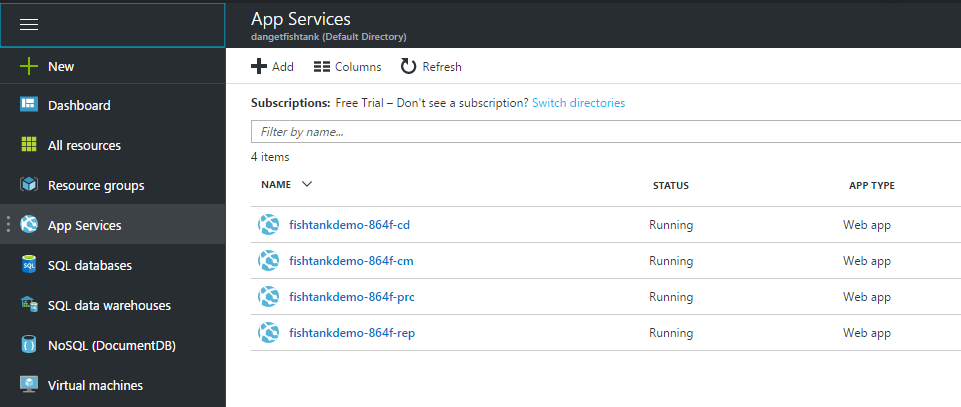
Navigation to your App Services and you should find familiar friends. Your Content Delivery (CD), Content Management (CM), Processing (PRC) and Reporting (REP) environments.
App Services can be thought of as containers executing code. They're a higher-level abstraction that sets above the traditional concepts of a Windows Server and IIS.
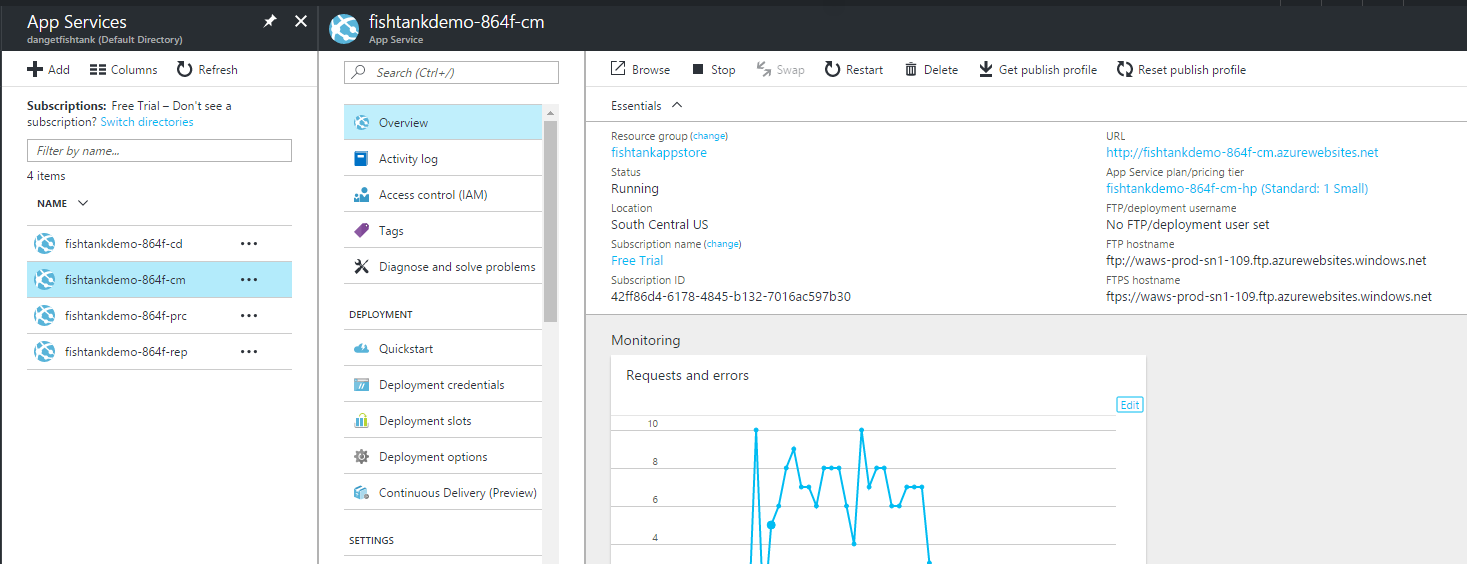
When selecting the CM App Service we finally (slash magically) see the public-facing URL that's been assigned to our instance. We can hit this straight away and view the default Sitecore website or hit */sitecore/login* and jump right into the back-end.
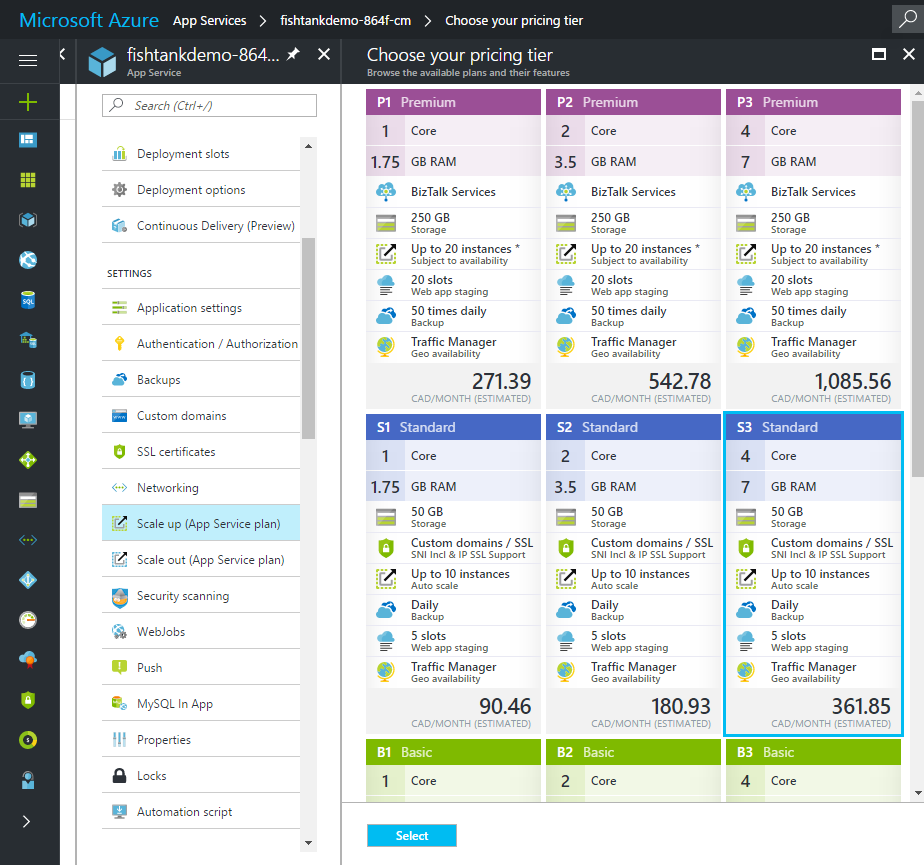
Scaling up is the vertical scaling we use to change the resources that power an App Service instance on the fly. With your App Service selected, select *Scale Up* and you can see, select and implement new sizing options with amazing ease.
We have 9 instances options. 3 Basic (B1, B2, B3), 3 Standard (S1, S2, S3) and 3 Premium (P1, P2, P3).
There is a lot to share and explore in the new Sitecore PaaS. I hope this post shed light on what it takes to get to Sitecore's platform-as-a-service model deployed and ultimately lowers a barrier that makes this world seem more accessible.
Thanks for reading.