Reading time: 5 min read
Predetermined Background Images with Sitecore XM Cloud & Next.js
Learn how to enforce design consistency in Sitecore XM Cloud by limiting background texture choices to approved styles via a developer-configured droplist.
Start typing to search...
There are particular cases where some projects use different images as backgrounds that can be re-used throughout the project. Although we could set it up in a more flexible way where authors upload and/or use images through Sitecore, there are some scenarios where we would rather be more restrictive and leave that control exclusively in the code repository. Expanding from this article on How to Use Styling & Advance Styling on Sitecore XM Cloud’s Page Builder, we can work on a way to achieve this by using Styles. In this example we will take a look at an approach for choosing texture images as background options for a rendering.
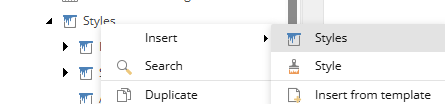
First, we must create the Styles where we will set up the different texture backgrounds. We can do so by right-clicking on Styles under Presentation inside your site item. We can call it Background texture.

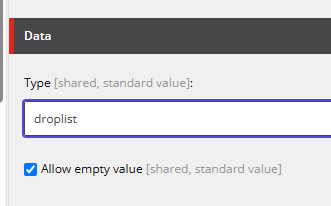
Under the Data section, select the droplist Type to make the selection of the texture background easier for authors on the Page Builder. Below this field, make sure the Allow empty value checkbox is set to true; this will allow authors to leave it blank if they don’t want to use one of these textures as the background for the rendering. You can now go ahead and save this item.
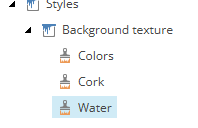
In this example, we will be using three different texture images, which we can set up as individual styles inside the Background texture style by right-clicking that item, selecting Style and typing a name for it.

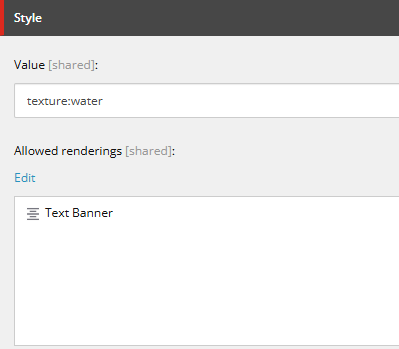
Once you’ve chosen a name for each Style you can then set the value for each. As discussed in the previously mentioned article (How to Use Styling & Advance Styling on Sitecore XM Cloud’s Page Builder), a way to make it easier for you to read the style value in the code is to set it up as the property of the style (texture) with the specific value of it. For instance, we can set the Water texture as texture:water. Apart from this, you need to select the allowed renderings where you’d like this texture background to be used in. In this example we will use a simple Text Banner rendering.
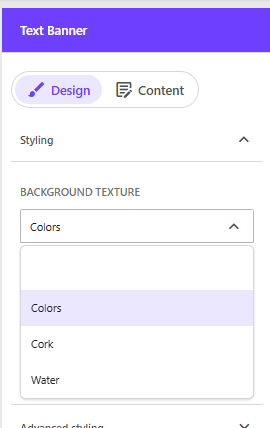
The last thing to do in Sitecore before jumping into the code is to go to the Page Builder where our Text Banner rendering is set and under the Styling panel on the right select one of the textures from the droplist we set up earlier, as in this case where the Colors texture is selected.
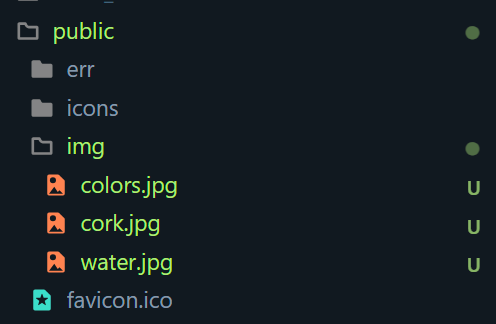
These images will be fixed textures image files that will be reused throughout the website and we want to keep the control over which images we are using. A good way to achieve this is by uploading the images directly to the NextJS project under the public folder.
Finally, we need to set up code to render the background in the TextBanner file. After parsing the styles to a JSON object, we can read the value set by the author for the background texture, if any. With this value we can determine which image file will be used, and as mentioned, in case there is no texture background set for the rendering, we will not be rendering any image at all with the help of a conditional clause.
const TextBanner: React.FC<TextBannerProps> = (props) => {
  // Since we receive a string from Sitecore, we use a helper function to extract the object we need
  let styles = JSON.parse(`{${
      props?.params?.Styles
        ?.split(' ')
        .map((style) => `"${style.split(':')[0]}":"${style.split(':')[1]}"`)
        .join(',') || ''
      }}`);

   // In this example the value for styles would be an object with the property "texture:colors"

  const TEXTURE_IMAGES = {
    colors: '/img/colors.jpg',
    water: '/img/water.jpg',
    cork: '/img/cork.jpg',
  };

  // We can define the fixed value for the image files paths using a constant object that would map the set values for the textures

  const selectedTexture =
    styles?.texture && TEXTURE_IMAGES[styles?.texture as keyof typeof TEXTURE_IMAGES];

 // In case there is a selected texture, we will render the backround behind the text banner text

  return (
    <div className="relative flex h-120 w-full items-center p-16">
      {selectedTexture && (
        <div className="absolute left-0 top-0 z-0 h-full w-full">
          <img src={selectedTexture} className="h-full w-full object-cover" />
        </div>
      )}
      <div className="relative z-10 flex h-full w-full items-center justify-center">
        <h1 className="text-5xl font-bold text-white">This is a TextBanner</h1>
      </div>
    </div>
  );
}
The final result will be the selected texture dictating which image file will be rendered as the background for the TextBanner component. We could further expand the use of this selection by updating other aspects of the rendering based on the selected texture, for instance updating the font color to have a better contrast with the background. The authors still have some level of control over which predetermined texture to apply to the rendering by the use of a droplist in the Page Builder, but as mentioned before, this is a very particular scenario where developers can restrict which image files are being used as backgrounds.