Reading time: 6 min read

So Sitecore JSS has been out for a while and I've been dying to use it more and so that's what we're going to do. Before we can have fun though, we need to know how to set it up. This article will cover what it takes to install Sitecore JSS in a local or standalone environment.
Install Sitecore JSS Service
The installation is straightforward if you've ever installed a package into Sitecore.
Prerequisites
There are a few prerequisites that we need to have in place before we can enjoy JSS.
- A valid Sitecore JSS license - If you don't know if you have it, you can open up your license.xml file and search for
Sitecore.JSS. - Sitecore 9.0 Update-1 or later - To use the JavaScript Rendering SDKs, for example, Next.js, you'll need Sitecore 10.0 or later.
Installation
Head on over to Sitecore Headless Rendering and download the applicable version depending on your version of Sitecore.
Once downloaded, load up Sitecore and head on over to the Desktop and load up Development Tools > Installation Wizard. Once loaded, load up and install the package file you just downloaded. You'll need to agree to the terms and conditions as well.
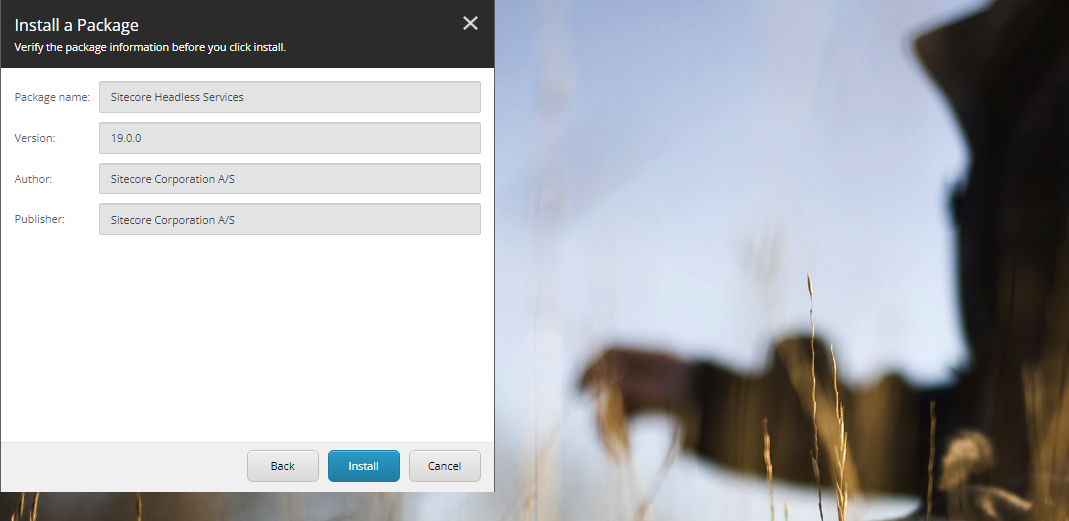
Once it finishes installing and honestly shouldn't take long at all you've done the first part. You've installed Sitecore Headless. Now obviously installing on a hosted environment that contains CM & CD environments has a few more steps, but this gets us out the door and ready to build a JSS application.
Application Setup
This certainly has a few more steps involved but is still just as easy. Let's break it down.
You will need to have Node JS installed and if you're using it for Sitecore SXA, the same version should work. I'm using Node JS Version 16.14.2 just for reference.
Next, open up Visual Studio Code, and navigate to your project folder. For me that's c:\demoproject\JSS and run the following in the terminal of Visual Studio Code.
npm install -g @sitecore-jss/sitecore-jss-cli
npm install -g @sitecore-jss/sitecore-jss-cliOnce complete you should be able to type jss and see something that resembles the following:
PS C:\DemoProject\JSS> jss
JSS CLI is running in global mode because it was not installed in the local node_modules folder.
jss

Commands:
    jss create <name> <template>  Creates a new JSS application based on one of
                                the sample apps.

Options:
    --version  Show version number                                       [boolean]
    --help     Show help                                                 [boolean]

Not enough non-option arguments: got 0, need at least 1
PS C:\DemoProject\JSS> jss
JSS CLI is running in global mode because it was not installed in the local node_modules folder.
jss
Commands:
jss create <name> <template> Creates a new JSS application based on one of
the sample apps.
Options:
--version Show version number [boolean]
--help Show help [boolean]
Not enough non-option arguments: got 0, need at least 1
Still with me? Good. Once we've verified jss is installed we're going to create our JSS project. Now I prefer React, but you can use Angular or Vue as your framework of choice. Really up to you.
I'm calling my app, demojssapp.
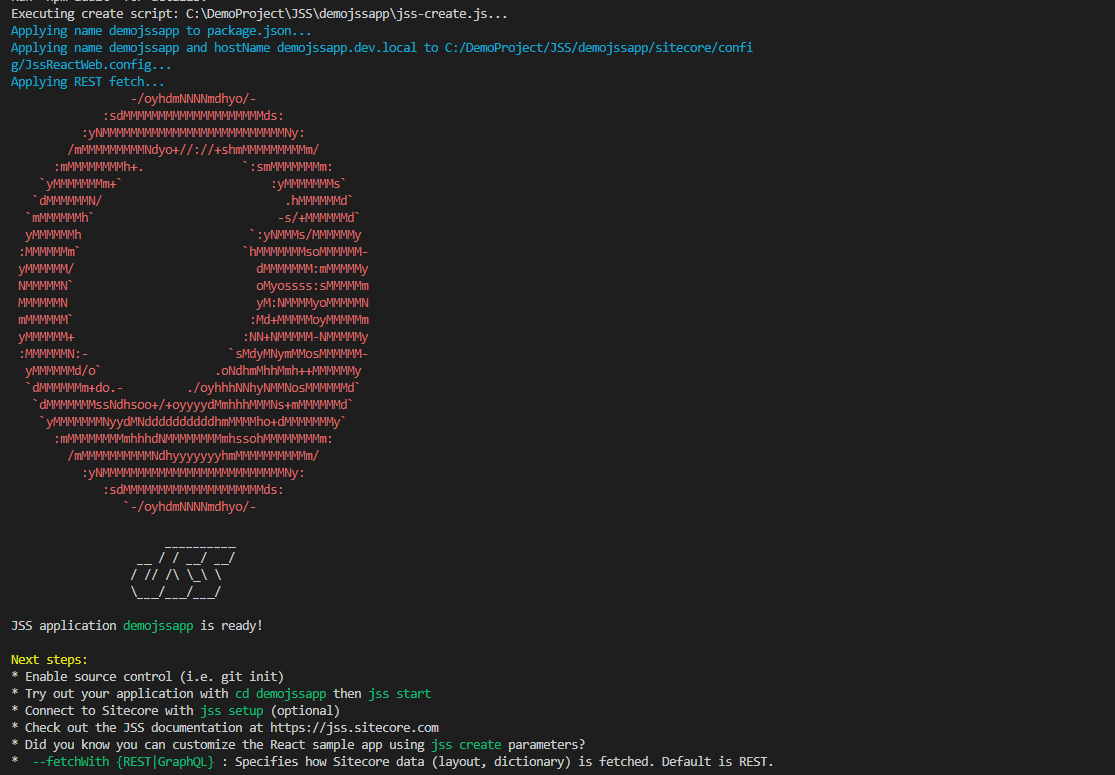
jss create demojssapp react
jss create demojssapp reactOnce it completes, and it can take a bit depending on your local instance, you should see something that resembles the following graphic and a statement that your JSS application is ready.
Let's see what it looks like shall we? In your terminal run:
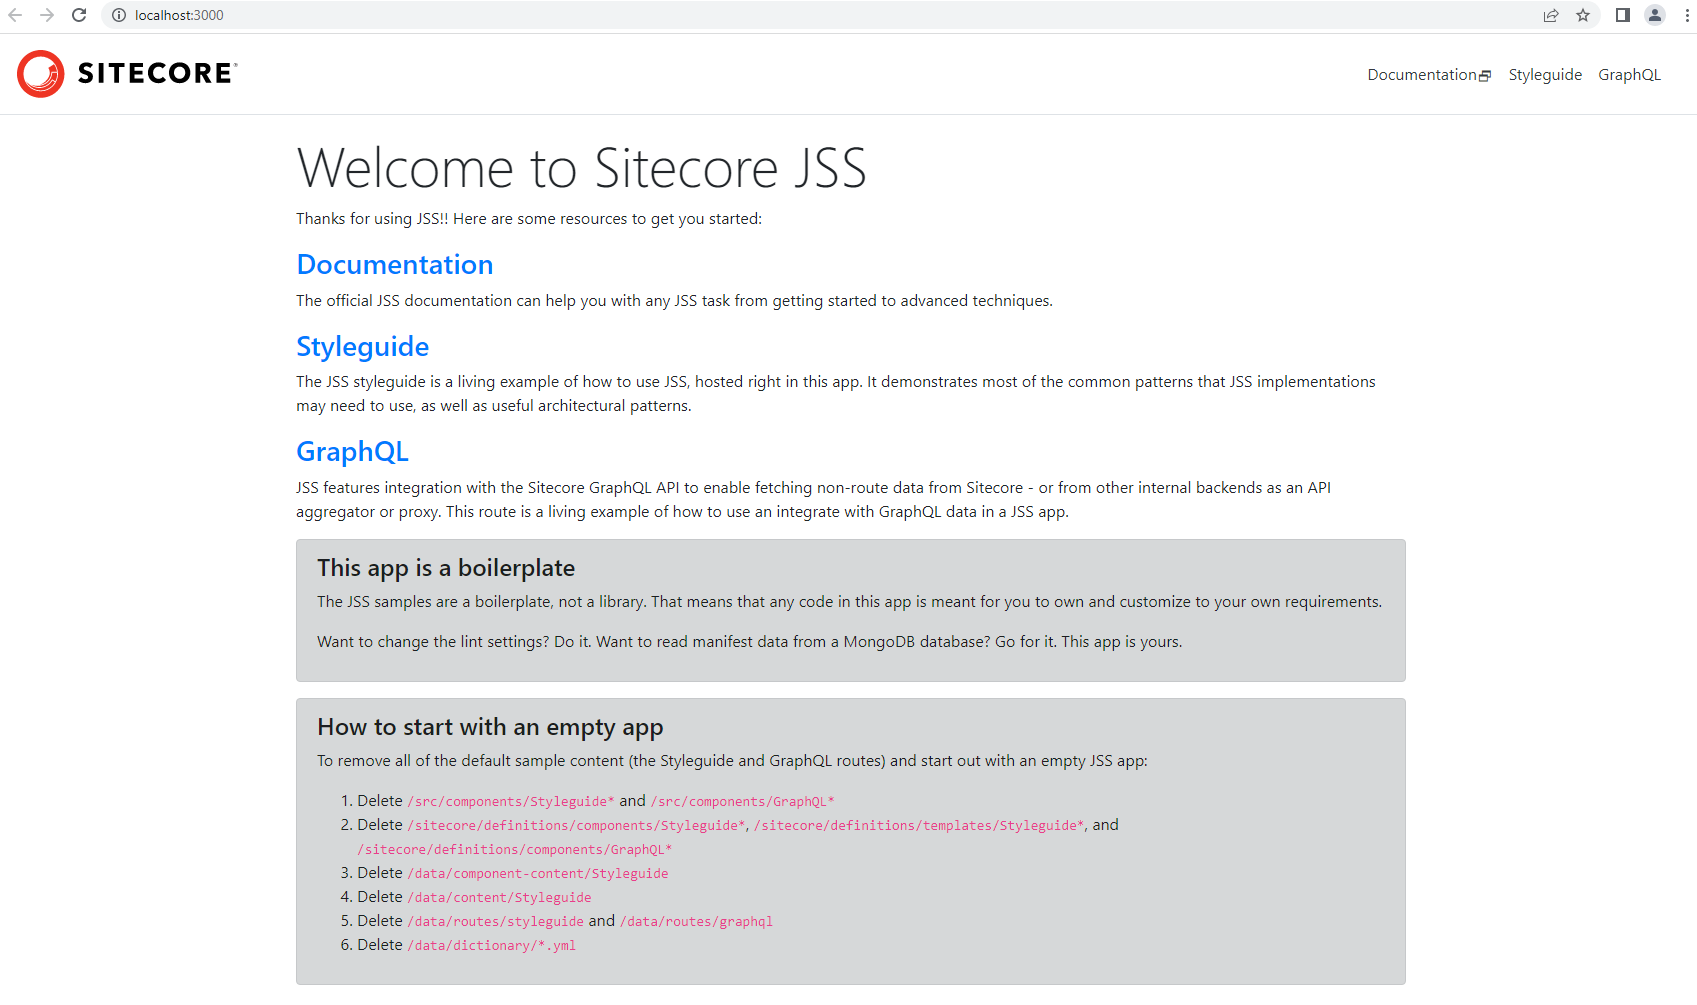
jss start
jss startYour browser should open to a site located at localhost:3000 and resemble the following.
Awesome. Our JSS app is installed. Now we have to connect it up to our Sitecore instance.
JSS App Configuration
Open up your host's file and add an entry for your application. The hostname will reference your JSS application so you will need to remember it for when we configure the JSS app.
127.0.0.1 demoappjs.dev.localNow go into IIS Manager and add a port 80 binding on your Sitecore instance with the above name.
With Sitecore up and running, head into Content Editor and head down to /sitecore/System/Settings/Services/API Keys and create yourself an API key.
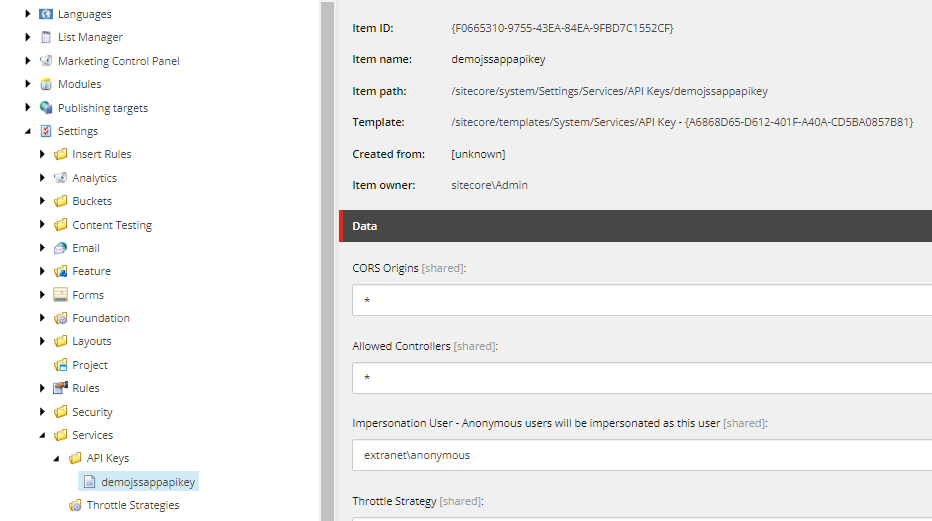
The GUID will be the actual key for your application. Be sure to update the CORS Origin and Allowed Controllers to * and update the Impersonation User to extranet\anonymous.
Let's head on back into VS Code and onto our terminal. Now change directories into our application and run:
jss setupYou will now be presented with a series of questions. Answer them accordingly.
PS C:\DemoProject\JSS\demojssapp> jss setup
Is your Sitecore instance on this machine or accessible via network share? [y/n]: y

Path to the Sitecore folder (e.g. c:\inetpub\wwwroot\my.siteco.re):  C:\inetpub\wwwroot\sxasc

Sitecore hostname (e.g. http://myapp.local.siteco.re; // This is the hostname you entered into your host file. Be sure to add http:// to the front of it.

Sitecore import service URL [http://demojssapp.dev.local/sitecore/api/jss/import]: // Hit enter unless otherwise known

Sitecore API Key (ID of API key item): // Enter the GUID of your API key here

Please enter your deployment secret (32+ random chars; or press enter to generate one): // Hit enter here unless otherwise known
After it successfully finishes, you'll have instructions on where to verify that the host was properly setup. As well, you'll have two commands to run in order to deploy the configuration and the application.
* Ensure the hostName in /sitecore/config/*.config is configured as demojssapp.dev.local, and
* Deploy your configuration (i.e. 'jss deploy config')
* Deploy your app (i.e. 'jss deploy app -c -d')
Run the commands provided. First, let's run the config.
jss deploy configAnd then deploy the app.
jss deploy app -c -dOnce complete, open up Content Editor and you should find your app under /sitecore/content.

You should also be able to browse to your app based on the host name you provided above. You should see the identical app that you saw in the beginning. If for whatever reason you see an error, such as Node JS cannot be found in the PATH, and if you have been following other setups of mine where we use NVM for Windows then you should follow these steps to rectify the issue.
Locate the NVM folder here: C:\Users\username\AppData\Roaming\nvm. You will want to right-click and select Properties > Security and then add Everyone giving them full control. Without this IIS cannot see the Node JS path which is likely setup in your PATH variable but as a linked directory.
Future articles I look to explore all the various aspects of JSS and what we can do with it so stay tuned.
