This article is intended for developers and that you already have installed Coveo for Salesforce in your Salesforce environment. Preferably your staging environment. As well, it's expected you have an account with the appropriate permissions in order to upload resources into said staging environment.
While there is a wide range of tools and coding languages that you can utilize, we're going to focus on three of the most important to go from zero to hero. Namely:
- Salesforce CLI
- SDFX Extension for Visual Studio Code
- Coveo Turbo
Salesforce CLI
Perhaps the simplest of the three, the Salesforce CLI allows for the interface with the Salesforce environment.
After downloading and installing the software found at the link above, you're done. All other interactions will be via the Visual Studio extension found below.
Salesforce Extensions For Visual Studio Code
The best way to develop both components and search pages for Coveo locally is by utilizing Visual Studio Code. Within this tool, you're able to install any number of components but we're going to focus on a few from Salesforce. The five components listed below will allow you to build and upload your components appropriately.
Important: It's highly recommended you don't install these individually but rather install the consolidated Salesforce Extension Pack.
- Salesforce CLI Integration
- Aura Components
- Apex
- Visualforce
- Lightning Web Components
Once installed, in order for Visual Studio to recognize your solution is indeed a Salesforce project, you'll want to use the SFDX: Create Project with Manifest via Ctrl-Shift-p.
This will create an sfdx-project.json file. If this file already exists, i.e. you've cloned an existing repository, then you won't need to create the project and manifest.
In order for the SFDX extension to initialize, the sfdx-project.json file must be found in the root of the folder loaded. So just keep that in mind.
Important: It can take up to 2 minutes when you load a project for the SFDX plugin to kick in. Once they have loaded you'll see these three icons show up on the left.
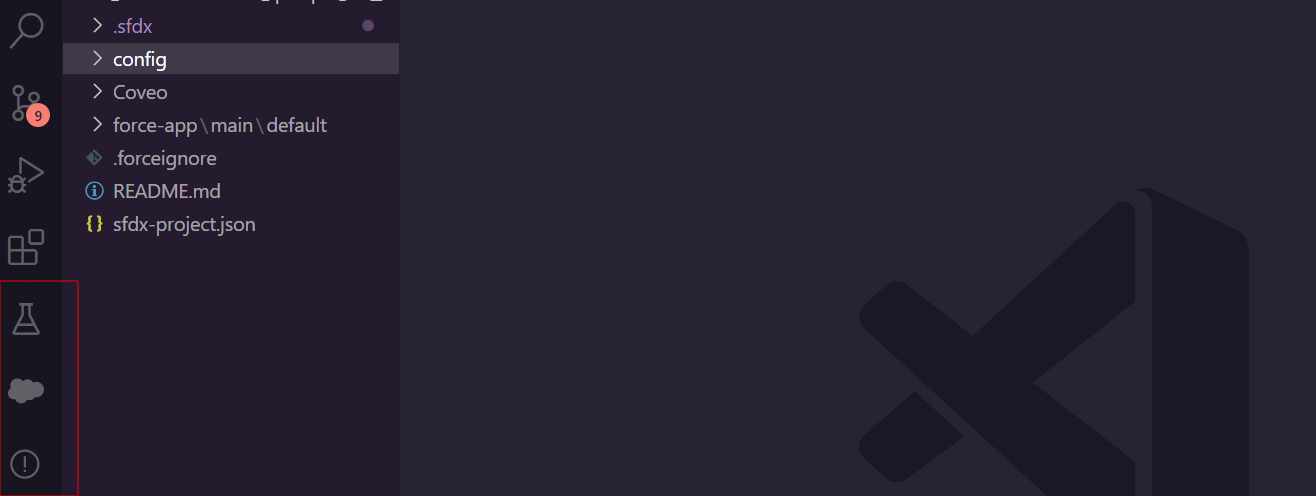
They are, in order:
- Apex Texting - Used for testing Apex components
- Org Browser - Allows you to browse the organization and pull components and resources you may need for your project.
- Org Differences - Enables you to see differences between your local and what's in the cloud environment.
Coveo Turbo
I won't go into details about creating a Coveo Turbo project as we've already done that in another article, found here.
What I will cover is how you migrate the code from your project into your organization.
Let's say you have a Coveo Turbo component that you've built and compiled. And now you want to upload it into Salesforce.
The first thing to do is to create a Lightning Component. I highly recommend familiarizing yourself with Coveo's Customizing the Coveo Lightning Community Components article.
Apex Components
This is where your HTML will go. You'll find it in your directory: force-app/main/default/components. The name should match the name of the component you've created.
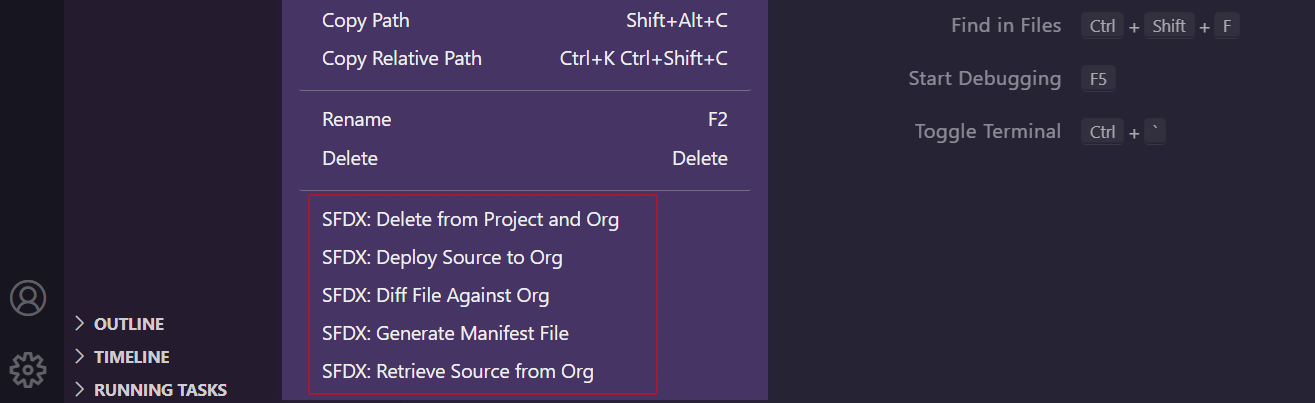
If you've created the component in Salesforce, you'll want to right-click on the components folder and select SFDX: Diff Folder Against Org, and synchronize your component with your local environment. You will repeat this for any static resources.
Opening up the .component file you will copy your HTML (everything inside the <body> element or if you've built something different only the HTML that encapsulates the component you've built. You will then paste your code within <apex:component> element.
Static Resources
For static resources, such as JavaScript and CSS, you'll copy these into a sub-folder inside /force-app/main/default/staticresources that references the same name as the component.
CSS can be uploaded as is from your compiled Coveo Turbo project.
JavaScript however will need to be wrapped inside a function as shown below.
window.coveoCustomScripts['default'] = function (promise, component) {
    // insert compiled JavaScript here
}
Pushing both the Apex component and the static resources up via right-clicking on each and selecting SFDX: Deploy Source to Org
Once both the component and static resources have been uploaded, you can add the component to the appropriate page.