Reading time: 12 min read
Creating A Local Sitecore XM Installation For XM Cloud
For developers wishing to explore Sitecore XM Cloud using Docker.
Start typing to search...
So you’re looking to dive into the wild world of XM Cloud? It’s possible you’ve read through the Walkthrough - Setting Up Your Full Stack XM Cloud Local Development Environment. Like us, maybe you even tried and failed as perhaps one or more steps weren’t clear enough.
Regardless, let’s go through some of the prerequisites as we’ve spent some time determining the optimal environment and versions of the requirements that allow you to setup an environment quickly and error free.
It may be not be obvious, but you can run XM Starter Kit on Windows 11 22H2 Pro. It’s important you run Pro and not Home edition as otherwise you won’t be able to utilize Hyper-V. It’s also advisable that you’re running at least 16GB of RAM, optimally 32GB. In the end it will depend on how big of a project you’re creating.
Additionally, you should install the following pieces of software and the respected versions. It’s certainly possible that alternative versions of Docker, Node, etc will work, however, these are the versions we had the most consistency with.
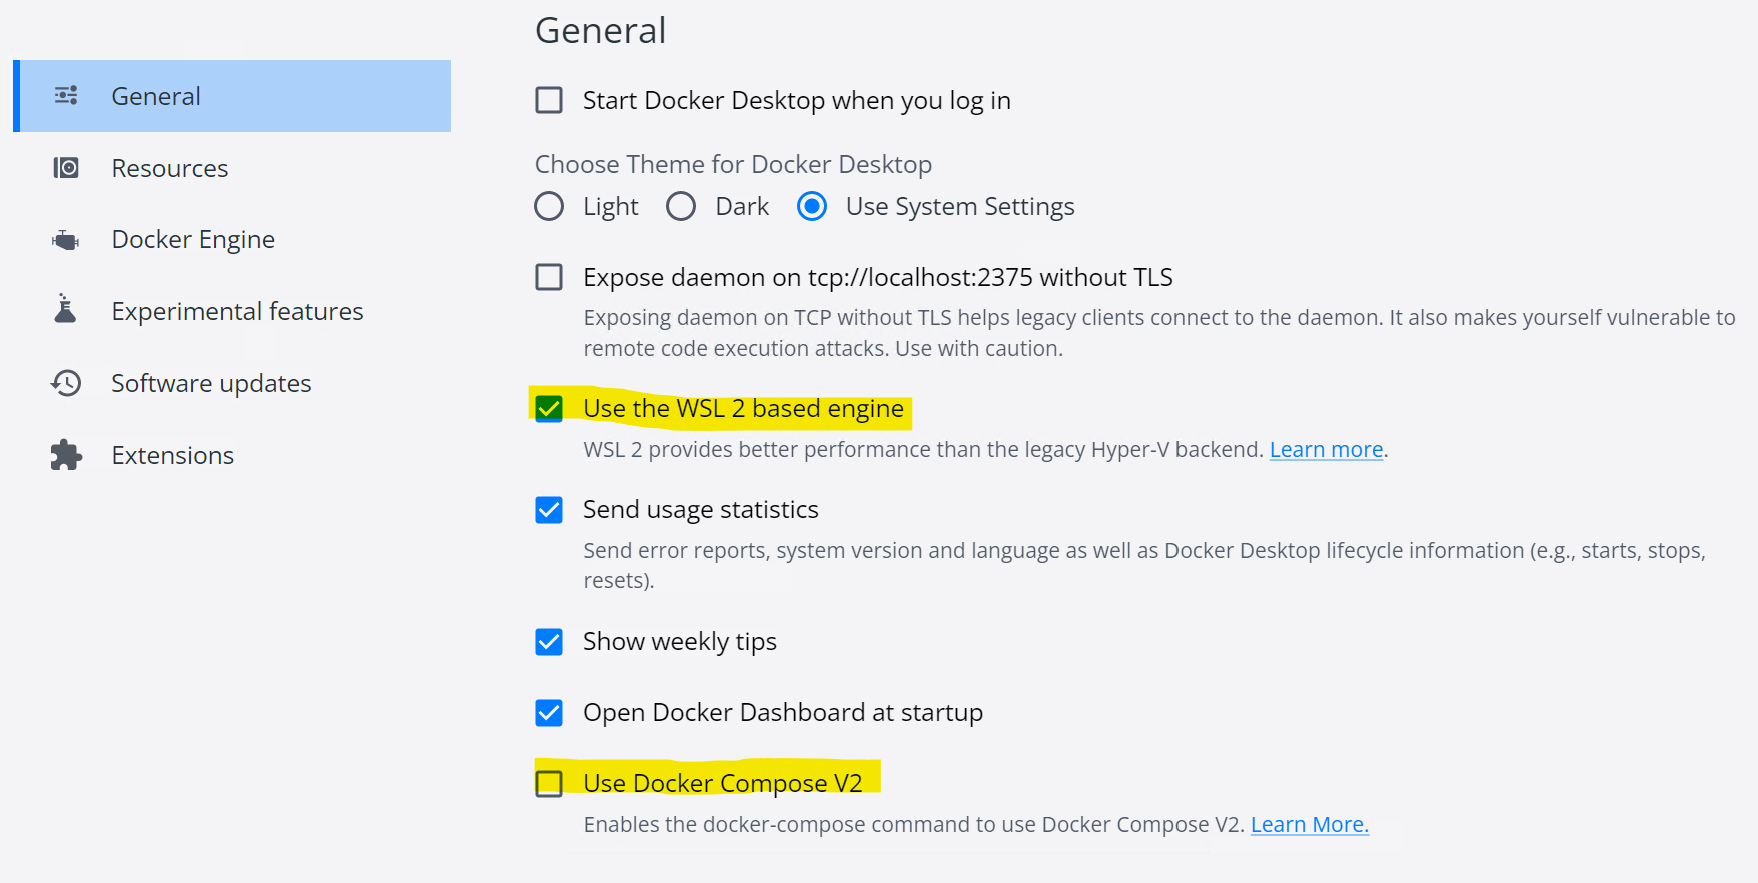
One you have installed Docker 4.11.1 you will want to ensure that Use Docker Compose V2 is unchecked and Use the WSL 2 based engine is checked.
Additionally it should say, in the Windows System Tray right clicking the Docker icon, Switch to Linux containers… as this will ensure that you are running using Windows Containers. When Docker is installed in the beginning it starts using Linux Containers. Clicking Switch to Windows containers… will change this but you may have to run an additional PowerShell script, shown below and RESTART.
If by chance when you click Switch to Windows containers that it doesn’t switch over, you will most likely need to enable Containers under Hyper-V.
The following PowerShell script will ensure Containers are enabled.
Enable-WindowsOptionalFeature -Online -FeatureName $("Microsoft-Hyper-V", "Containers") -All
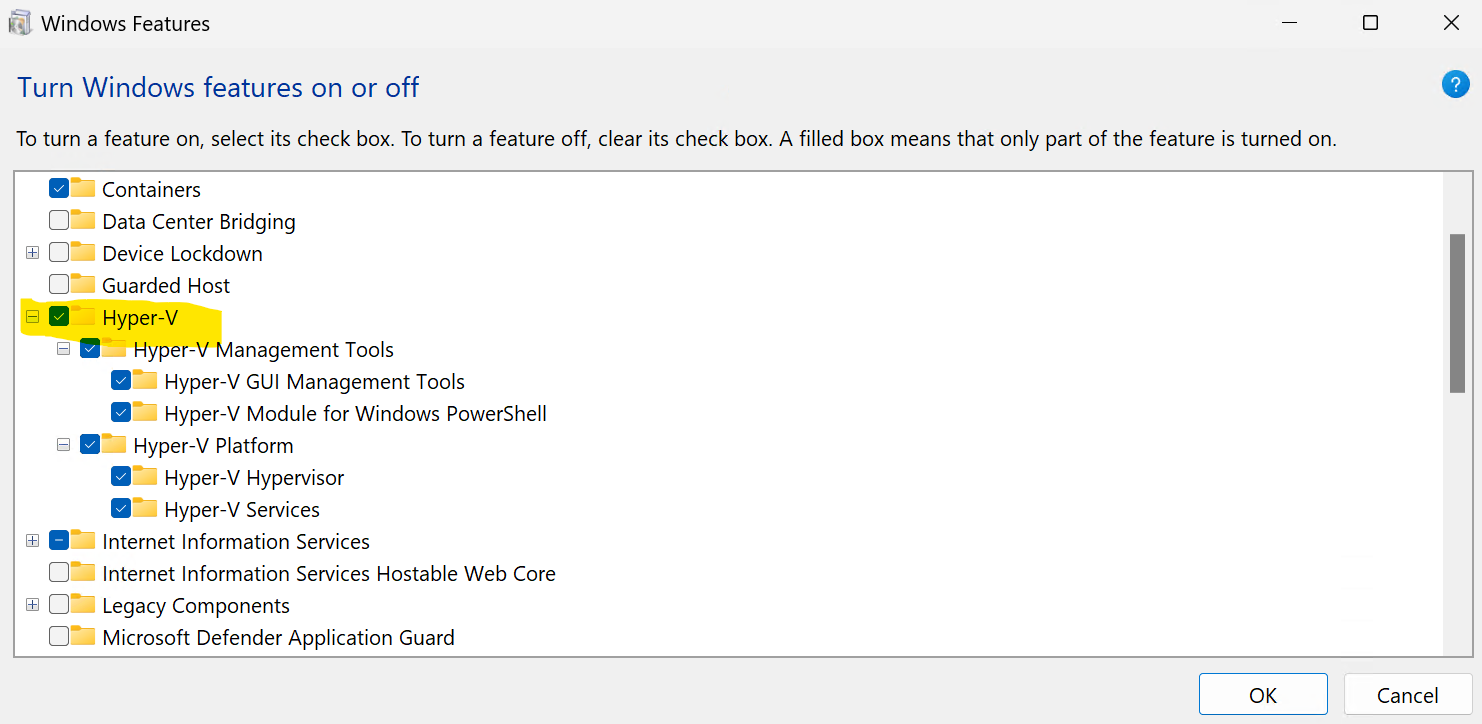
If this still doesn’t work, then it’s likely that Hyper-V is not enabled in the Turn Windows features on or off in the Control Panel.
There are two ways you can go about setting up a local XM Cloud installation. The first is using the XM Starter Kit. The second is using an XM Cloud Template which you can obtain from your own repo once you set up an environment.
Download the XM Starter Kit from the official GitHub repository. Once downloaded, unzip it and I recommend placing it in a short named directory off the root. This may save you some issues in the future with long Windows folder structures and names. e.g. c:\xm-starter-kit
If you’ve gone this route then skip down to the Pre-Initialization section.
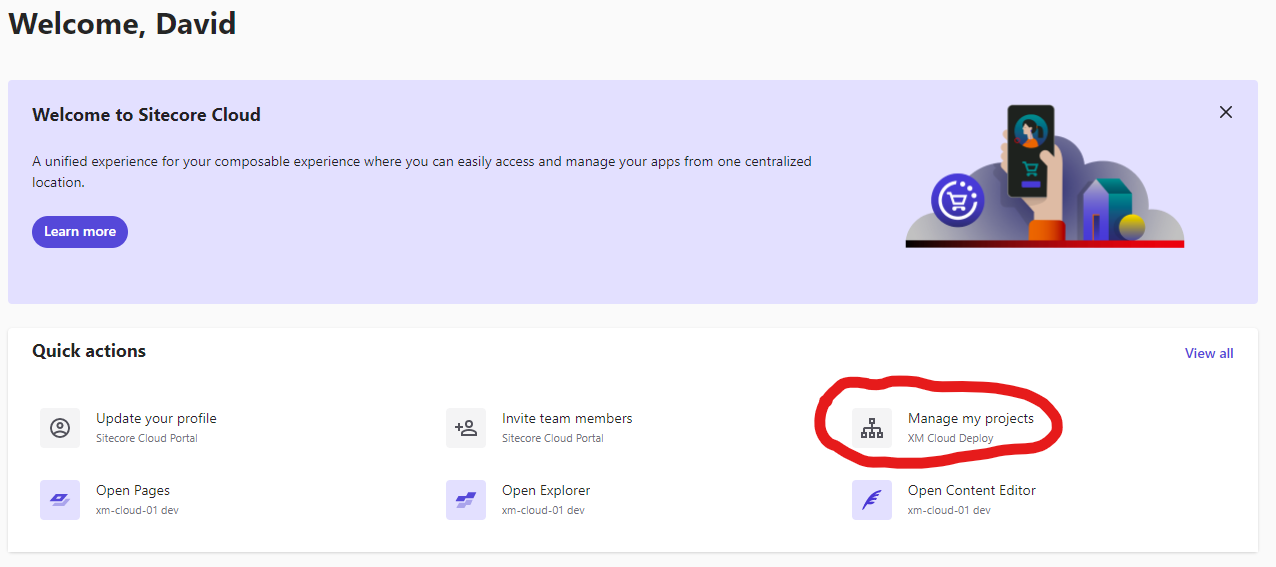
Log into the Sitecore Cloud Portal. On the main page, once you’ve selected the appropriate organization, select Manage my projects.
On the right, click Create new project.
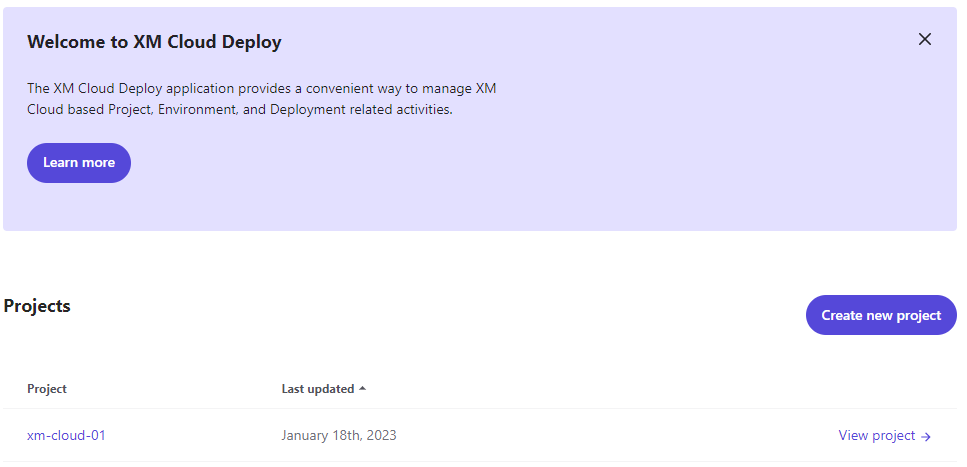
If the button is disabled then you’ve maxed out the number of projects you are allowed according to your license.
Following the steps provided you will be able to name your project and select the appropriate GitHub organization you have available.
Note: You need to be an administrator of the organization in order to create a “connection” with the GitHub repository. That is unless a connection has already been created for you. Without this, a new project and subsequent template will not be able to be created and deployed to the repository selected.
Note: The name of the project you choose will be the name of the repository within the GitHub organization, so choose wisely. Once complete and deployed, you will then be able to Clone the repo down to your local. At this point you’re now at the same stage as the XM Starter Kit.
Ensure that IIS is stopped by running the following command on your local environment. If it’s running, you will likely run into errors when trying to bring up the Docker environment.
iisreset /stop
If you are running any Solr locally, you must it too is stopped. You can review *Services* and stop it there, or via a command. We just need to ensure nothing is running on port 8984.
You will need to have a valid XM Cloud license to proceed with this step. If you don’t have one, please contact your appropriate Sitecore rep.
While in Terminal, running as Administrator, change into your XM Starter Kit directory. Run the following command.
.\init.ps1 -InitEnv -LicenseXmlPath "<C:\path\to\license.xml>" -AdminPassword "<desired password>"
What you see next should resemble the following:
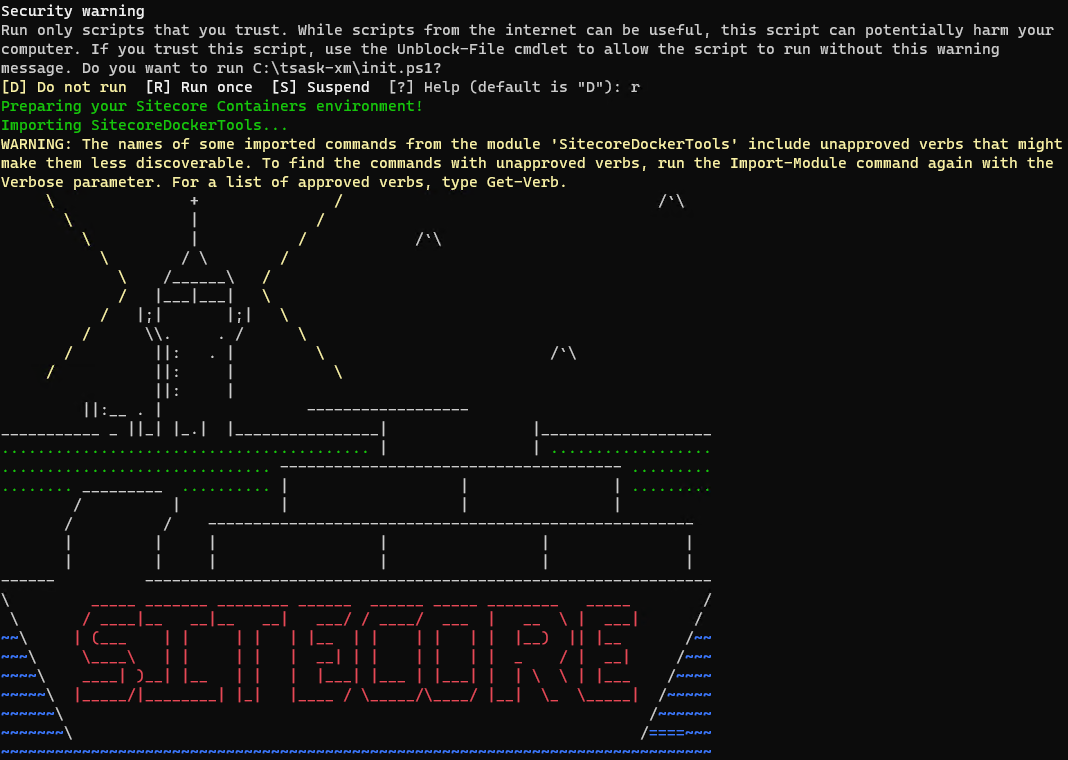
After which it will install the appropriate certificates.

Please note the bottom message. You will need to do this if you haven’t done so already.
setx NODE_EXTRA_CA_CERTS C:\Users\<user>\AppData\Local\mkcert\rootCA.pem
This should only need to be done once if you’re running multiple XM kits on a local environment.
Now with the initialization process finished, we should be able to just run the Up command.
./up.ps1
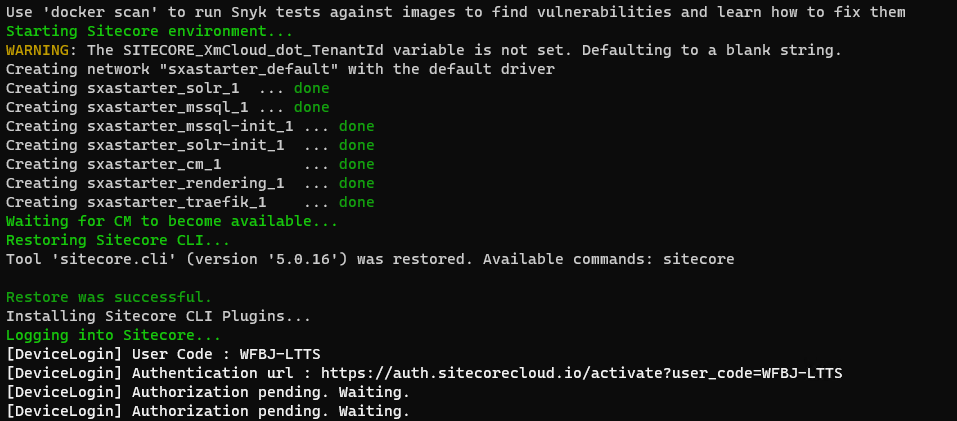
If it’s successful, you will see the following Device Confirmation screen.
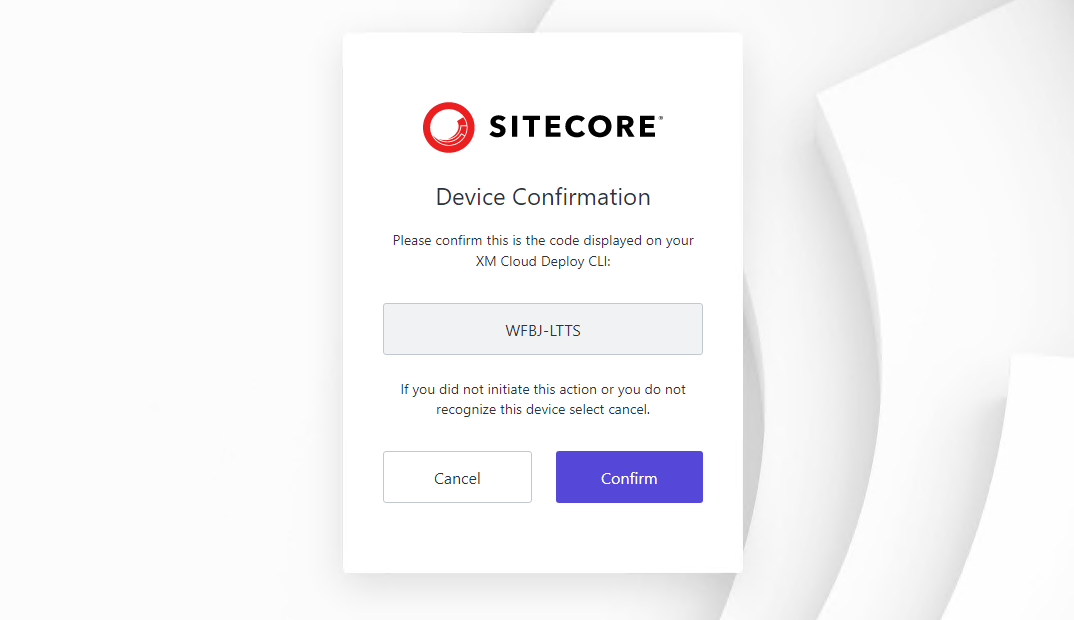
Once confirmed you will then be asked to login. Even if you don’t yet have an organization, create an account. Logging in here is how you will log in to your local environment regardless if it is tied to an organization or not.
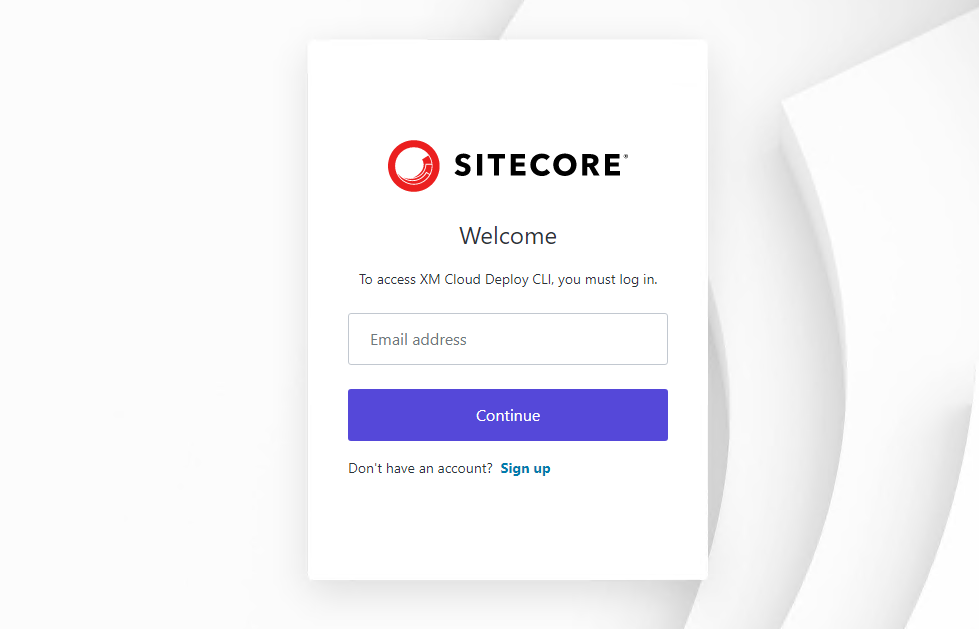
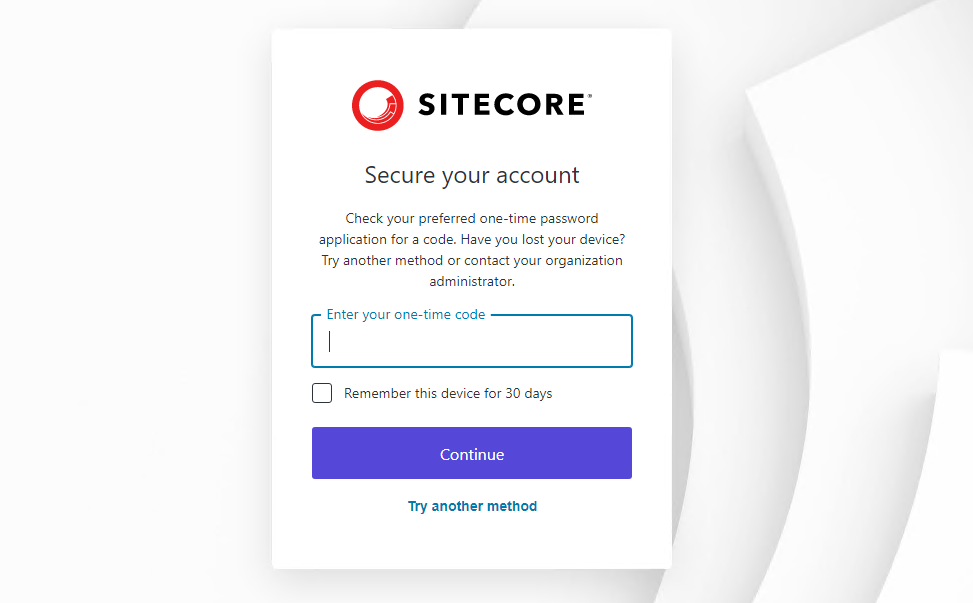
With two-factor authentication you will then be prompted to enter your one-time code.
If all is well, you’ll see a confirmation that your two-Factor authentication worked.
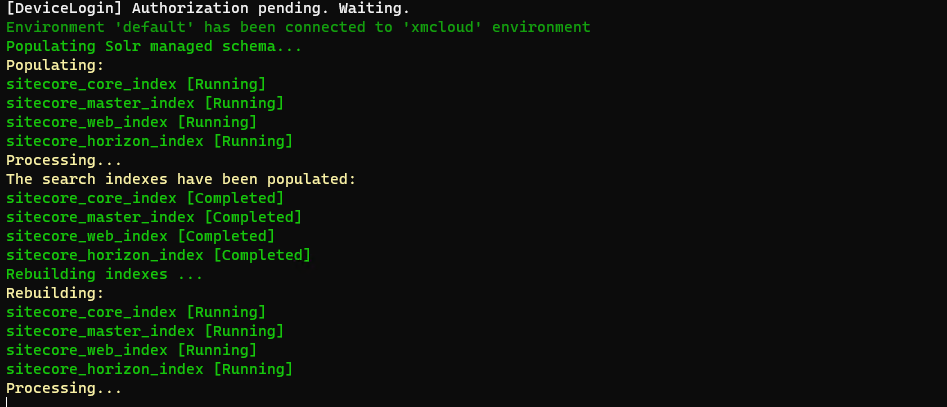
Back in the PowerShell terminal, you will see this and it will have appeared to have stalled. Don’t be alarmed but this can take a few minutes depending on the speed of your computer.
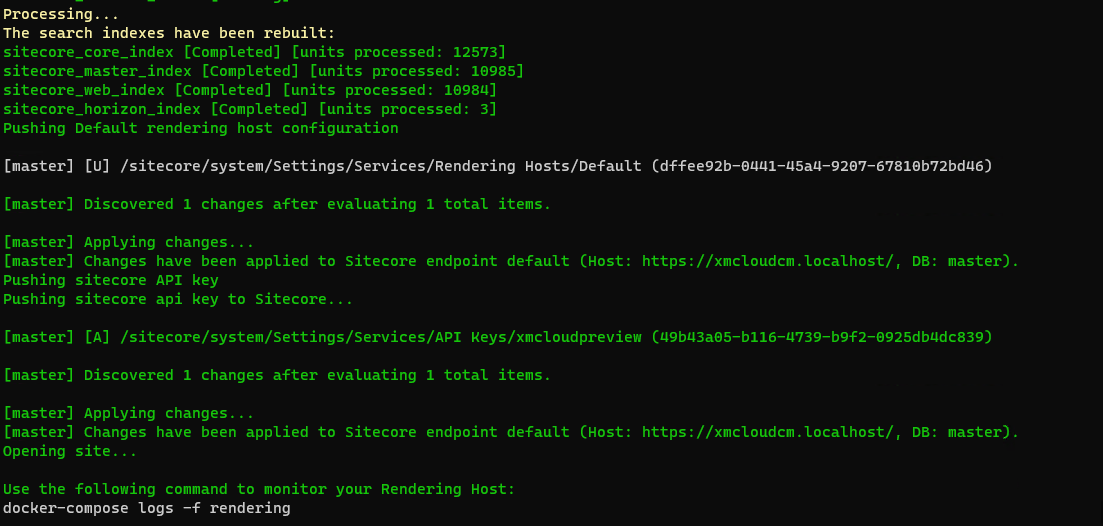
After a short while you will see additional changes being made and at the end, once ready, it will open up your XM Cloud local dev environment.
What you should see next is your browser opening up and displaying the Launch Pad.
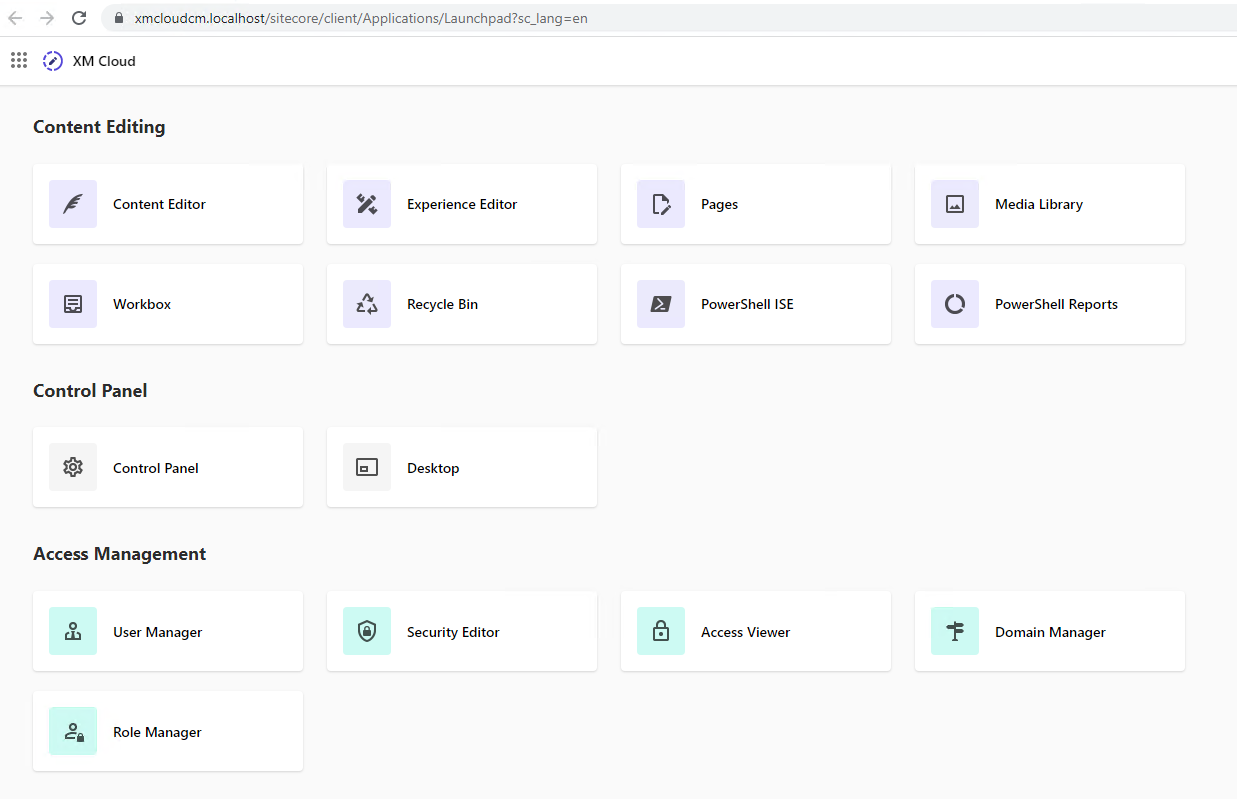
While this is great, you’ll notice in the Content Editor that the site is empty. You’ll see here that there is no Headless Tenant and subsequent Headless Site configured.
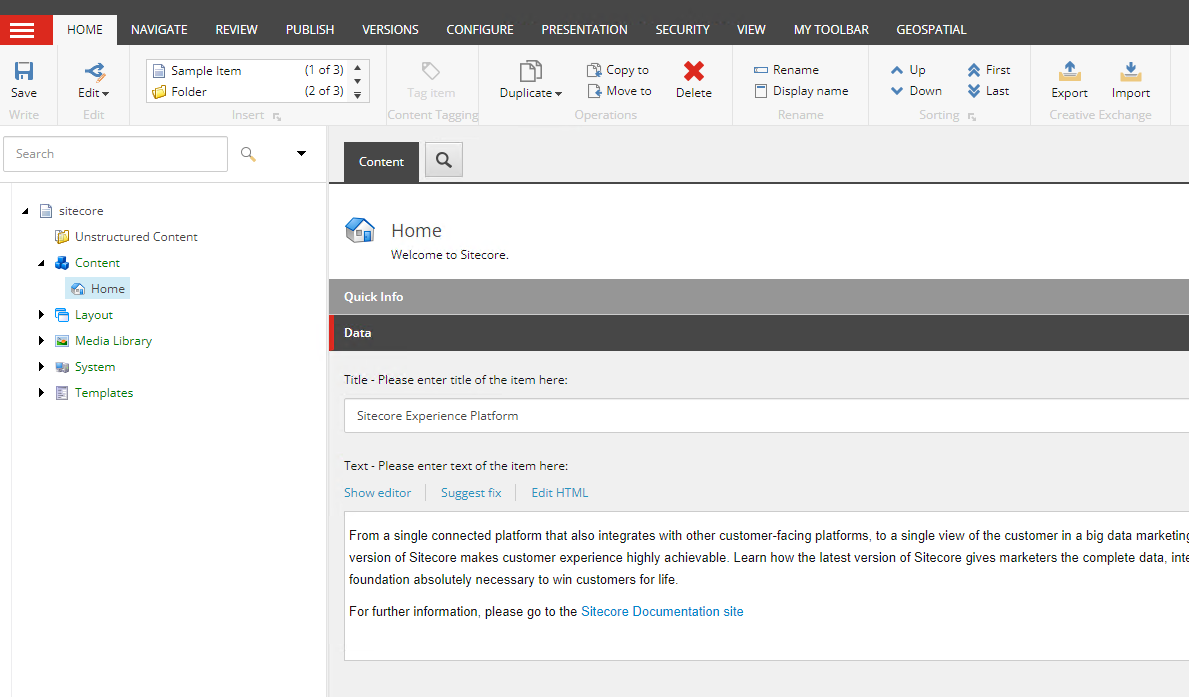
To get a proper Headless site configured and displaying, we’ll have to serialize the structure from our cloud organization. Of course, you can create these all locally and then push them up, but it’s advised you set these up in the cloud as the appropriate rendering host values are automatically generated for you.
First thing first is to log into the cloud. This will allow you to select the Organization you want to retrieve the serialization from. Do this by running the following command. A browser will popup directing you what to do.
dotnet sitecore cloud login
Next, run the following command to show you available projects in your Organization
dotnet sitecore cloud project list
What you see will likely resemble something like the following:
Found 1 project(s)
dev-xmcloud Project detailed information:
Organization Name : abc-company-1
Organization Id   : org_XXXXLMuPY57zQY
Project Id        : 2FJvHjXXXXXXkEkVlRMYP
Project name      : abccompany-xmcloud
Region            : eus (East US)
Created by        : [email protected]
Created at        : 1/19/2023 8:56:08 PM
Last updated by   : [email protected]
Last updated at   : 1/19/2023 8:56:08 PM
Note the Project Id value. Copy it. It will be used in the next step so we can obtain an Environment Id.
dotnet sitecore cloud environment list --project-id <project-id>
Performing the above command should yield a response similar to the following:
Found 1 environment(s)
tsask-xmcloudenv Environment detailed information:
Organization Id                   : org_XXXXLMuPY57zQY
Organization Name                 : abc-company-1
Project Id                        : 2FJvHjXXXXXXkEkVlRMYP
Project name                      : abccompany-xmcloud
Environment Id                    : 1DIIXXXXXXBbiFHhVs
Environment Name                  : dev-xmcloudenv
Environment Host                  : xmc-abccompanyabc-xmcloud-abccompanyxmcloudenv.sitecorecloud.io
Environment Type                  : nonprod
Created by                        : yourname@email.com
Created at                        : 1/19/2023 8:56:09 PM
Last updated by                   : yourname@email.com
Last updated at                   : 1/19/2023 8:56:09 PM
Provisioning status               : Complete
Provisioning last failure message :
Note the Environment Id value. Copy it. You will need it in order to “connect” to it as part of the serialization procedure.
dotnet sitecore cloud environment connect -id <environment-id> --allow-write true
It will say Connecting to the environment…
What this does is update the .sitecore/user.json file, which is important to NOT store and should be part of your .gitignore file. The file looks something like this.
{
  "endpoints": {
    "xmCloud": {
      ...
    },
    "<name you gave your environment>": {
        "ref": "XMCloud",
        "allowWrite": true,
        "host": "<the environment host>",
        "variables": {}
    }
  }
}
Finally we need to identify the local environment and add that to this user.json file.
dotnet sitecore connect --ref xmcloud --cm https://xmcloudcm.localhost --allow-write true -n local
If yours gives you an error something like Reference environment configuration 'xmcloudlocal' doesn't exist then refer to the user.json file and locate the ref value associated with your local instance. Otherwise you should see Environment 'local' has been connected to 'xmcloud' environment.
Locate the src/renderinghost.module.json file and duplicate it. I suggest calling it a name associated with your project, e.g. projectname.module.json.
Modify the namespace value to the same as the project name.
Open up the Content Editor for your environment from with the Sitecore Cloud Portal. You may want to create a project name under the Project folder located within /sitecore/Templates/Project and /sitecore/Media Library/Project and then add these names below.
{
    "$schema": "../../.sitecore/schemas/ModuleFile.schema.json",
    "namespace": "<Project Name>",
    "items": {
        "includes": [
            {
                "name": "templates",
                "path": "/sitecore/Templates/Project/<Project Name>",
                "allowedPushOperations": "CreateUpdateAndDelete"
            },
            {
                "name": "contentRoot",
                "path": "/sitecore/content",
                "allowedPushOperations": "CreateUpdateAndDelete"
            },
            {
                "name": "media",
                "path": "/sitecore/Media Library/Project/<Project Name>",
                "allowedPushOperations": "CreateUpdateAndDelete"
            }
        ]
    }
}
It is vitally important to note that you will in all likelihood need to REMOVE the changes listed under contentRoot otherwise, once authors use the cloud environment their changes will get overridden whenever a push is done.
You can set this up in a way that specific areas, such as the Settings/Site Globals folder is not overriden.
With the following command, changing out the value for the appropriate cloud environment name, a pull will happen loading your local environment with what’s in the Cloud. If you’re unsure on this value, please refer back to the .sitecore/user.json file. It will be the name of the environment you setup in the previous steps.
dotnet sitecore ser pull -n "dev"
If you see an error resembling the following it just means the serialization structure you setup in the
Configured source item path /sitecore/Media Library/Project/MySite did not exist in Sitecore endpoint
Otherwise, if all works, you should see these items pulled from the Cloud environment to your local environment.
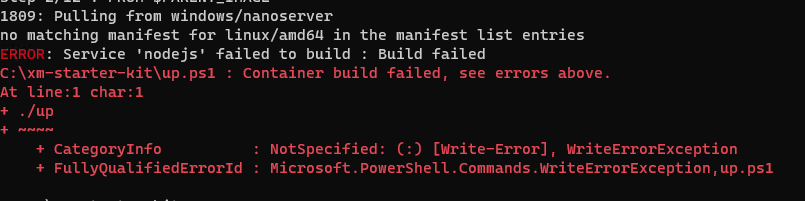
If you encounter the following error this is due to the Windows Container not running. If you check Docker in the system tray most likely your still on Linux Containers.
Likewise this error pertaining to “Failed to solve with frontend dockerfile.v0”, is also related to running in a Linux Container when it should be a Windows Container.
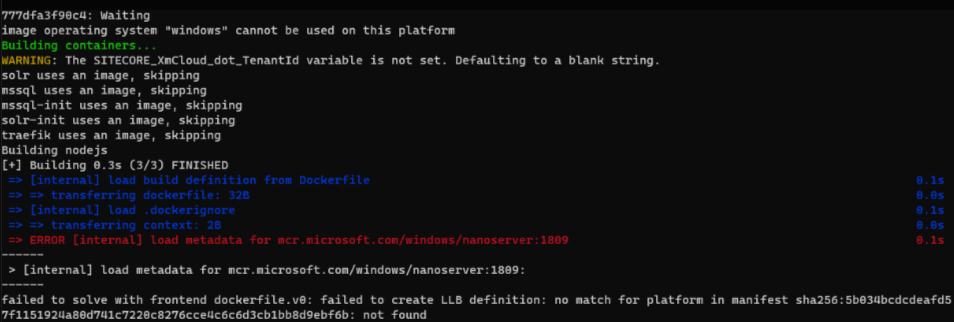
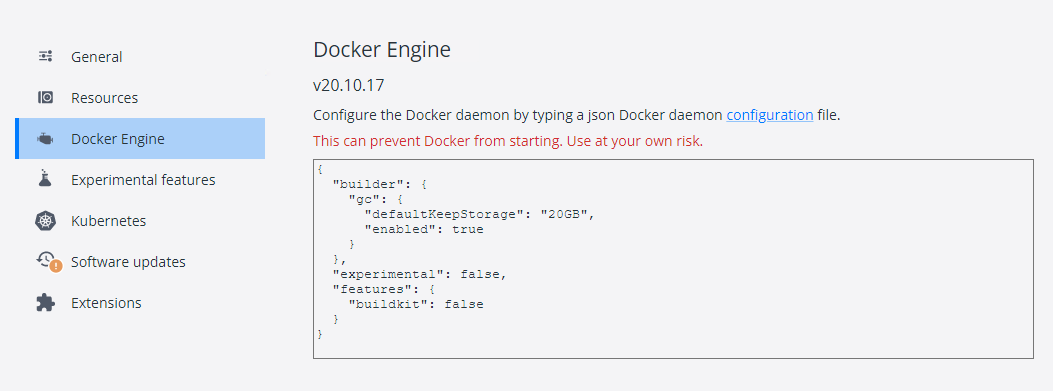
Once you have Windows Containers running and if you still experience issues related to dockerfile.v0 you can try switching the buildkit to “false”. This has been referenced a few times as ways to get past the dockerfile.v0 issue.
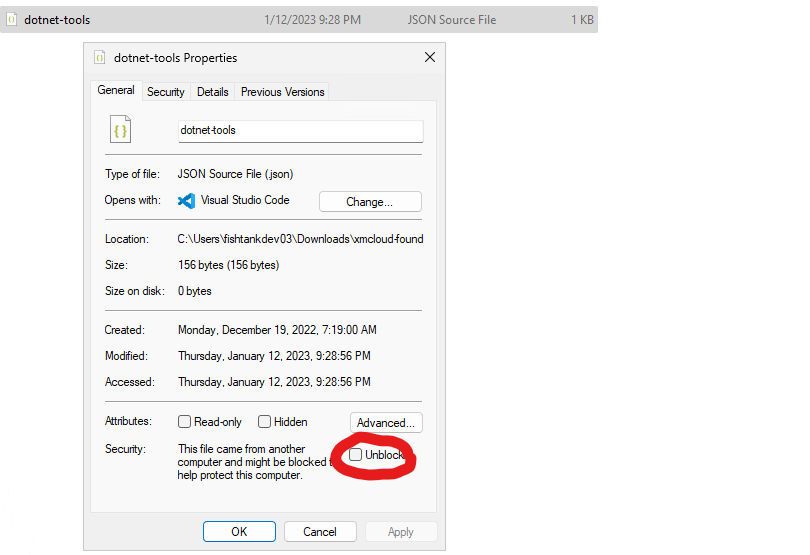
This error is easy to resolve. You may see something where the dotnet-tools.json file is being blocked and you need to unlock it. Similarly to what’s shown below.

Go to this file in your project and right-click on it and select Properties. At the bottom, check the checkbox where it says Unblock.

With this error it simply means that you either forgot to install DotNet 6, did not install correctly, or you might still need to restart your computer and or the Terminal from which you are running the installation from before it picks up the term, ‘dotnet’.
Once you have a successful installation of even a single XM Cloud on a local development environment you’ll find it remarkably easy to setup additional environments.