Reading time: 5 min read
Add Automated Pipeline in Azure DevOps that automatically checks code's style against eslint rules.
Pre-Requisite
- A javascript project with package.json (npm)
- Already installed and configured eslint (if not, checkout eslint)
- Basic knowledge of Azure DevOps
Overview
Eslint is a powerful tool that automatically checks your javascript (or TypeScript) code's style and gives you feedback. If this blog is your first exposure to eslint, I highly recommend that you add it to your javascript project ASAP (or even better, checkout VS Code Extension for eslint eslint for VS Code).
In this blog, I explain how to run eslint whenever a pull request is submitted in Azure DevOps. Then I take a step further and show you how to protect your codebase by making this pipeline a requirement for a pull request completion.
Step 1 - Confirm Your Project Is Ready To Run Eslint
Open up your package.json and confirm that eslint is listed under devDependencies and 'lint' command is specified with 'eslint zzz' where zzz is a path to your folder that contains javascript files (this is usually src, but it depends on your project structure).
            {
                "name": "nuscale",
                "description": "Application utilizing Sitecore JavaScript Services and Next.js",
                ...
                "dependencies": {
                  ...
                },
                "devDependencies": {
                  ...
                  "eslint": "^7.32.0",
                  ...
                },
                "scripts": {
                  ...
                  "lint": "eslint zzz",
                  ...
                }
            }
Step 2 - Push Your Project To Azure DevOps
Code needs to be in Azure DevOps for you to run. Please connect your project with your remote repo in DevOps.
Step 3 - Create Azure DevOps Pipeline
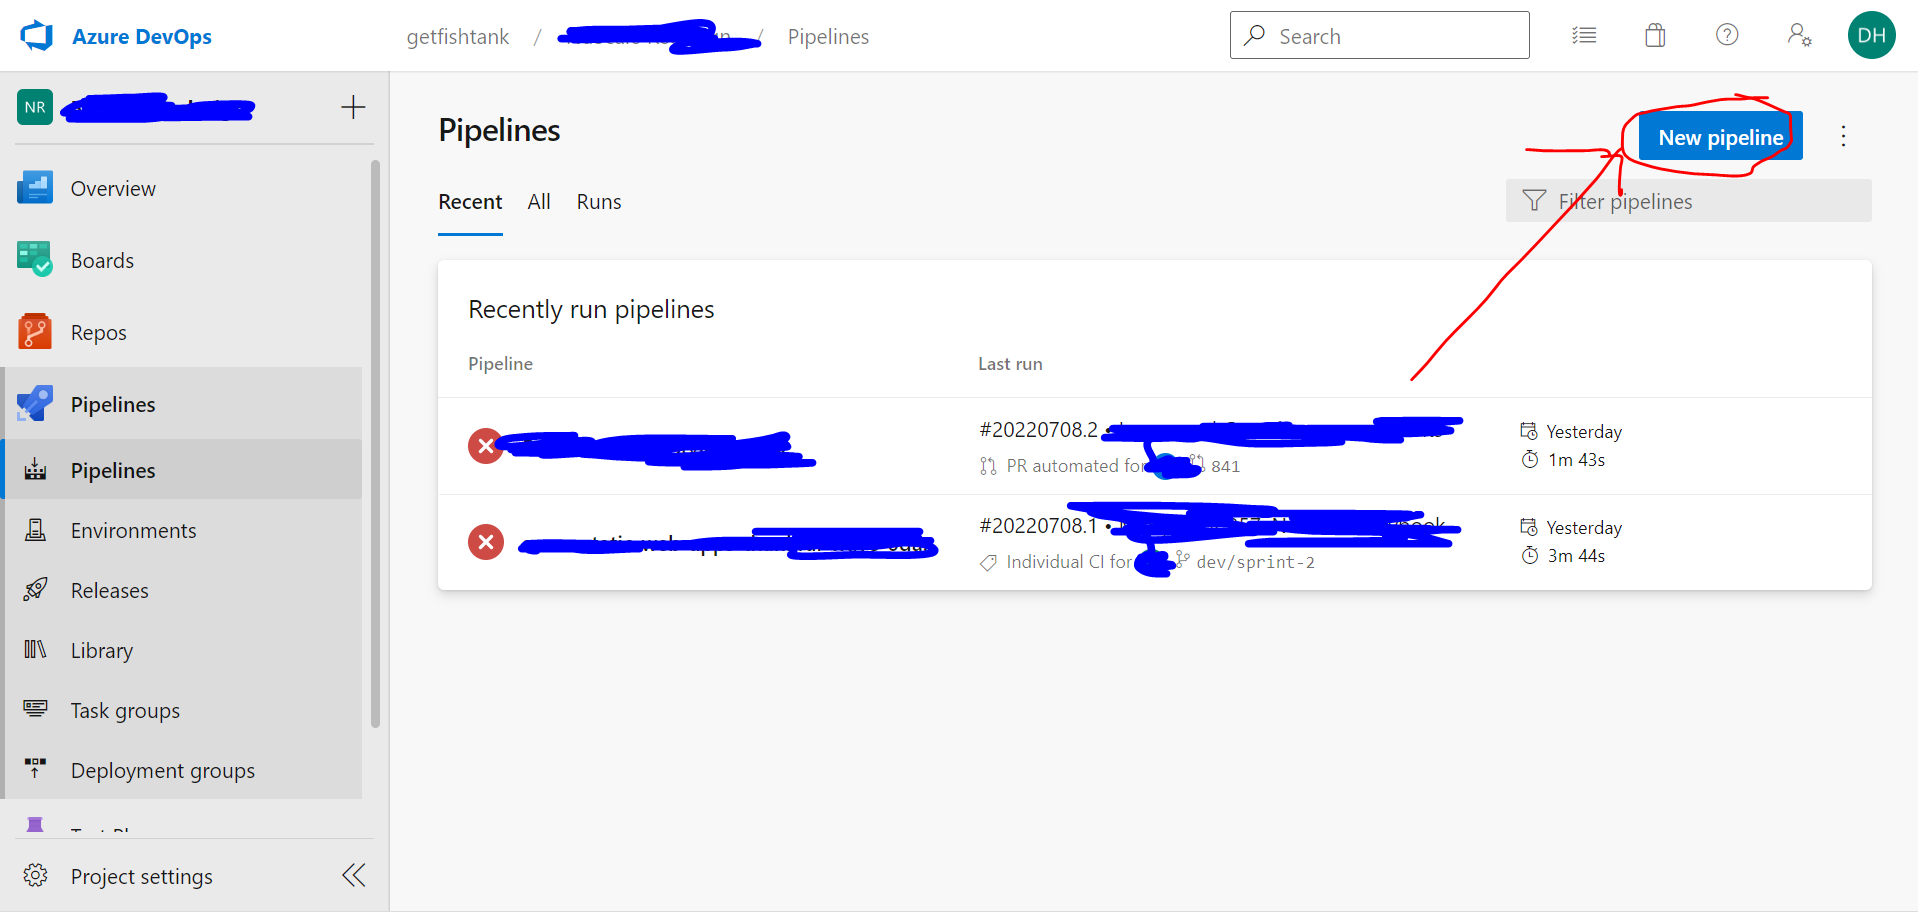
3.1 Create New Pipeline
In your Azure DevOps, click on Pipelines/Pipelines on your left Toolbar, and then click 'New pipeline' like in the picture below:
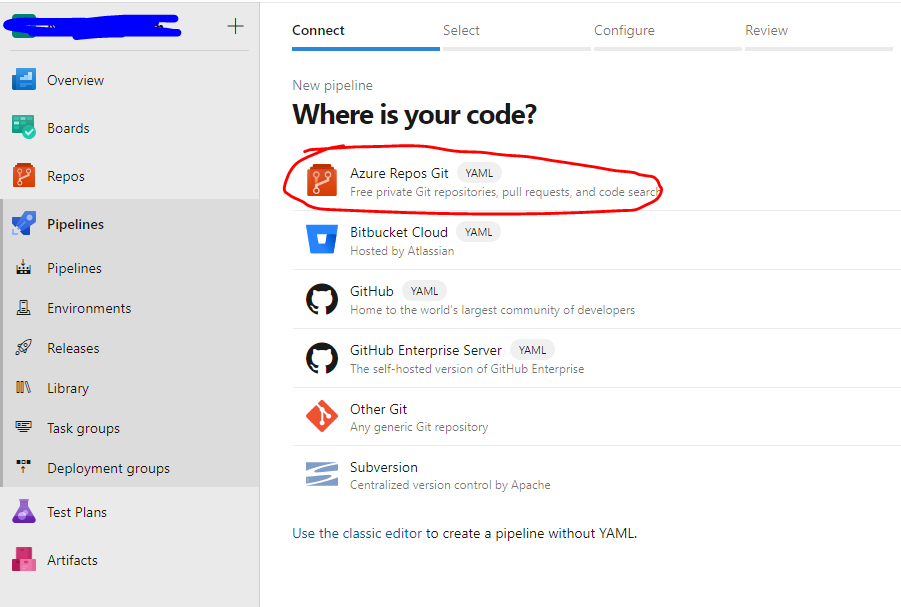
3.2 Select Repo Type
You'll be greeted with the window below. Select 'Azure Repos Git'.
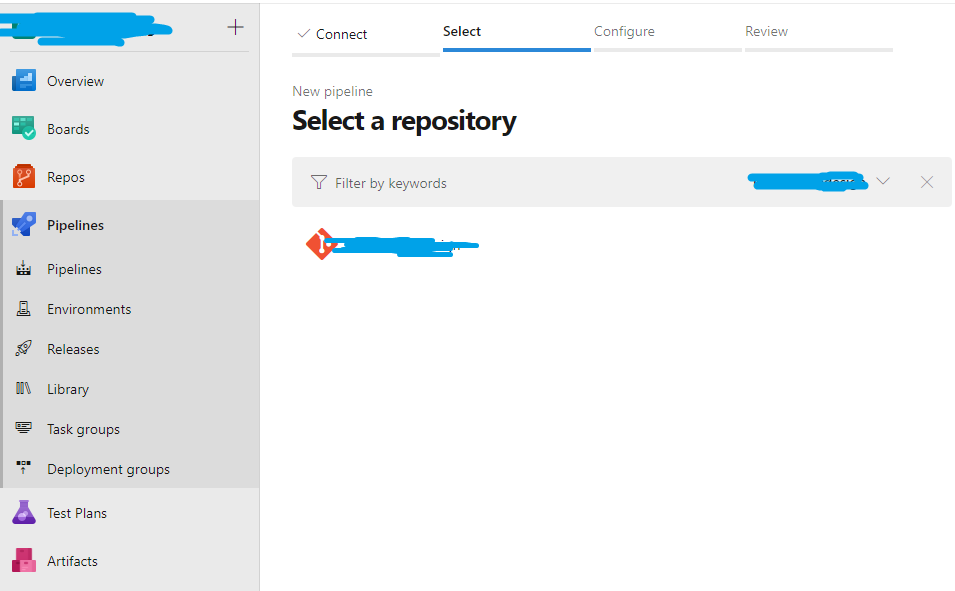
3.3 Select Your Repo
Select the repo that contains your code.
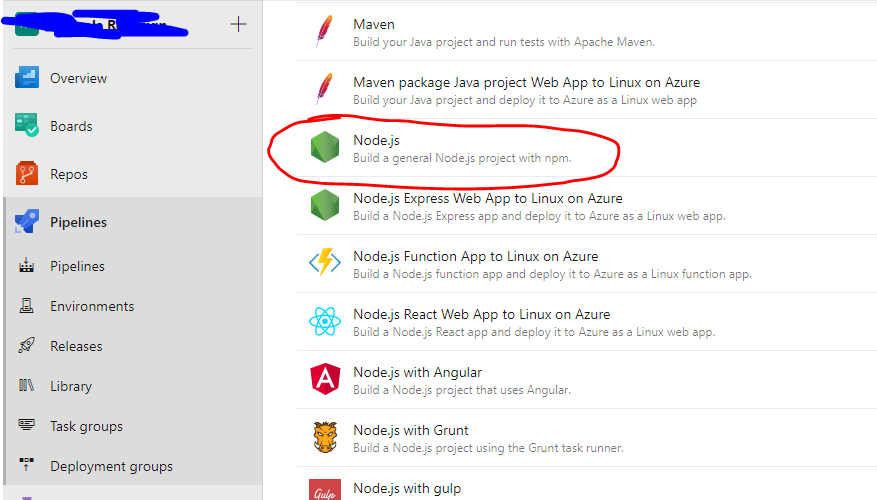
3.4 Setup NodeJS Pipeline
In the configure section, you'll select nodeJS (you may have to scroll down a bit).
3.5 Edit Your Script
You'll see a text editor for a script that will run your pipeline. Copy and paste the code snippet below and complete it (specify the cd path under script. Mine is set to src/rendering/projectname, but it really depends on your project structure):
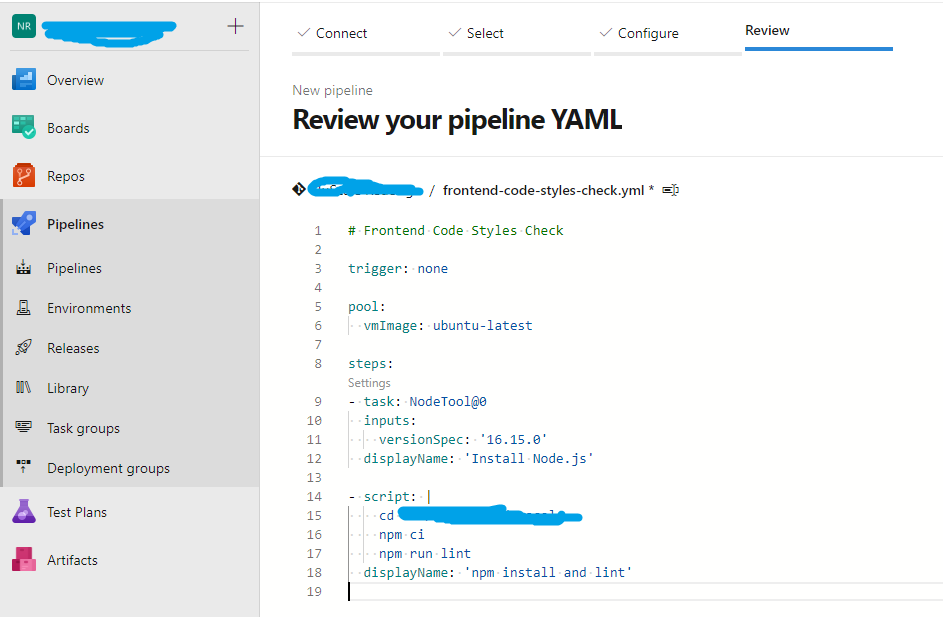
            # Frontend Code Styles Check

            trigger: none

            pool:
              vmImage: ubuntu-latest

            steps:
            - task: NodeTool@0
              inputs:
                versionSpec: '16.15.0'
              displayName: 'Install Node.js'

            - script: |
                cd [[ specidy the path to your package.json, from the root of your repo, ex. src/yourproject ]]
                npm ci
                npm run lint
              displayName: 'npm install and lint'
We're essentially telling DevOps to spin up a new linux environment with nodejs installed. And then subsequently run npm ci and npm run lint commands. Once everything is ready, click 'Save and run'. Upon save, it will ask you to commit to a branch. Please commit to a branch that you're currently working on.
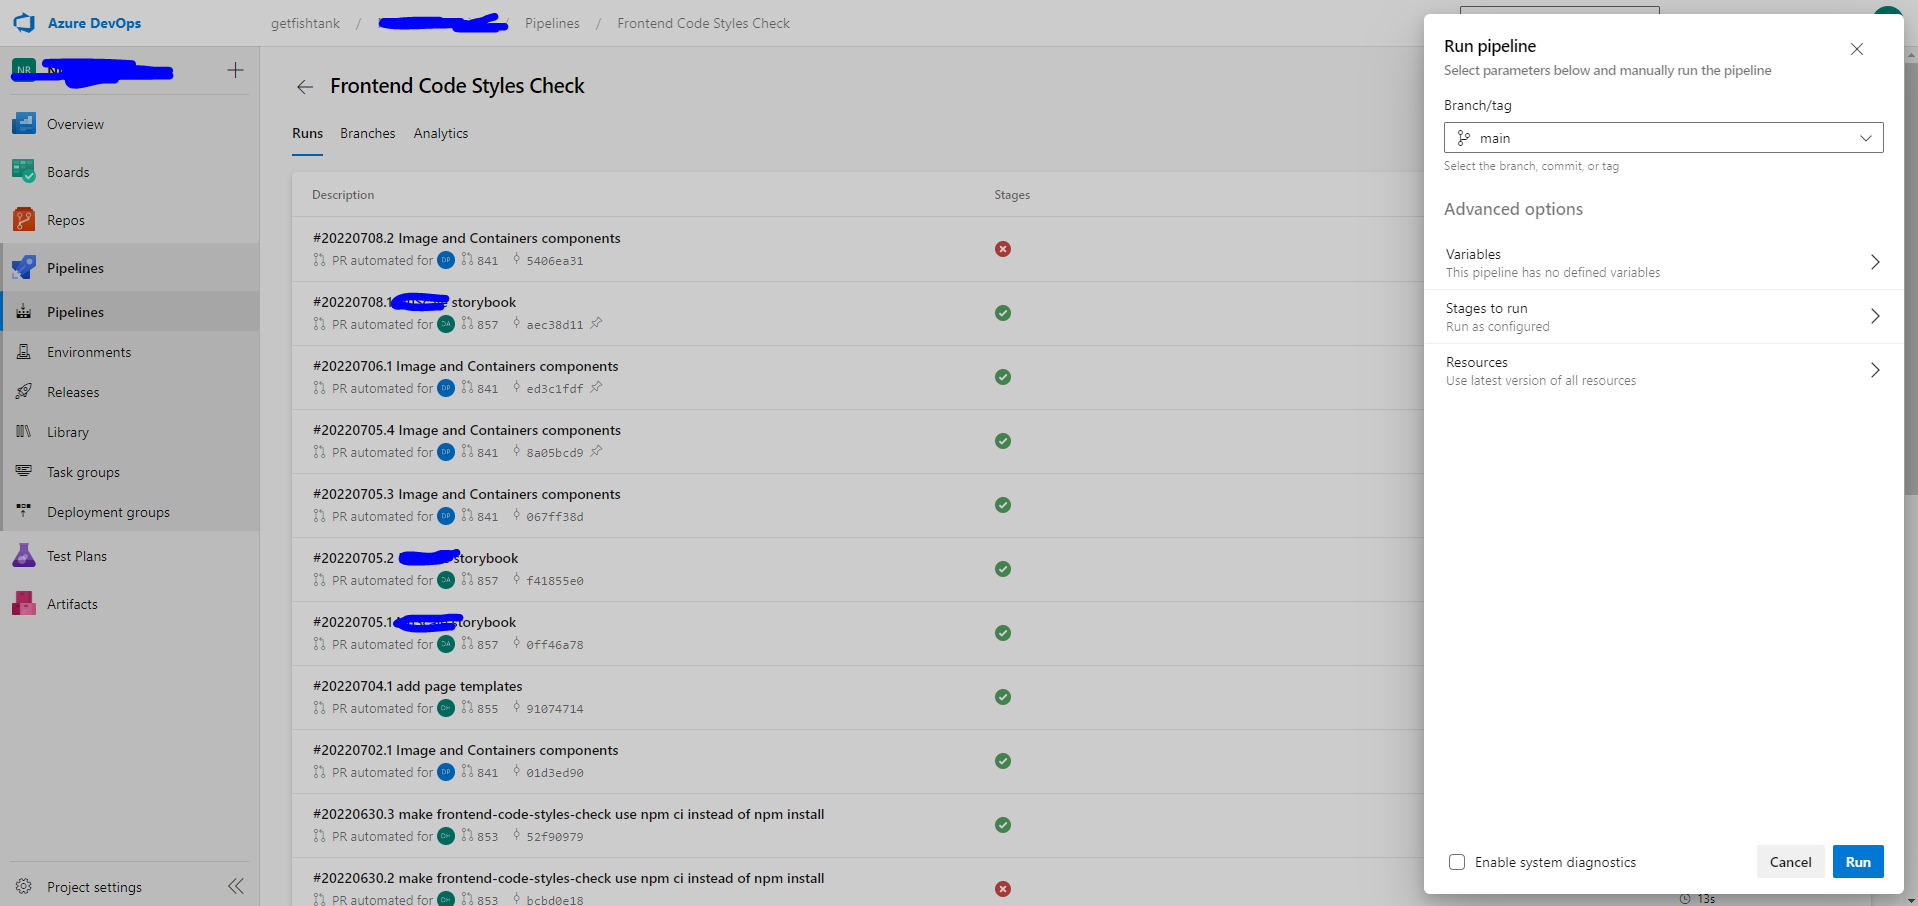
3.6 Run
Go back to Pipelines/Pipelines (step 3.1). You'll now see a newly added pipeline. Click on the pipeline that was just created and manually run the pipeline against a branch like below:

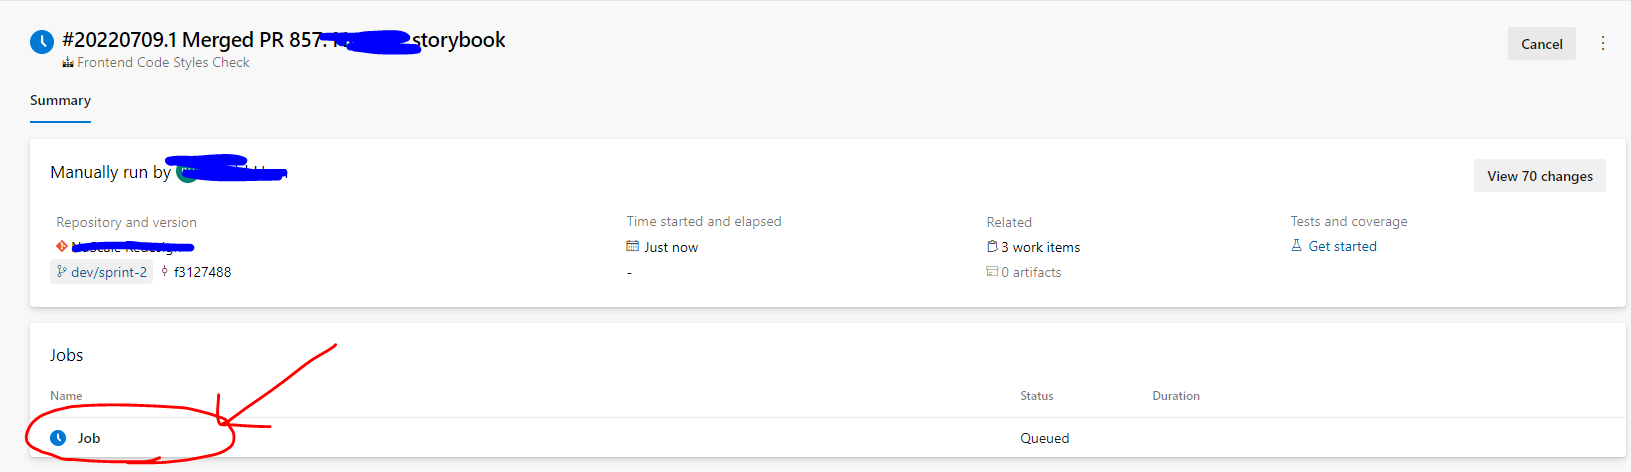
3.7 Check
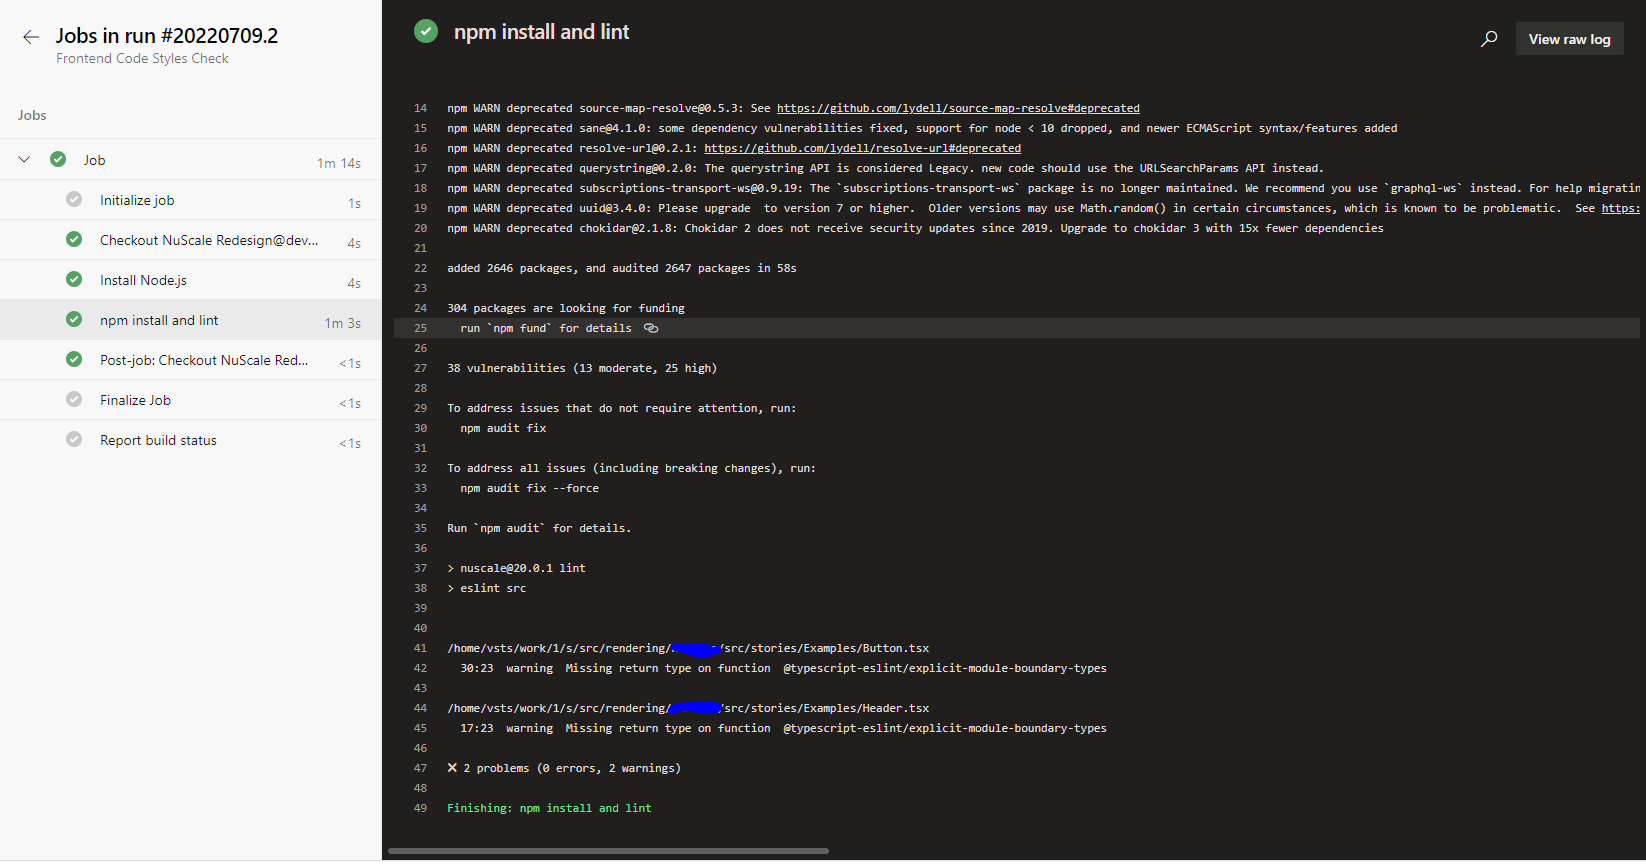
After you run it, click on the 'Job' circled in red as seen below:
Under 'npm install and lint', you can see the logs as it runs 'npm run lint'. If it ends with either a successful lint or a lint failure, your pipeline is working. For anything else (ex. cannot find path, etc), you must troubleshoot as it means it's not working properly. Below is a picture of a successful automated linting pipeline.
3.8 Add This Pipeline To Your Branch Policy
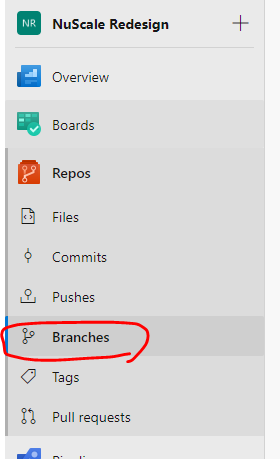
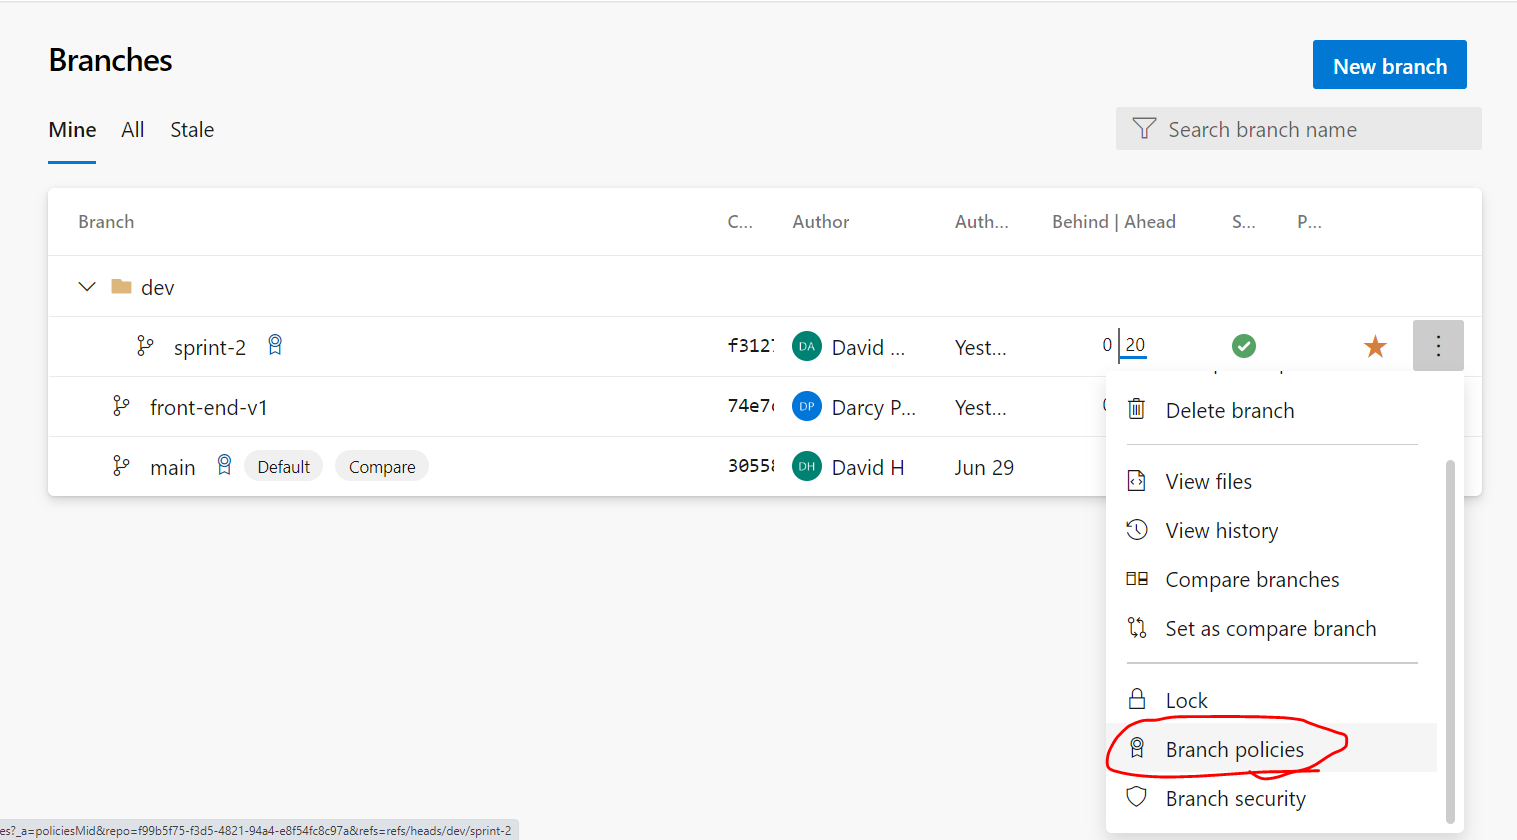
So far we've only ran it manually. But how do we actually run it on Pull request submission? Go to your Repo/Branches.
Right-click on branch's triple dots and click on 'Branch Policies'.
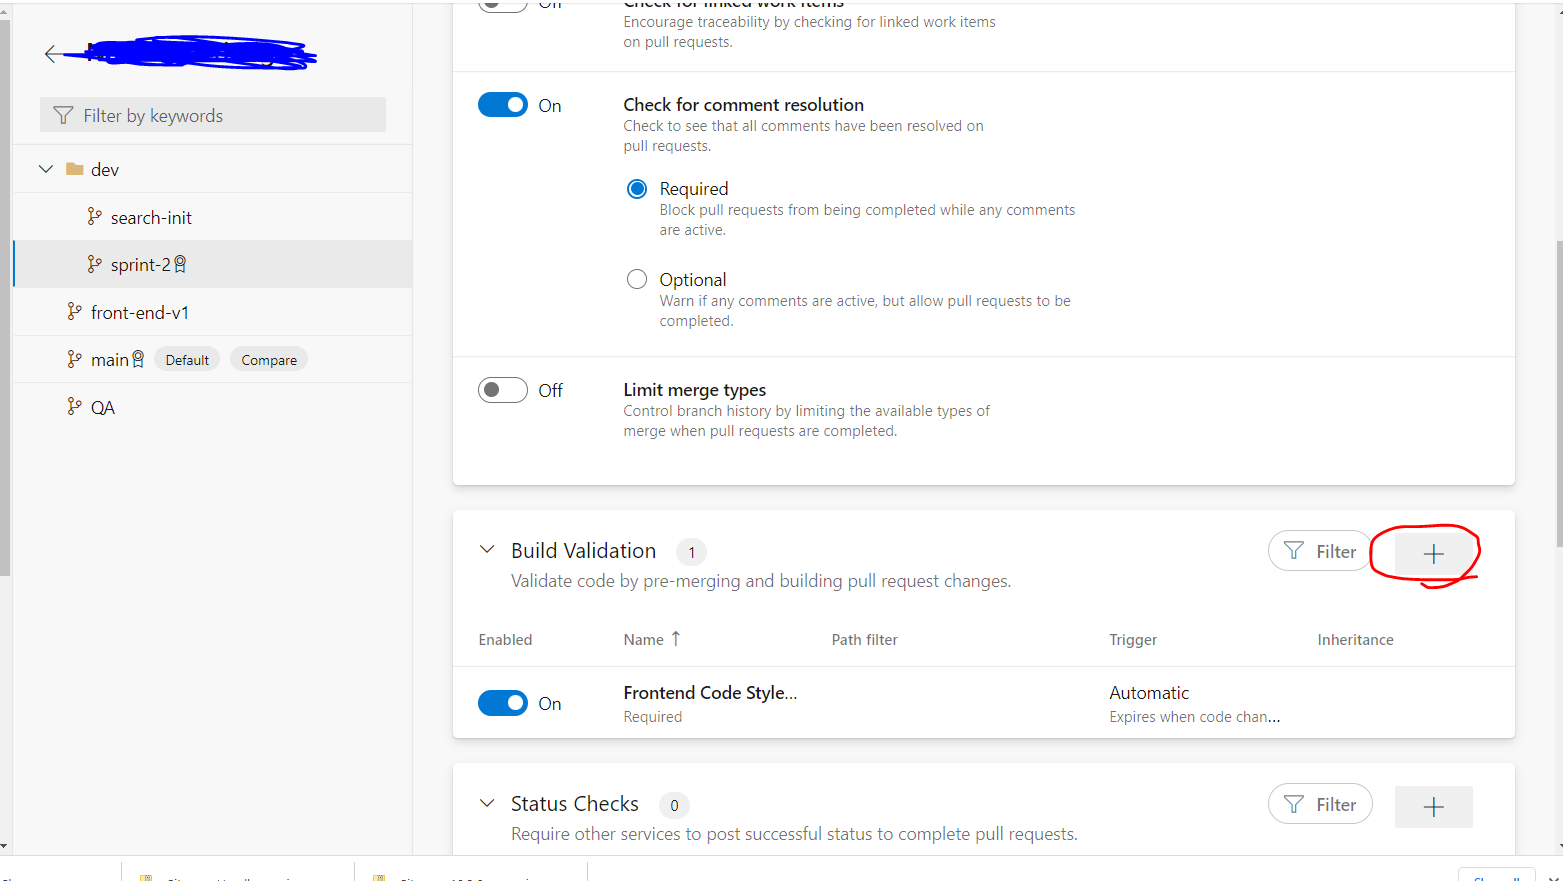
Scroll down to 'Build Validation' and click on the + sign.
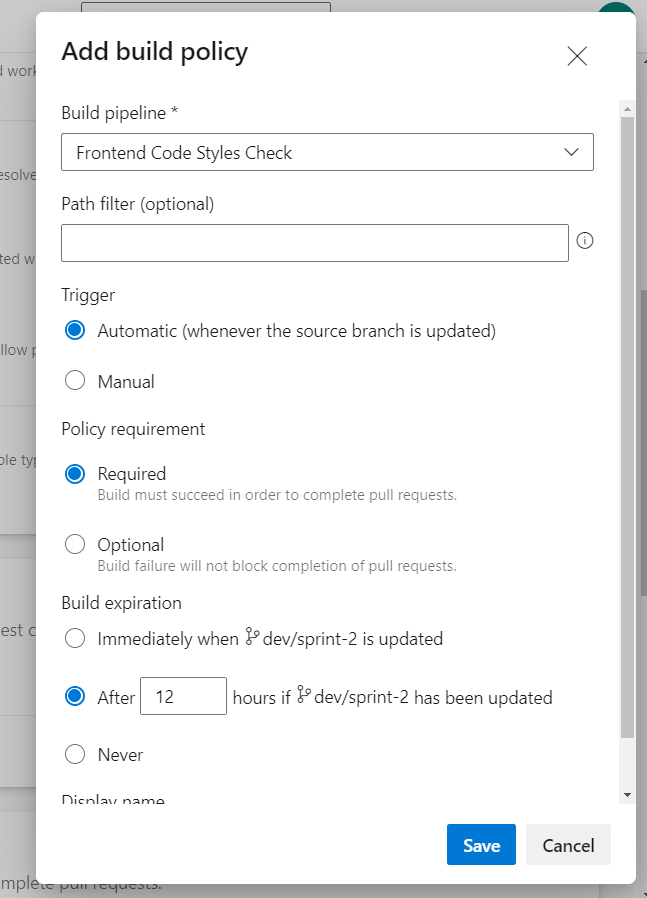
Add the pipeline we just created under 'Build pipeline'. Then press 'Save'.
3.9 Test Out Your Branch Policy
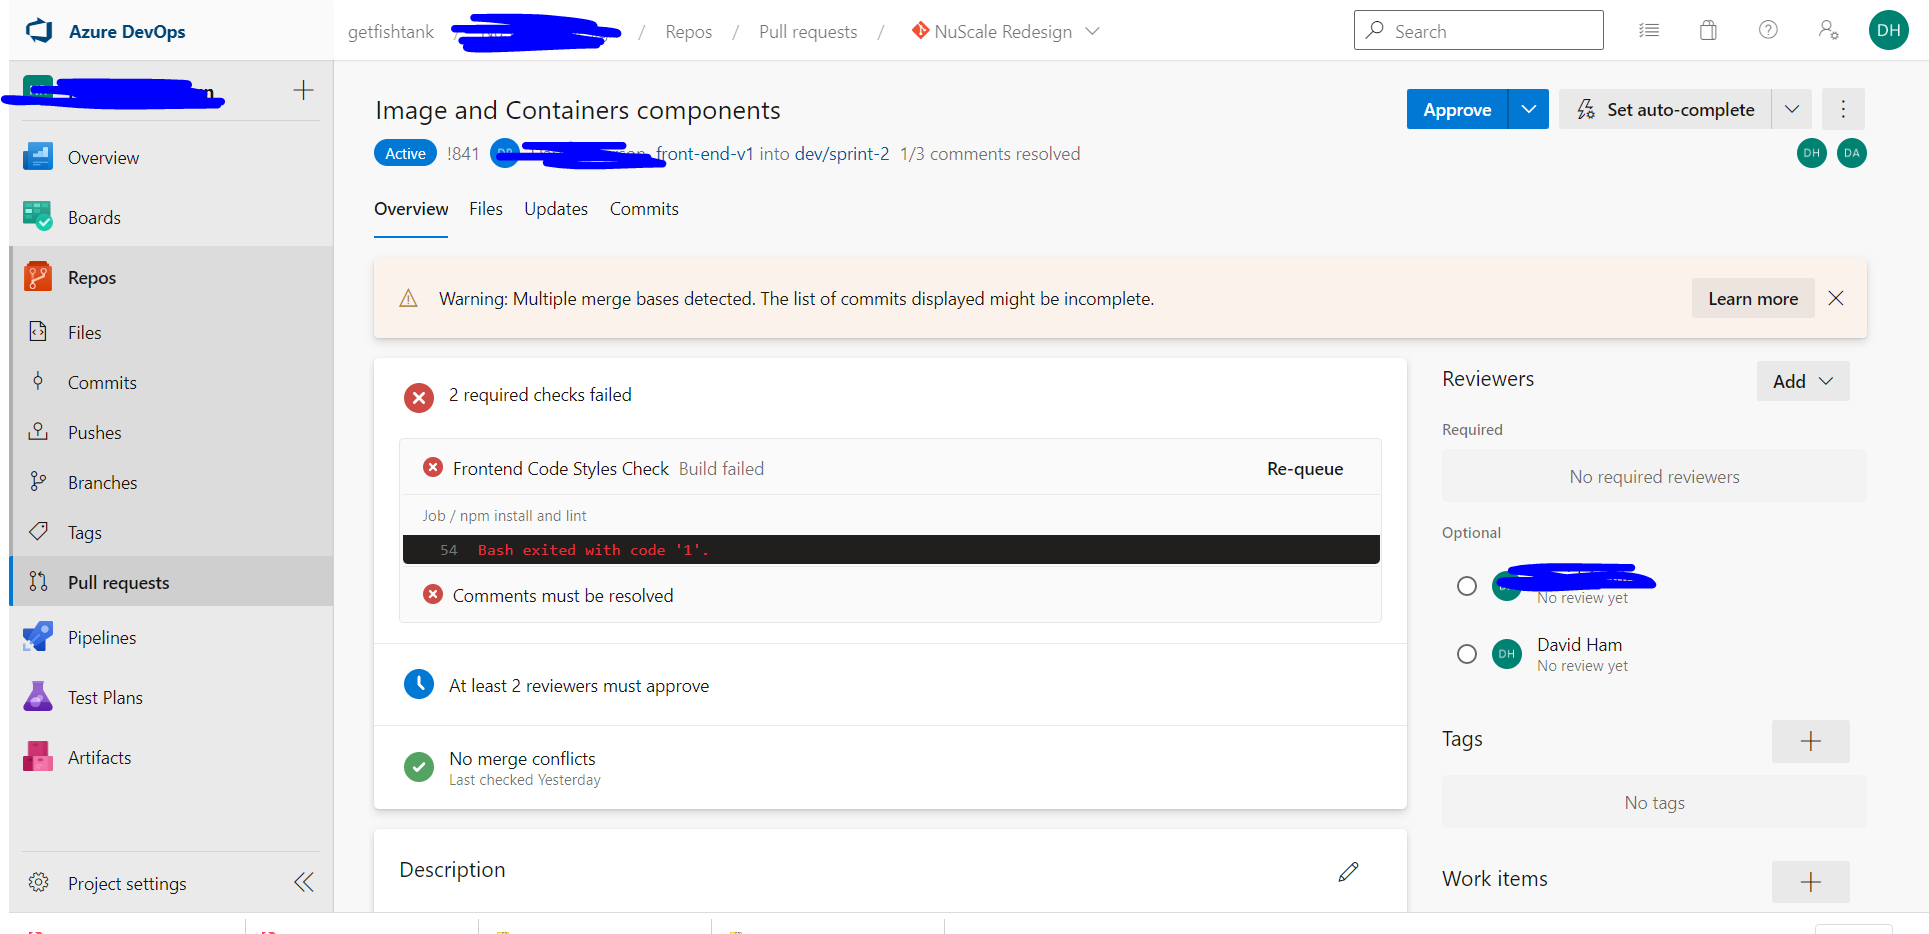
Now go ahead and create a test pull request to the branch with the branch policy we just added. If everything worked correctly, it should automatically run the pipeline. It will not let you merge the PR unless the eslint problem is addressed:
Conclusion
We looked at adding an eslint pipeline in Azure DevOps and guarding our pull request unless the eslint passes.
